3D model description
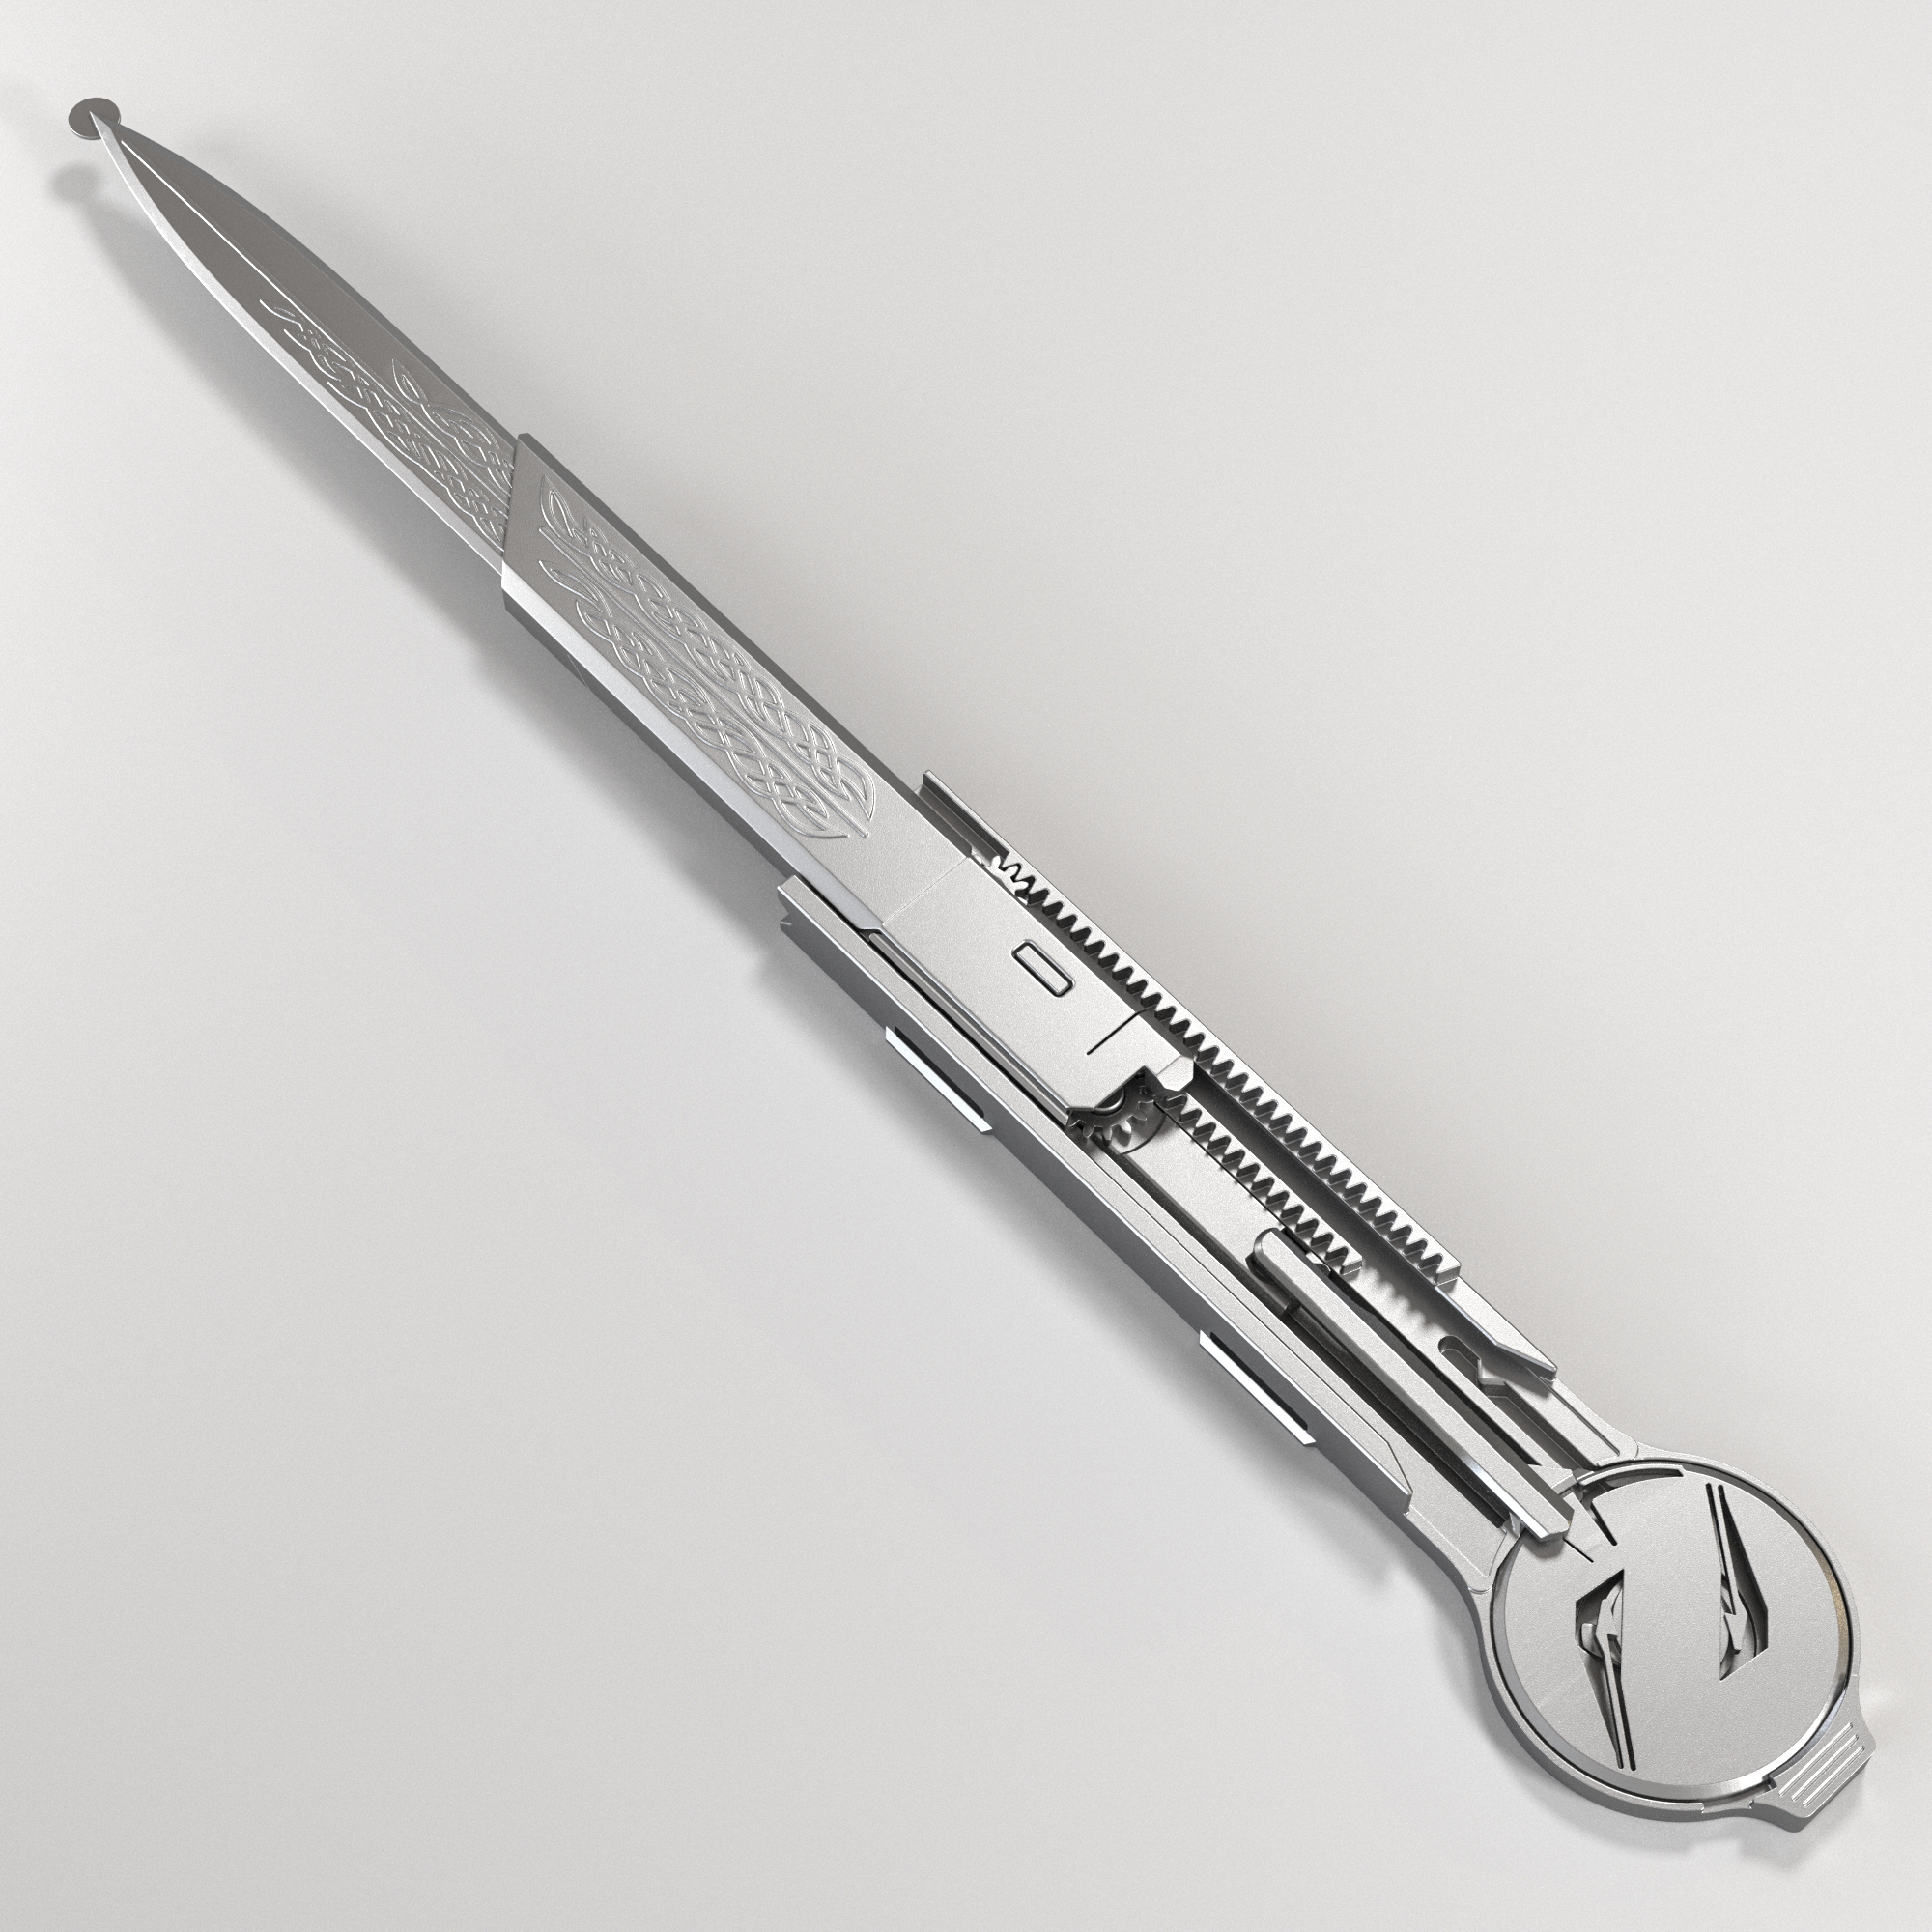
This is my 2nd Assassin’s Creed inspired hidden blade 3D model (Assassin’s Creed 2 version) equipped with a unique mechanism, every single detail of that is 3D printable, except for a nylon cord and rubber band. There’s no need for screws, nuts, springs, magnets or ball bearings. All you need is about 100g of filament (PLA or PETG) and a piece of nylon cord (0.6-0.8mm thick) and a rubber band (1-1.5 mm thick).
An assembly approach has been inspired by the handguns assembly process, which can be done in a matter of seconds by using no tools.
I’m going to make some other hidden blade versions! Subscribe to my profile in order not to miss them.
3D PRINTING AND ASSEMBLY
The main video instruction shows the process of 3D printing and assembly step by step: https://youtu.be/v9SSSFaRpQI
The current mechanism has some differences compared with the one in the video:
It doesn’t have a 3D printable coil spring, it was replaced by a rubber band. Here is a video on how to install it: https://youtu.be/mDPNlCua8GE;
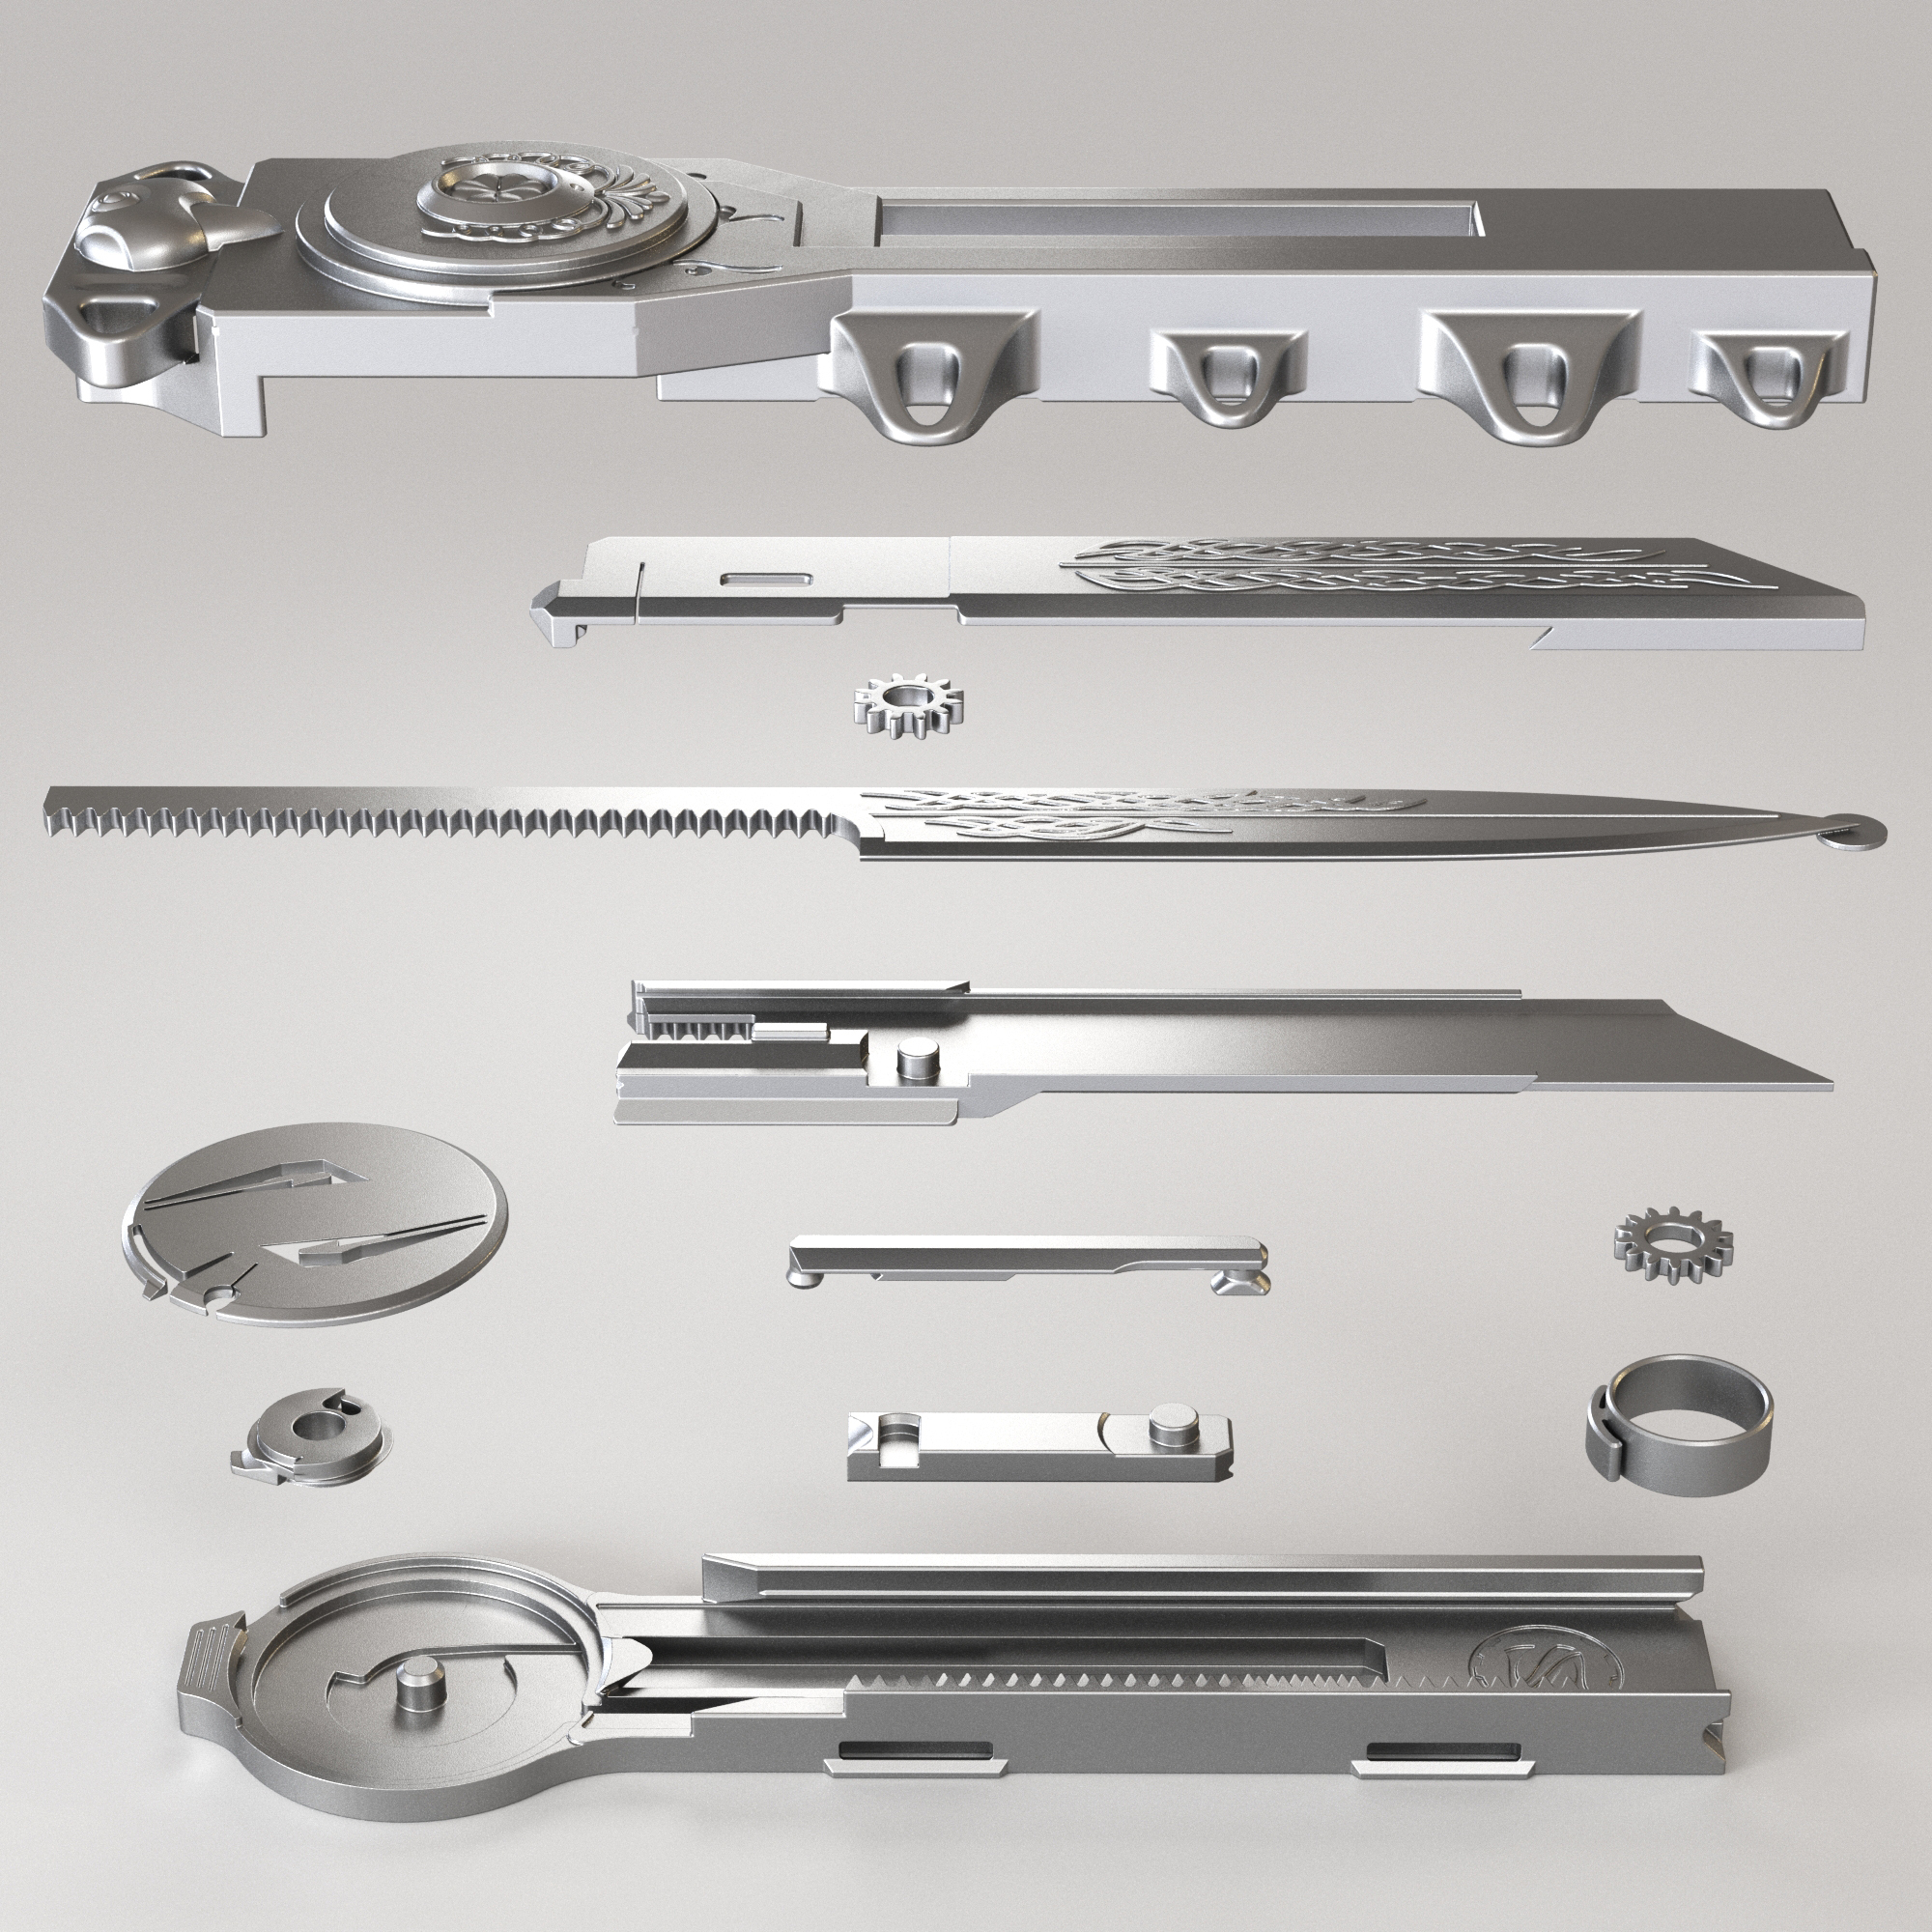
A blade carriage now is printed as two separate pieces which are glued together later the same way as cover is, using two aligning pins, but make sure that the pins don’t stick out of the holes after gluing (you can cut excess material using a utility knife);
The outer parts look different.
And for the rest it’s the same mechanism.
If you have any issues with your build please read the PDF guide included in the folder, probably you’ll find the way to fix it there.
FILES
All the printable files are in STL format.
All the parts are ready to print and placed on a bed the most optimal way, taking into account layer arrangement and Z seam position.
Some parts have embedded supports.
Some parts have round thin support elements at the corners (so called “mouse ears”), they prevent the corners from rising caused by material shrinkage while 3D printing, especially when using PETG. They are easy to remove after printing.
Blade tip has a safety tab.
The mesh was checked for errors.
The biggest part can be printed in the area not smaller than 195*195 mm (7,67*7,67”)
IF SOMETHING DOESN’T WORK
The files were tested many times but unfortunately it doesn’t mean that they will work flawlessly with any 3D printer, because different printers can give different results at the same settings. I made a troubleshooting PDF guide that describes possible issues and their solutions and added it to the folder with printable files. Please read it first if you have any issues.
3D printing settings
Layer height: 0.15mm (the only exception is “Cover_Top_Part.stl”, I recommend 0.1 or even smaller value)
Wall line count: 3
Z seam position: at the back right corner
Top layers: 3
Bottom layers: 2
Infill density: 20-35%
Support generation: off
The overall 3D printing time is about 15 hours.
The minimal required bed size is 195*195 mm (7,67”).
Ring Size Conversion Chart (the values are approximate)
US ring size → Diameter in mm
4-½ → 15mm
4-¾ → 15.5mm
5 → 16mm
5-¼ → 16mm
5-½ → 16.5mm
5-¾ → 16.5mm
6 → 17mm
6-¼ → 17mm
6-½ → 17mm
6-¾ → 17.5mm
7 → 17.5mm
7-¼ → 18mm
7-½ → 18mm
7-¾ → 18.5mm
8 → 18.5mm
8-¼ → 18.5mm
8-½ → 19mm
8-¾ → 19mm
9 → 19mm
9-¼ → 19.5mm
9-½ → 19.5mm
9-¾ → 20mm
10 → 20mm
10-¼ → 20mm
10-½ → 20.5mm
10-¾ → 20.5mm
11 → 21mm
11-¼ → 21mm
11-½ → 21mm
11-¾ → 21.5mm
12 → 21.5mm
12-¼ → 22mm
12-½ → 22mm
12-¾ → 22.5mm
13 → 22.5mm
13-¼ → 23mm
13-½ → 23mm
13-¾ → 23mm


:format(webp)/https://fbi.cults3d.com/uploaders/24898590/illustration-file/73177805-d329-40f1-a158-9dc93ba299b7/Predator_Mask_Presentation.gif)
:still()/https://fbi.cults3d.com/uploaders/24898590/illustration-file/38e6d095-762e-407e-a182-b0669b7bf4ba/Ring_Box_Presentation.gif)
:format(webp)/https://fbi.cults3d.com/uploaders/24898590/illustration-file/9592ab7b-88e1-437e-b9e5-bda6ac61f29b/vlcsnap-00001.gif)
:format(webp)/https://fbi.cults3d.com/uploaders/24898590/illustration-file/34c4c8e4-fd9e-4ebb-b47e-642b9c6927ce/Pumpkin_Box_Animation.gif)