6 Main causes of extruder clicking and gears slipping
Here is an article for all those who want to know why the extruder is slipping or clicking, why they are having under extrusion issues, or printer not printing correctly.

You may be warping your own bed while leveling, setting your spring tensions and visual bed leveling guide. This article was written and illustrated by Peter Solomon, founder of Wham Bam.
Many may be warping their beds while leveling and thinking that your bed came warped. This explains how that may happen and how to avoid it.
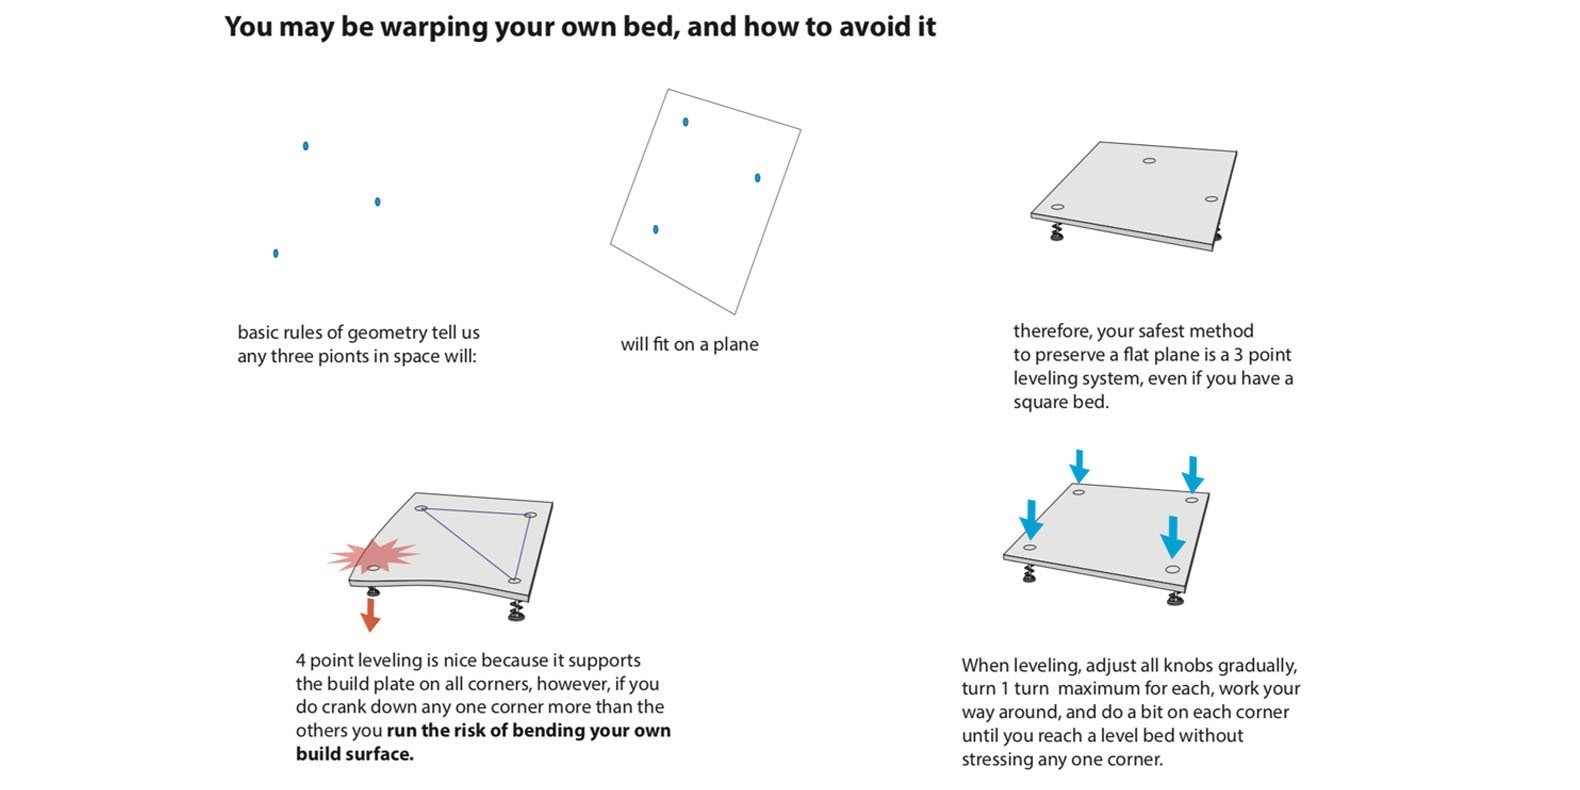
Basic rules of geometry tell us that any 3 points in space will contain a flat plane.
For this simple reason, machines with 3 leveling screws are safest.
4 point leveling is nice because it supports the build plate on all corners, however, if you do crank down any one corner more than the others you run the risk of bending your own build surface.
So, when leveling, adjust all knobs gradually, turn 1 turn maximum for each, work your way around, and do a bit on each corner until you reach a level bed without stressing any one corner.
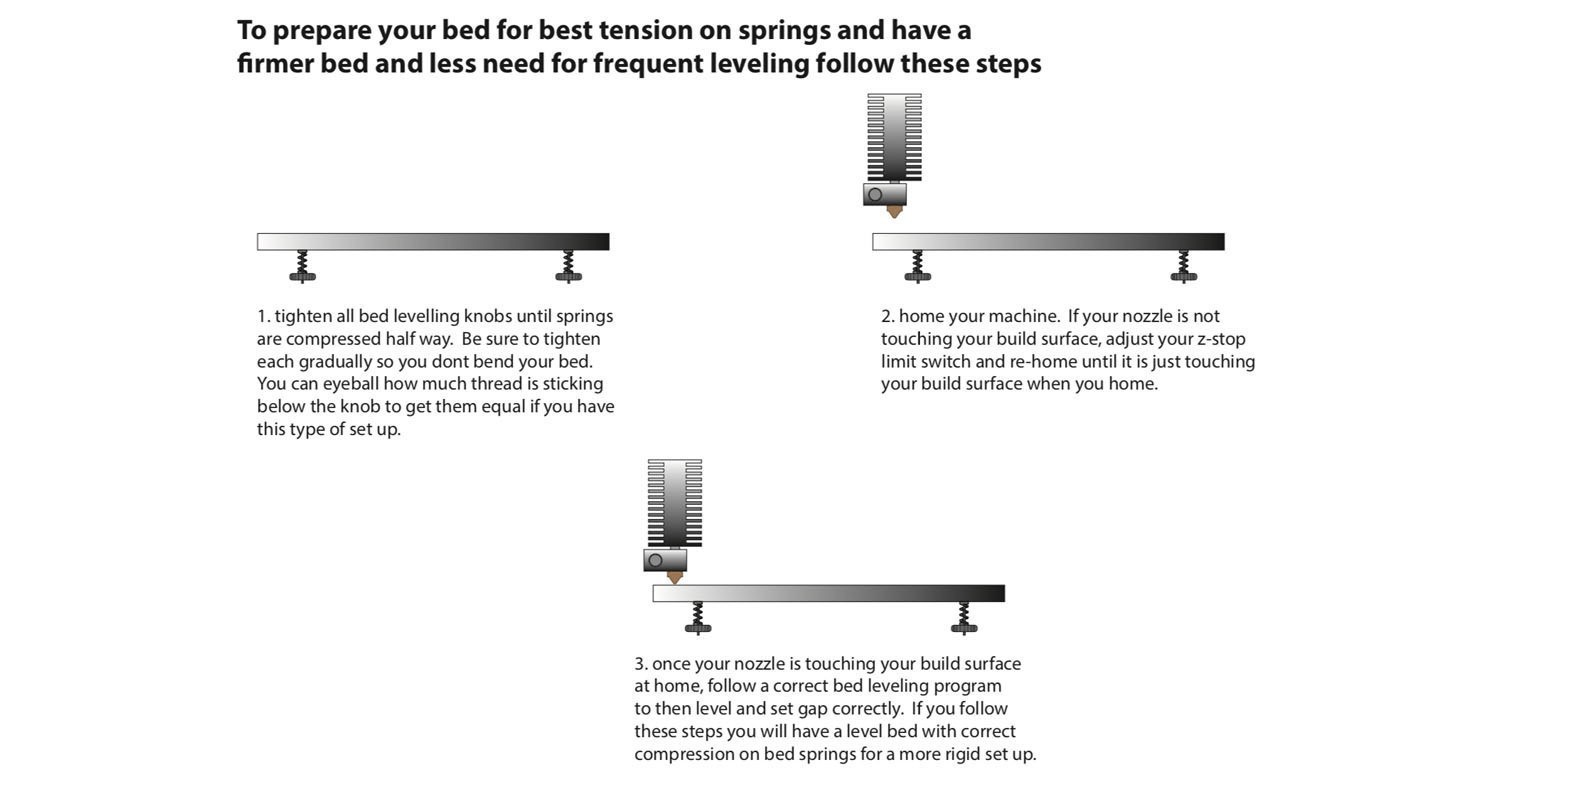
tighten all bed leveling knobs until springs are compressed half way. Be sure to tighten each gradually so you dont bend your bed.
You can eyeball how much thread is sticking below the knob to get them equal if you have this type of set up.
home your machine. If your nozzle is not touching your build surface, adjust your z-stop limit switch and re-home until it is just touching your build surface when you home.
once your nozzle is touching your build surface at home, follow a correct bed leveling program to then level and set gap correctly.
If you follow these steps you will have a level bed with correct compression on bed springs for a more rigid set up.
This may help you to block your leveling screws so they do not twist in the bed: https://www.youtube.com/watch?v=-UL1d61HClo&t=77s

Here are my tips for best practice in leveling your bed. It is of utmost importance that your bed is level and the correct gap is set correctly for every print. Once you learn the process its easy and fast and may not have to do more than simple on-the-fly adjustments while your printer is laying down the skirt for most of the time thereafter.
You will need a function of the printer which runs around the bed and stops the nozzle right above each leveling knob for a few seconds before moving on, or a gcode which does the same that you can use via print function.
You will need to have your home set correctly. Follow above instructions on how to compress bed springs and set Z limit switch. Use a leveling gcode or your printer leveling program.
Do Not push your bed and print head around as this may give you very inaccurate results. Heat your bed and nozzle to desired print temperatures, then run your gcode or levelling
program. Make sure your nozzle tip is free of globs and filament. Make sure your leveling process stops exactly over bed levelling screws.
Now heat your machine to desired print temp (both nozzle and heated bed).
Once heated, run your leveling program or gcode.
Do not push your hot end and bed around, this may create movement on the Z and give you false readings.
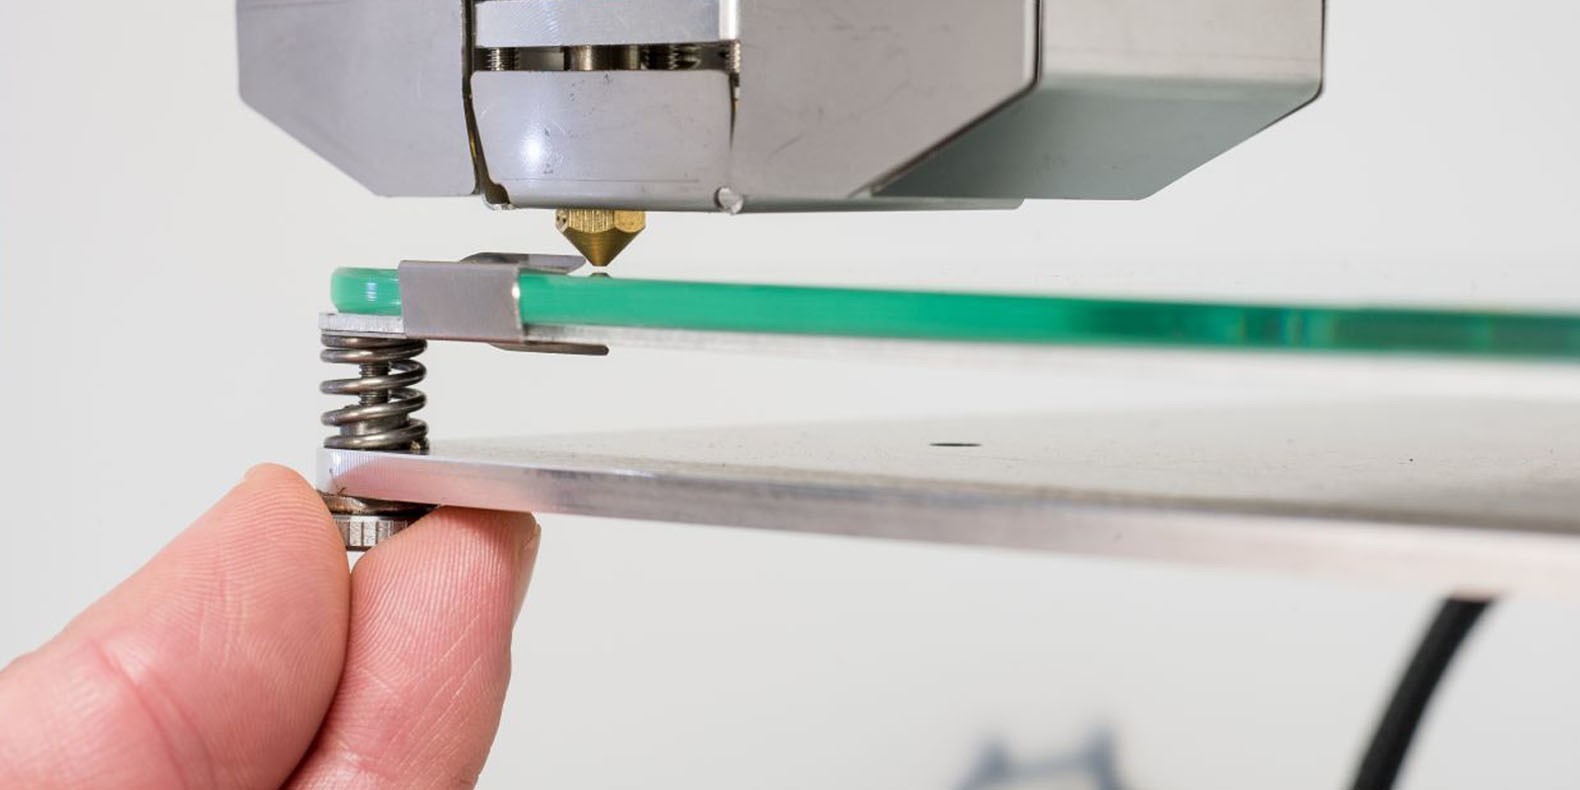
Put a strip of copy paper ( I like the heavier type - about 28 lb. stock) under the nozzle as it stops at each point and if there is no drag, move your leveling knob at that point until it creates drag. Try to slide the paper back and forth with a grip about 3" or 60 mm from the nozzle, you should feel drag on the paper. If you cannot pull or push the paper under the nozzle back off your bed until it passes. Try not to turn any single knob more than one turn or it may bend your bed, you may have to adjust each of the knobs together for first round.
Allow it to move to the next corner.
Repeat the above for all corners.
Repeat the process again, you will notice that when you move one corner it can have an affect on the others.
Repeat the process until you go all the way around all bed leveling knobs without adjusting at all.
Thats it your bed is level.
Now to set the gap with a live level.
Program your slicer to print about 2-3 skirt lines as far away from the part so it goes close to the edge of your printer.
Set your part to print, and while its laying down your skirt lines, inspect visually and adjust your knobs closest to print areas as necessary.
If the bead laid onto the bed is too round and high, close the gap slightly.
If it is flat topped and a bit wider than the nozzle width it is perfect.
If it is too transparent and doesn't flow out, your gap is too tight, you need to increase the distance slightly.
Different print surfaces, and different filaments require different gaps, you may need to experiment with your gap. PETG for example doesn't like the nozzle to drag across it so you may need a bigger gap.
In general some squish is always advisable, print first layer very slow (40% print speeds) its worth it to get a good layer.
You can do this for every print, or if your level is pretty stable only do the live level between prints.
Please see this article for getting the perfect 3D printing first layer.
And this video to learn how to tram your machine and the full leveling process.
Here is an article for all those who want to know why the extruder is slipping or clicking, why they are having under extrusion issues, or printer not printing correctly.
Follow the steps below to take apart and re-assemble your hot end with confidence and without issues. Read the explanations to understand why to do each step.
