Design is to be printed out in separate parts in the corresponding colors to eliminate the need to paint. This also allows everyone to be able to print this design regardless of what printer you are using.
You can follow me on Instagram, https://www.instagram.com/pla.n.pa/
to find out what I designs I am currently working on
If you’re interested in selling prints of my designs, become a Patreon supporter here…
https://patreon.com/planpa3d
OMG I love this thing!! Cowabunga Dude!
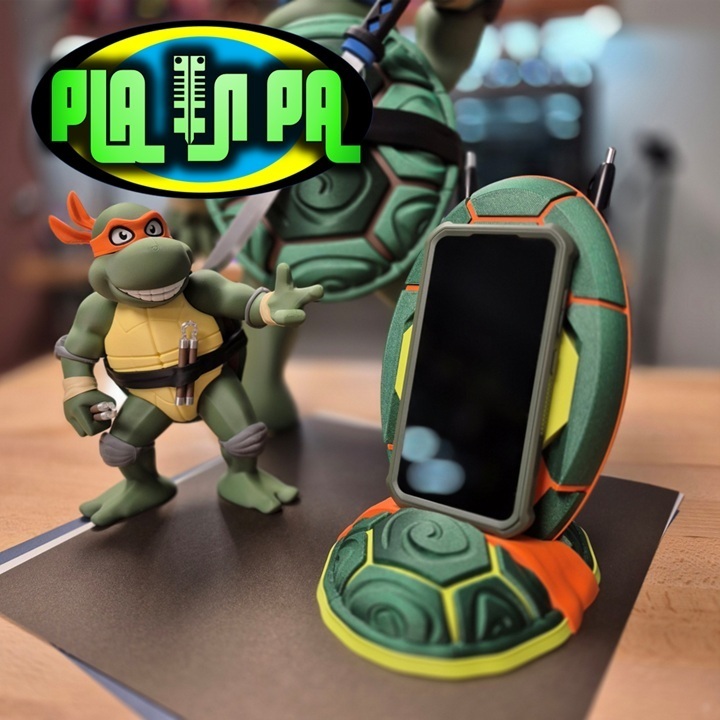
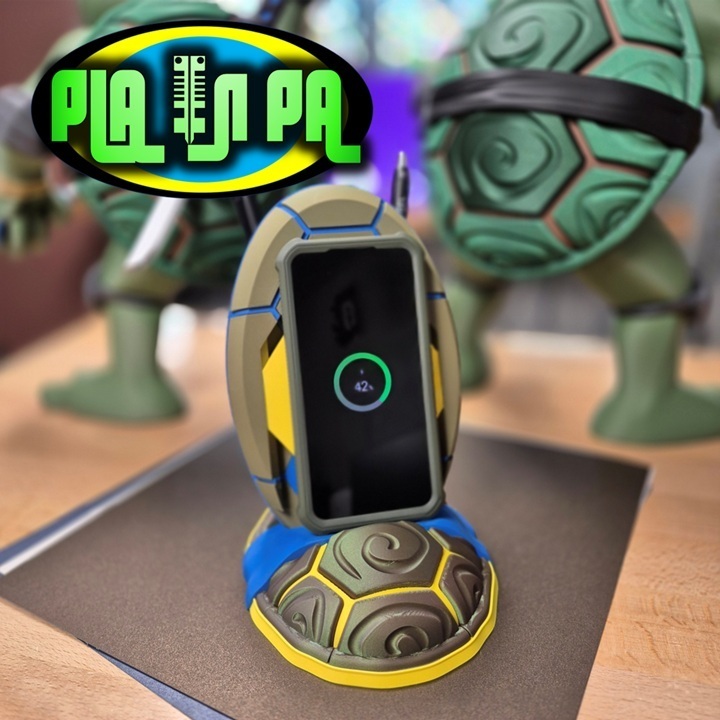
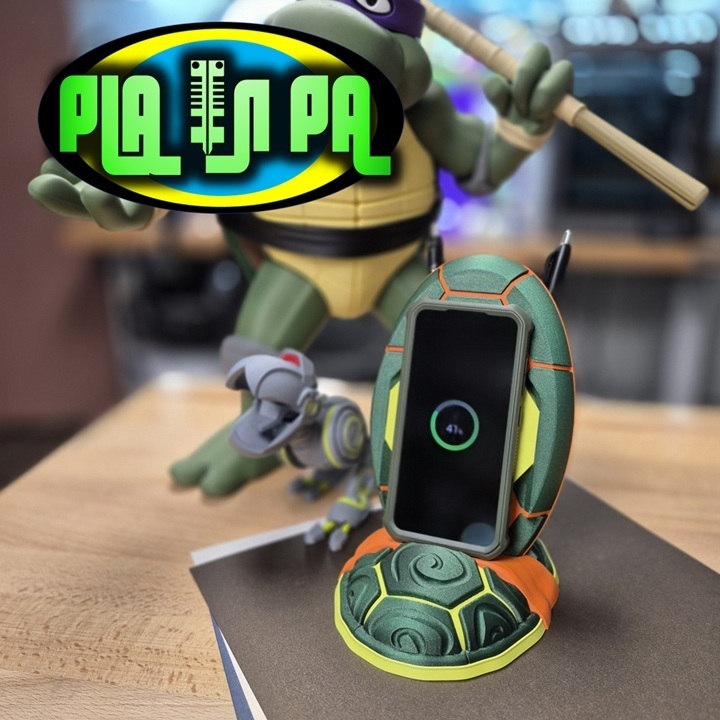
I really needed a spot to sit and charge my phone while working on designs and things, and hearing a lot of feedback here recently on my display shells growing in popularity, I thought what better way to expand on the design than to make a TMNT phone stand.
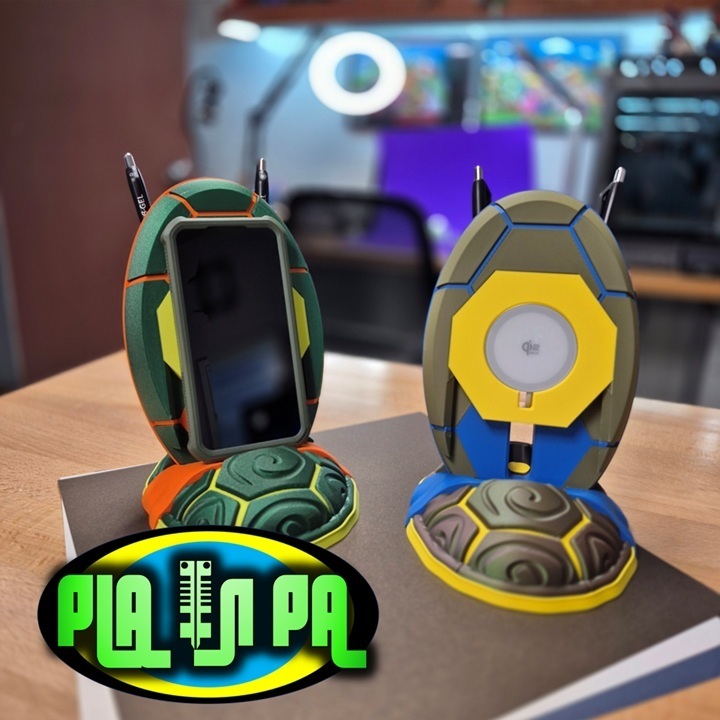
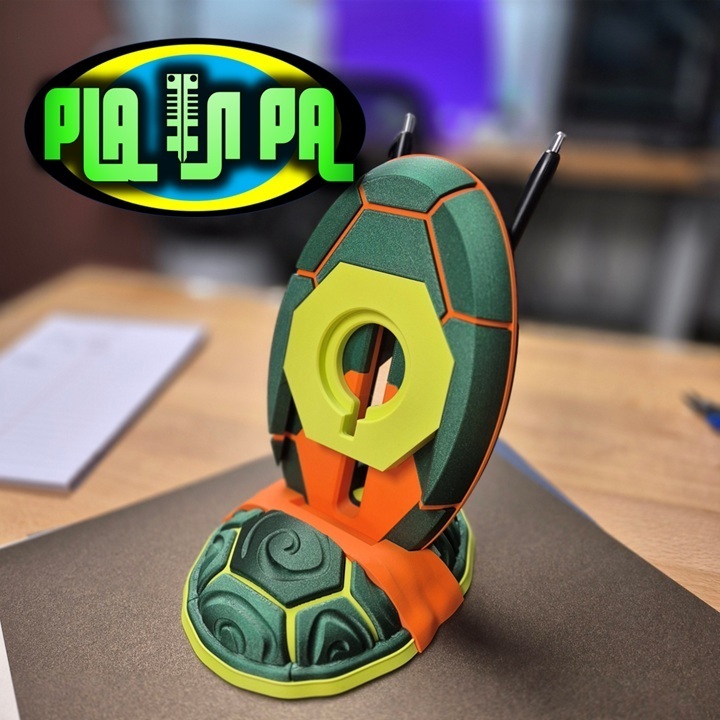
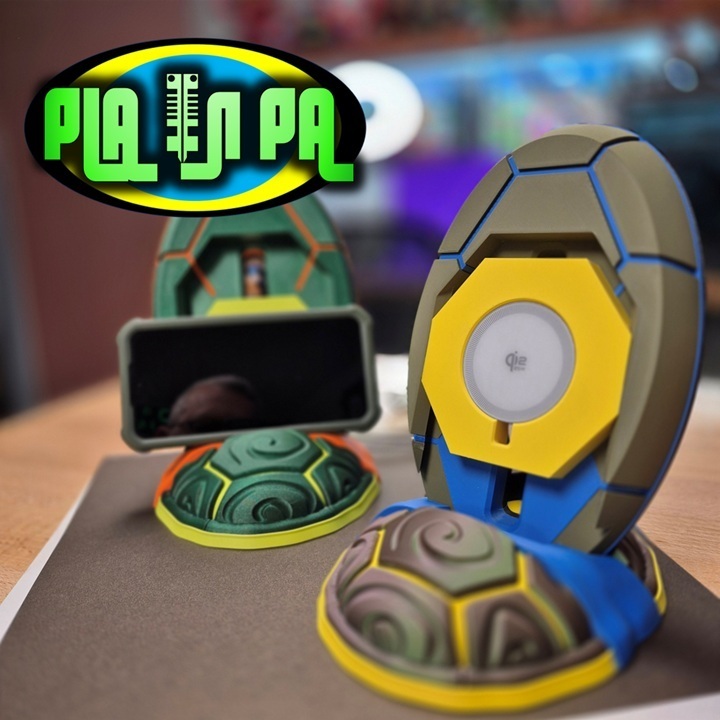
I toyed around with the concept a bit and wanted to make the design work with just about any phone or charger, for that matter. I incorporated some of my ideas into the design, making the charger's placement adjustable to fit just about any phone size. The Yellow charger slides up or down on a “V” track with some force and can be adjusted to fit larger or smaller phones.
I purchased these phone chargers on Amazon here…
25W Magnetic Wireless Charging Pad
But realize that not everyone would have, nor would they want to buy, the same charger. So I am including a “Blank” yellow charger in the STL and the 3MF lists in the download. If you have a different cordless charger, you can adjust the negative “generic cylinder” in the 3MF to accommodate the charger's size. I will include instructions on how to do this in the “Pic and Doc” folder in the download. I hope I made this simple enough to understand, but if there are any questions, please let me know.
Leo, being the greatest, coolest, most powerful, and totally awesome turtle, all the others bow down to, I was thinking about adding Katanas to the back of the shell for some more decor, but settled on a pen holder instead. Which actually worked out well, as they appear to be antennas. I'm down with that, adding to the 80’s retro vibe is always a good thing in my book.
The fully assembled design is roughly 8.25 inches (209 mm) tall.
Printing…
As always, it should be relatively simple; I was able to complete all my test prints without needing any supports.
All parts already have built-in clearances in the design, so adding X-Y compensation in the slicer is unnecessary.
Please check the “Pics and Doc” folder for more detailed instructions on adapting the design to fit a different cordless charger if you need a customizable option.
Assembly…
I am attaching assembly pictures in the download files to help you along. Please reference the photos.
Dry fit everything in place before adding glue.
I highly recommend PLA Gloop, if you can get your hands on it.
PLA Gloop Website
Starbond Adhesives make a good CA or super glue alternative at a lower price point. I recommend the Medium or Thick formula. I would defiantly pick up some Accelerator if your planning on using the Thick formula.
This is a relatively simple enough design to put together. I would hope the assembly pictures are enough for everyone to figure this one out, but if you have any questions, please let me know.
I do not recommend gluing the yellow insert in place. It should be tight enough to stay put, but movable if you ever need to.
Suggested Filaments
Mikey Shell in Pics
Ziro emerald Green PLA
Polymaker Matte Lime Green
Ziro Matte Orange
Bambu Matte Black
Leo Shell In pics
Ziro Matte Military Green
Ziro Matte Yellow
Polymaker Saphine Blue
Polymaker Starlight meteor
Bambu Matte Black
/https://fbi.cults3d.com/uploads/user/avatar/16675644/2024_logo_scalled_75.jpg "PLA-N-PA")


:format(webp)/https://fbi.cults3d.com/uploaders/16675644/illustration-file/dc020048-572f-4d2b-a221-13c117ed32ce/stash-pot-main.jpg)
:format(webp)/https://fbi.cults3d.com/uploaders/16675644/illustration-file/158c189e-d70b-415e-9bc6-074a88c71ee7/king-side.jpg)
:format(webp)/https://fbi.cults3d.com/uploaders/16675644/illustration-file/ffcc39f6-8974-4349-be67-076611633fa9/CultsSwitch-Container.jpg)
:format(webp)/https://fbi.cults3d.com/uploaders/16675644/illustration-file/c35c70ce-b871-46fb-86a0-bb7836c9da27/20220422_162228.jpg)
:format(webp)/https://fbi.cults3d.com/uploaders/16675644/illustration-file/6f92eee4-da9d-4127-9352-0a35cc2656a4/Plant-famly.jpg)
:format(webp)/https://fbi.cults3d.com/uploaders/16675644/illustration-file/13e587c4-cd73-4070-a8a0-1c4f2a5cb496/20220909_132506.jpg)
:format(webp)/https://fbi.cults3d.com/uploaders/16675644/illustration-file/307977f6-78c8-49e9-b4f0-f57ff15c5378/Front-Face.jpg)
:format(webp)/https://fbi.cults3d.com/uploaders/16675644/illustration-file/66fb990f-b9b2-4fbd-a238-7dca166156d5/cover.jpg)