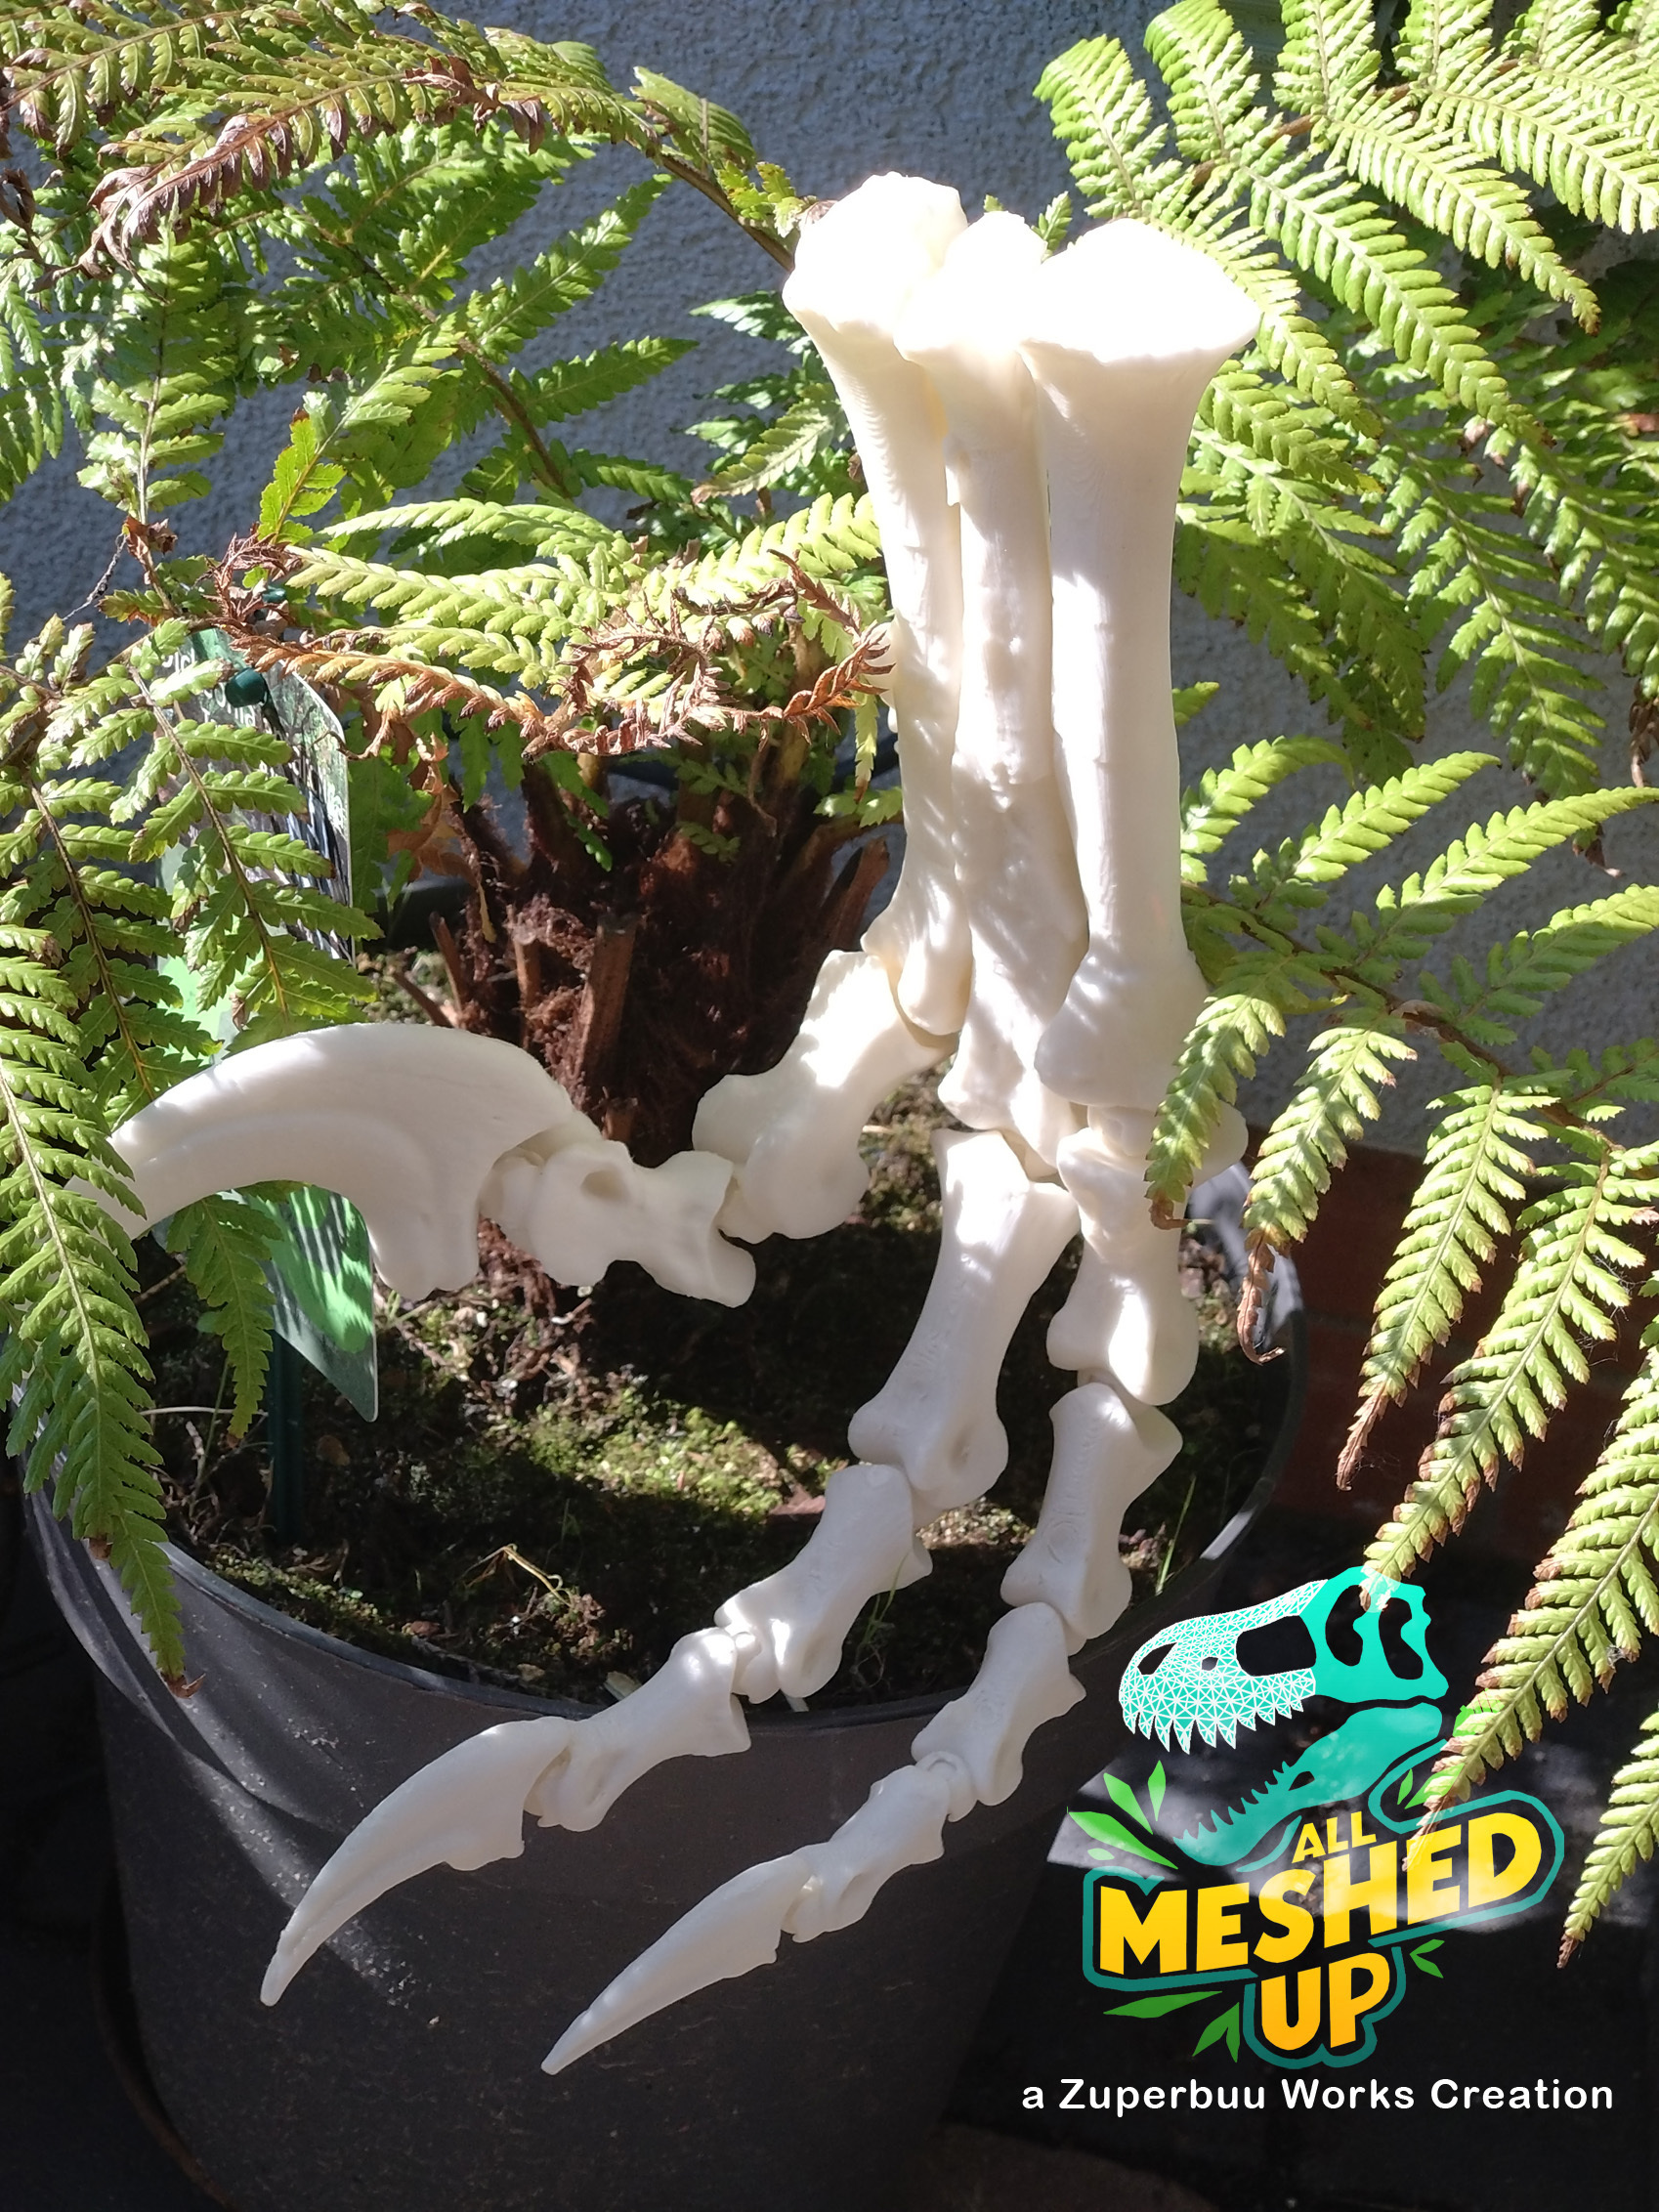
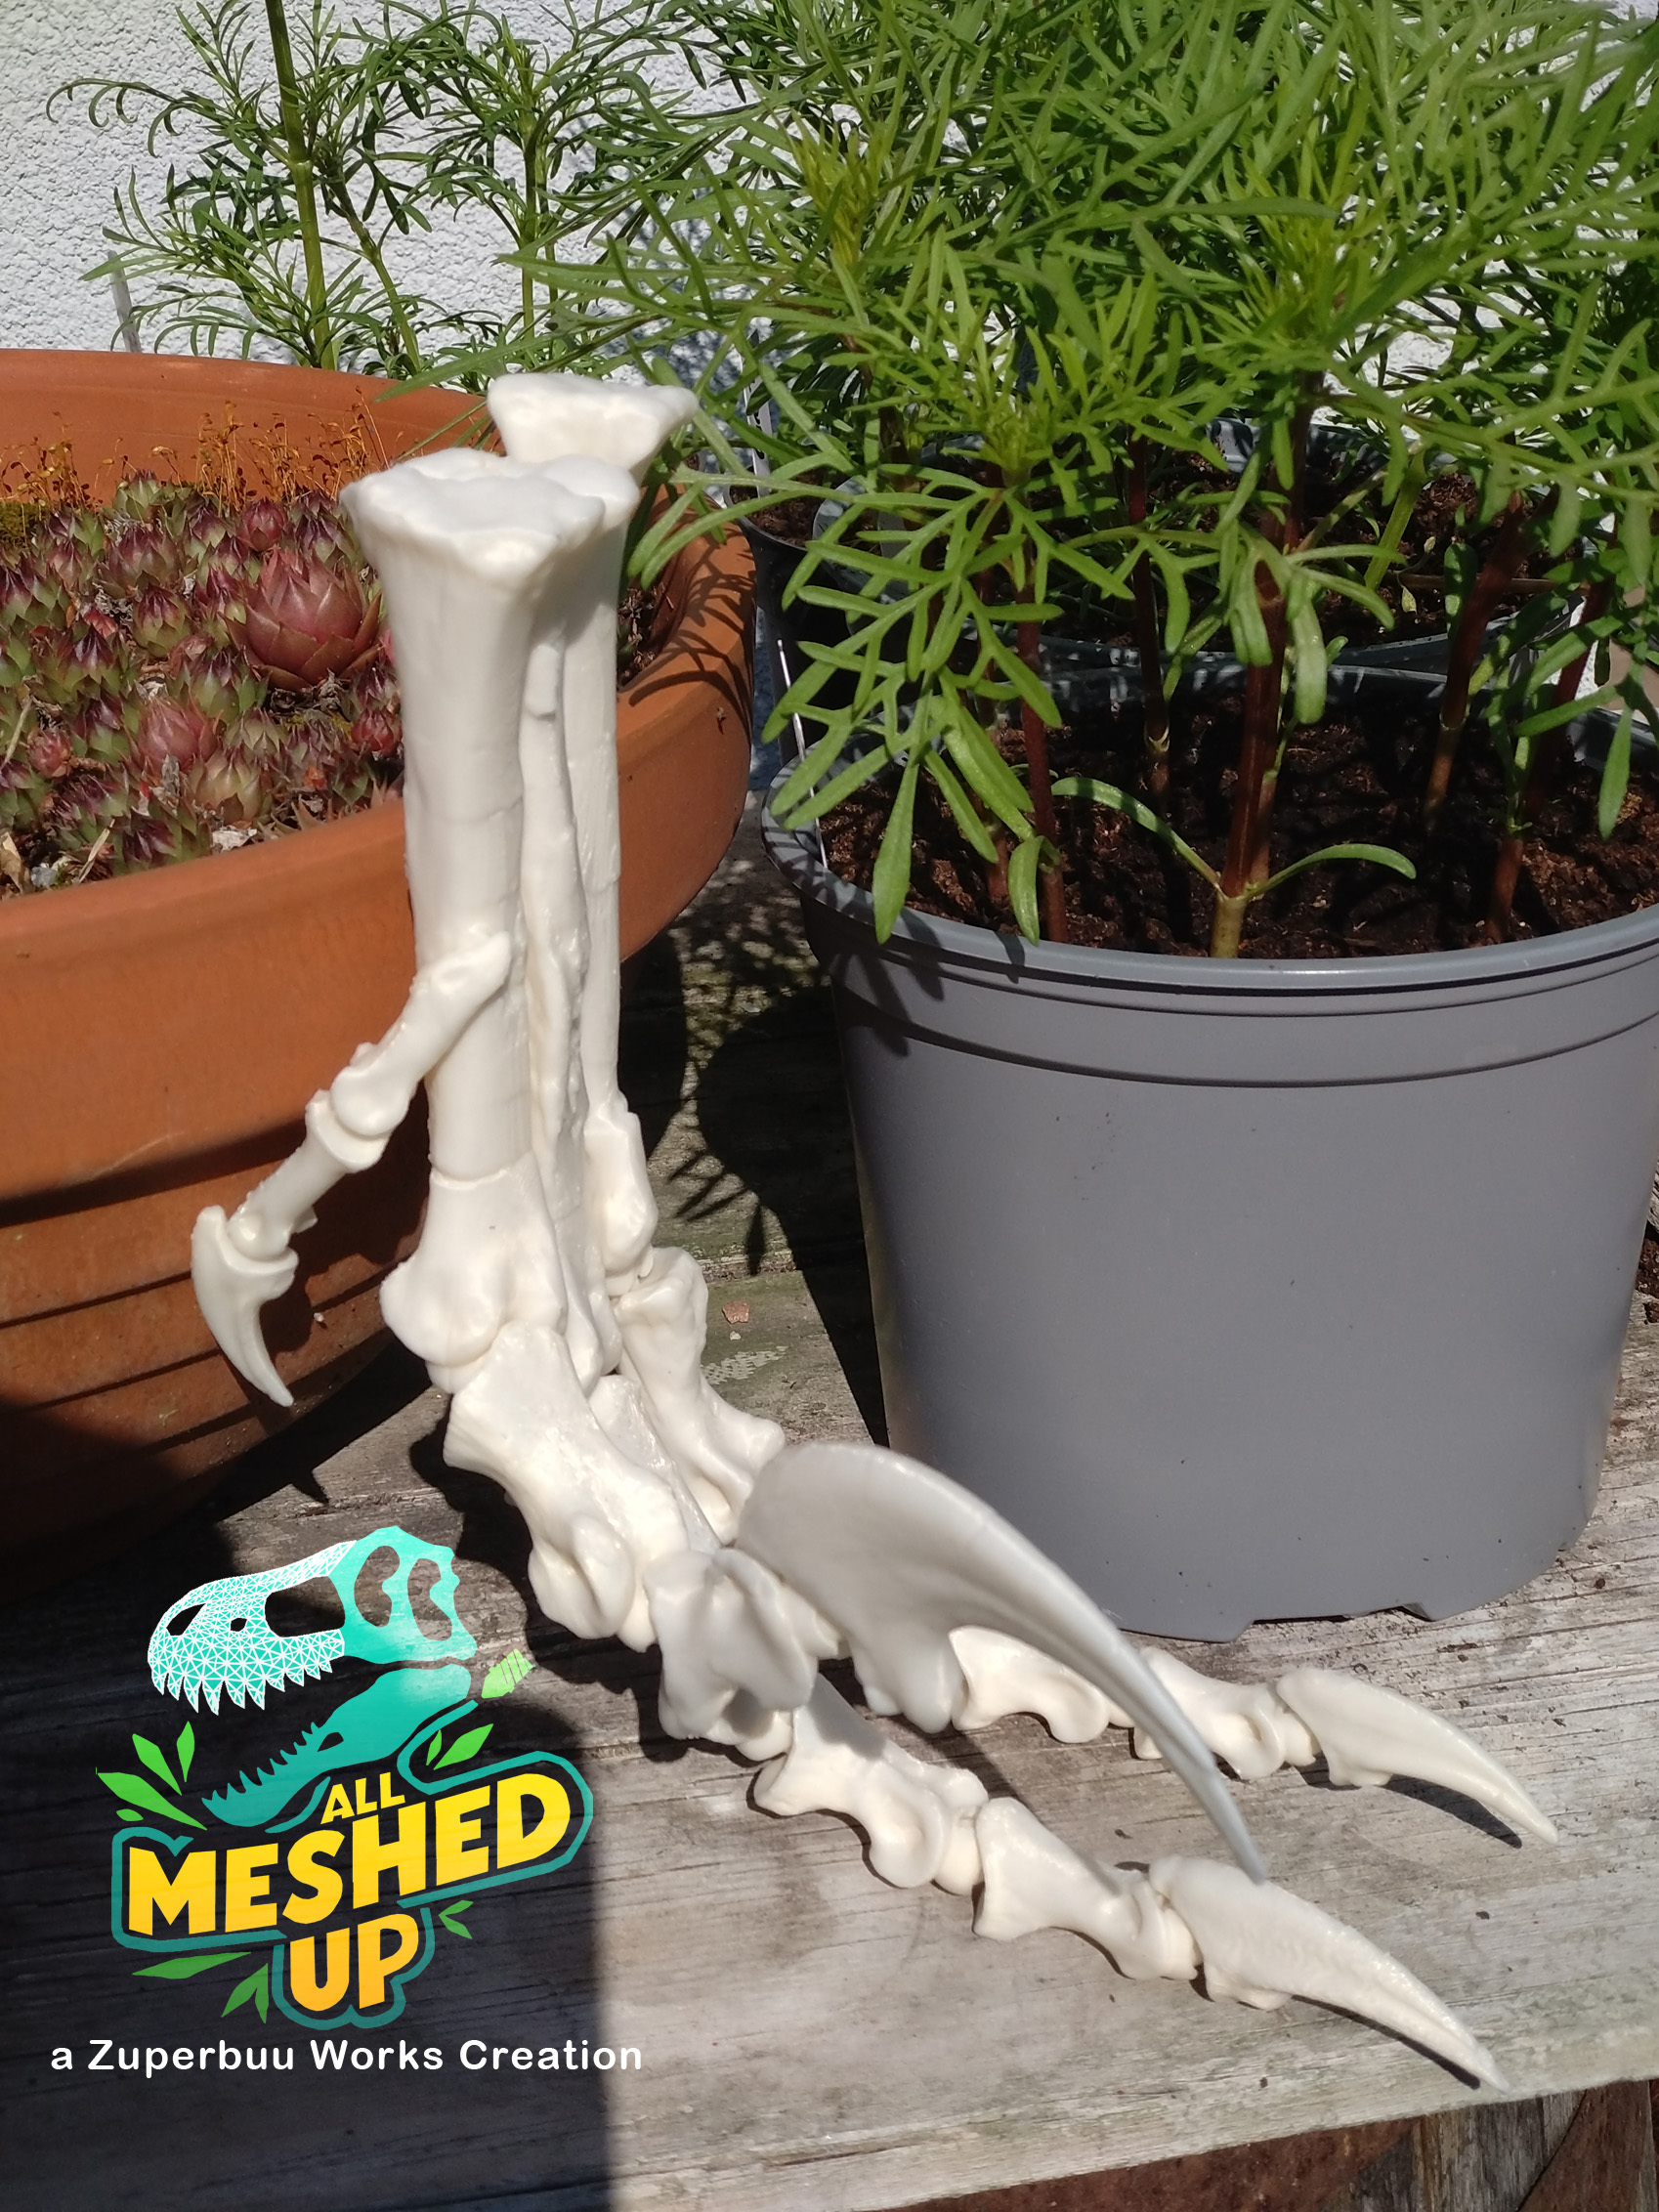
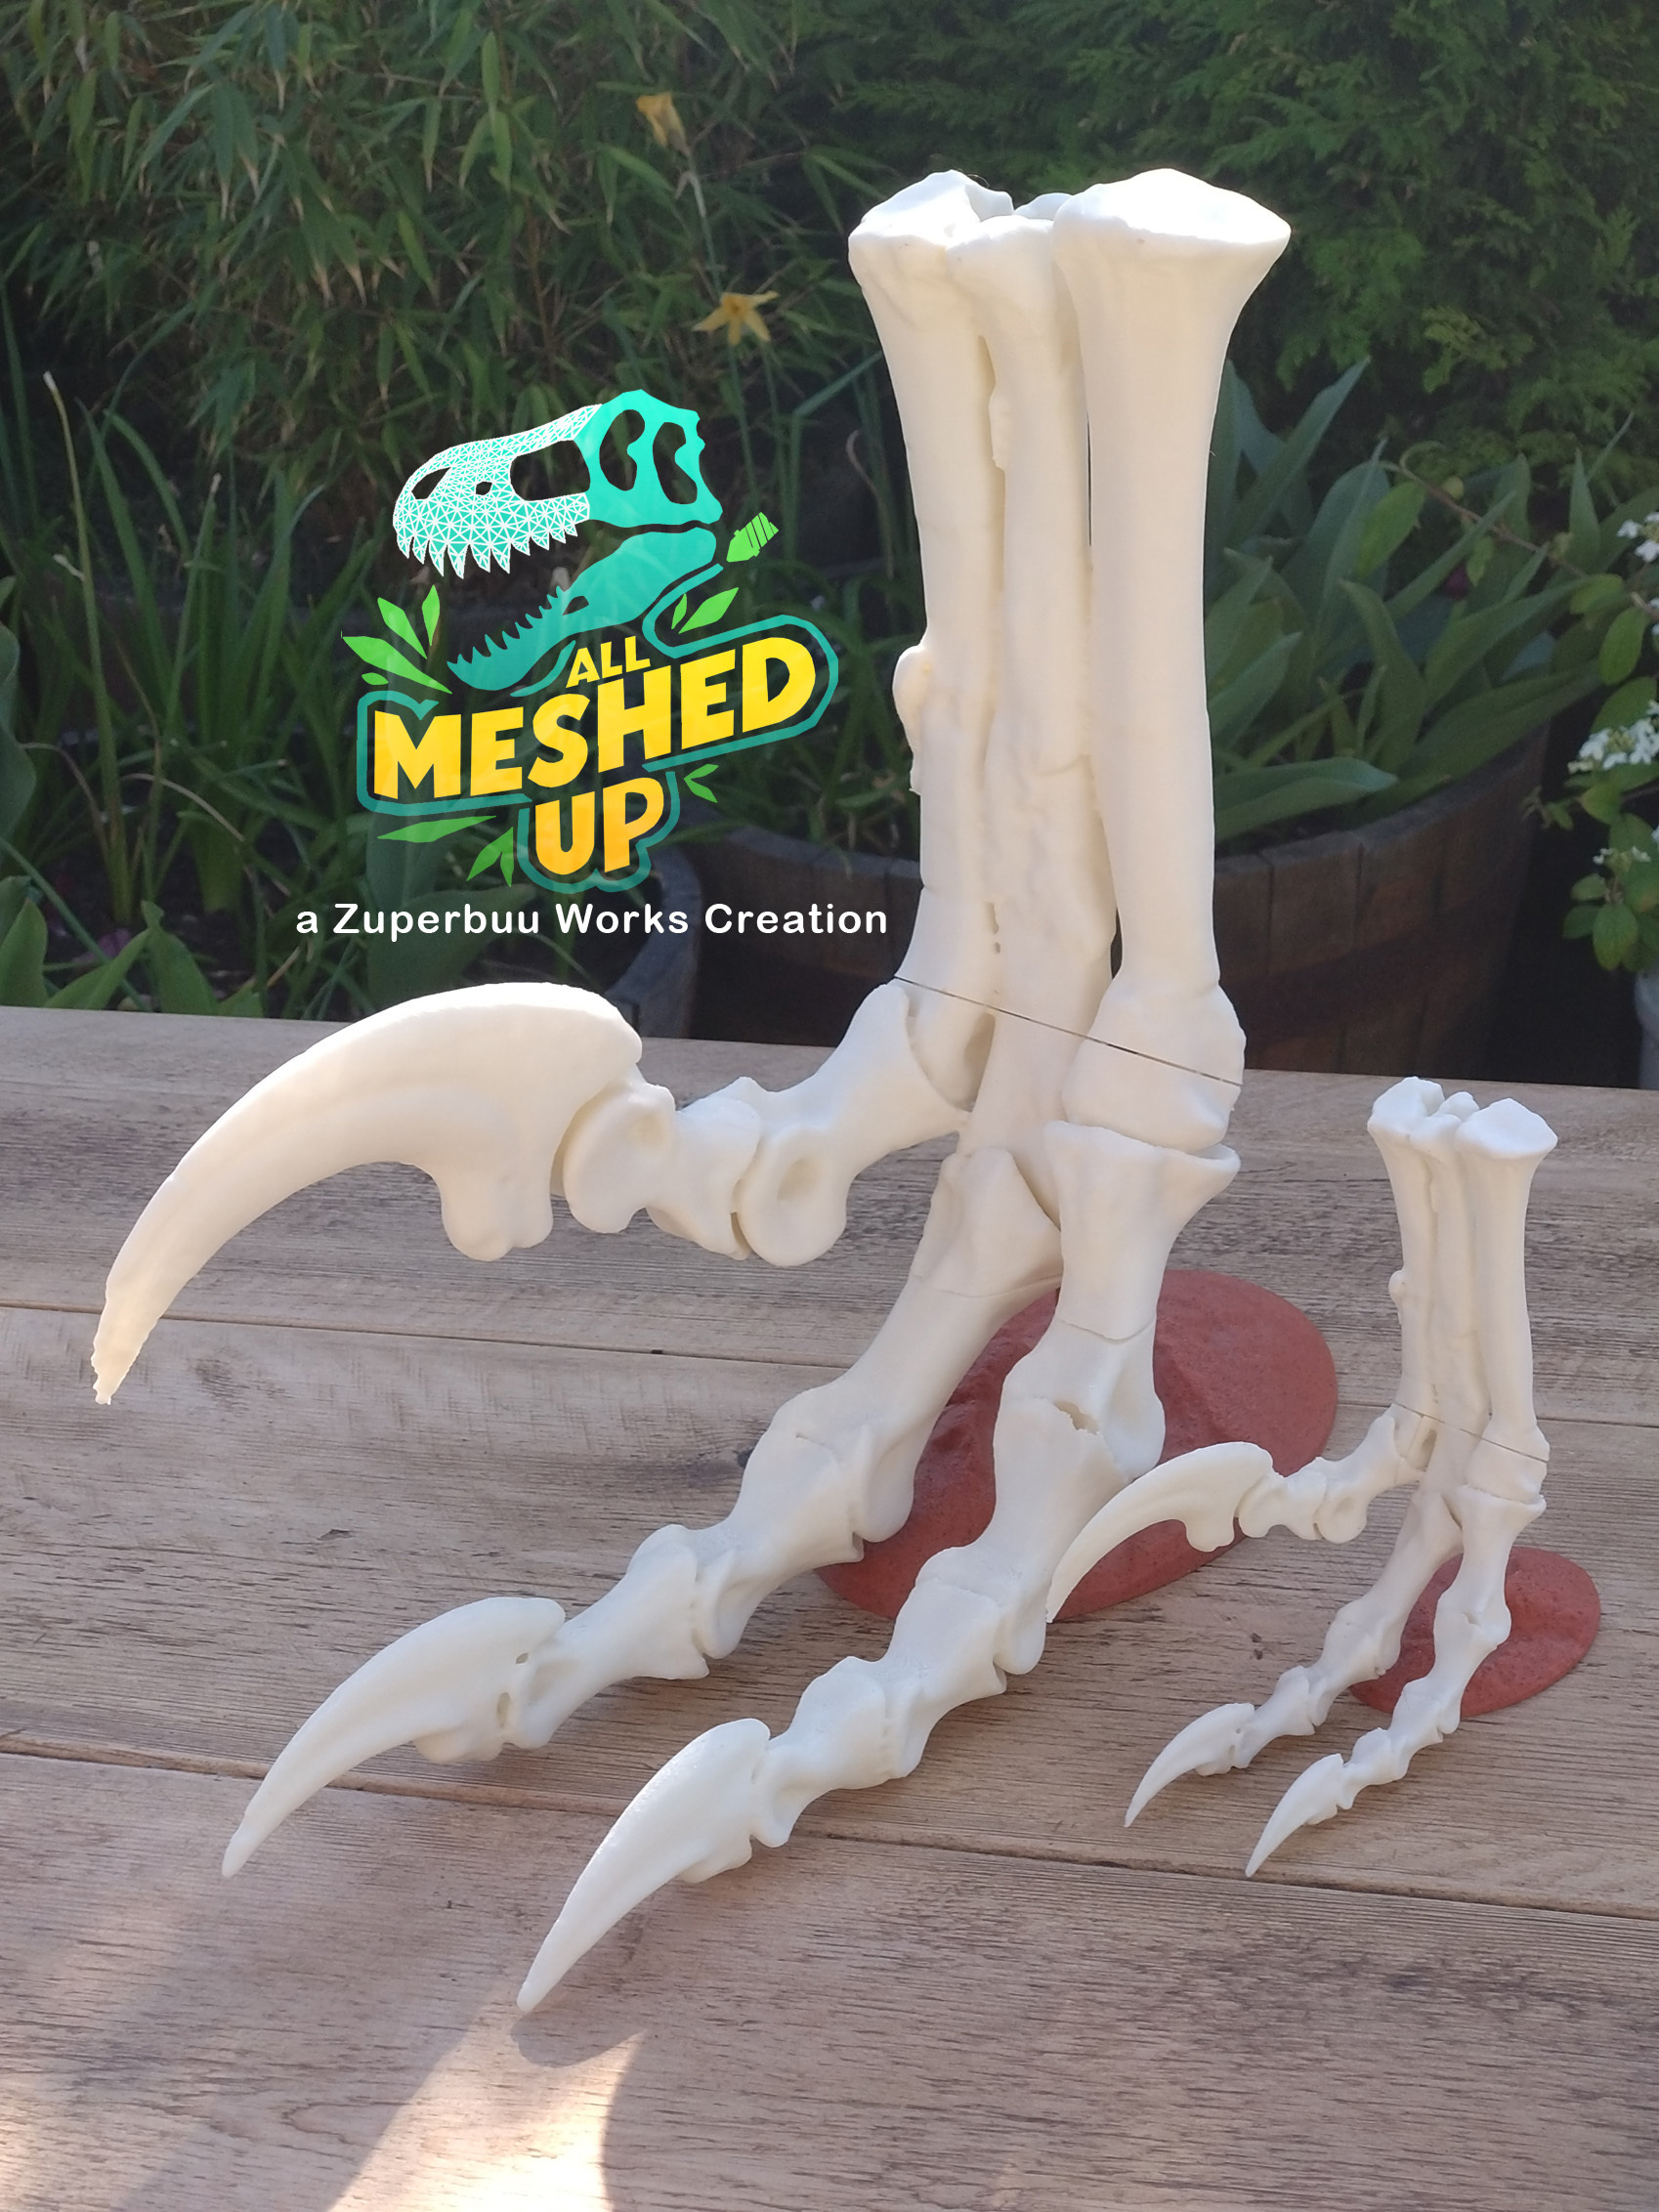
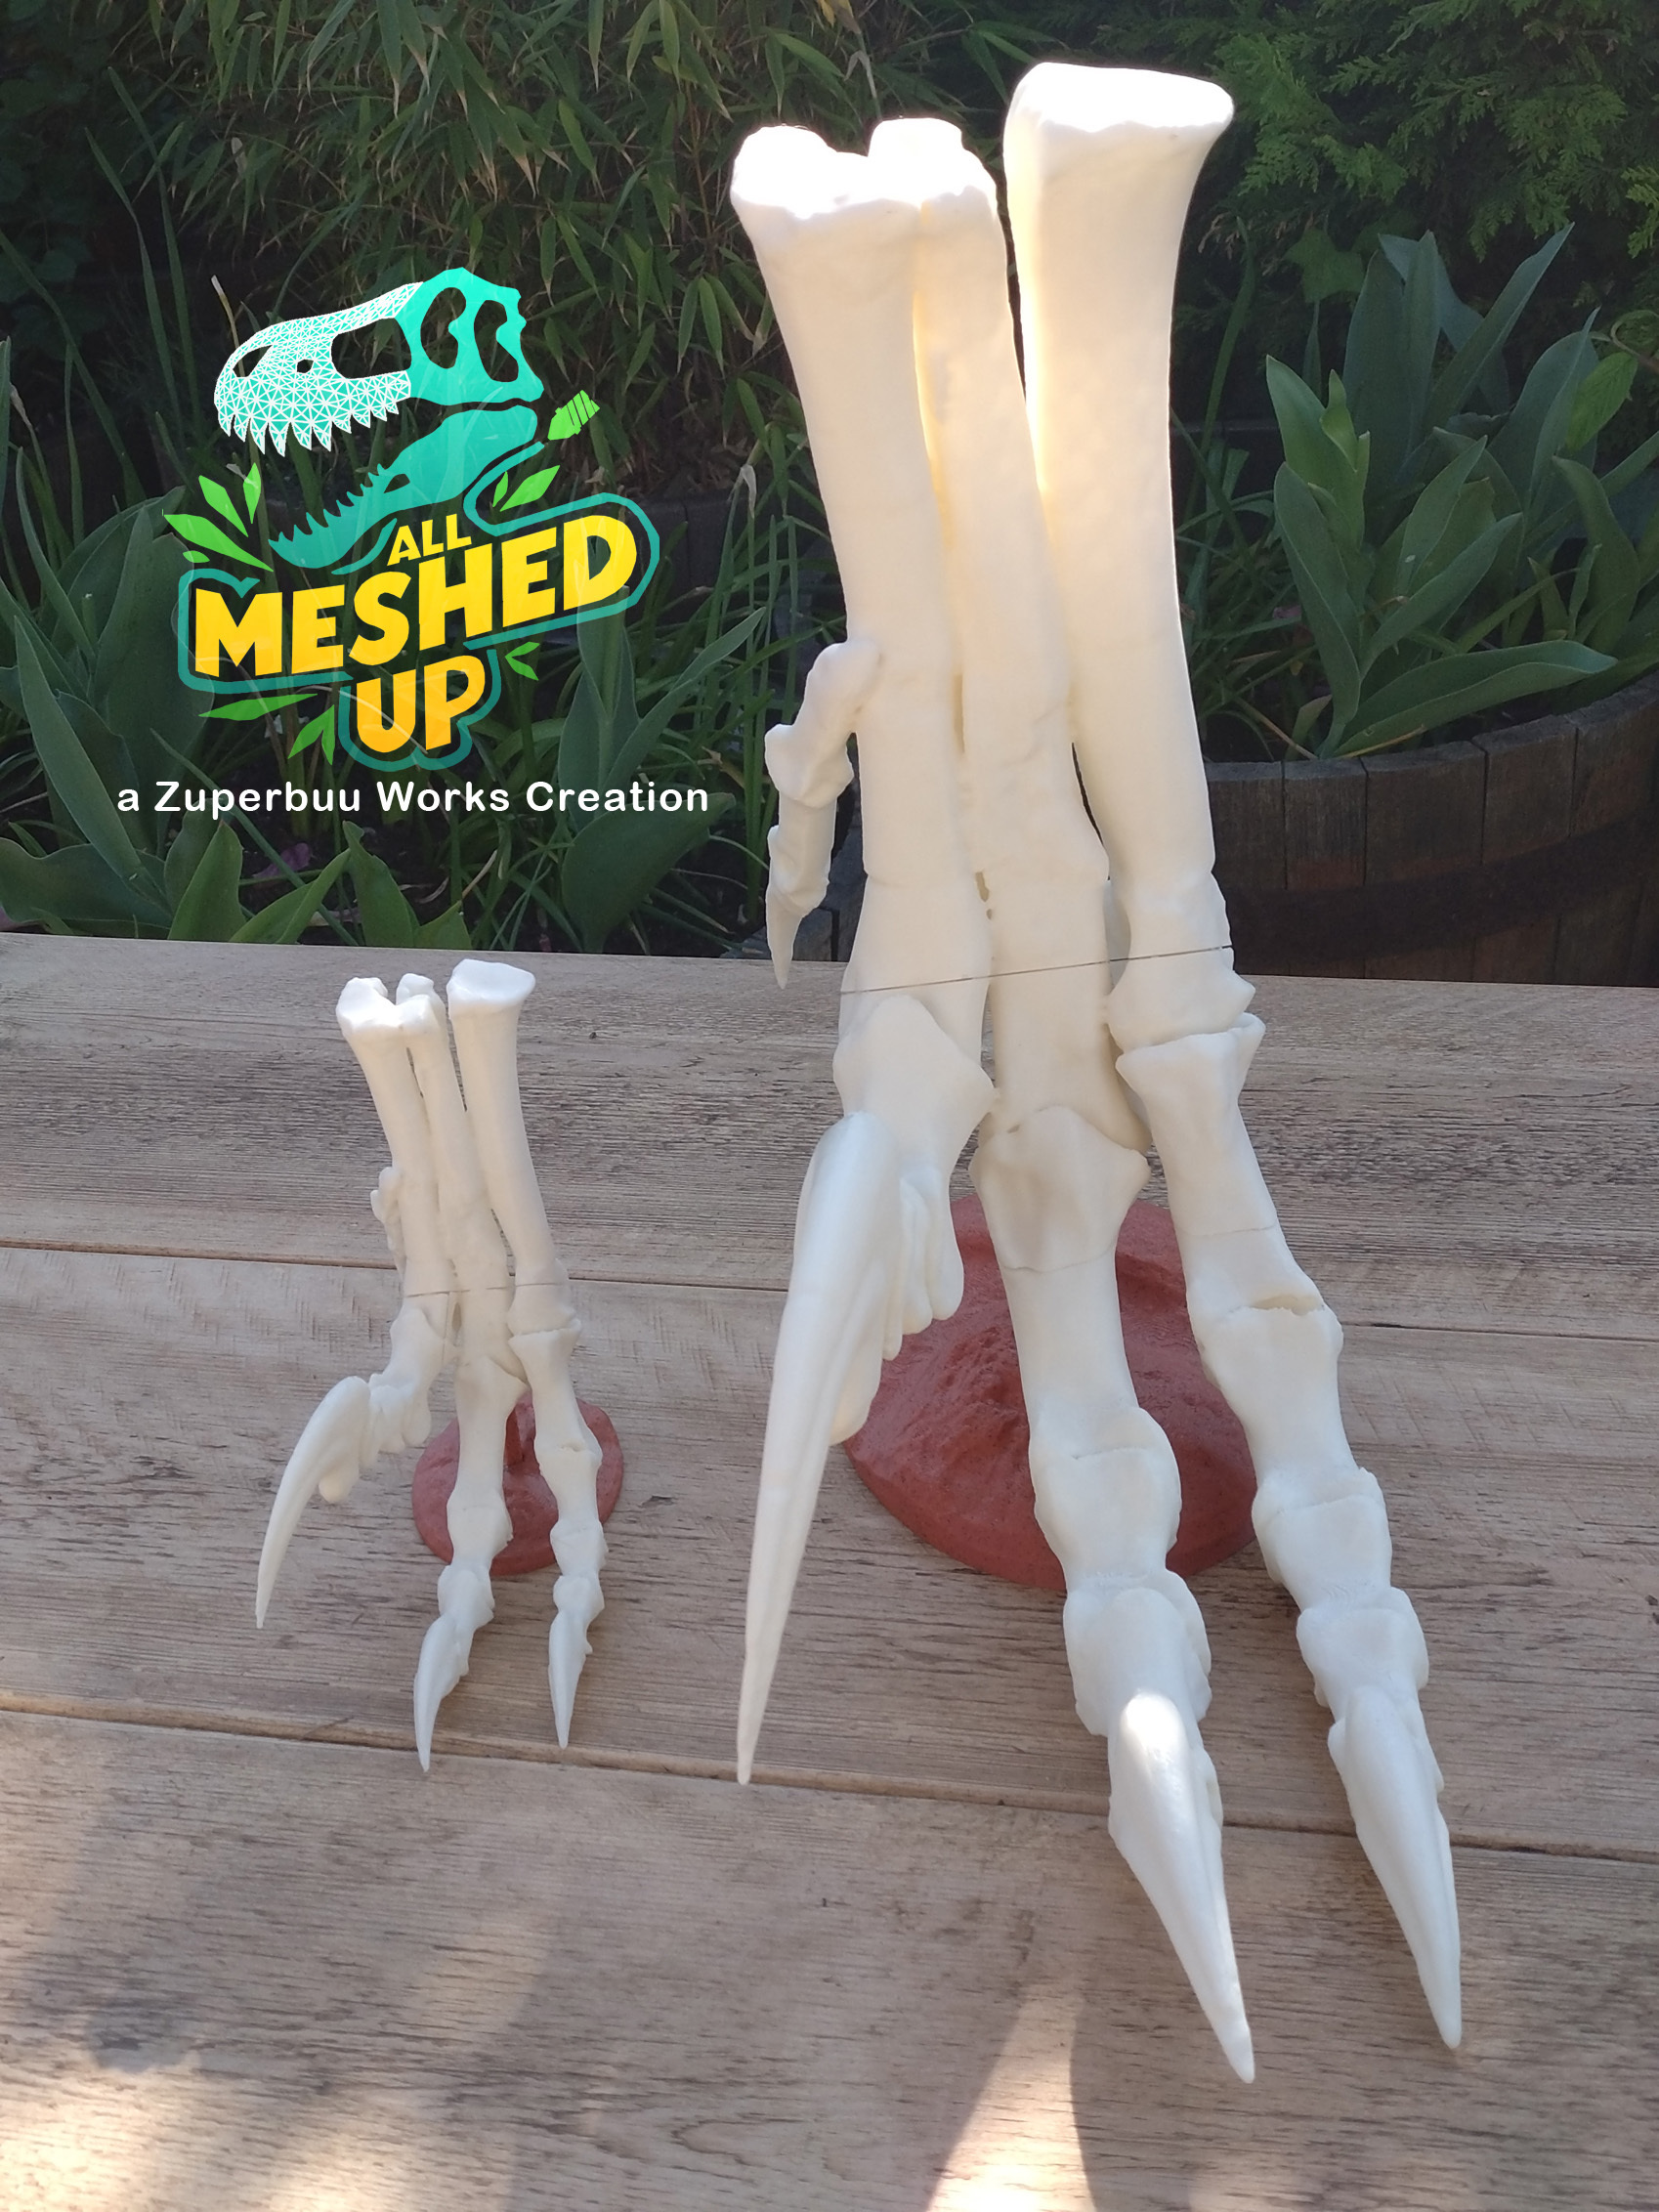
This model is designed to replicate the fascinating structure of a Deinonychus foot, and is based on scans of a real fossil!
Help keep Fossils in Museums and places of scientific study; say no to buying fossils and print a replica instead!
The model can serve as both an educational tool and an artistic point of reference; great for classrooms, or personal collections. It's a perfect gift too for anyone interested in palaeontology or animal sciences.
The fossil used as reference was incomplete and badly damaged, so whilst most of it is a 1:1 replica, a few parts had to be sculpted from scratch. I did my best to keep it as close to the real thing as possible.
--Printing Recommendations--
There are 2 3MFs and two "styles to choose from. Which one you use is up to you.
SOLID style has no movement; it's the easiest to print and put together.
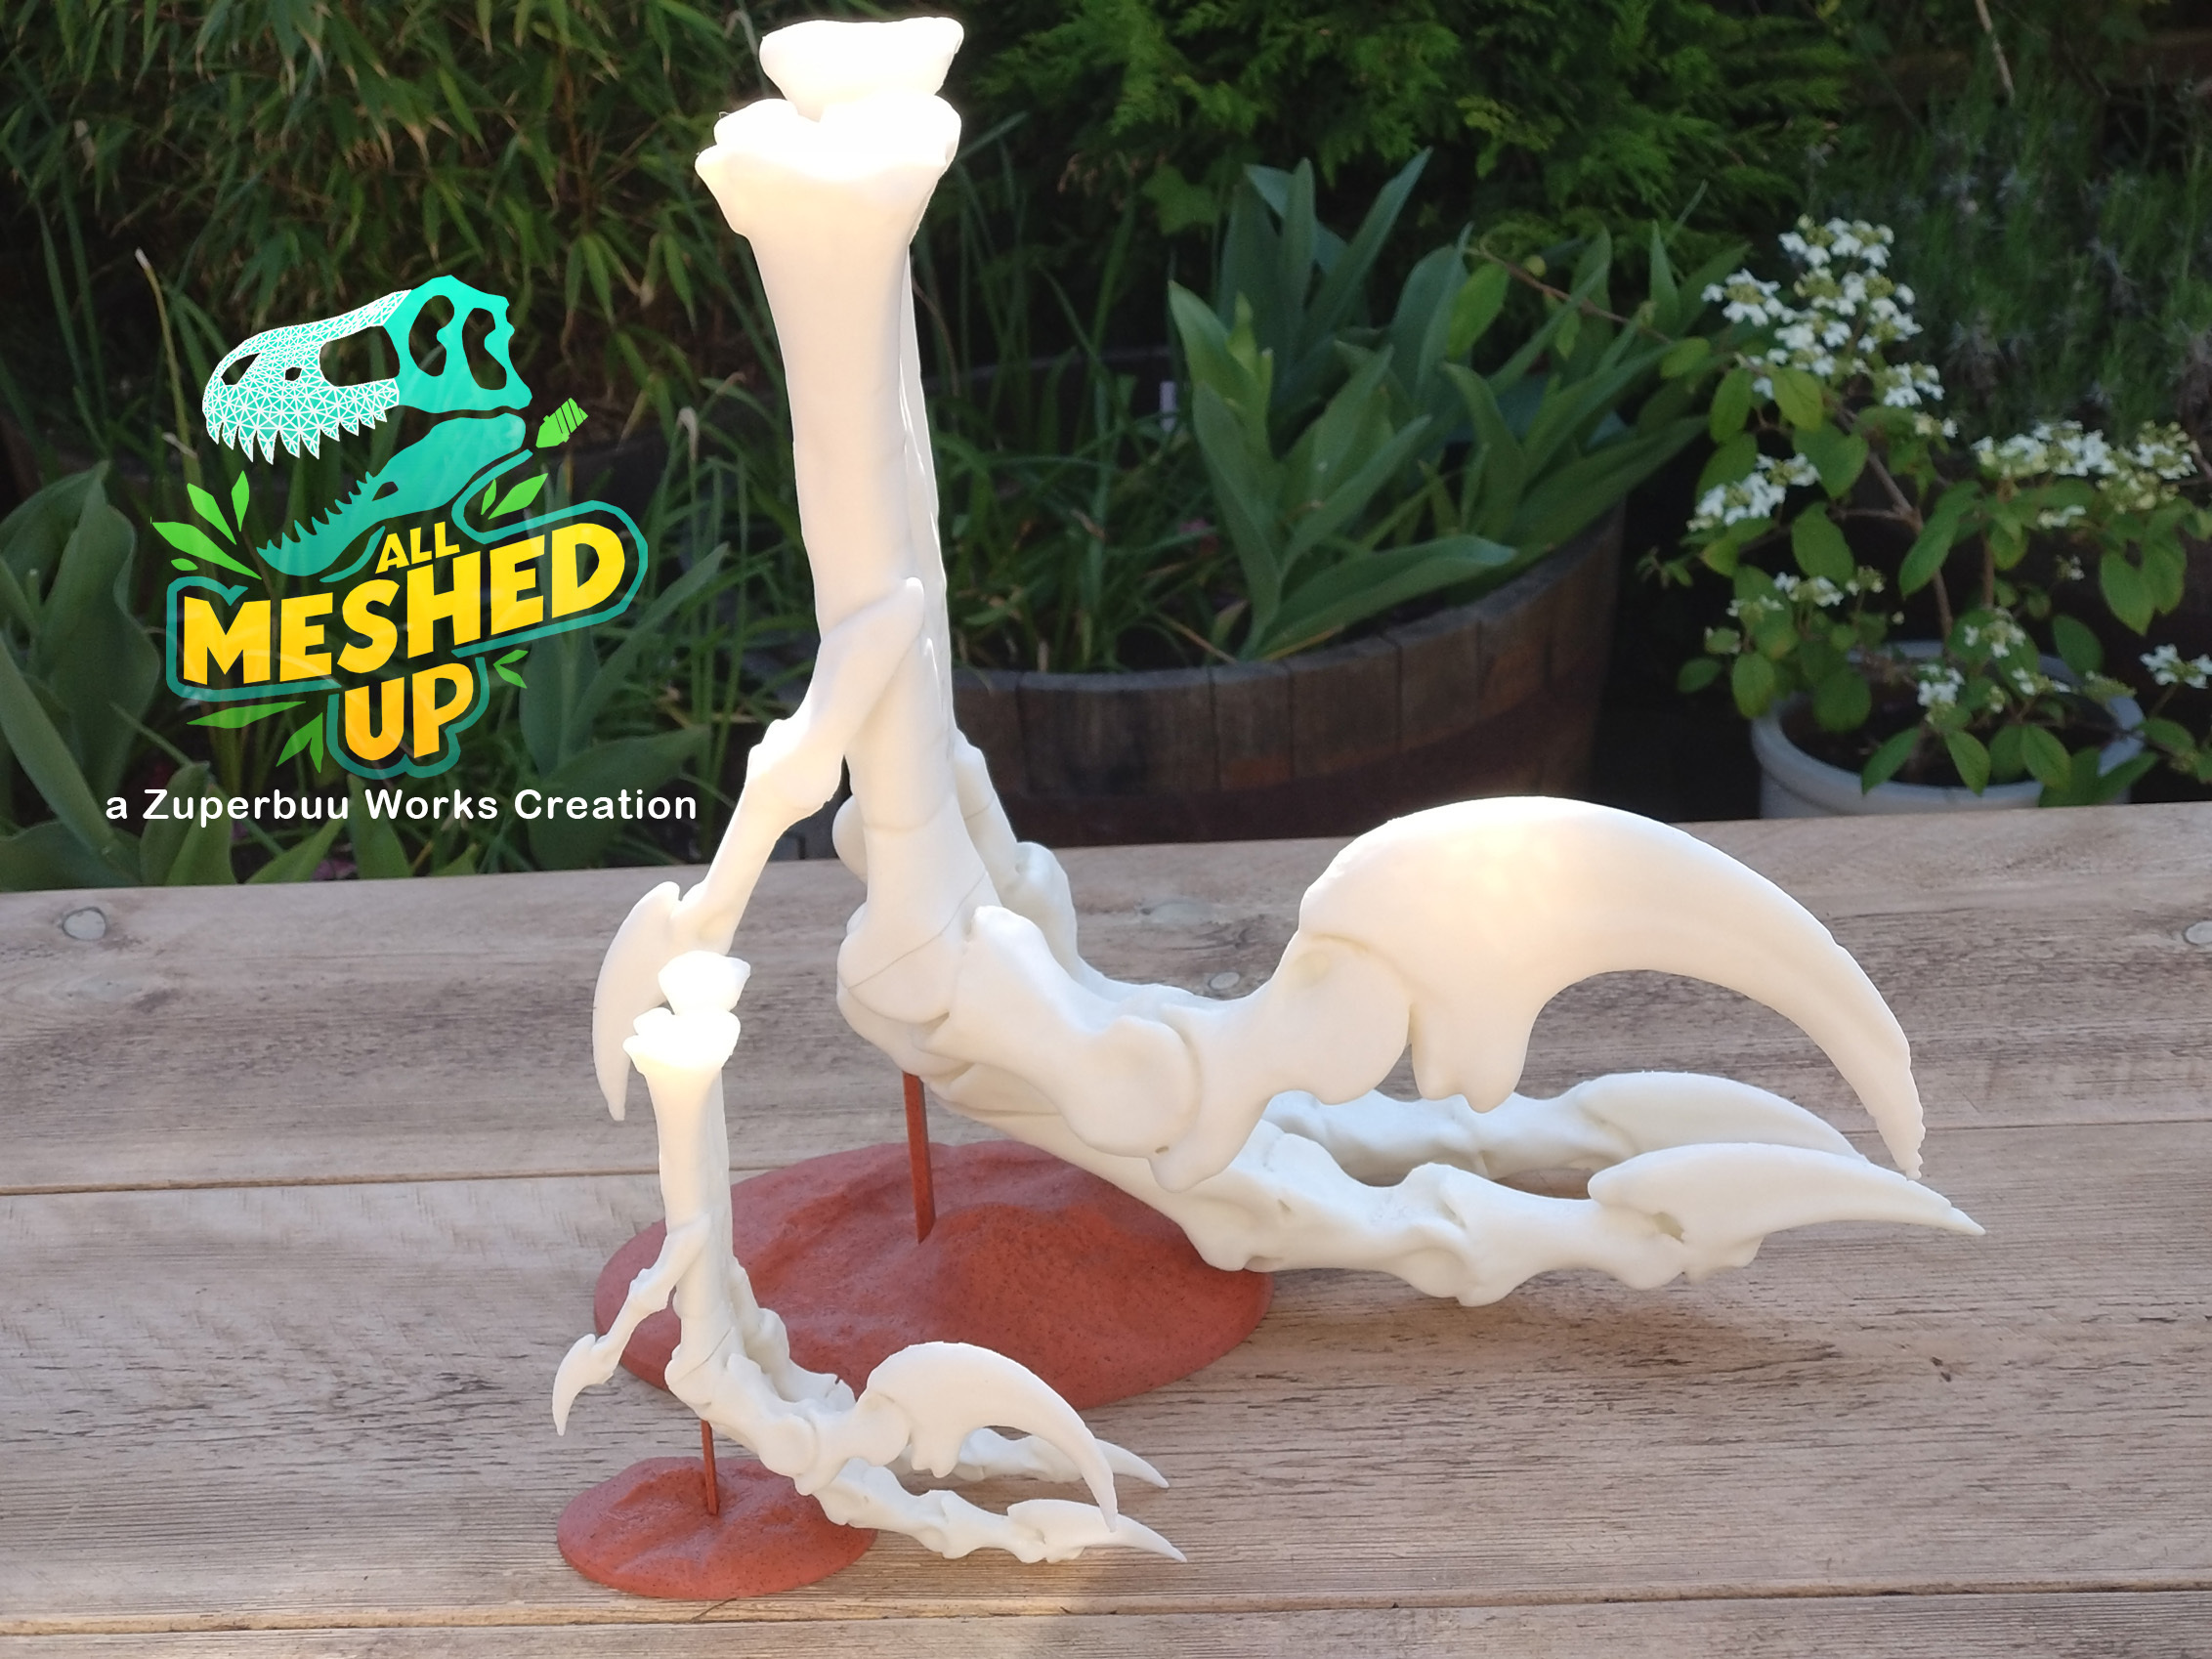
ARTICULATED style has movement; it requires extensive assembly and can be challenging to print.
PETG or ABS is recommended for the Articulated style, though PLA still works well (my prints are all in PLA).
There are raw STLs available, but please note that the articulated foot base does NOT have a hole for the stand to go into it; use the 3MF if you want the articulated footstand.
SUPPORTS ARE REQUIRED ON BOTH STYLES. There is no way to print either style without them.
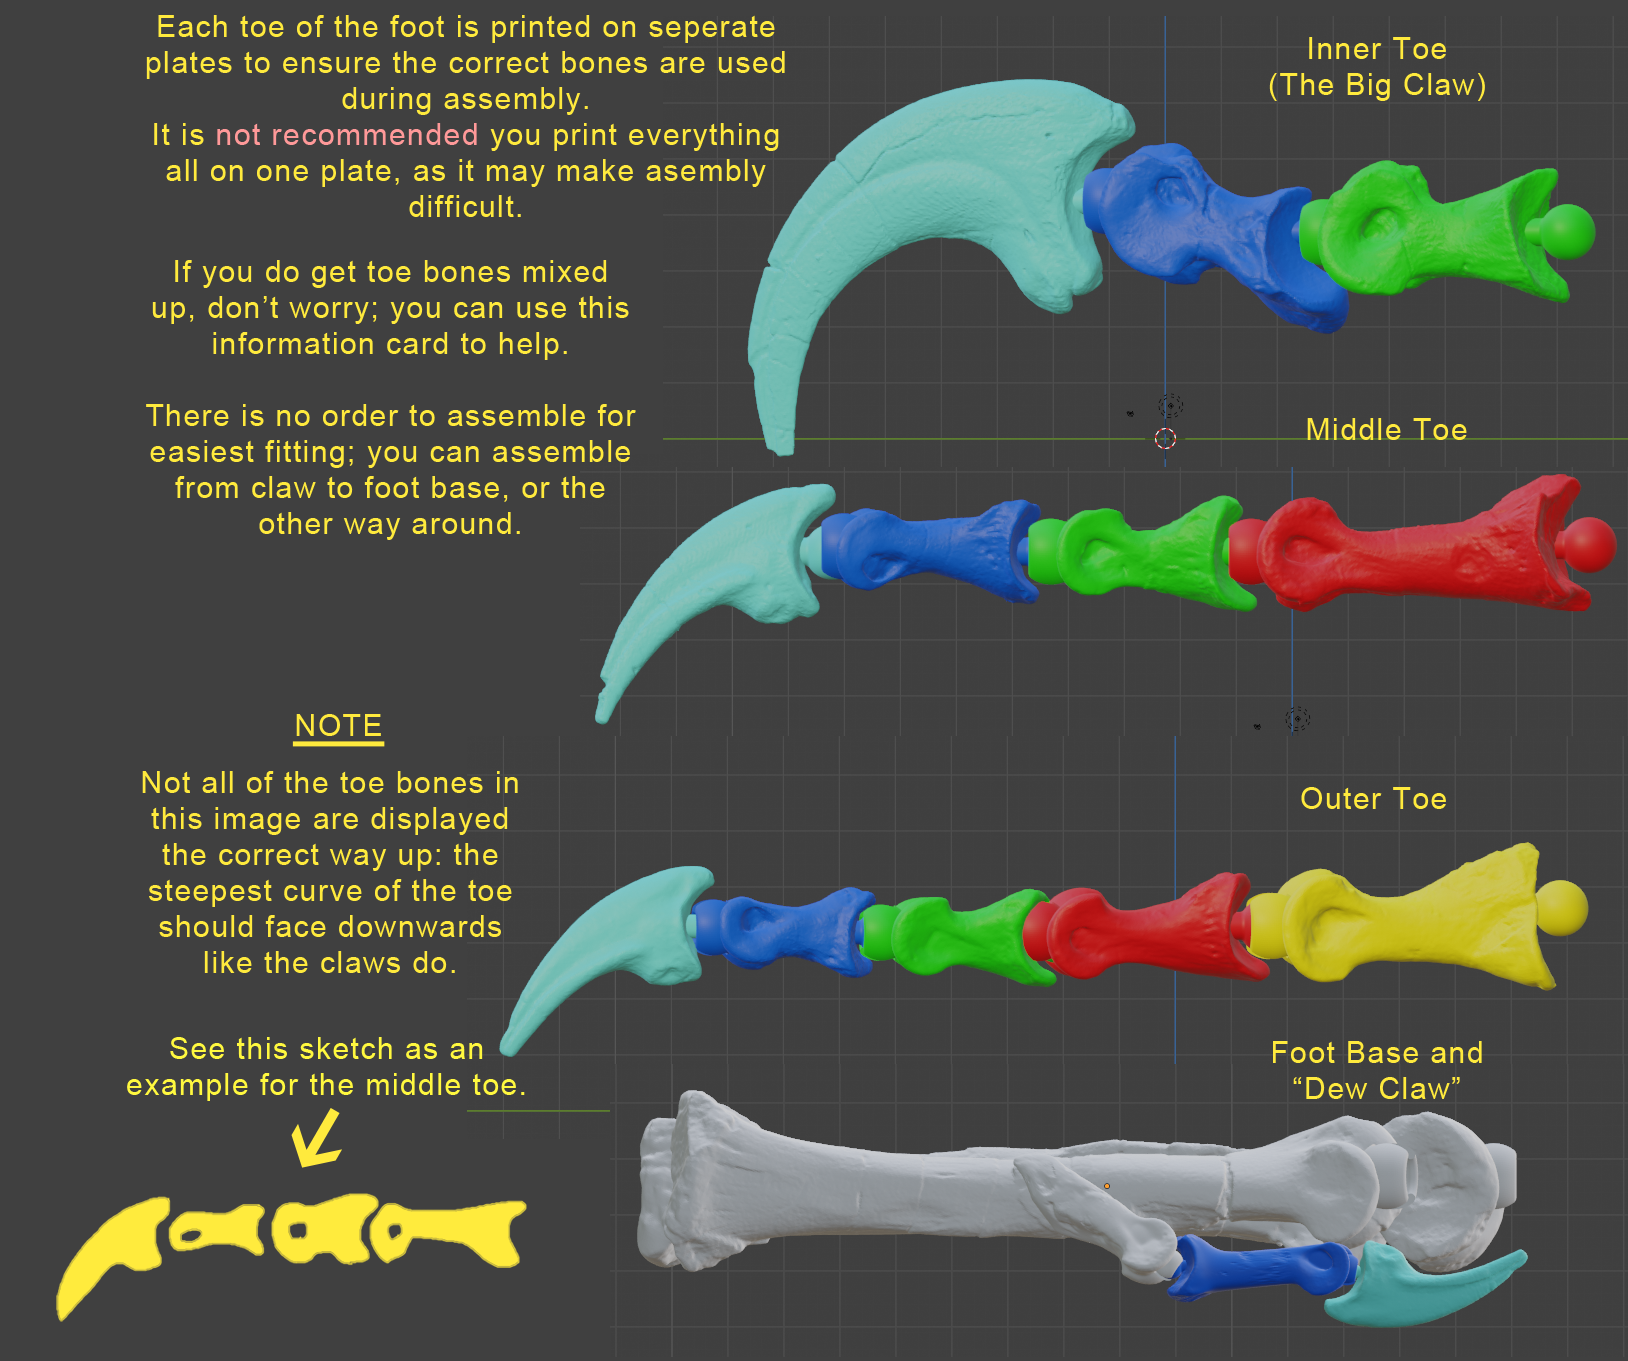
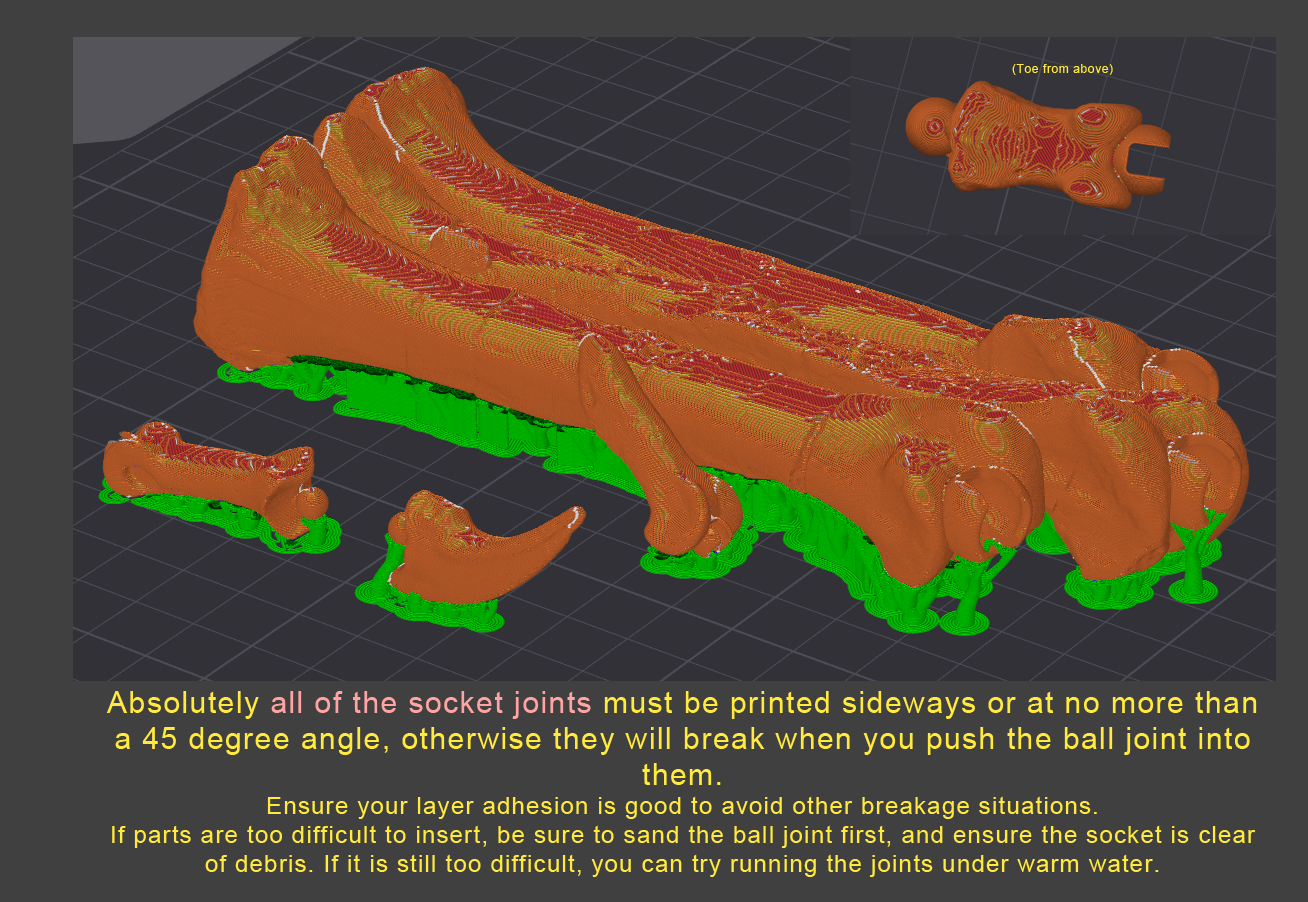
For the ARTICULATED style: An information card is also included in the IMAGES. It is important to keep all socket joints facing sideways and NOT up or down, otherwise they will break when you force the ball joint into them.
Double-check that your layer adhesion is good before attempting this print; bad layer adhesion can cause the socket joints to snap.
The joints will be very tight; be sure to sand the ball joints down a little if they are too stubborn to insert, and make sure the socket joints are completely clear of support debris before inserting the ball joint.
If you are really struggling, you can try running the joints under warm water to make them more pliable.
For the SOLID style; you can orientate the parts any way you see fit, and they all snap together easily, but the larger size is heavier and will require glue to stay fixed together.
--Assembly Instructions--
For the Solid style, you can assemble it however you wish; it is very simple.
For the Articulated style; assemble the joints carefully following the instruction card in the IMAGES.
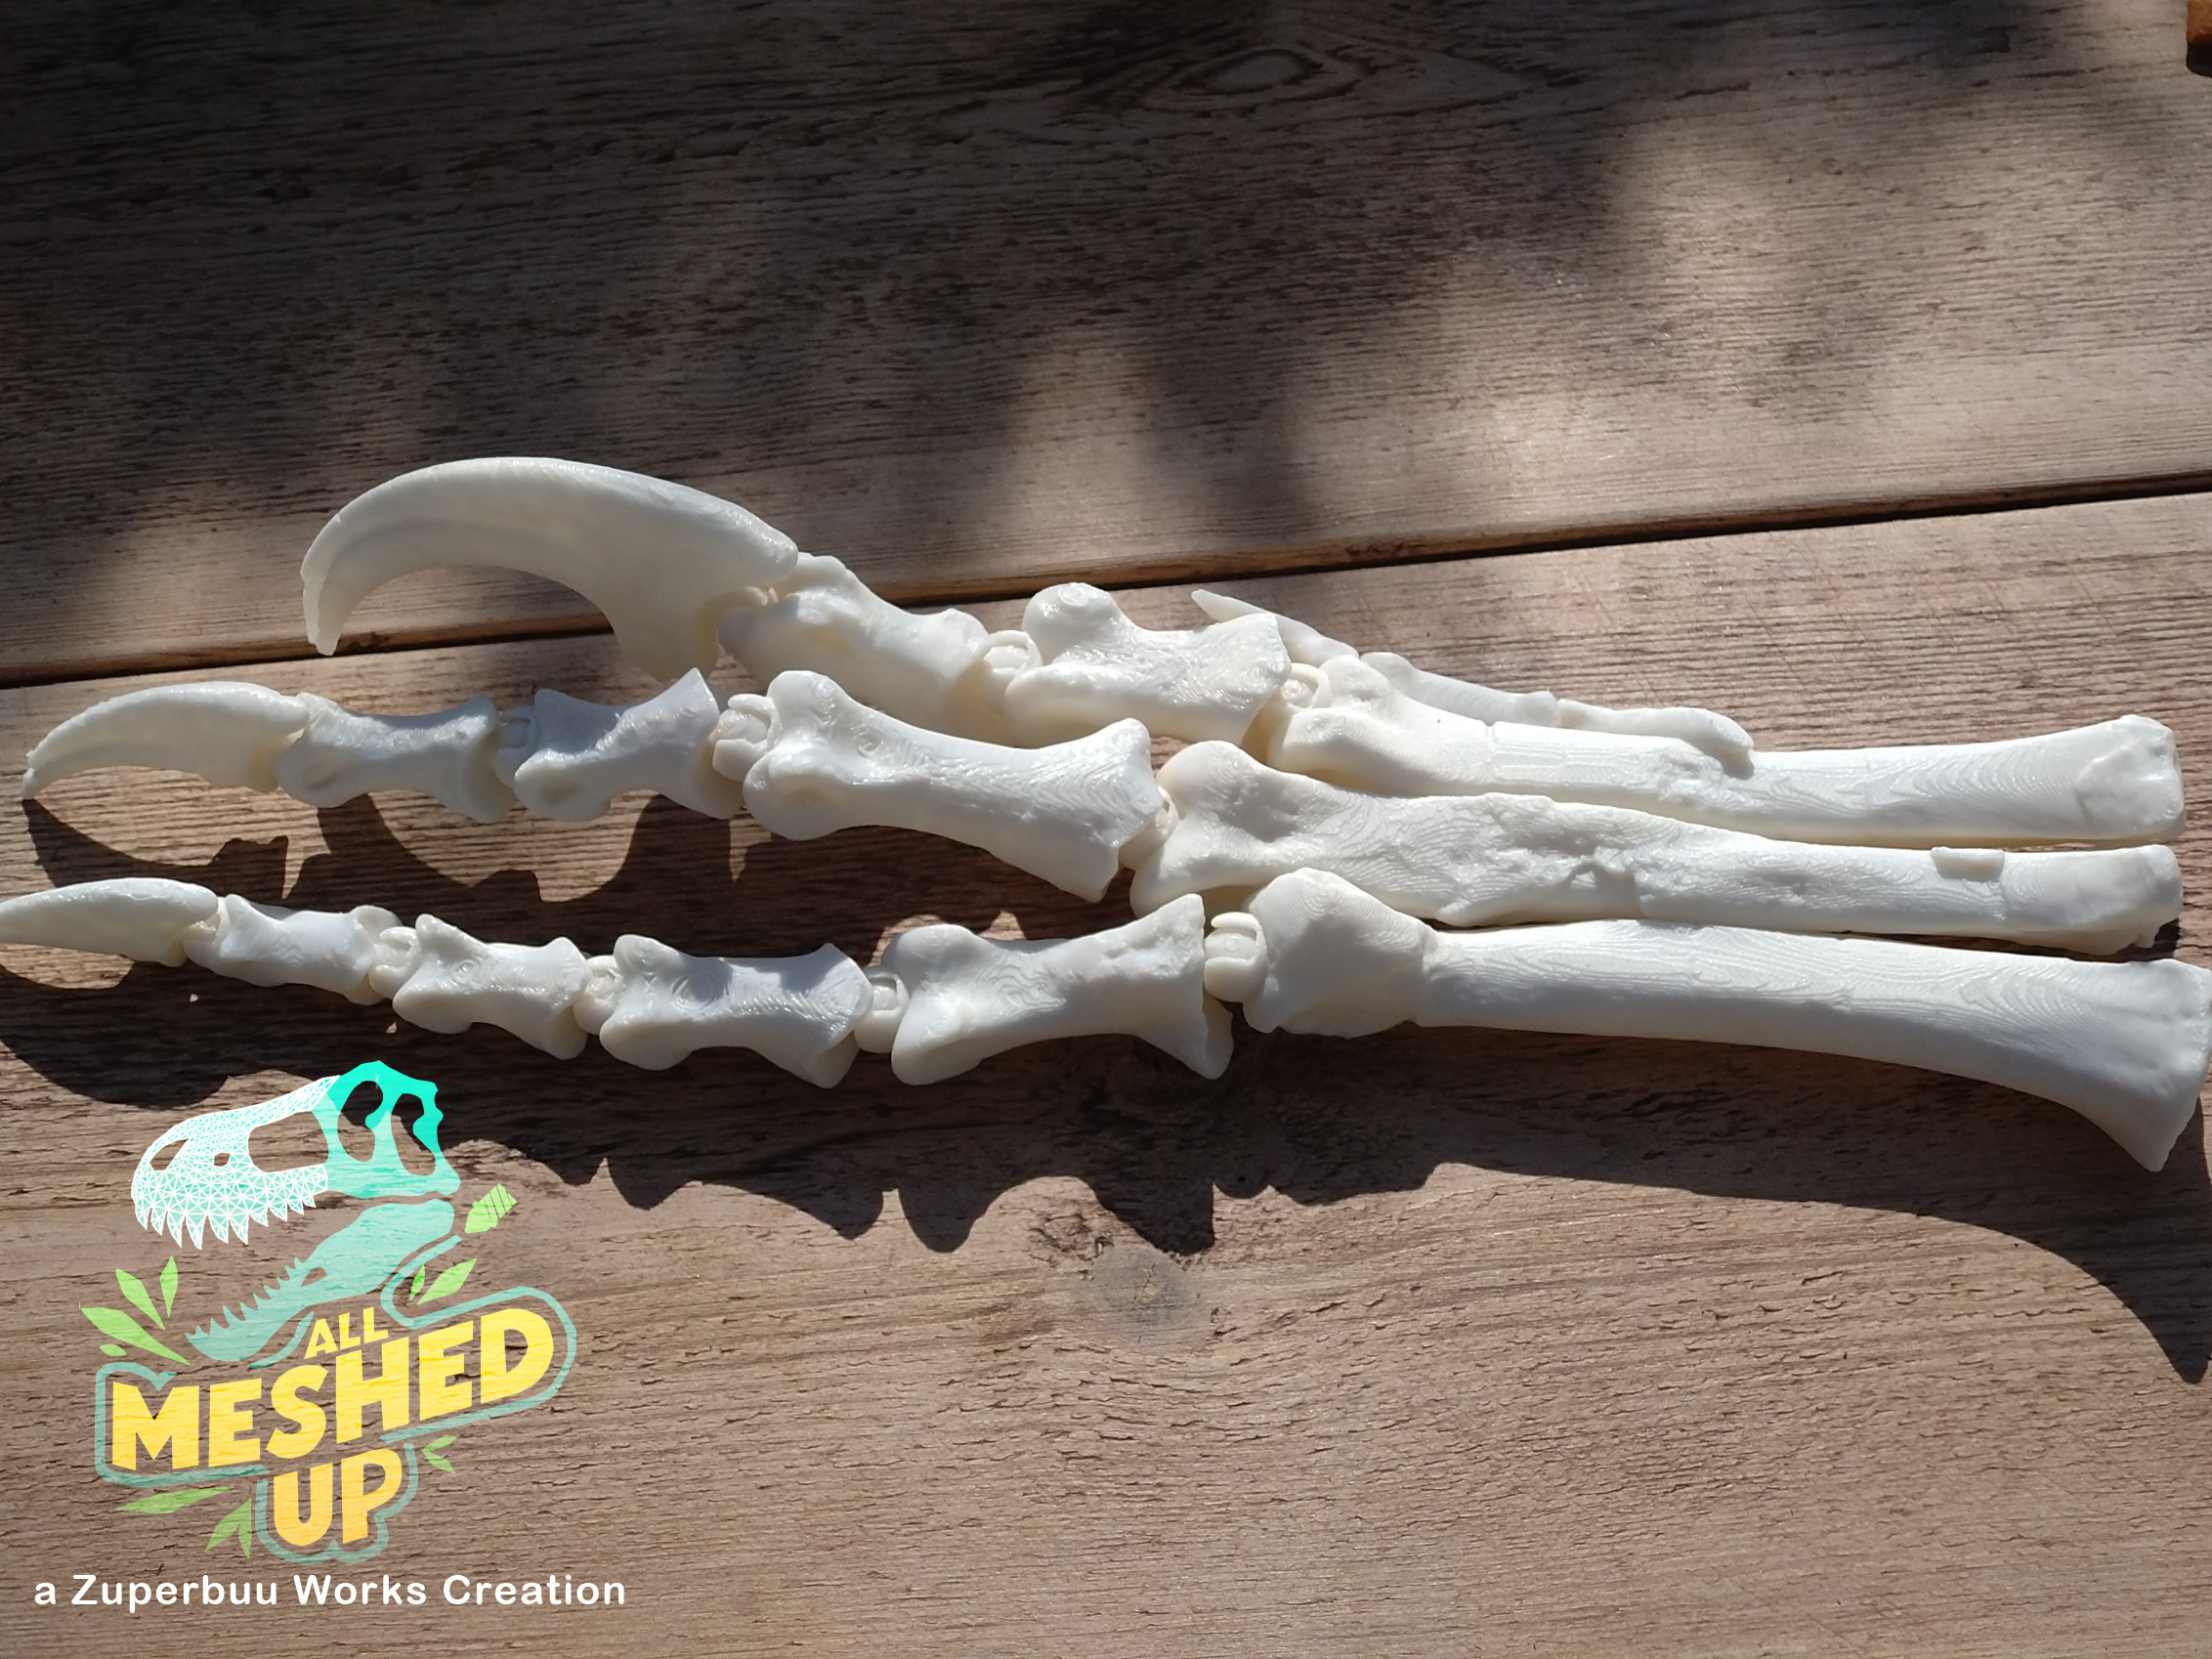
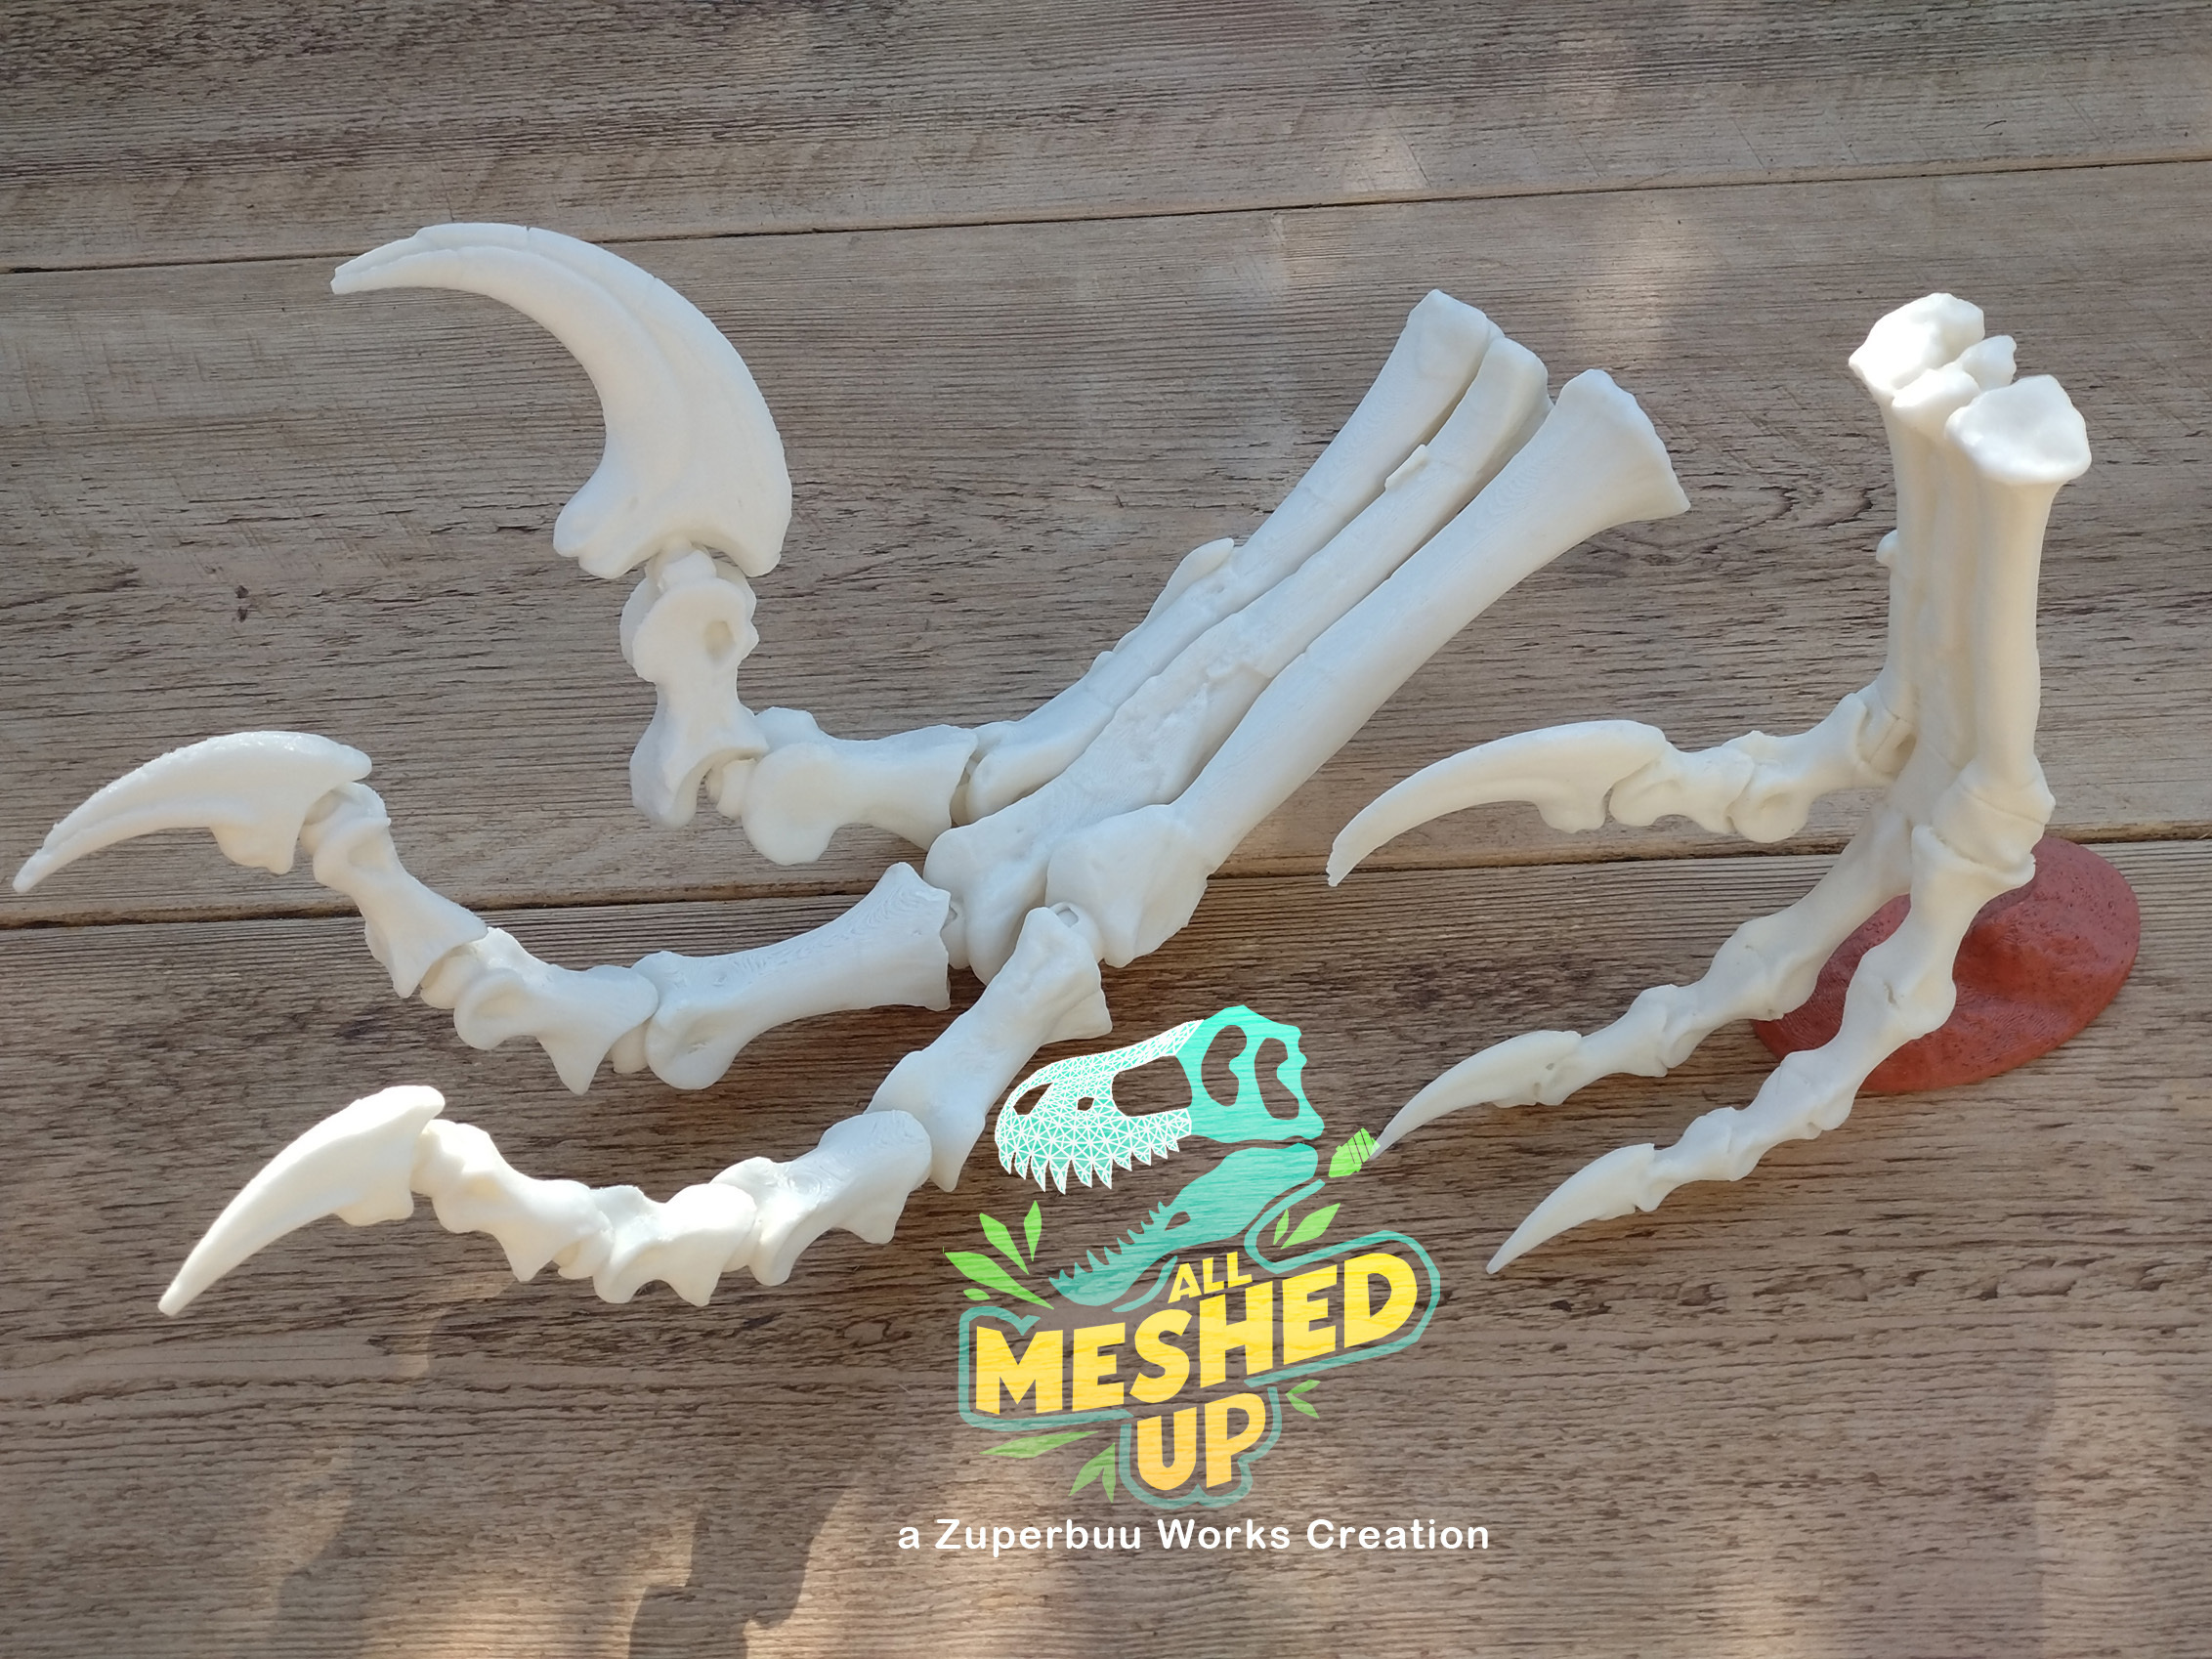
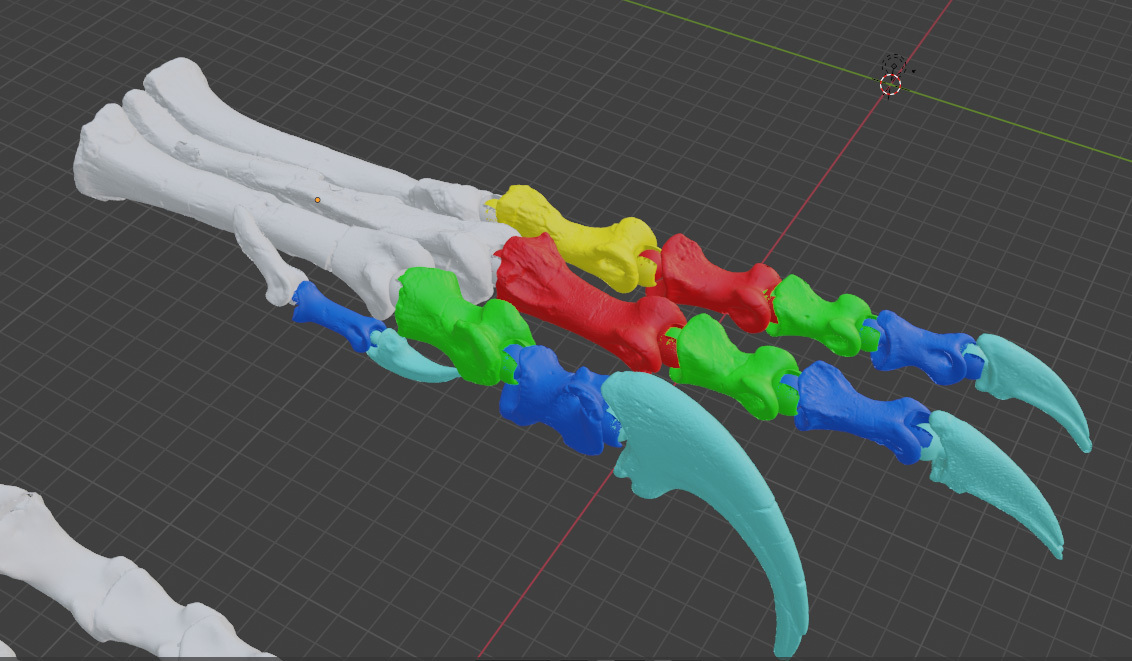
To avoid bones getting mixed up, I split the toes onto different plates and labelled the plates: Big Toe, Inner/Middle Toe, Outer Toe, Foot Base and Dew Claw, then the stand.
You can print everything on one plate, but printing it this way makes it easier to assemble and avoids the wrong bones being used on the wrong toes.
Note that not all toe bones are displayed in this image the correct way up: the "underside" of a toe is the most curved side, just like the claws.
--COMMERCIAL USE--
This file covers personal, non-commercial use; do not share or redistribute. Do not sell the files or prints of the files. Remixing is not allowed. Do not remove the creator stamp from the base.
If you are using this model for educational purposes, such as for a lecture or display, and do not intend to sell or redistribute the file or print to your students as part of your course, no License is required.
If you want to sell prints of this model, please visit my Patreon to learn how to obtain a Commercial License: https://www.patreon.com/thomastedwards
---FAQ---
Please see the questions below before asking any in the comments; your answer may be here already.
--I want to sell prints of this model. Is this allowed?--
Not without paying for the right to do so. The fee on this model is for private printing use. If you wish to sell prints of this model, you must subscribe to the “Commercial License" tier of my Patreon and can only sell prints for the period you subscribe for. The other tiers do not cover commercial use: https://www.patreon.com/thomastedwards/membership
--I want to remix this model. Is this allowed?--
You can only remix this model for private use. You cannot upload your remix or any model you have made that uses any of this model's parts.
--How long does it take to print this model?--
This depends on 3 things; your printer's speed, the model's size, and if you're printing everything on one plate or as loose parts.
My examples were printed on a BambuLab X1C. The models were printed as loose parts and assembled afterwards.
The Small SOLID Style took 5 hours.
The Large SOLID Style took 11 hours.
The ARTICULATED Style took 7 hours.
--How large is this model?--
The size of the model depends on whether you upscale or shrink the provided model components, or which size you choose from the files. If you print them as provided, measuring the foot from the top to the ankle:
Small SOLID is roughly 15cm tall.
Large SOLID is roughly 30cm tall.
ARTICULATED is roughly 20cm tall.
--What materials/colours are used in your examples?--
I used filament from BambuLab and Prusa. Prusament Vanilla White PLA was used for the foot. Bambulab Granite PLA was used for the stand.
--Will it fit on my printer?--
This depends on 2 things; how large your printer is, and if you are printing everything on one plate or as loose parts.
Most printers have a print space of 250x250mm and can print all 3 sizes of this model.
Tiny printers such as the A1 Mini have a printing space of 180x180mm which requires the model parts to be shrunk down considerably, increasing the likelihood that socket joints will become fragile. For this reason, printing is NOT recommended for the ARTICULATED style on the A1 Mini; you can print the small SOLID one perfectly fine on an A1 Mini.
--I'm having issues with adhesion. What would you suggest?--
A majority of adhesion issues are user-end problems and are not associated with the model itself. There are numerous things you can do to troubleshoot your adhesion issues.
First, establish if your printing plate is clean; gently clean it with dish soap and warm water, and dry it with a clean cloth. Try not to touch the surface of the plate, as the natural oils in our skin will contaminate the surface, making it dirty again; hold the plate in the corners or in areas you won't be printing on.
If the plate is clean, and you still have adhesion problems, and you are using a smooth plate, you could try applying glue to it. However, only use glue recommended by your plate's manufacturer.
If the plate surface is damaged in any way, you should consider replacing it; the surface should be free of scratches or deep marks.
Try printing with a brim or levelling your hotbed.
Try a different style of plate; if you used a textured PEI, why not have a go on a smooth plate?
The material you are using might be too wet; dry out your filament before printing with it again, or try another type of material.
If your nozzle is over-extruding, it can “pull” the model from the plate during printing, making it seem like an adhesion issue when in reality, it's an extrusion issue. Ensure your nozzle isn't over-extruding filament.
You may want to investigate if your machine's firmware needs updating, or if there is a known fault with your machine/plate type.
--The model messed up. Can you help?--
I need to know HOW it has “messed up”, and WHERE in the model it has “messed up”, before troubleshooting anything. If you provide no details to me, I can't help you.
--The model broke when I touched it. What happened?--
Anything could have happened, it depends on numerous user-end factors.
Don't “rip” your models from the plate when they are done, even if you saw some YouTuber do it; this guarantees you'll eventually break a model, often a result of putting unnecessary strain on joints/links as you rip the model off the plate. Study proper model removal procedures, such as “flexing” your plate at all four corners to help lift the model from its surface, and gently use a scraper to get under any stubborn parts.
Don't print the model too small; chain links and the socket joints become more delicate the smaller they become.
Don't print using a brittle filament. Whilst I print all my items in PLA and PLA+, and the parts hold up fine, if you want something guaranteed to be stronger I recommend giving ABS a try.
Double-check your printer's layer settings, and ensure the nozzle is clean; it may have skipped a layer, or the nozzle may have had a clog and failed to extrude part of a layer. Bad layer adhesion can cause weak joints/links on all models.
If a socket joint broke when inserting a ball joint, double-check you orientated the socket joints as shown in the pictures. If orientated correctly, and all support material is removed from the ball and socket, the joints shouldn't break.
If you add additional walls to the model it makes the model thicker, resulting in parts fusing or the balls will no longer fit in the sockets. Do not add additional walls.
The infill density must not be set too low, as it will weaken the model.
--Something else went wrong/I have a question that wasn't answered here.--
Read the instructions first if you haven't already, then please provide your issue in the comments. If you require my help, please be clear and precise about what went wrong.
If you have another question, please leave it in the comments and I will do my best to answer it.
:format(webp)/https://fbi.cults3d.com/uploaders/23806018/illustration-file/cd2d71f3-cc0b-49d2-8e25-3e5596dac099/articulated-ezgif.com-optimize.gif)
/https://preview3d-images.cults3d.com/zwqk7ida841jmp2rtmxxqe6fla7q)
/https://preview3d-images.cults3d.com/cmc9atetk6qucvq98v6ko6znb1n2)
/https://preview3d-images.cults3d.com/bmpz09ot488qnmxb2ol9p6sqgbbp)
/https://preview3d-images.cults3d.com/6kmfg42mmfgj7zn542adv7fp2njg)

/https://preview3d-images.cults3d.com/g8aed8vpf2nta0u0you42b4i17ag)
/https://preview3d-images.cults3d.com/aq4e2fb6847fbnsa39ub6gp6pnwo)
/https://preview3d-images.cults3d.com/cgufgmza67agpije0yl23v5bntyr)
/https://preview3d-images.cults3d.com/h080xxh81ibbv5fg8cf3egalk0jz)


:format(webp)/https://fbi.cults3d.com/uploaders/23806018/illustration-file/5a0f98aa-f690-4763-ba87-a8823260254b/DSC_0203-1.jpg)
:format(webp)/https://fbi.cults3d.com/uploaders/23806018/illustration-file/87d3445c-9f13-4018-a81b-2fd1ed64a61b/DSC_0463.jpg)
:format(webp)/https://fbi.cults3d.com/uploaders/23806018/illustration-file/6fa246fc-340f-4c27-8657-3b00537bc354/DSC_0467.jpg)
:format(webp)/https://fbi.cults3d.com/uploaders/23806018/illustration-file/f679959f-db33-4b6e-94e6-ff908c420041/DSC_0318-1.jpg)
:format(webp)/https://fbi.cults3d.com/uploaders/23806018/illustration-file/354c6eb3-15de-47bd-8cf9-8cfbc0f6b378/dsc_0412.jpg)
:format(webp)/https://fbi.cults3d.com/uploaders/23806018/illustration-file/2704d1d9-53cd-454e-ab88-5b0051d46f2c/DSC_0551.jpg)