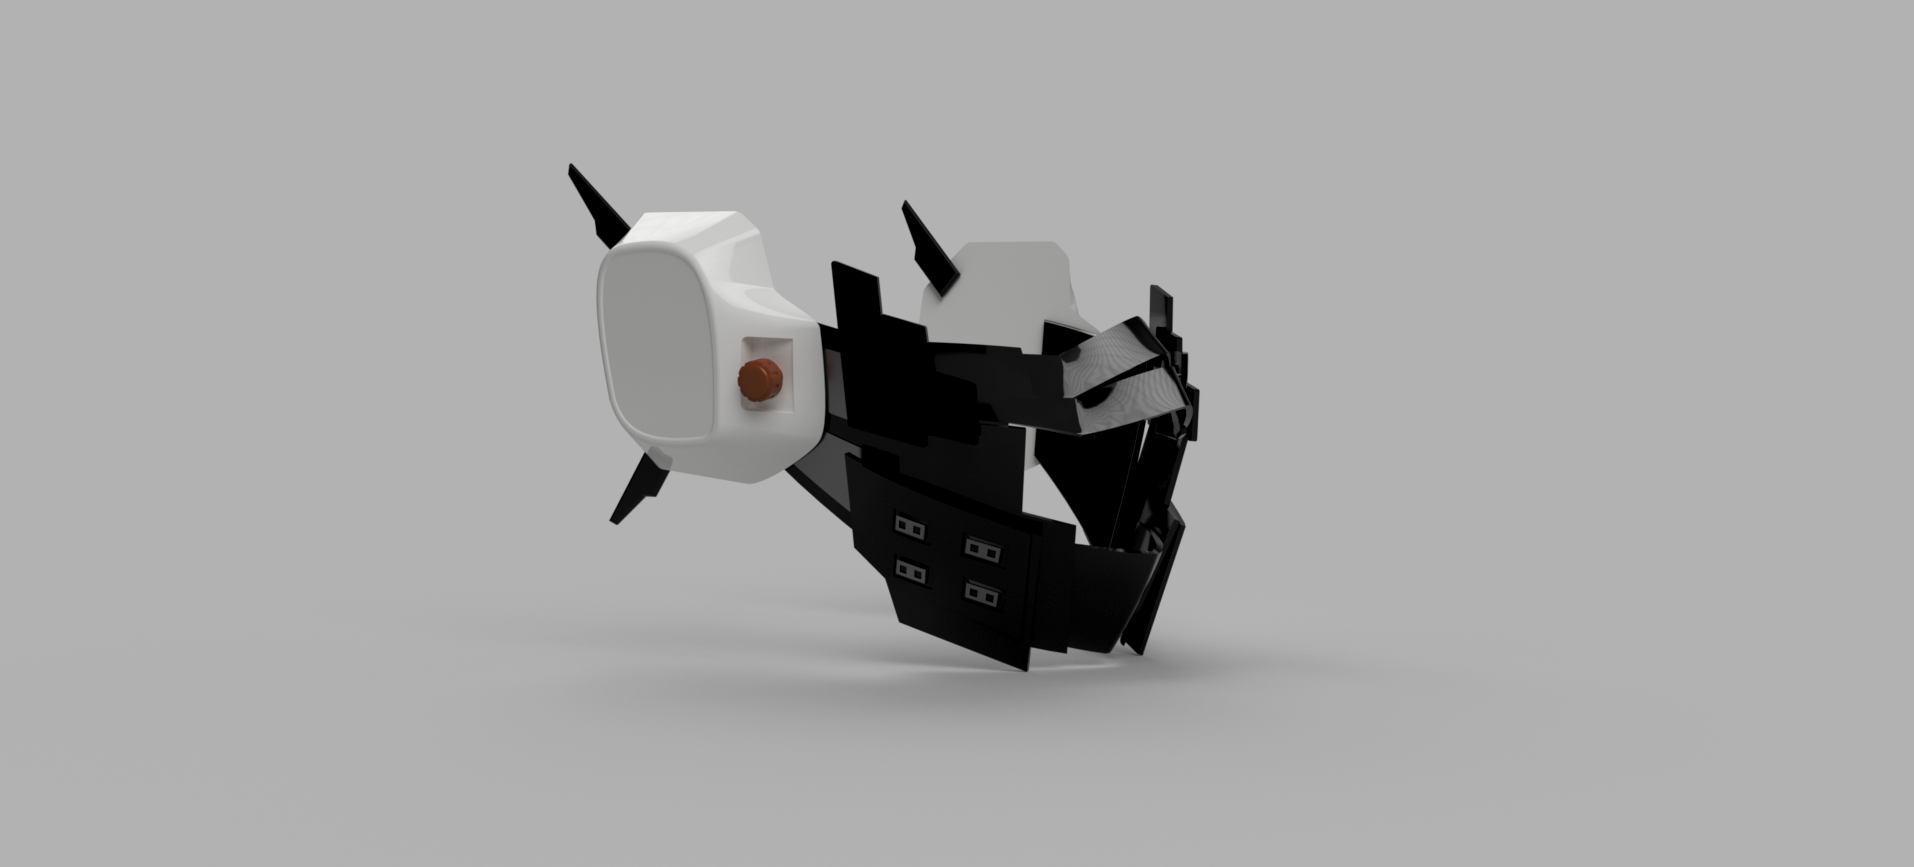
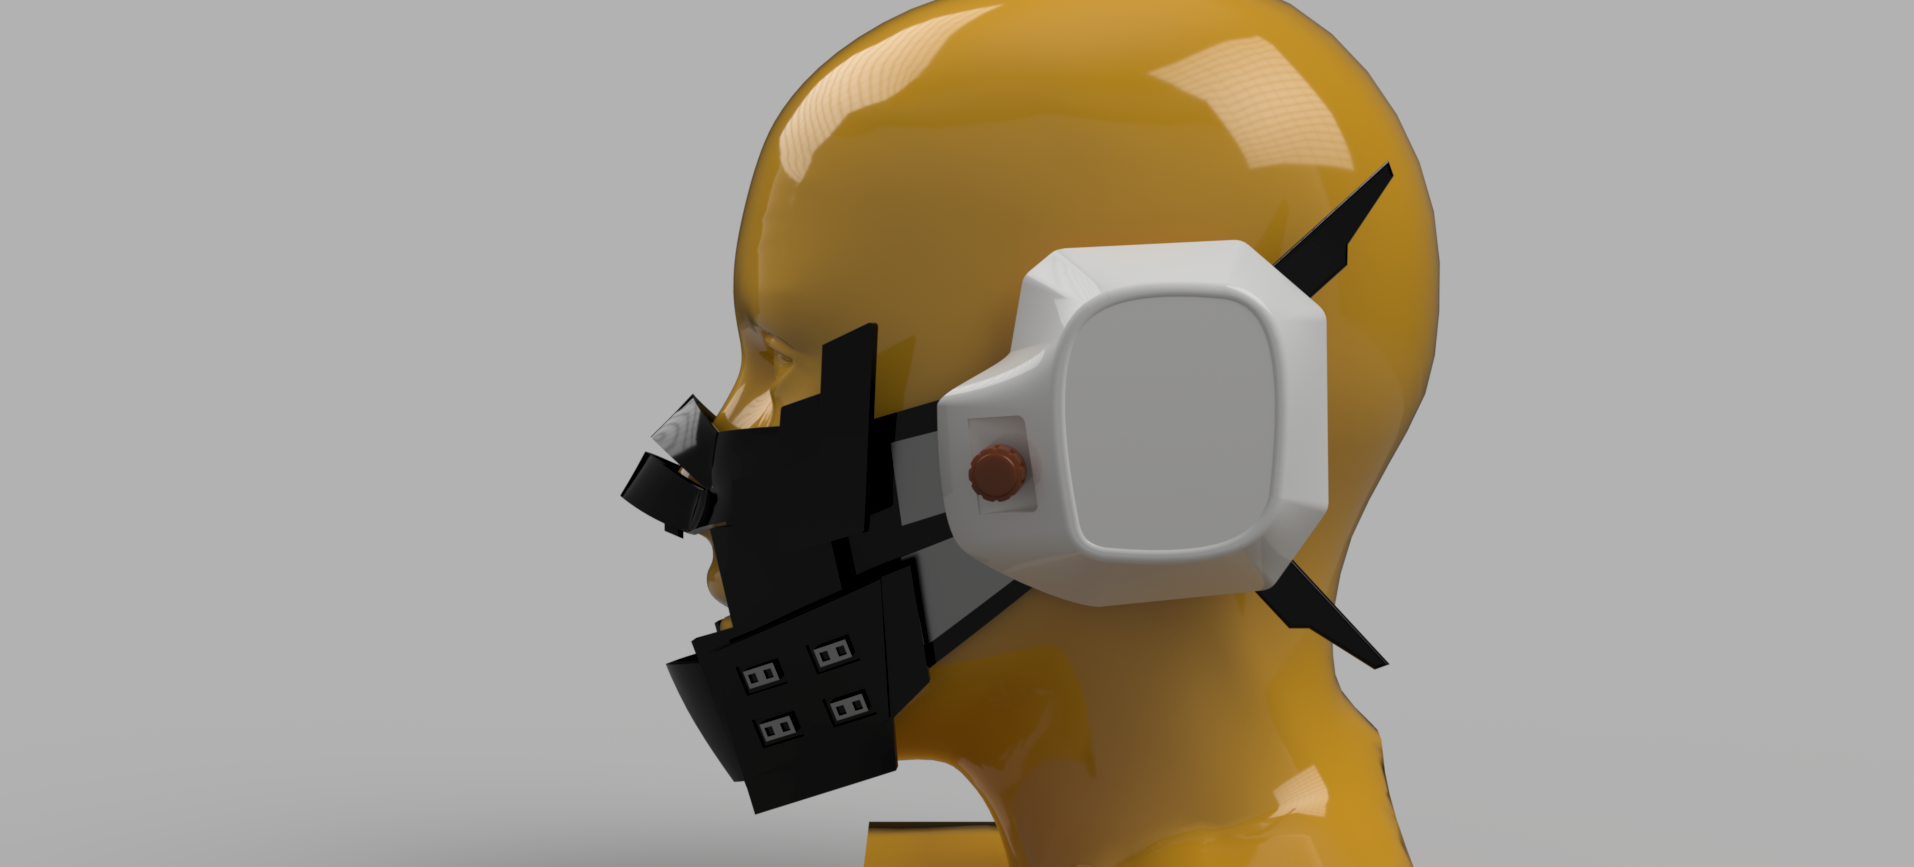
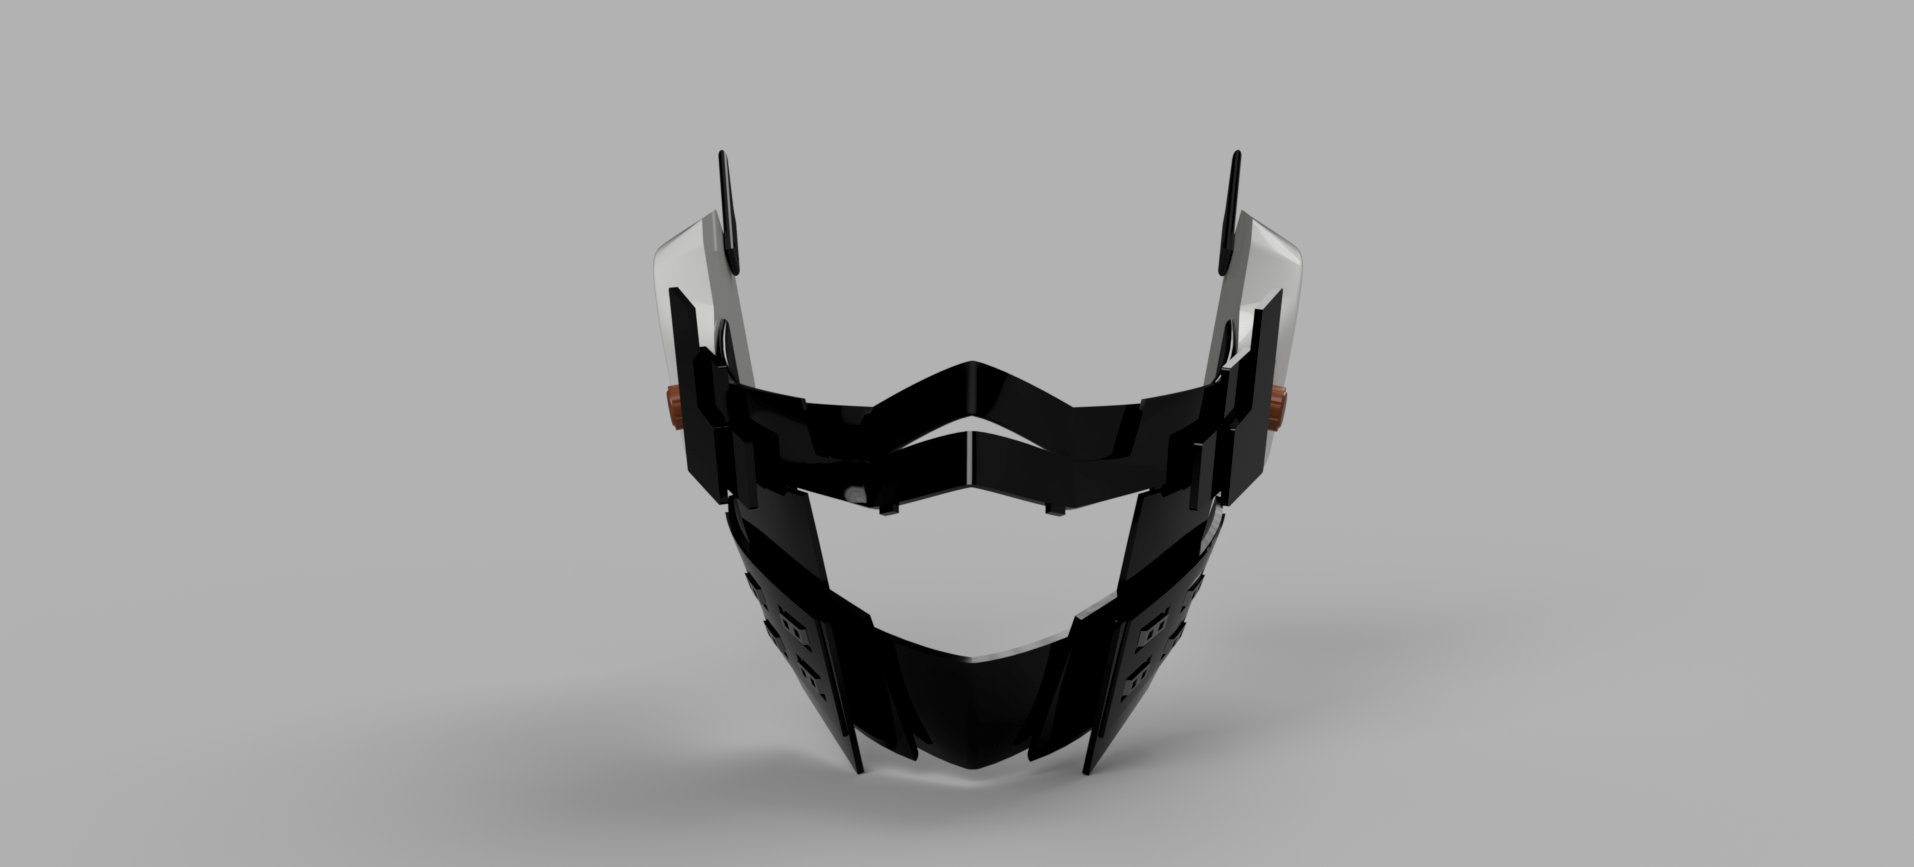
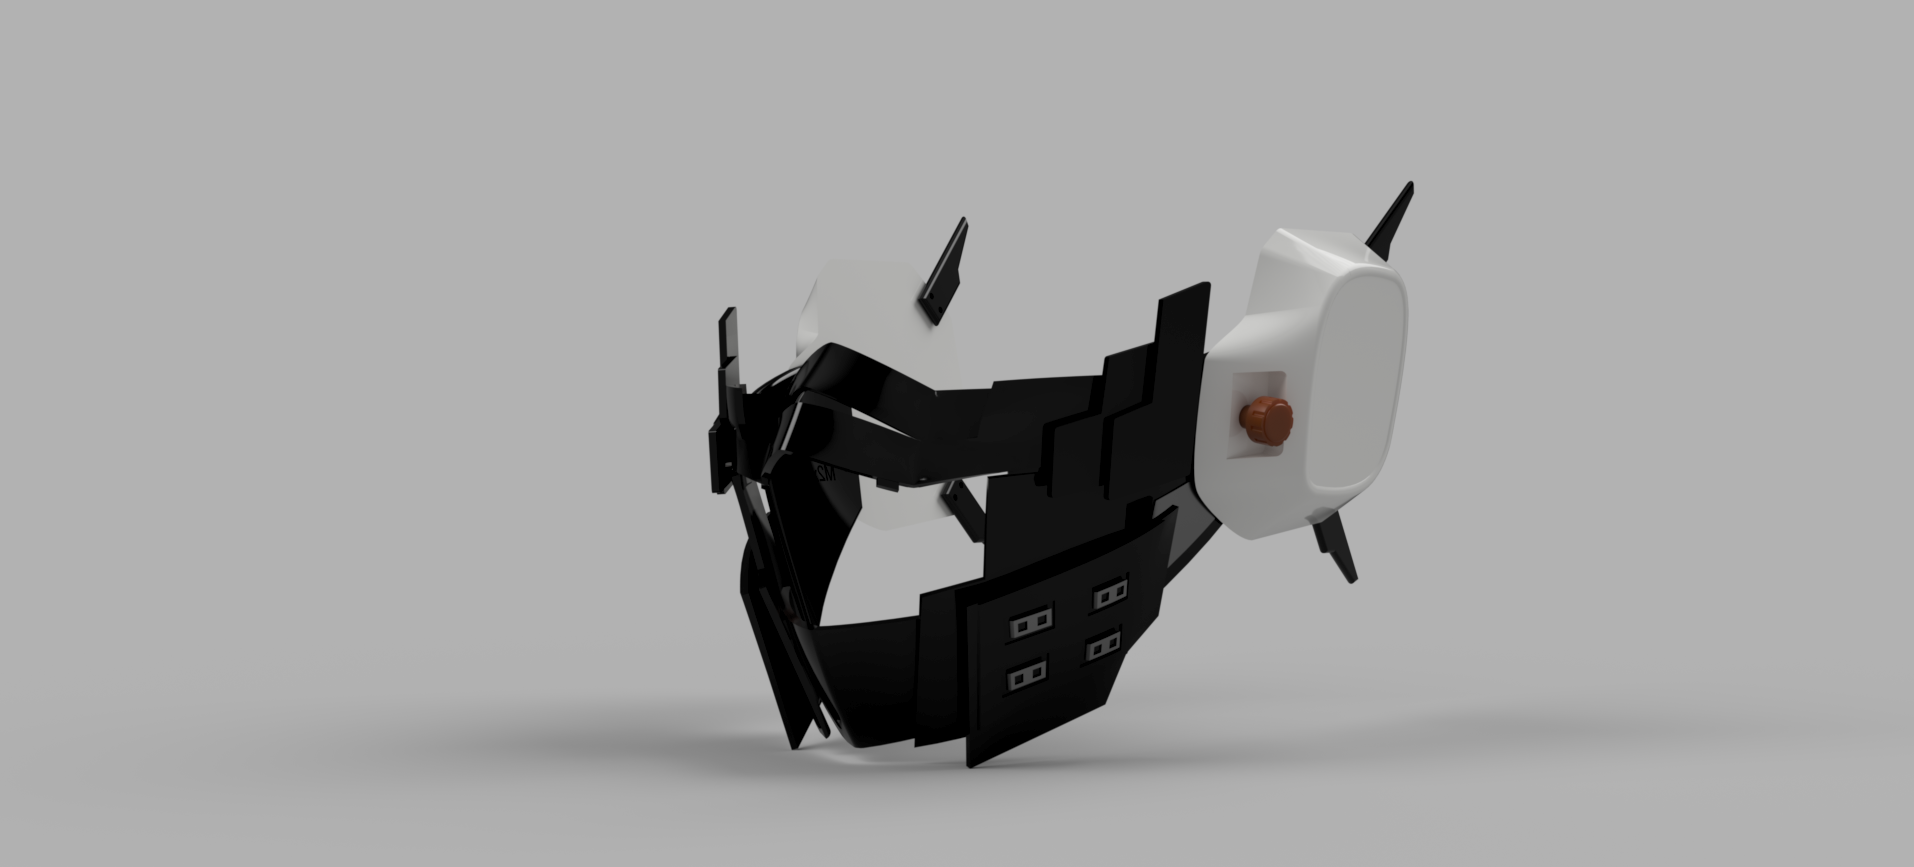
HITOSHI SHINSO MASK - MY HERO ACADEMIA
:format(webp)/https://fbi.cults3d.com/uploaders/13876934/illustration-file/bb4ffbf3-9646-4f06-a6c8-b74c6dfe41cc/Shinso-v14g.png)
/https://preview3d-images.cults3d.com/z9v949skf1gacl8zkywkq6nlgv09)
/https://preview3d-images.cults3d.com/yv2wmr6eu76zto7ckg4nc7kfzh2h)
/https://preview3d-images.cults3d.com/9vmywz5dysztrt9jr4hkidpo57pc)
/https://preview3d-images.cults3d.com/em8cby19yuk5bhgv2mwnozg1nofy)
/https://preview3d-images.cults3d.com/gx8kkbw3f4nkuzsnw9u0eq5mguwu)
/https://preview3d-images.cults3d.com/i1n2gkuq2sualfrzppizc6402zjo)
/https://preview3d-images.cults3d.com/48n2ukd5ypwog3xqzfrq3nfwp09d)
/https://preview3d-images.cults3d.com/la3o6uld0kwp2r7yu5ou4hxaq6vq)
/https://preview3d-images.cults3d.com/5cqjd311fztm6z7w77lxru3qhcsy)
/https://preview3d-images.cults3d.com/rfbt99a2wdqsdgrpjluapc0c9pab)
/https://preview3d-images.cults3d.com/ge9kh2vxw6huogy8xo4jcr1uxj6g)
/https://preview3d-images.cults3d.com/vuskgj3nmbpqxp3v3gl7vh4xxmzo)
/https://preview3d-images.cults3d.com/dbakyw0qvyvbie3xfwr0255sto8z)
/https://preview3d-images.cults3d.com/09q3vshbakrvhino03u0bwuiv5jv)
/https://preview3d-images.cults3d.com/jn26npaorwyturps935yc96d45le)
/https://preview3d-images.cults3d.com/f5k6mqdt96fr6yb1rqf82sxt8k42)
/https://preview3d-images.cults3d.com/usjaifypwaiod7em2t83xuwqrg22)
/https://preview3d-images.cults3d.com/0yh72sbqk0yzef3fvqxj6ot34kgn)
/https://preview3d-images.cults3d.com/1az3oo5wyfcuzjt8b0f9fgke88ra)


/https://preview3d-images.cults3d.com/variants/z9v949skf1gacl8zkywkq6nlgv09/cbbb7afd8a0ec9560f7f7940881f98c31dcb04582a03efcc135070de65821be8)
/https://preview3d-images.cults3d.com/o7w3mevf52p5e3n15l4buwz93jpu)
/https://preview3d-images.cults3d.com/nscnwe28ql0gsxkz3ir1v7oai63r)
/https://preview3d-images.cults3d.com/2v3dv52eniiu13lpwabyv3csaemv)
/https://preview3d-images.cults3d.com/xtoq8trzflvgdhune4jkeenor9n2)
/https://preview3d-images.cults3d.com/00bm4oawdsze6gwewmthkmkyq7d6)
/https://preview3d-images.cults3d.com/272geeo0omp27fzf8ow3rbud9c4s)
/https://preview3d-images.cults3d.com/aq6j1uaego0ymhzlxpshmbaea9yj)
/https://preview3d-images.cults3d.com/pejjot8sbocumfuvppses1r291hf)
/https://preview3d-images.cults3d.com/ahxufea5nbf6ok6p8wtg4ali5ebg)
/https://preview3d-images.cults3d.com/6f0i4gl2ws7yn7c1cg8jxrdhpx1r)
/https://preview3d-images.cults3d.com/pyairpn99g26yybco529zut4niuc)
/https://preview3d-images.cults3d.com/klv87ravkrc8o68ng3anq2j0caln)
/https://preview3d-images.cults3d.com/variants/09q3vshbakrvhino03u0bwuiv5jv/cbbb7afd8a0ec9560f7f7940881f98c31dcb04582a03efcc135070de65821be8)
/https://preview3d-images.cults3d.com/variants/jn26npaorwyturps935yc96d45le/cbbb7afd8a0ec9560f7f7940881f98c31dcb04582a03efcc135070de65821be8)
/https://preview3d-images.cults3d.com/7a0nld1smgpsrdn201zj20n1aho7)
/https://preview3d-images.cults3d.com/variants/usjaifypwaiod7em2t83xuwqrg22/cbbb7afd8a0ec9560f7f7940881f98c31dcb04582a03efcc135070de65821be8)
/https://preview3d-images.cults3d.com/variants/0yh72sbqk0yzef3fvqxj6ot34kgn/cbbb7afd8a0ec9560f7f7940881f98c31dcb04582a03efcc135070de65821be8)
/https://preview3d-images.cults3d.com/vt17qvnbdof6g1dorln2awnpd46r)
- 18k views
- 35 likes
- 83 downloads
- 2 collections
- 1 comment
- 1 make
| License | |
|---|---|
| 3D design format |
19 files (OBJ and STL) Close
|
| Publication date | |
| Design number | 447704 |
| Design author | Yurican |


:format(webp)/https://fbi.cults3d.com/uploaders/13876934/illustration-file/4087cc26-a34a-4fc0-891b-6bd3904724e4/Spartan%20helm1.JPG)
:format(webp)/https://fbi.cults3d.com/uploaders/13876934/illustration-file/e909bb70-a032-4fff-b3af-f401d6b42cec/Hirako%20v12%20a.jpg)
:format(webp)/https://fbi.cults3d.com/uploaders/13876934/illustration-file/68844304-e240-4cdc-a11f-e6b0d90163d0/Ichini3%20v16%20angle%20right.jpg)
:format(webp)/https://fbi.cults3d.com/uploaders/13876934/illustration-file/de3593cb-c8f7-460b-9f7e-2d59249be770/Harribel%20Mask%20v6.jpg)
:format(webp)/https://fbi.cults3d.com/uploaders/13876934/illustration-file/032848c7-11bb-4fd4-8561-972835a97034/akatsuki4.png)
:format(webp)/https://fbi.cults3d.com/uploaders/13876934/illustration-file/e5fdc160-de6d-4cd1-ac59-6a108b996416/Red%20Roit%20v7d.jpg)
:format(webp)/https://fbi.cults3d.com/uploaders/13876934/illustration-file/1c3847a1-ac2a-4234-840e-615d5e5037b8/front%20view.gif)
:format(webp)/https://fbi.cults3d.com/uploaders/13876934/illustration-file/3b242d0b-3a6a-4902-aa8e-e386bc52bc1d/Uraraka-v10.jpg)
Would you like to support Cults?
You like Cults and you want to help us continue the adventure independently? Please note that we are a small team of 4 people, therefore it is very simple to support us to maintain the activity and create future developments. Here are 3 solutions accessible to all:
- ADVERTISING: Disable your ad blocker.
- DONATE: Make a donation via Ko-Fi Donate
- WORD OF MOUTH: Invite your friends to come, discover the platform and the magnificent 3D files shared by the community!
Sharing and downloading on Cults3D guarantees that designs remain in makers community hands! And not in the hands of the 3D printing or software giants who own the competing platforms and exploit the designs for their own commercial interests.
Cults3D is an independent, self-financed site that is not accountable to any investor or brand. Almost all of the site’s revenues are paid back to the platform’s makers. The content published on the site serves only the interests of its authors and not those of 3D printer brands who also wish to control the 3D modeling market.
Hi, really nice project. Only one question: how is it supposed to be assembled/glued and then weard on?
Hello, there is an OBJ file that you can open up to see all the parts together to give you an idea on how to place them. For assembly, there are screw holes in the mask to allow for M2 (2mm wide) screws to be used to merge the plates. A total of 12 M2 screws are needed for the main mask. Two of those need to be M2x16 mm screws. The rest can be M2x8mm. The antennas in the back can be attached with 4 M2 screws per side. You can choose to glue some areas instead of using screws, but the screws are better and allow for some of the plates to pivot around the screw to move the mask. The 4 small plates ( 2 per side) around the cheekbone area have some 1mm holes to allow for different rotation configurations, for instance, a pin can be inserted through the innermost cheekbone plate to the outermost plate. To change the configuration, you can remove the pin, rotate the outermost cheekbone plate and re-insert the pin when the 1mm holes line up.
Hi. Ok, and how do you secure the mask to your head?
You can attach a couple of straps or bands to the back using the 8 holes (4 per side) which you use to secure the antenna. So you end up with a band that goes over the top back part of your head, and another that goes around the lower back of your head. Up to you as far as what material you want to use for this :)
Hi! What head style on the screws is the design made for? For example, is it made for counter sunk or socket type screws or something else? Just want to make sure the heads of the screws wont foul on anything.
Oh and one more thing, should we use nuts to secure the screws or are the holes designed so that the screws bite into the plastic?
Thanks! :)
Aside from comfort, the screw head doesn't really matter, makers preference :)
If you plan on having the mask really snug on your face, then countersunk screws are recommended (you will be inserting the screws from inside such that they face outwards).
No nuts needed, the screw holes are designed to allow the screws to bite into the plastic. The screw holes for the pieces that are expected to rotate/move a little are a bit wider to allow the part to rotate about the screw. Depending on print quality, you might want to open those up a bit more if you they are snug and not allowing rotation/movement as freely as you would like.
Note that although the side knobs are expected to rotate, do not widen the screw hole on the knob. The screw should bite into this part. The screw holes on the adjacent parts should be loose to allow the screw to rotate freely within while remaining bonded to the knob.