SimEyeSee WarpShield
The SimEyeSee WarpShield is an airflow deflector for 3D printers that use a secondary auxiliary fan blowing from the side.
This includes Bambu Lab X1, P1, P2, and H2 series printers, as well as printers from other manufacturers that employ side-mounted or chamber auxiliary fans, such as some Creality, QIDI Tech, FlashForge, and AnyCubic printers.
Unlike a separate accessory you install on your printer, the WarpShield is a 3D-printed accessory that prints alongside your model. It redirects the auxiliary fan’s side-blast airflow upward and along the actively printing layers, protecting the lower layers (where warping usually begins) while still focusing strong cooling where it improves print quality.
The WarpShield is intentionally lightweight and efficient. Its walls are approximately 1 mm thick, using only a small amount of filament and adding a modest amount of print time depending on size. In multi-color prints, material waste can often be reduced further by routing purge material into the WarpShield instead of discarding it.
With the WarpShield in place, you can often run the auxiliary fan at 70% or higher without warping on the fan-facing side of the part.
Why It Exists
The WarpShield was developed in response to real-world printing challenges encountered while designing the:
EmBlazeGuard Door Holder Panels
https://SimEyeSee.com/EmBlazeGuard/
Those panels rely heavily on fine details, thin walls, and overhangs, all of which benefit from strong auxiliary cooling. At the same time, their geometry makes them highly susceptible to fan-side warping when exposed directly to side-blast airflow.
The WarpShield was created to resolve that conflict — preserving aggressive auxiliary cooling for quality and detail, while protecting the lower layers where warping typically begins.
Real-world testing:
https://SimEyeSee.com/WarpShield/#Test
What Problem It Solves
Auxiliary side fans are excellent for:
- Overhangs
- Bridges
- Thin walls
- Fine details
…but they frequently cause:
- Fan-side warping
- Edge lift
- Corner curl
- Early bed separation
The WarpShield solves this by reshaping airflow instead of blocking it, preventing overcooling of the lower layers while preserving strong cooling where it is beneficial.
How It Works (In Simple Terms)
- The WarpShield acts as an airflow ramp, not a wall
- Side-blast airflow is lifted upward and over the print
- Lower layers are protected from uneven cooling
- Upper layers still receive strong airflow for quality and detail
For tall parts, the Curved WarpShield keeps airflow attached and lifting upward even after the model grows taller than the shield.
More detail:
https://SimEyeSee.com/WarpShield/#Why-It-Works
Available Variants
Straight WarpShield
- Best for parts up to ~40 mm tall
- Recommended: generate using the Autodesk Fusion file, which creates it at the correct height automatically
- Fusion generates a minimum height of 5 mm
- If the part is shorter, the shield can be trimmed in the slicer and remains effective
- STEP files may need to be scaled or trimmed
Curved WarpShield
- Intended for tall parts
- Can be generated from the Fusion file or scaled from STEP files
- Maintains upward airflow redirection as the print grows above the shield
Straight Starter WarpShield (optional)
- Simply a short Straight WarpShield, typically ~15 mm tall
- Used closer to the part when pairing with a tall Curved WarpShield
- Improves airflow control during the earliest, most warp-sensitive layers
Customization details:
https://SimEyeSee.com/WarpShield/#Custom-Sizes
Which One Should I Use?
0–40 mm tall parts
Use the Straight WarpShield, generated or trimmed to match part height.
Parts taller than the WarpShield
Use a Curved WarpShield, so airflow continues to be redirected upward as the print grows.
Conservative default for tall, warp-sensitive parts
40 mm Curved WarpShield + ~15 mm Straight Starter WarpShield
Less conservative option
Shorter Curved WarpShields (~18–30 mm) depending on geometry and material.
More guidance:
https://SimEyeSee.com/WarpShield/#Curved-WarpShield
https://SimEyeSee.com/WarpShield/#Variants
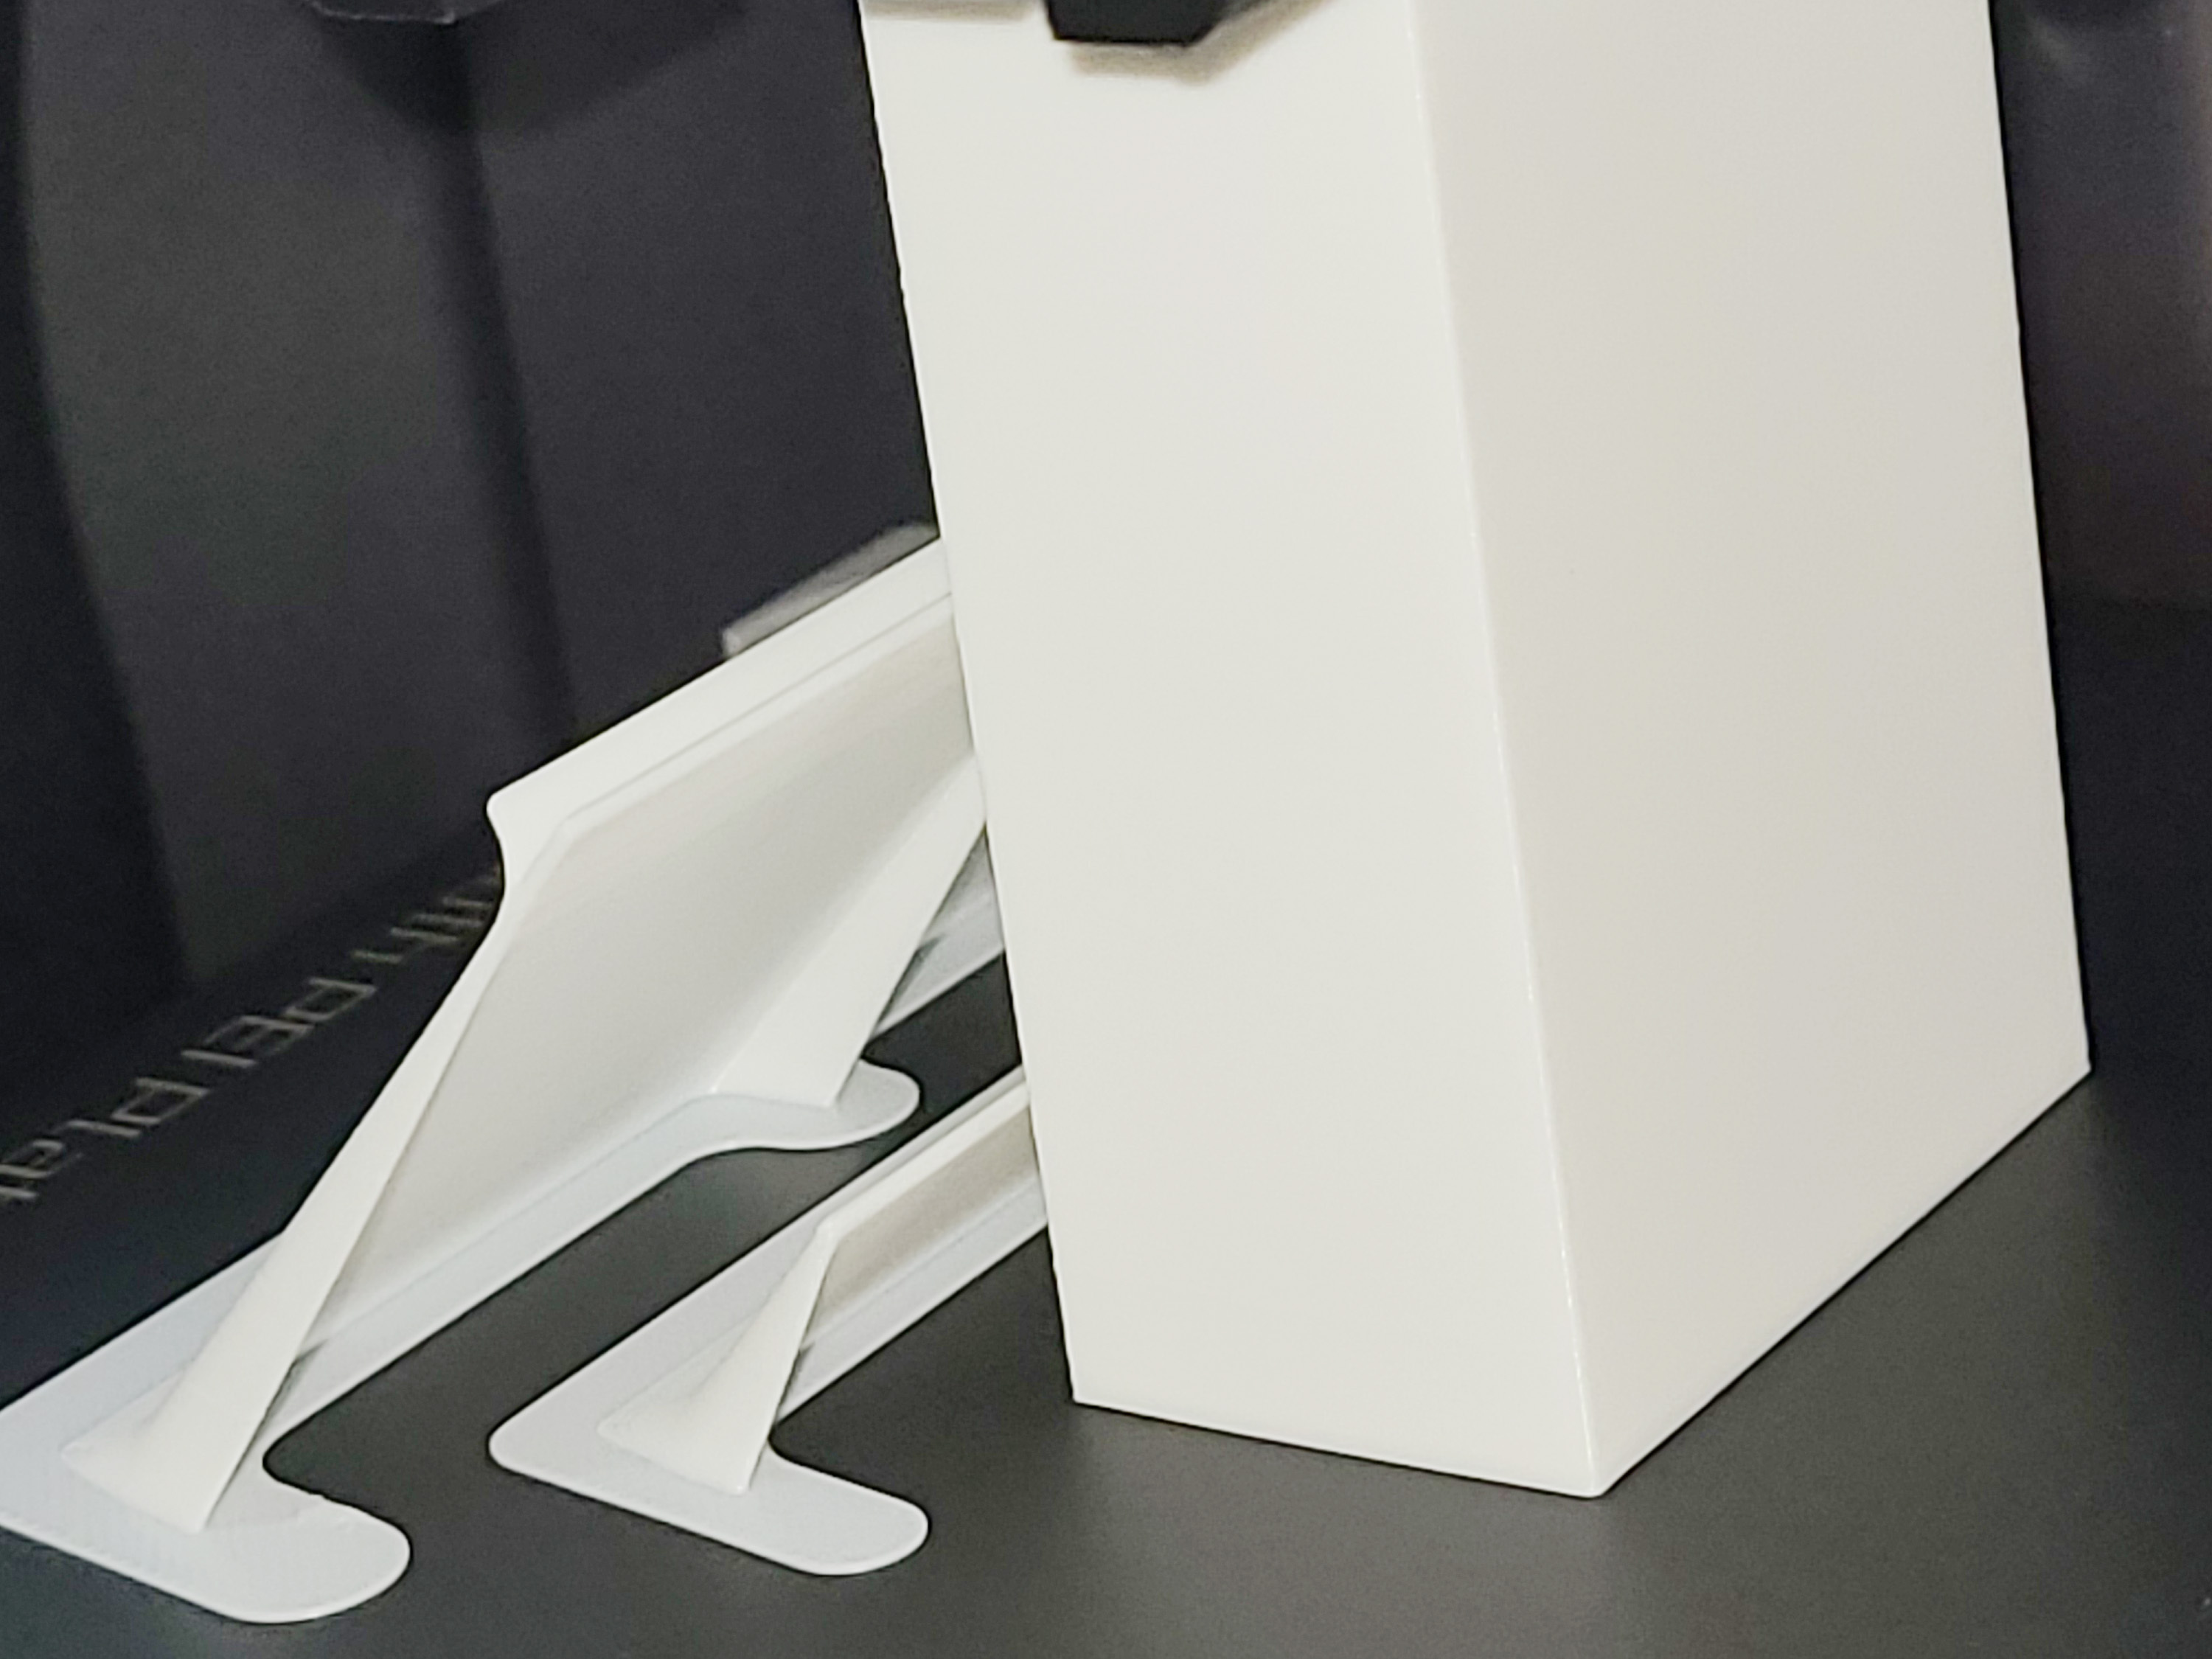
Placement Guidelines
- Place the WarpShield on the auxiliary-fan side of the model
- Maintain a 2–3 mm gap between the WarpShield and the part
- The WarpShield sits flat on the build plate and prints alongside the model
Examples:
https://SimEyeSee.com/WarpShield/#Placement
Auxiliary Fan Setup (Important)
For best results:
- Keep the auxiliary fan off (0%) until the WarpShield reaches ~1 mm in height
- At 0.20 mm layer height, this is about 5 layers
- Once the shield reaches ~1 mm tall, the auxiliary fan can be enabled safely
Full instructions:
https://SimEyeSee.com/WarpShield/#Instructions
Print Time & Material Usage
When printed alongside a model, the WarpShield often adds less time and material than expected:
- It builds gradually during the print
- In multi-color prints, purge material can be routed into the WarpShield
- Some time normally spent purging is used to build useful geometry
To understand the true impact, compare your model with and without the WarpShield included.
Fusion & STEP Customization
Autodesk Fusion (Recommended)
Change only:
- partWidth — width of the protected part
- partHeight — height of the protected part
- Maximum generated height: 40 mm
- Minimum generated height:
- Straight WarpShield: 5 mm
- Curved WarpShield: 18 mm
The Straight WarpShield can be trimmed below 5 mm in the slicer and will continue to work correctly.
Fusion notes:
https://SimEyeSee.com/WarpShield/#Custom-Sizes
STEP Files (Alternative)
You may:
- Scale the WarpShield
- Trim or cut height to match your part
STEP file naming format:
- Straight or Curved — WarpShield type
- P = part width (mm)
- S = shield width (mm)
- H = shield height (mm)
Examples:
SimEyeSee WarpShield v47 - Straight - P25 S64.4 H20.step
SimEyeSee WarpShield v47 - Curved - P50 S100.8 H40.step
Multi-Color & Single-Color Benefits
Multi-Color Prints
- Assign WarpShield as a purge object
- Purge material is deposited into the WarpShield
- Improves priming and reduces color contamination
Single-Color Prints
- When merged and seam-painted, WarpShield can act as a layer-start anchor
- Improves extrusion stability and seam quality
- Some layers may still start on the model — this is normal
Details:
https://SimEyeSee.com/WarpShield/#Benefits
License & Usage
License: Creative Commons CC BY-ND 4.0
Attribution required.
The SimEyeSee WarpShield is a free, licensed airflow accessory, not a remixable base or template.
You may:
- Use it for personal or commercial printing
- Include it with your own models (including commercial models)
- Resize, scale, or trim height
- Generate custom sizes using official Fusion or STEP files
You may not:
- Modify the airflow geometry or design
- Create altered or derivative versions
- Rebrand or redistribute it as a standalone product
Attribution example:
Includes the SimEyeSee WarpShield — https://SimEyeSee.com/WarpShield/
Full license details:
https://SimEyeSee.com/WarpShield/#Licensing


:format(webp)/https://fbi.cults3d.com/uploaders/30799654/illustration-file/c9d688f0-a502-4992-8a7b-e2ab58546a89/HovErgo-Standard-5x6.jpg)
:format(webp)/https://fbi.cults3d.com/uploaders/30799654/illustration-file/9b9a18ff-77a9-4e55-9c2f-e97b4f0baf26/HovErgo-Orb1-5x6.jpg)
:format(webp)/https://fbi.cults3d.com/uploaders/30799654/illustration-file/e7d6a5fe-ef89-465e-ac43-0666947b58df/HovErgoFloral1-5x6.jpg)