Printing Instructions: https://marcosticks.org/model-t-training/
Always go to the above web page for actual printing instructions for this particular model. But here is a quick rule of thumb that in general works for most Marcosticks 3D models:
- The 3MF files are PrusaSlicer projects, with our own start-up GCode for MKS3.
- The STL files can be used direct in your own preferred slicer.
- Print in PLA - it's stiff enough for marcosticks.
- Marcosticks models require 100% infill, if you want sticks to be stiff enough for practice.
- Set layer height to 0.20mm. You can try finer layers if you really wish. But 0.20mm works.
- Enable "Detect bridging parameters" in PrusaSlicer, or the equivalent in your slicer.
- Use oval brims (see the 3MF file) to prevent ends of marcosticks from warping off the bed.
POST-PRINTING PROCESSING
Follow this video: https://youtu.be/bJubl_FE2Es for full instruction. Following is a quick summary.
Trim oval brims off marcosticks using scissors, a flush cutter, or a deburring tool.
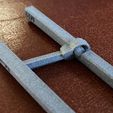
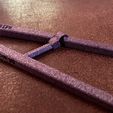
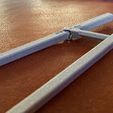
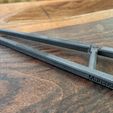
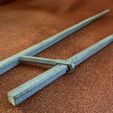
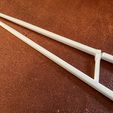
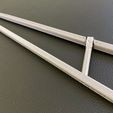
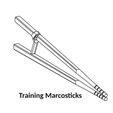
Training marcosticks contain articulate parts that are printed interlocked. They are the C-hook on the connecting rod, and the groove on the top marcostick. These two parts are printed with tight clearances. And they often come off the print bed "stuck" to each other. They are not really fused together during printing. You can snap them apart with a light push.
You will need to rub the two separated parts against each other, to smooth contact surfaces, in order to reduce friction. Note that the top marcostick have a rotational range of 90° around the longitudinal axis, and a 20° tilting range. As mentioned, the top marcostick follows the twirling path prescribed by the Standard Grip. You should move the top marcostick along this twirling path, to smooth contact surfaces.
Once you smooth the contact surfaces, apply tiny amounts of lubricant to these contact parts, with a micro screw driver, or a paper clip. When done properly, you should be able to hold the top marcostick, and freely dangle the bottom marcostick without resistance.
OPTIONAL MARK-AND-GO LICENSE
We made 3D models available on Thingiverse with a strict, CC non-commercial no-derivatives license. You can choose to follow this strict license for personal uses.
But we actually made a much more lenient license available, if you want to create derivative works, or commercialize these training marcosticks. Please consult the Mark-and-Go Marcosticks license. Here is a quick summary:
Utility patent applications for many training marcosticks have been filed. A few specific models were also detailed in design patent applications. But we are making all models FREE for everyone to print on their own, as long as you follow the Mark-and-go license.
You may upload these models to online model repositories, but only if you clearly label these as Marcosticks, as the license stipulates. You may make derivative work, but you will need to carry the same Marcosticks Mark-and-Go license with the same label requirement. You may even reproduce them in bulk, and sell them at profit, without paying marcosticks.org any royalty fees. Make sure you follow the Mark-and-go license, for commercial deployment which includes quality control checks.
For additional information, see MAG FAQs.
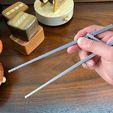
/https://fbi.cults3d.com/uploaders/16495111/illustration-file/6df4b2e9-0c65-4cf1-9f7a-eeaab3806d02/Marcosticks_Presentation_background_4-to-3%20aspect-wooden%20table-plus%20training%20stick-IMG_1263_FRD-scaled.jpg)


/https://fbi.cults3d.com/uploaders/16495111/illustration-file/c2c3dfce-c49a-4416-a055-8162d269404b/Marcosticks-3D-printed%20M20%20Ergonomic%20Marcosticks%20against%20intro%20background%20in%204-to-3%20aspect%20ratio-IMG_1207_IMG_1482-FRD-scaled.jpg)
/https://fbi.cults3d.com/uploaders/16495111/illustration-file/7608b391-5051-4e45-bab8-8a454ad4fbc5/Marcosticks-Presentation_background_4-to-3_all_marcosticks_in_one_combo-IMG_1484_IMG_1142-FRD-scaled.jpg)
/https://fbi.cults3d.com/uploaders/16495111/illustration-file/40061807-1bf9-4a1d-baa4-fde2258a5131/Marcosticks_Printed_model_B2_Chopstick_Buddies_3d_model_repo_header_image_IMG_4743.jpg)
/https://fbi.cults3d.com/uploaders/16495111/illustration-file/a3de45d9-5507-4d0e-85c3-2aaef2c31fee/Marcosticks_Printed_model_B1_Chopstick_Buddies_3d_model_repo_header_image_IMG_4017.jpg)
/https://fbi.cults3d.com/uploaders/16495111/illustration-file/481c0130-cd3f-4764-bebd-03e2bacaeee1/Marcosticks_3D-printed%20Finger%20helper%20bars%20-%20intro%20image%20-%20model%20HT%20thumb%20and%20HR%20ring%20finger_on_bg_4-to-3_IMG_1502_FRD-scaled.jpg)