Hello!
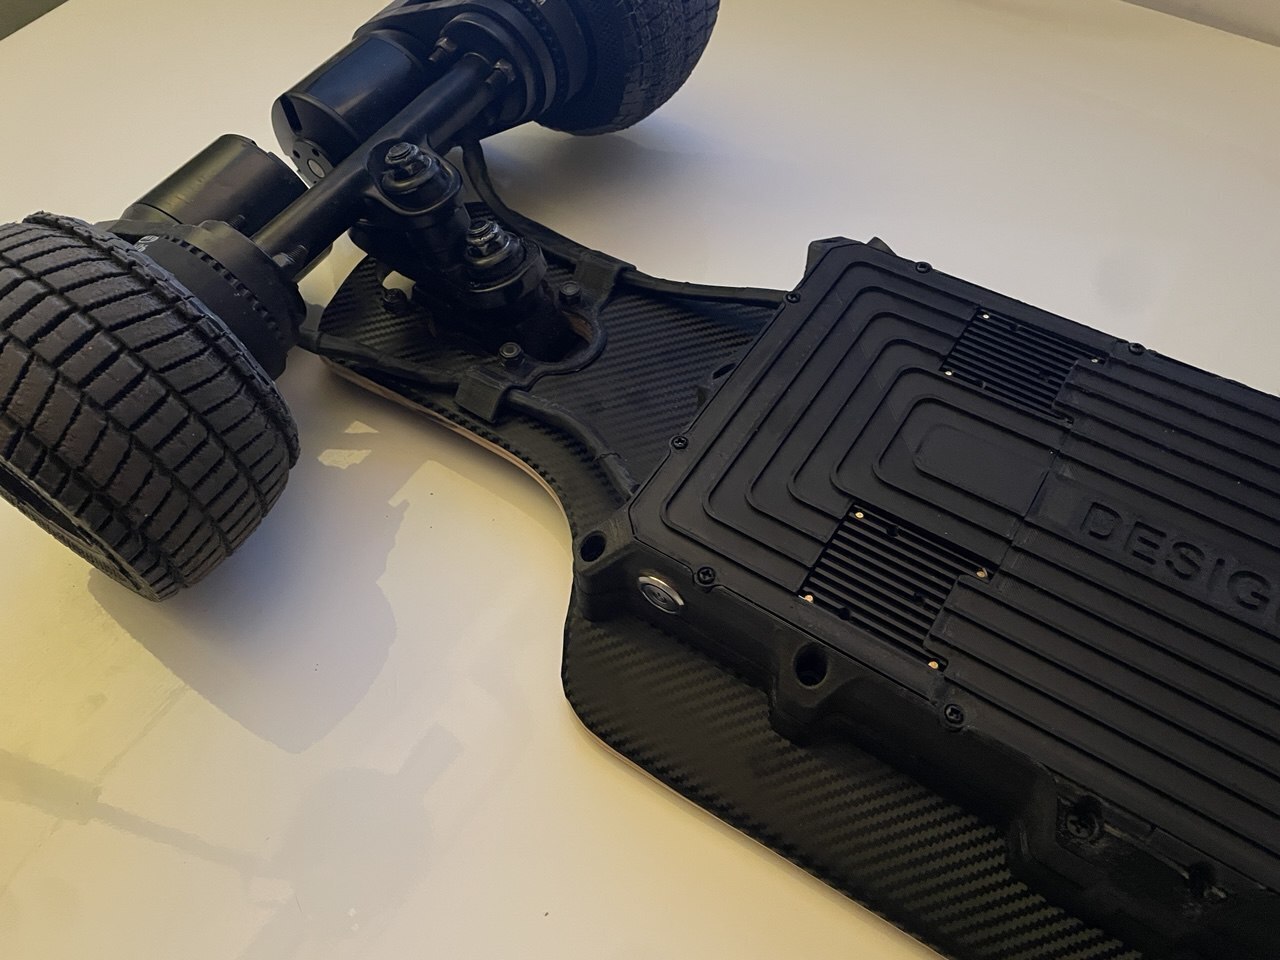
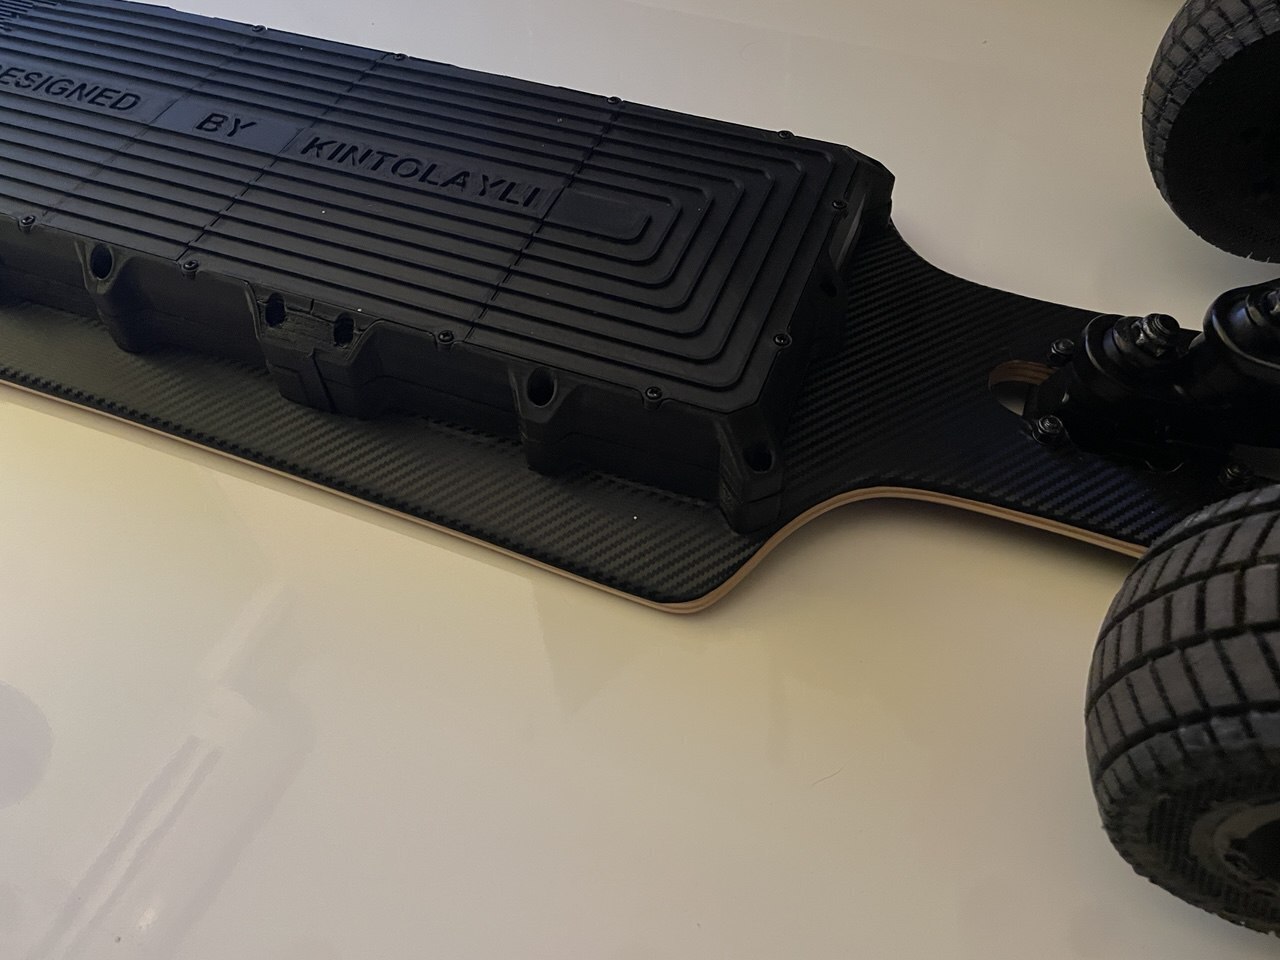
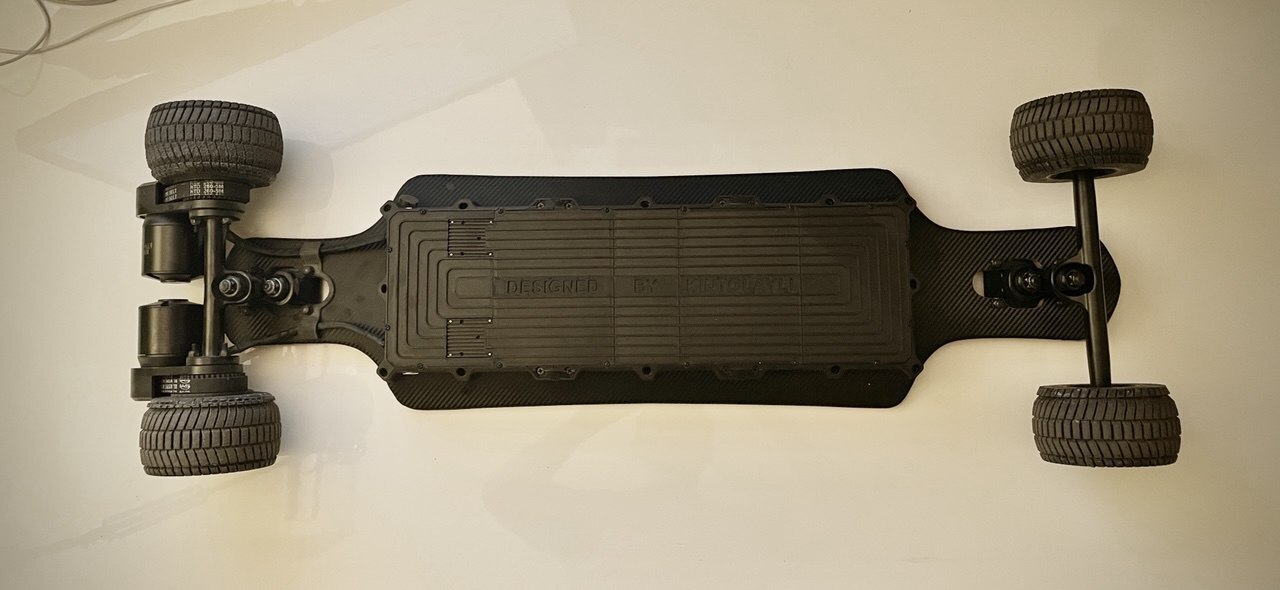
I developed this design in the summer of 2023 and refined it this year. Now, I'm excited to share it with you. My goal was to create a DIY electric skateboard that doesn't look homemade. As an industrial design enthusiast, I took on the challenge of developing the battery enclosure myself. The reference size for the design was a 10s3p 36V 14400 mAh battery. At the time, I believed this was the sweet spot between weight, battery size, cost, and performance.
For assembly, you will need:
- 20 pcs M4 wood threaded inserts
- 8 pcs M4 countersunk screws, 40 mm in length
- 12 pcs M4 round head screws, 30 mm in length
- 16 pcs M3 round head screws, 25 mm in length
- 16 pcs M3 nuts
- A 3D printer with a build volume of at least 220×220×220 mm
- Printing materials: ABS or PETG, as well as TPU (hardness 75A or 95A)
Other parts for the electric skateboard that I used:
(You can use any parts of your choice or your own)
- Motors: 2 × 6374 170KV
- Controllers: 2 × FLIPSKY 4-13S Lipo ESC Mini FSESC6.7 70A based on VESC6.6
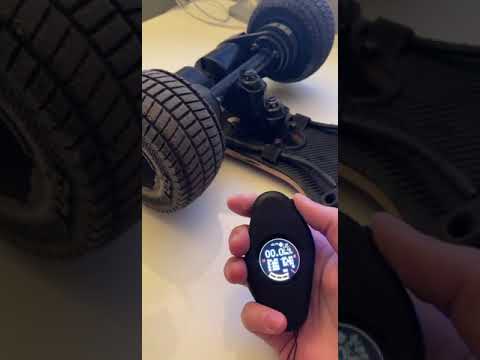
- Remote: Flipsky VX4
- Antispark switch: Flipsky Antispark Switch Pro with aluminum PCB V3.0 280A
- Charging port: Kugoo M5 electric scooter charger, T-shaped charging cable 15 cm
- BMS board: JBD Smart BMS 36V 100A
- Battery: Custom 10s3p 36V 14400 mAh made of 21700 cells
- Trucks: Double kingpin 12 inches
- Deck: Longboard 38 inches
- Wheels: Any from 97 mm to 120 mm. I recommend CLOUDWHEEL Discovery FE—I'm planning to switch to them myself.
The model consists of 13 printable parts:
- seal_base_start_v3.stl or seal_base_v3_dummy.step
- seal_base_mid_v3.stl or seal_base_v3_dummy.step
- seal_base_end_v3.stl or seal_base_v3_dummy.step
- 2 x seal_between_001.stl
- frame_enclosure_start_v3.stl
- frame_enclosure_mid_v3.stl
- frame_enclosure_end_v3.stl
- cap_enclosure_start_v3.stl
- cap_enclosure_start_mid_v3.stl
- cap_enclosure_mid_v3.stl
- cap_enclosure_mid_end_v3.stl
- cap_enclosure_end_v3.stl
BONUS PART:
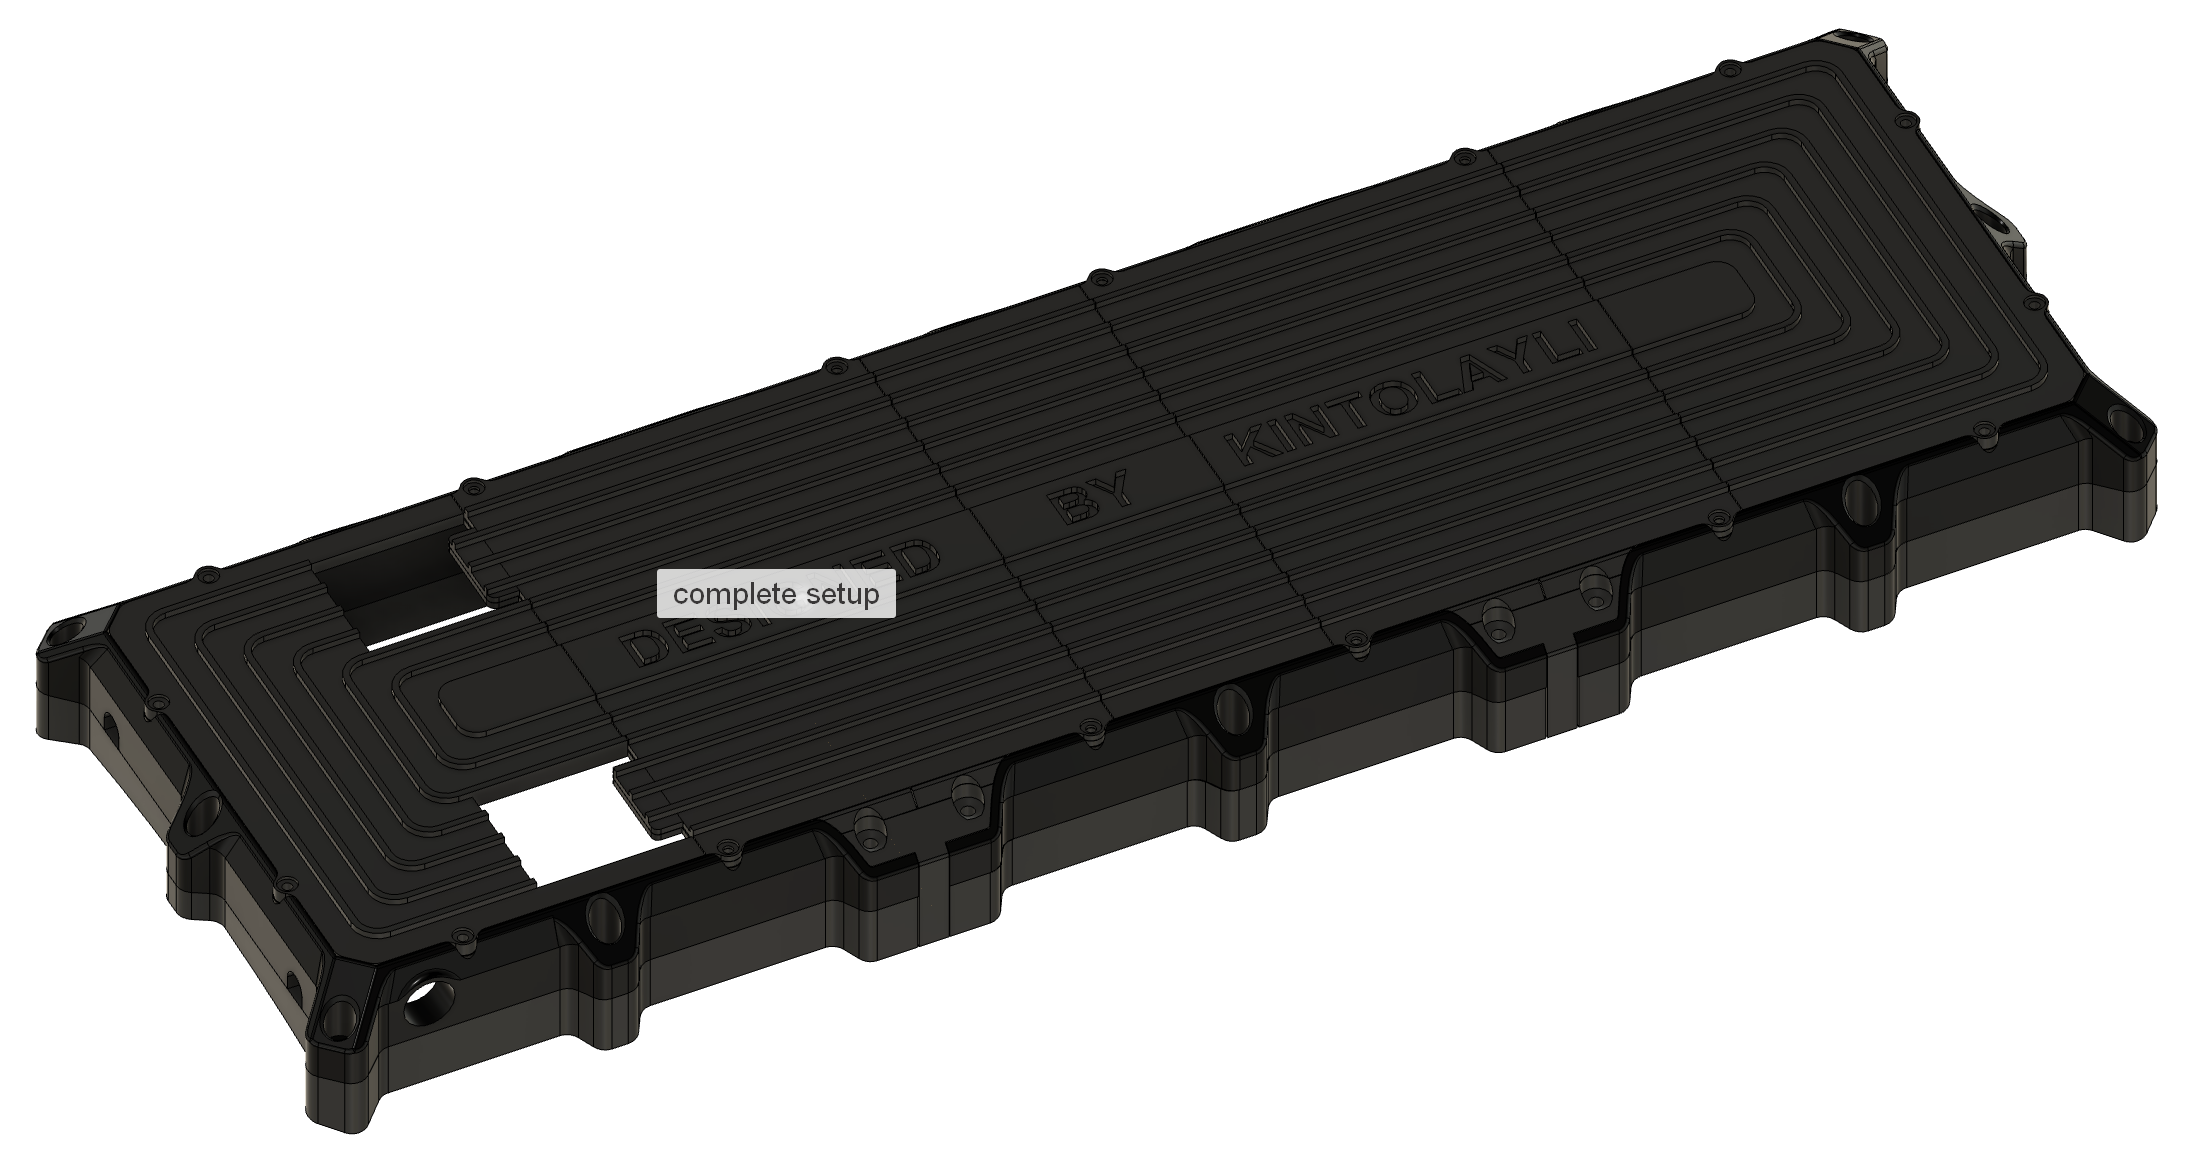
Now let's take a closer look at each printable part and its features. All elements are labeled in the screenshots.
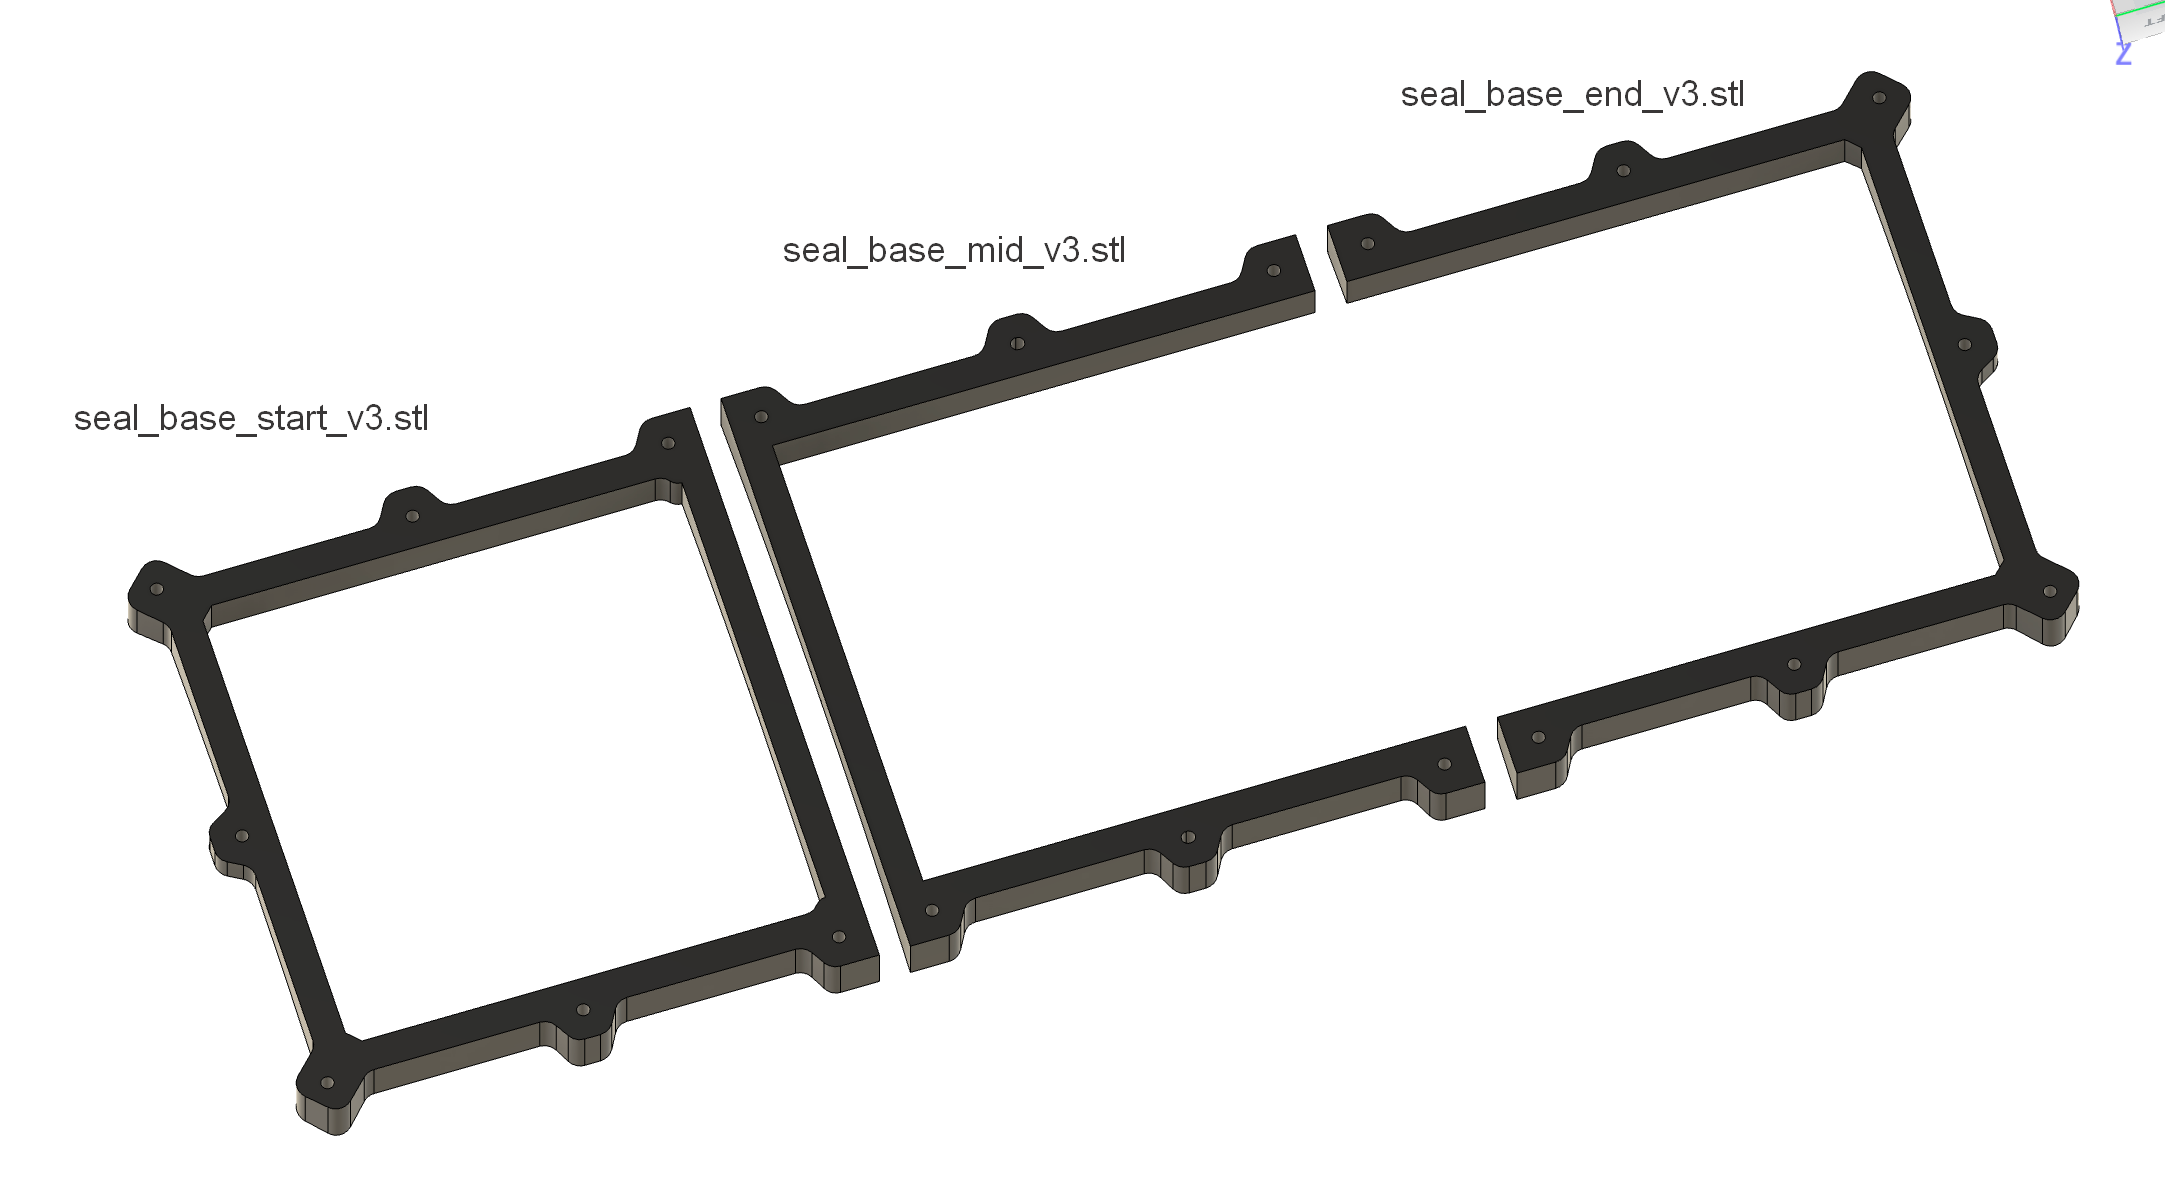
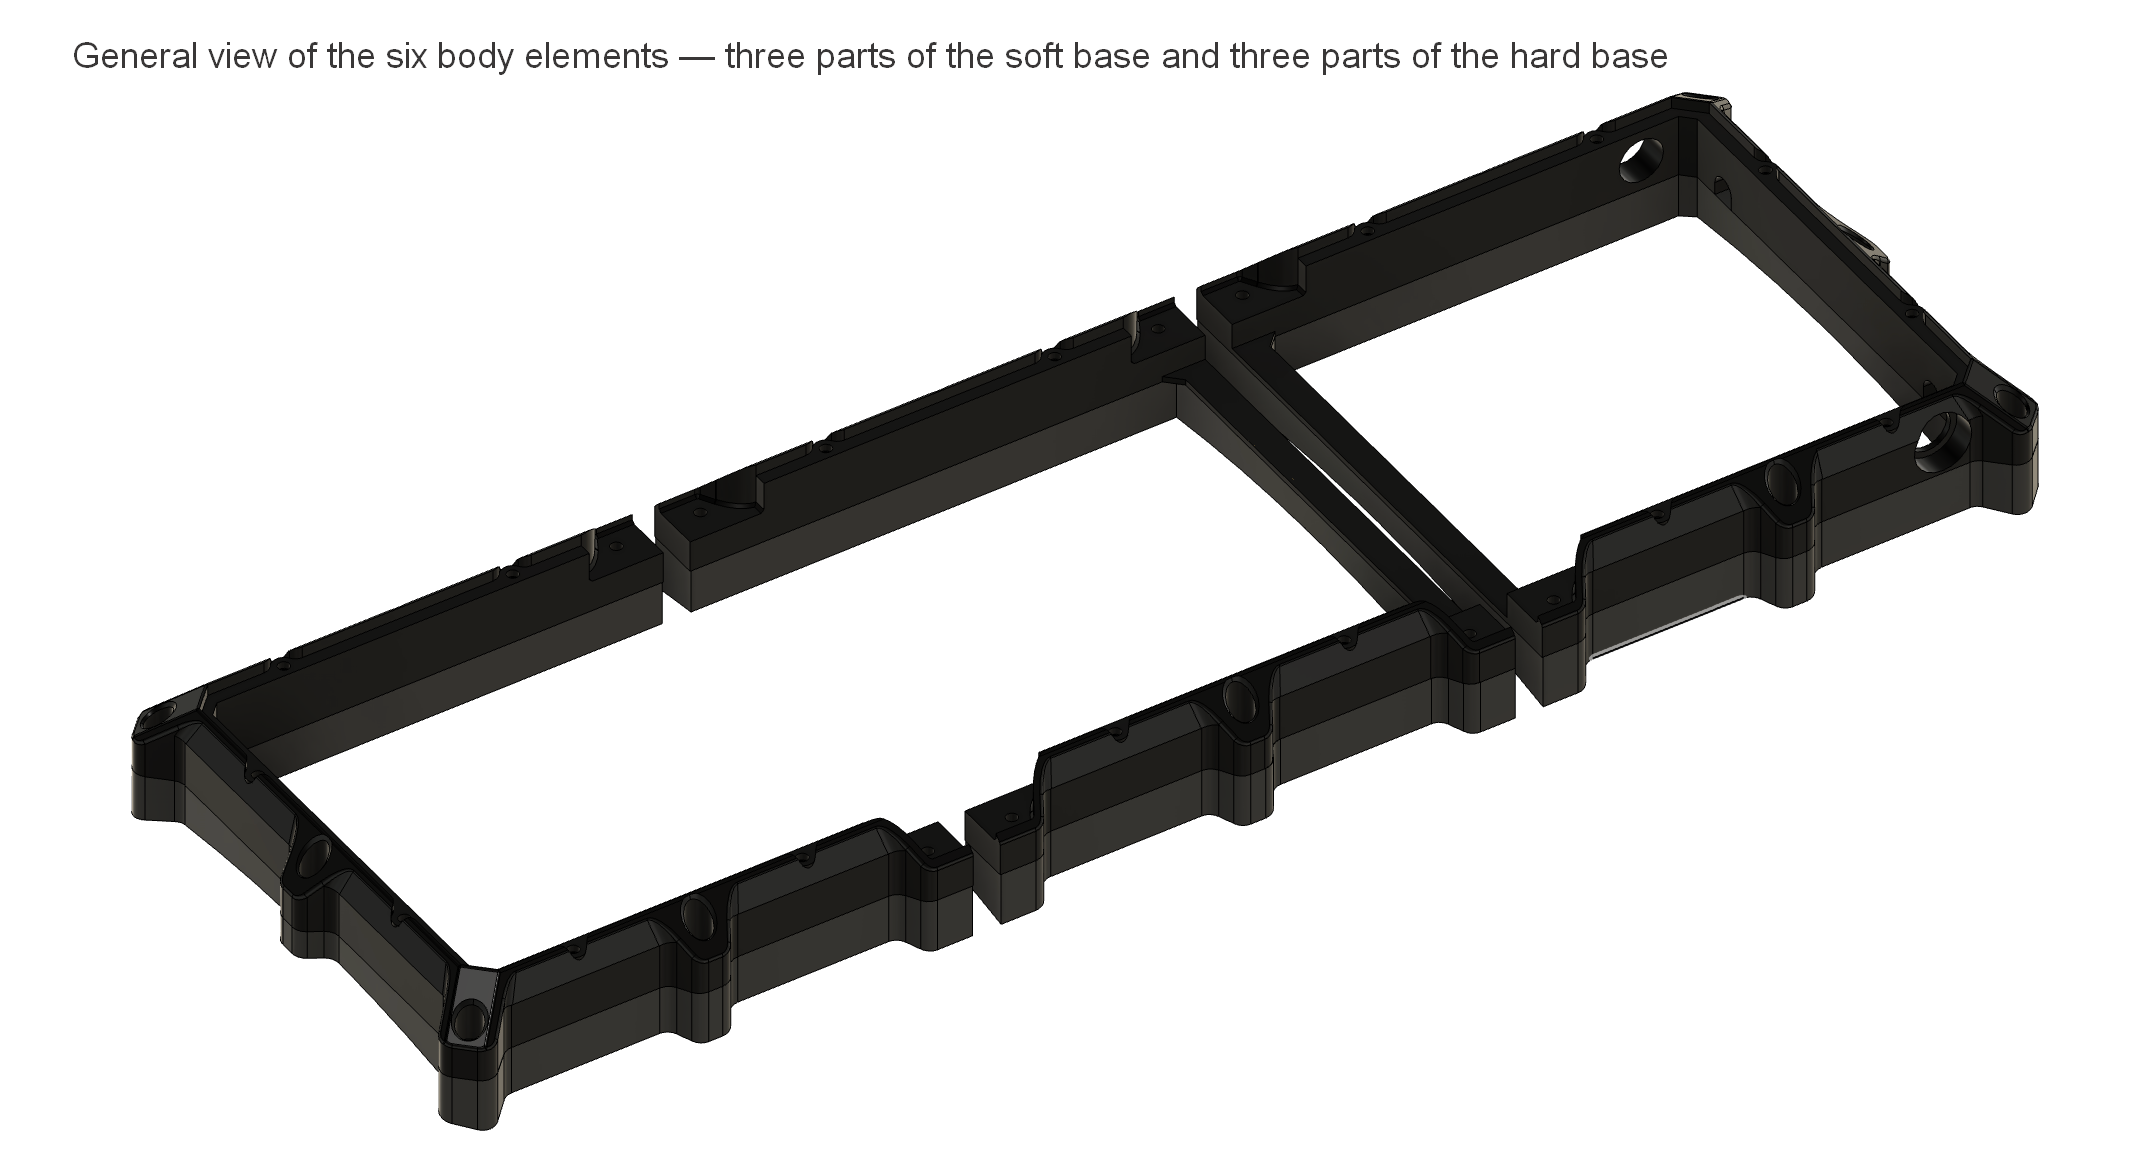
3 Soft Base Parts:
- seal_base_start_v3.stl or seal_base_v3_dummy.step
- seal_base_mid_v3.stl or seal_base_v3_dummy.step
- seal_base_end_v3.stl or seal_base_v3_dummy.step
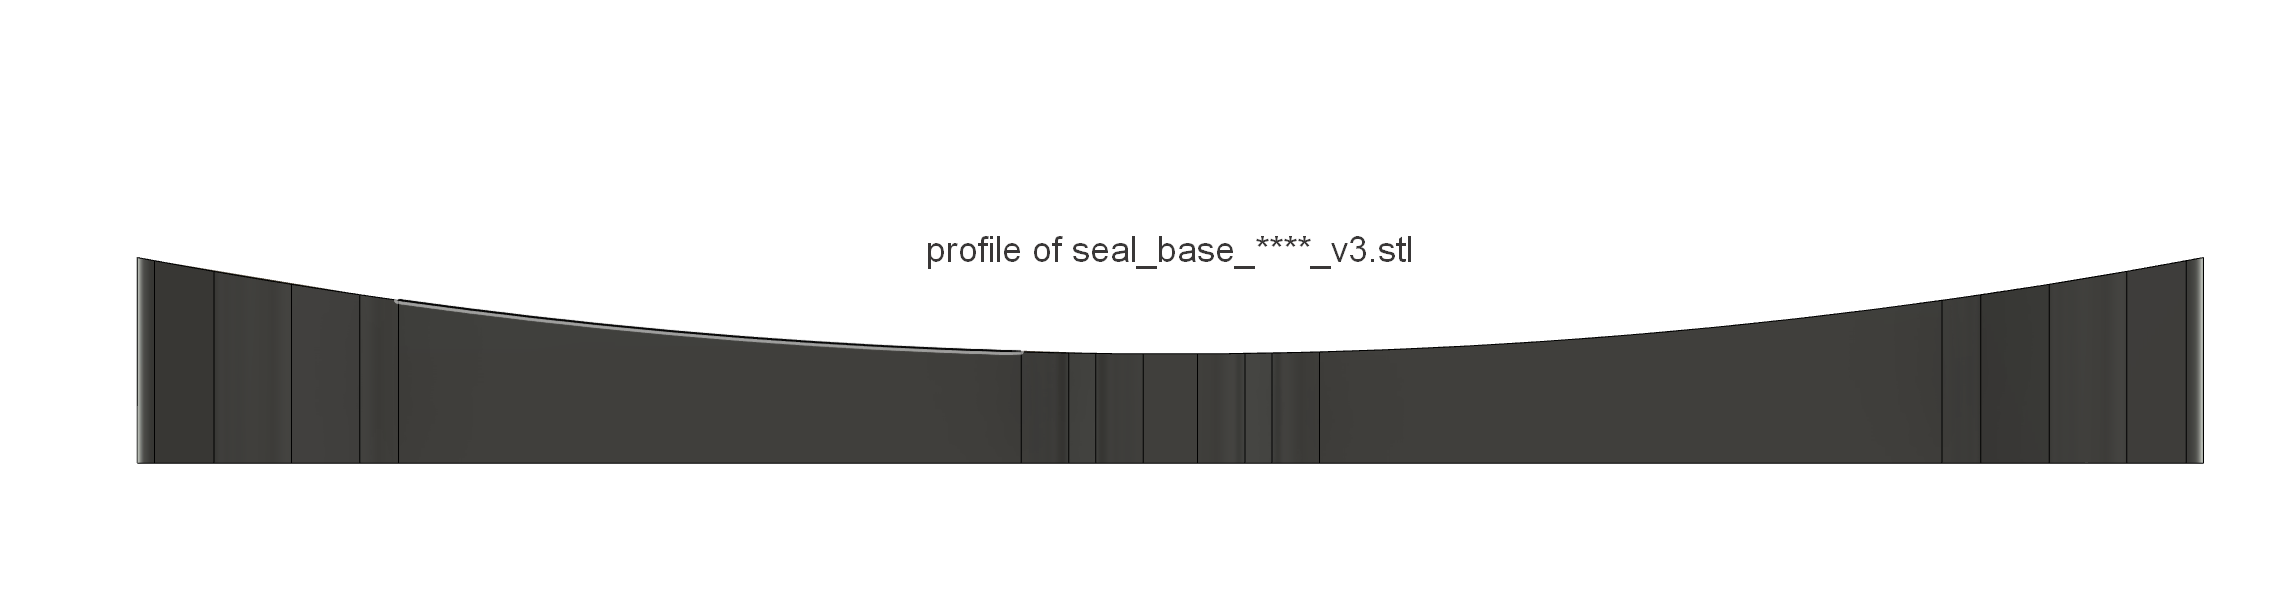
These base parts serve multiple functions: they dampen vibrations, protect against splashes and dust, and flex with the deck, preventing the main enclosure from breaking. Thanks to these elements, the enclosure becomes versatile—you can print the parts to fit different deck curves, while the other components remain unchanged. Therefore, they must be printed from TPU filament. Adjust the infill density based on the Shore hardness of the filament. I used filament with a hardness of 75A and 20% infill density.
In the archive, you will find two versions of the base part:
- STL files (seal_base_start_v3.stl, seal_base_mid_v3.stl, seal_base_end_v3.stl) with pre-cut radius. These files are ready for printing and fit most standard longboards.
- **STEP file - seal_base_v3_dummy.step - for editing. These file allow you to adjust the radius to your specific longboard if its curvature differs from the standard. You can modify them in any CAD software to create the perfect profile for your deck.
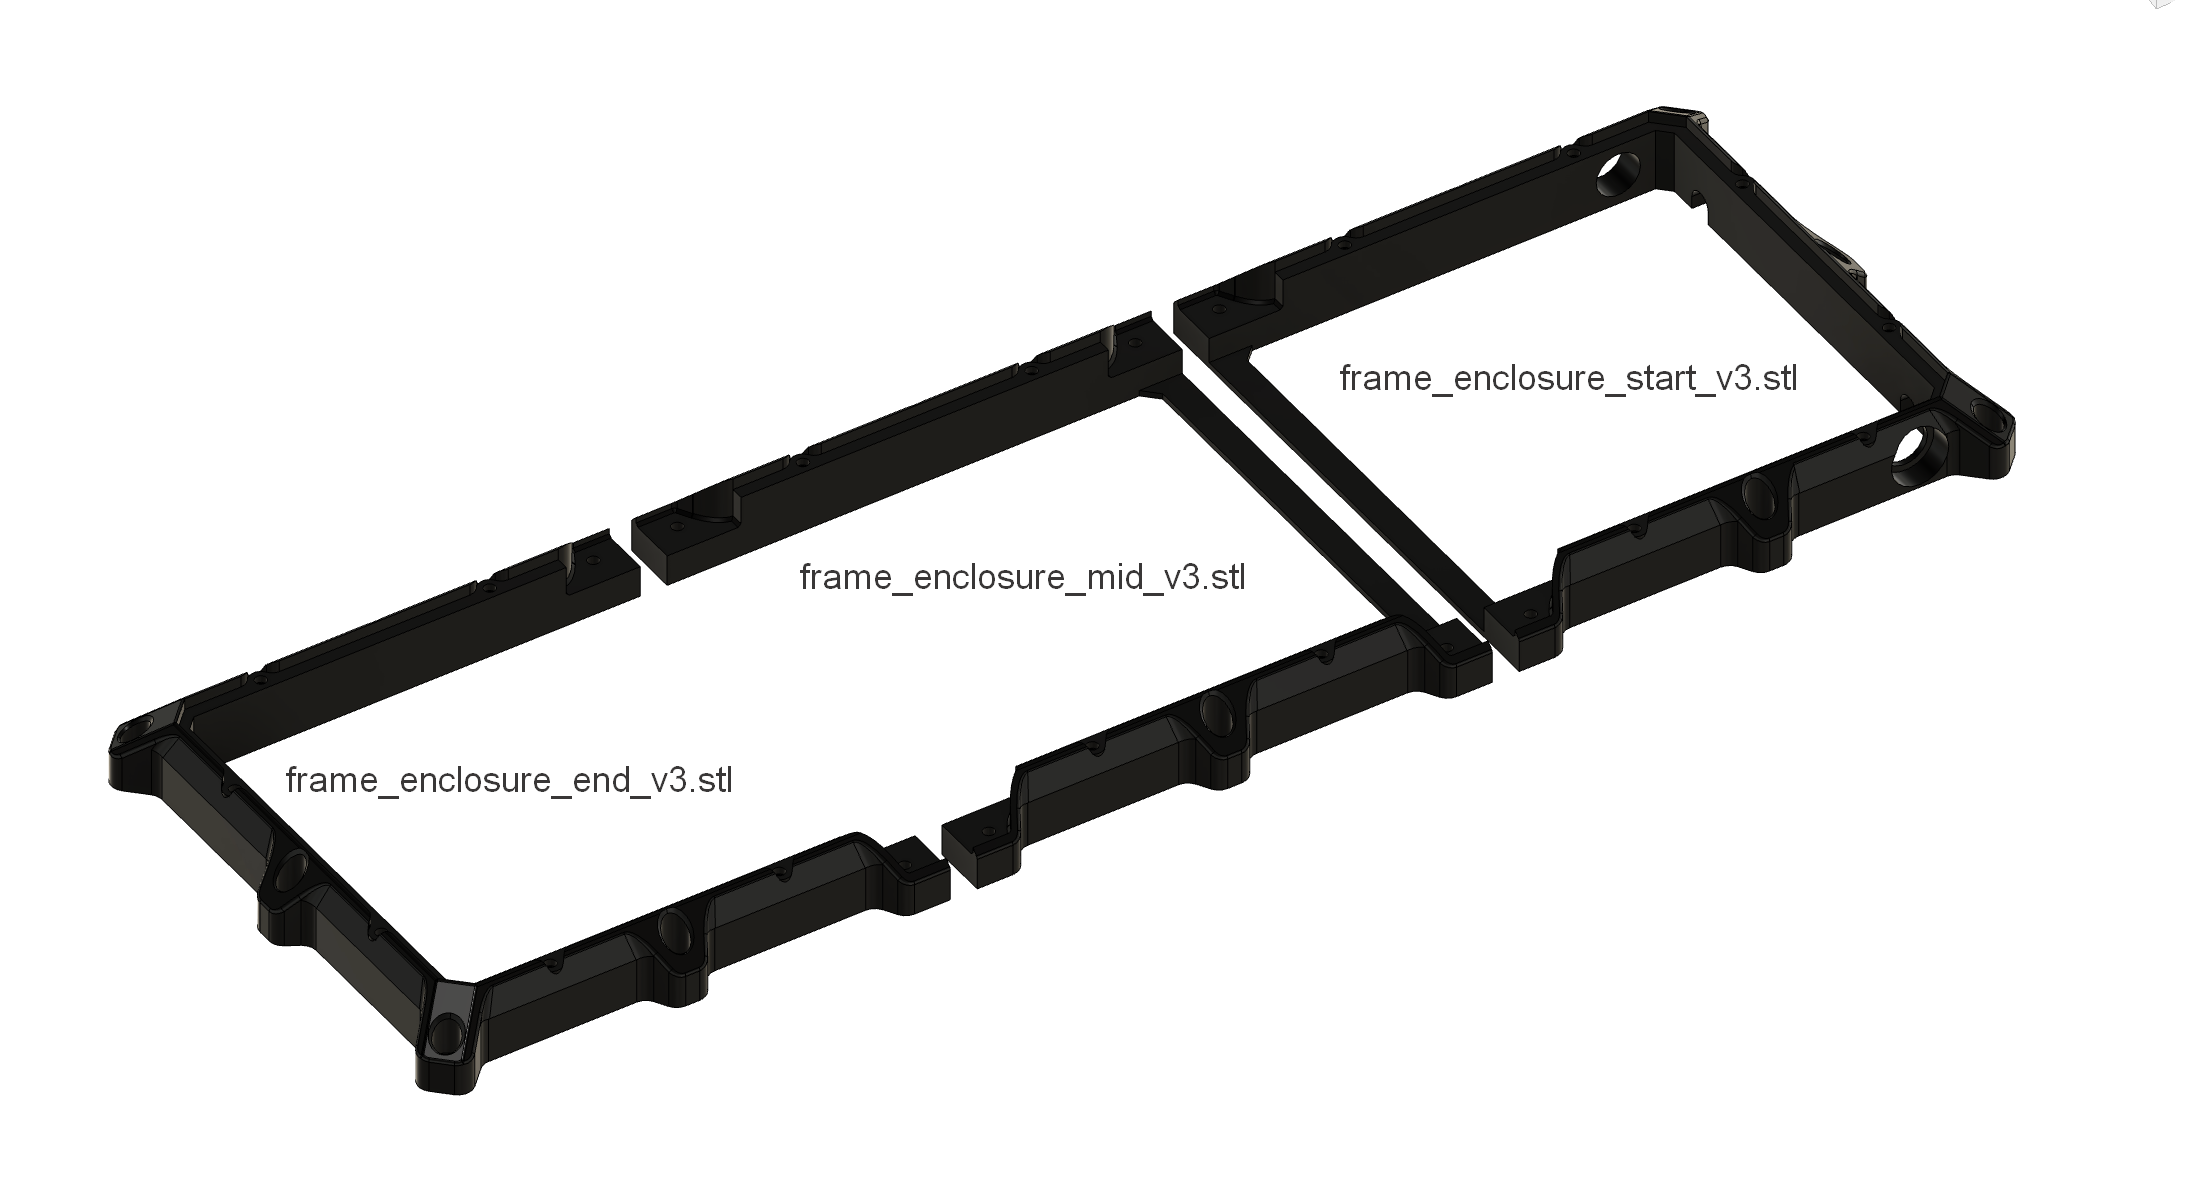
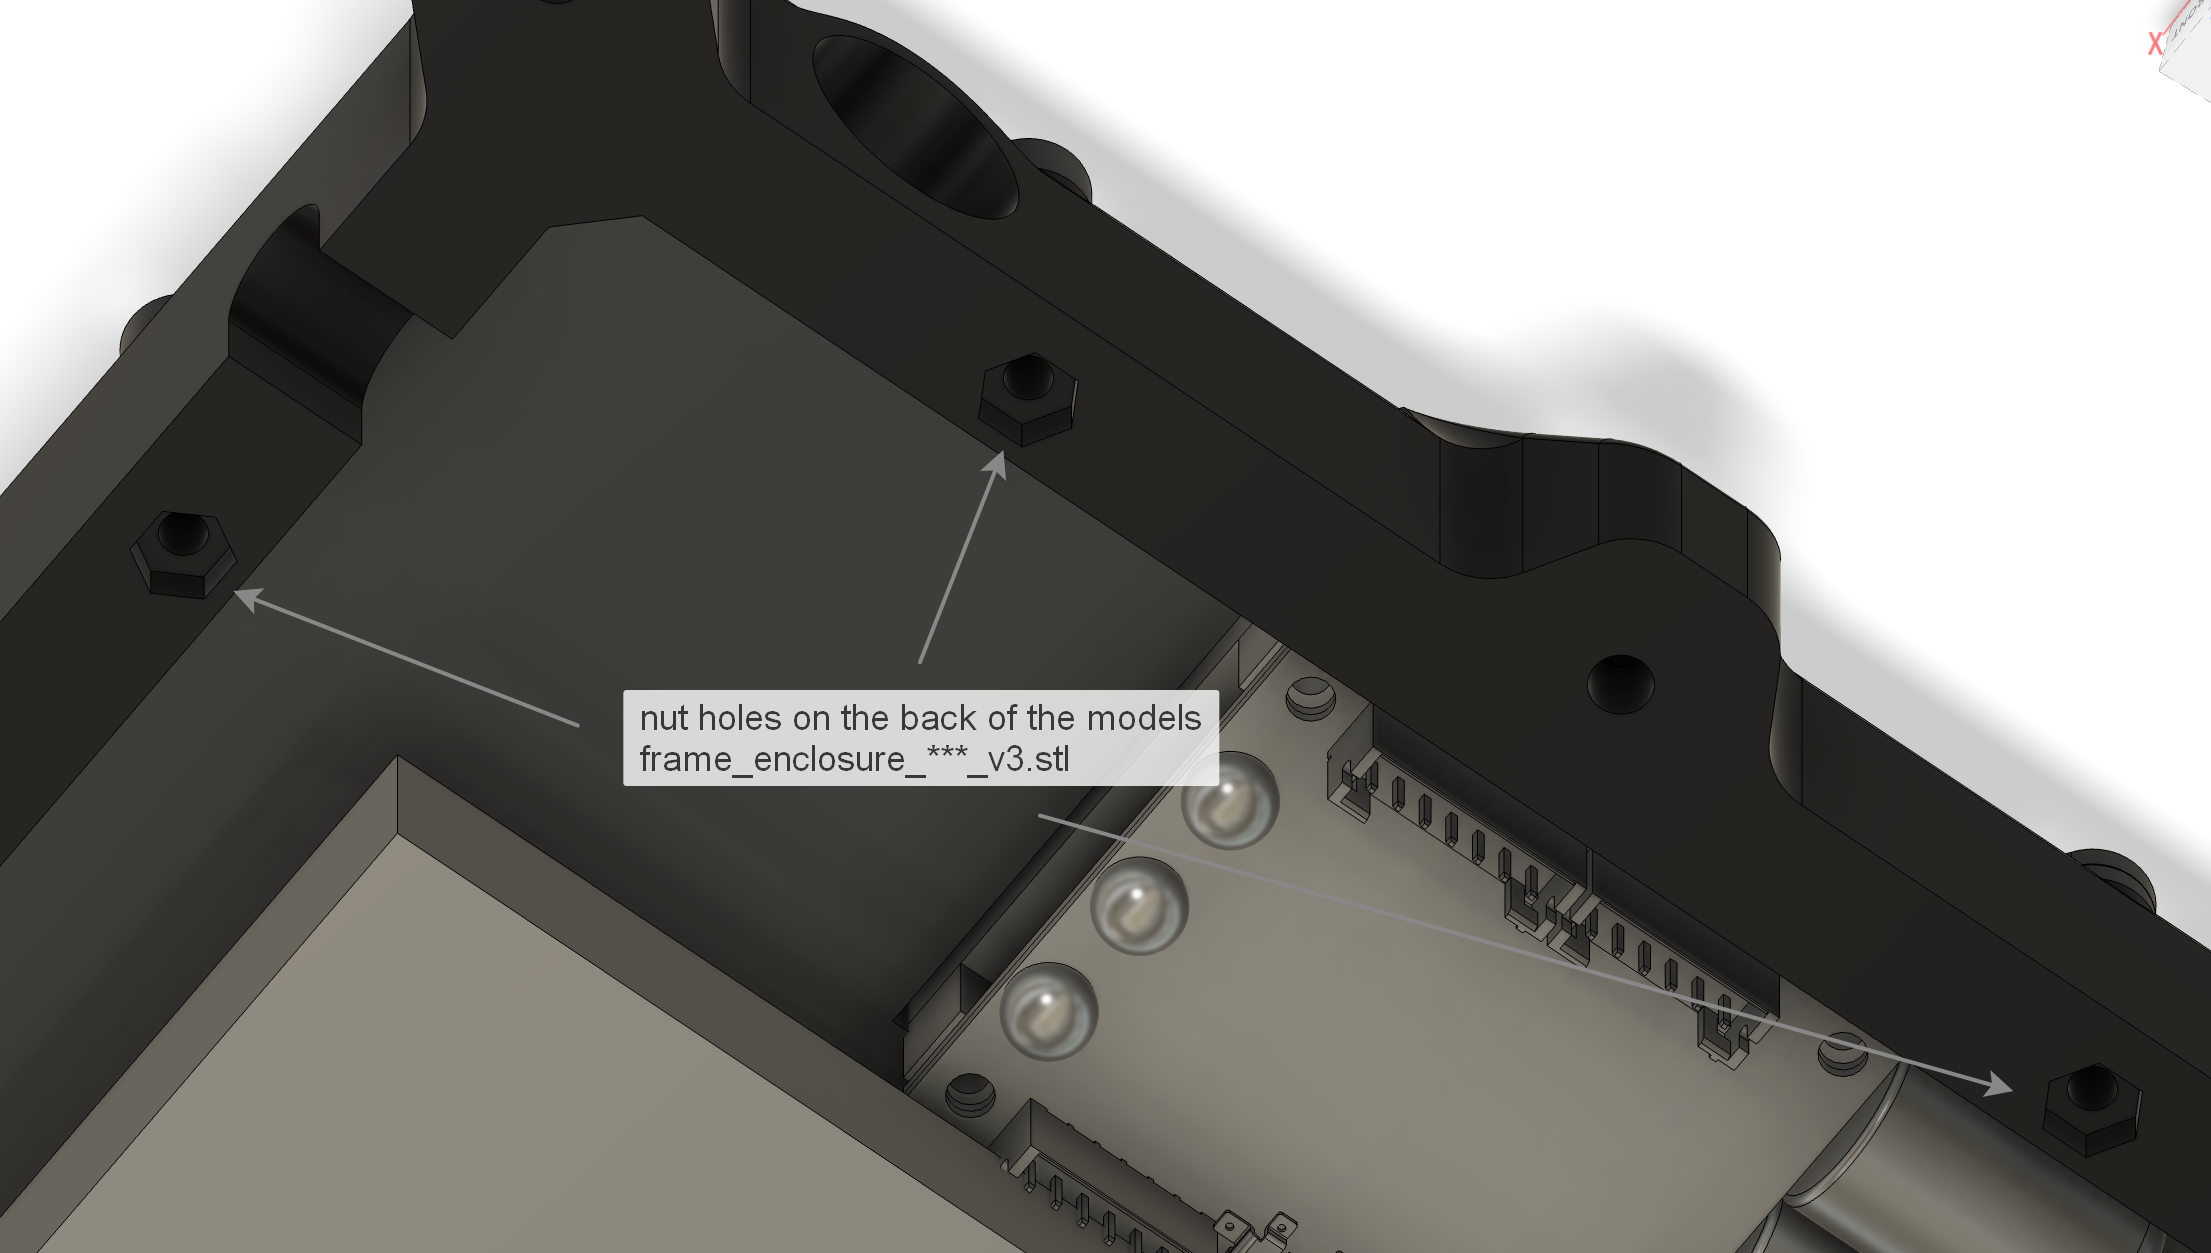
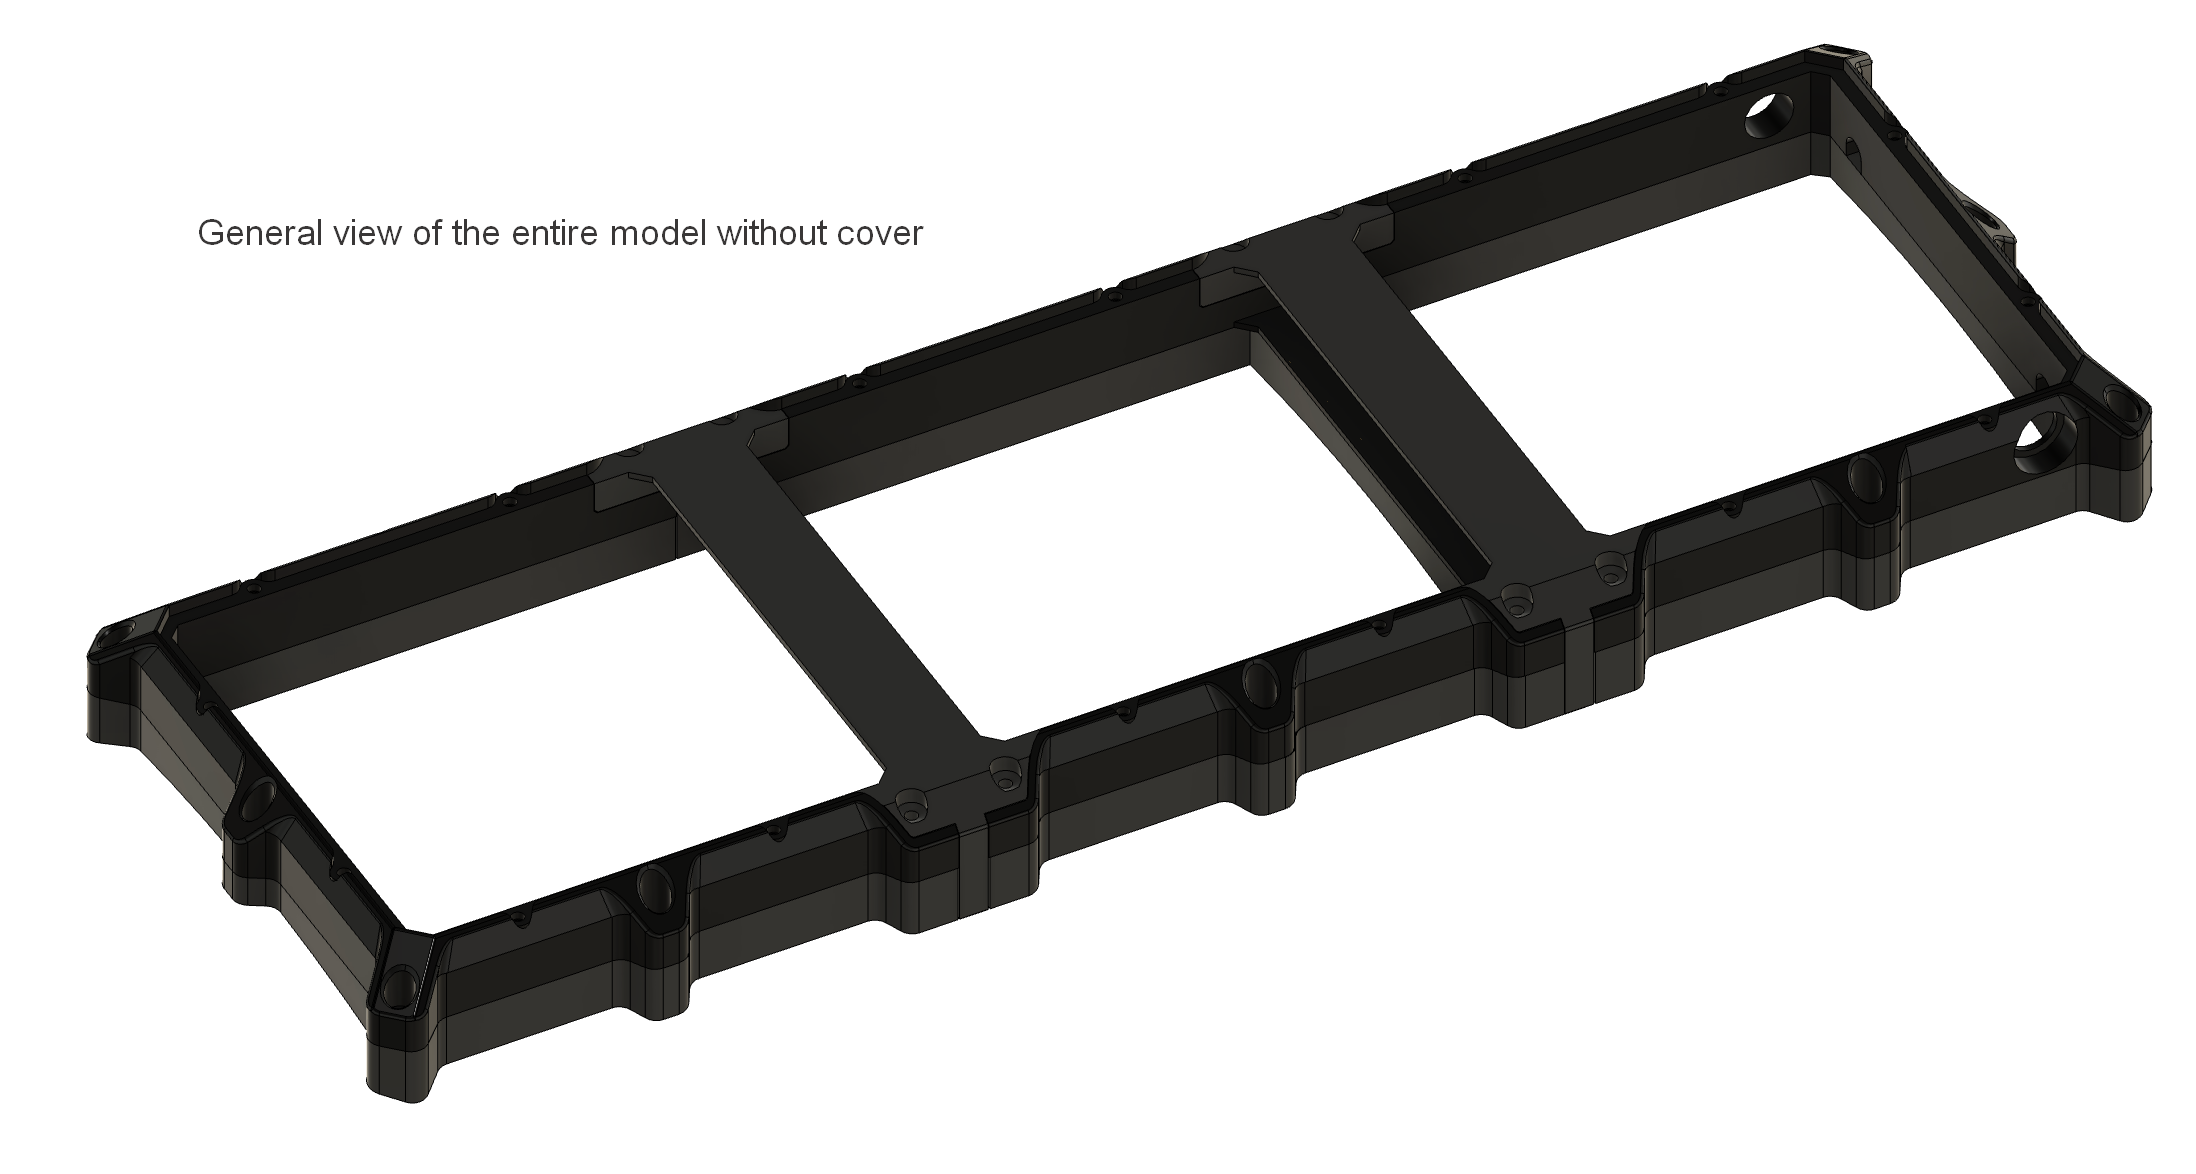
3 Rigid Base Parts:
- enclosure_start_frame_v3.stl
- enclosure_mid_frame_v3.stl
- enclosure_end_frame_v3.stl
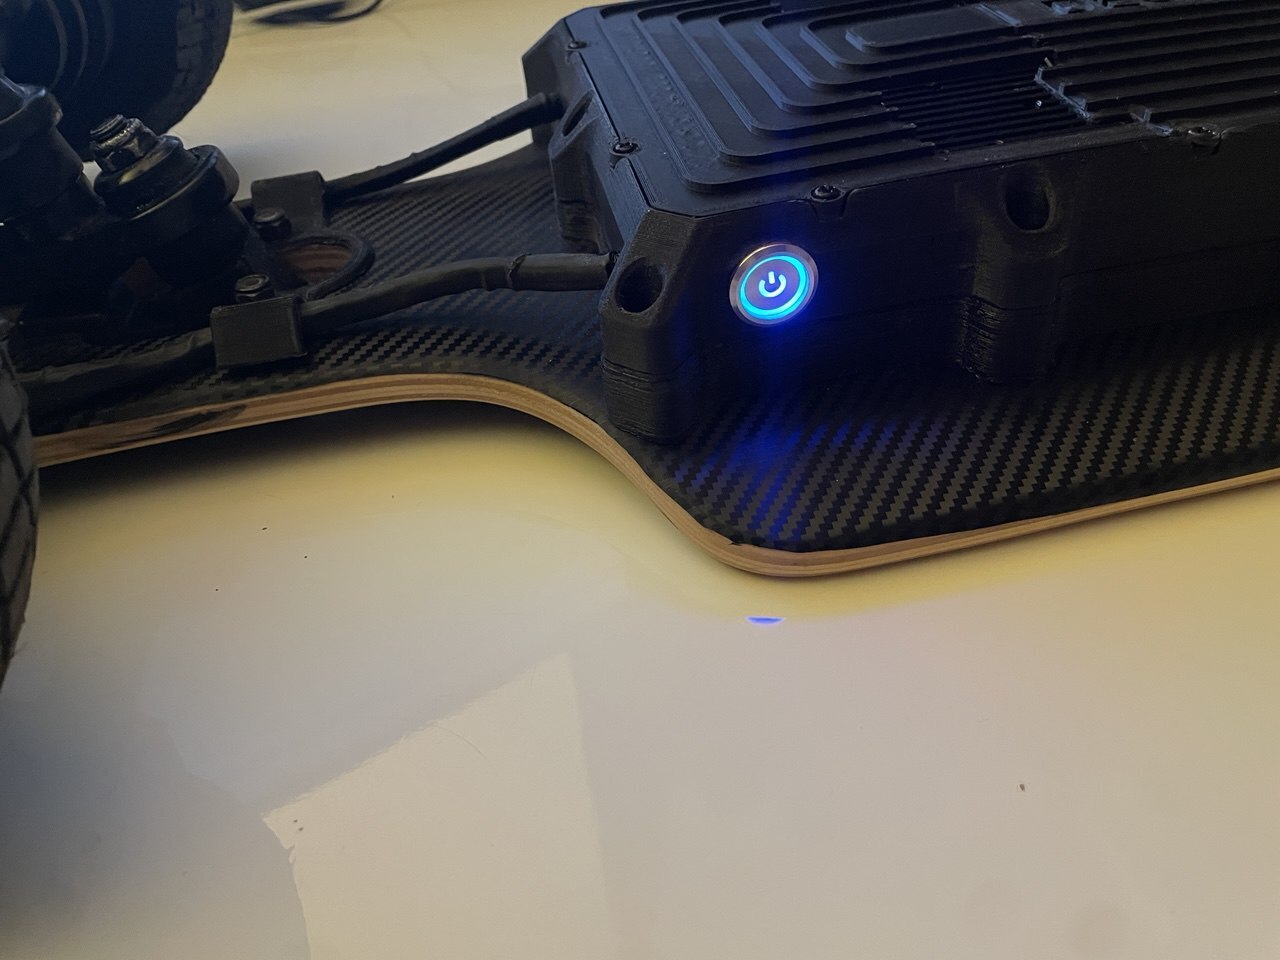
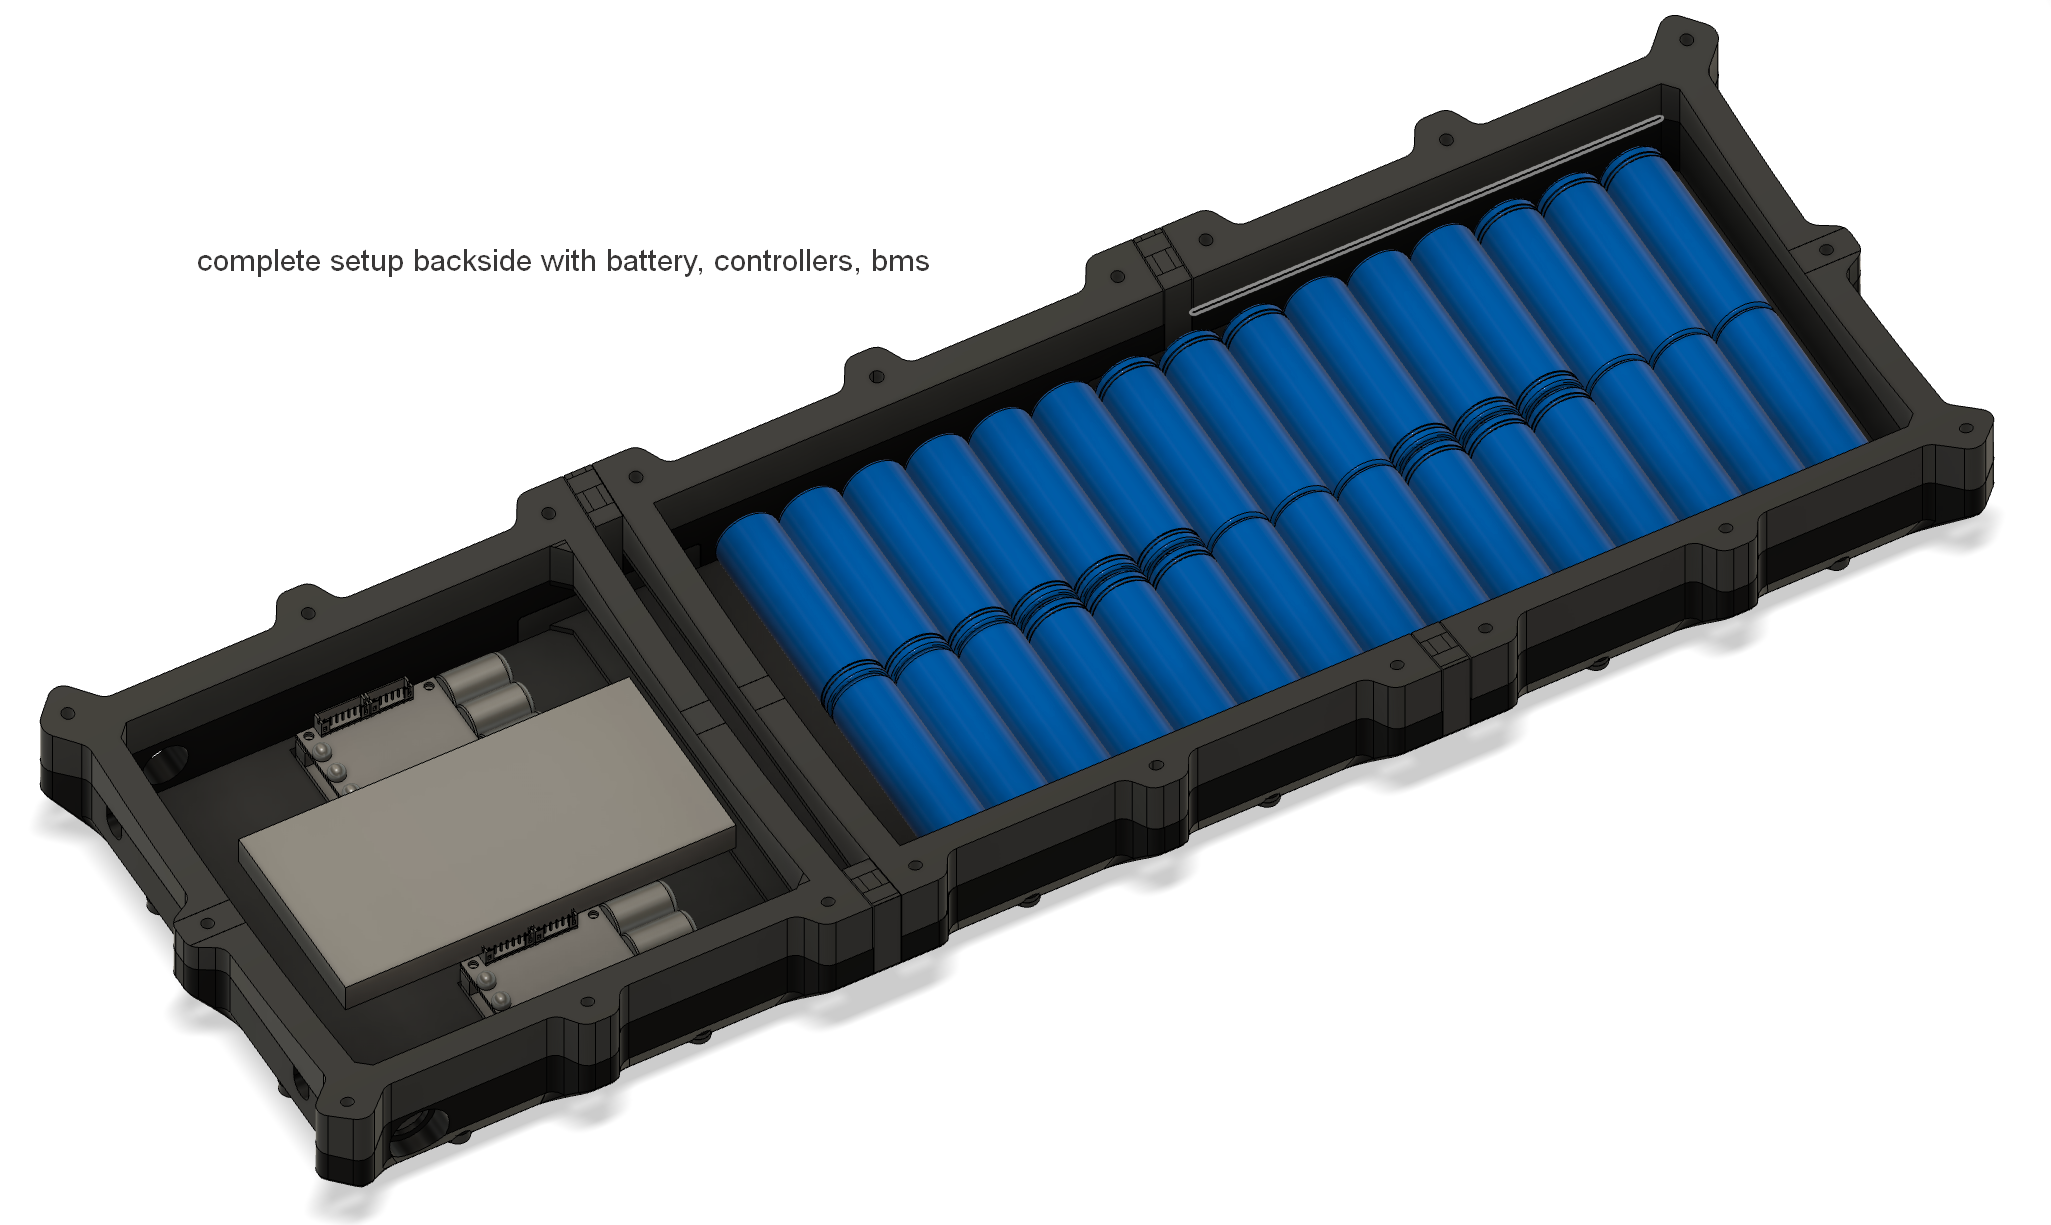
The enclosure_start_frame_v3 has two holes for motor cables, as well as two round side holes for the power button and charging port. Print these parts from ABS or PETG. To attach the lid, each of the three elements has holes on the reverse side for nuts, which just need to be pressed in. There's also the option to use M3 heat-set inserts—each hole has been widened for them—but I preferred regular nuts, as I had issues with the heat-set inserts.
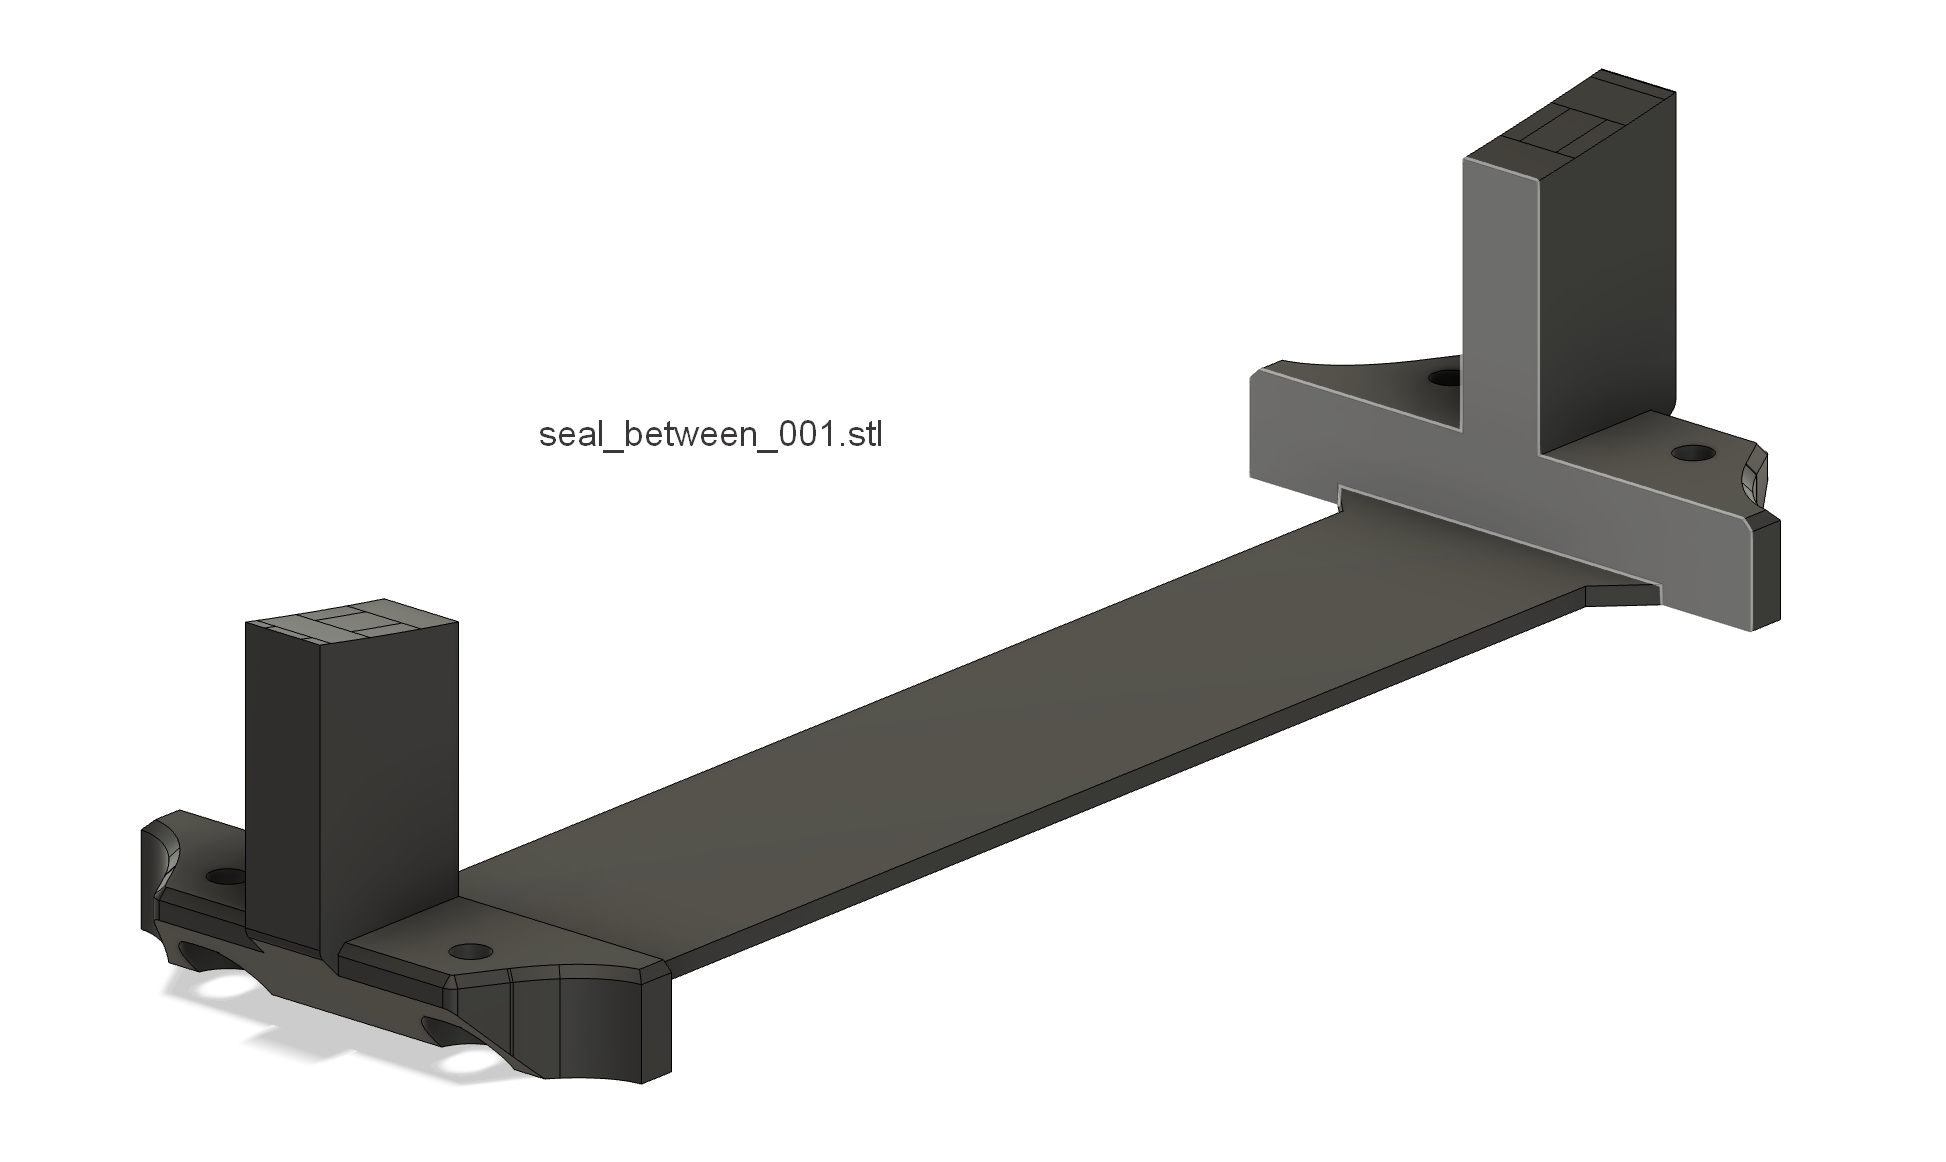
2 Soft Connecting Elements:
These connecting elements join the enclosure parts and must be printed from TPU. The design is specifically created for printing in an inverted position without supports. You'll need to print two pieces of this element.
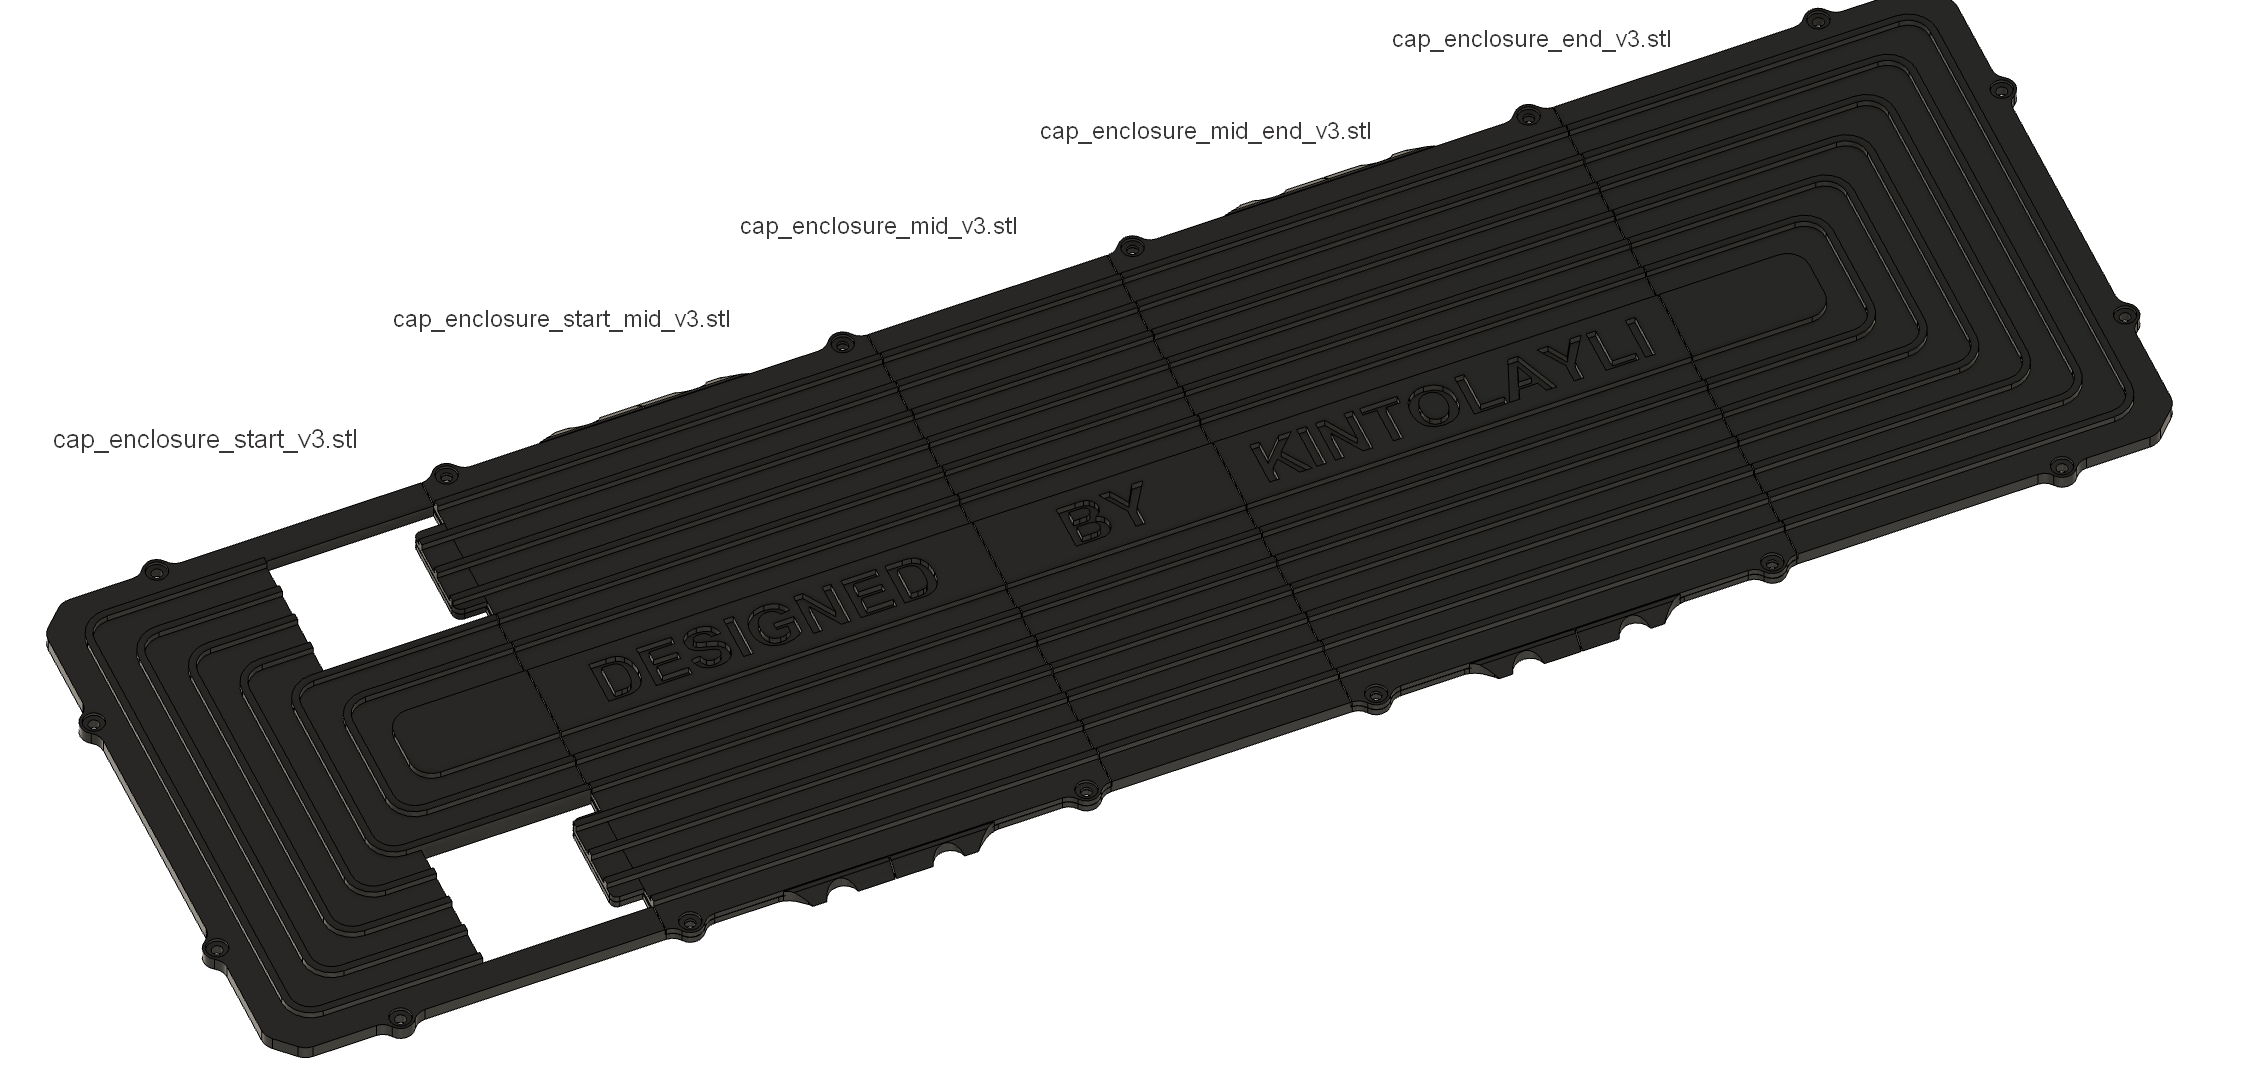
5 Enclosure Cap Parts:
- cap_enclosure_start_v3.stl
- cap_enclosure_start_mid_v3.stl
- cap_enclosure_mid_v3.stl
- cap_enclosure_mid_end_v3.stl
- cap_enclosure_end_v3.stl
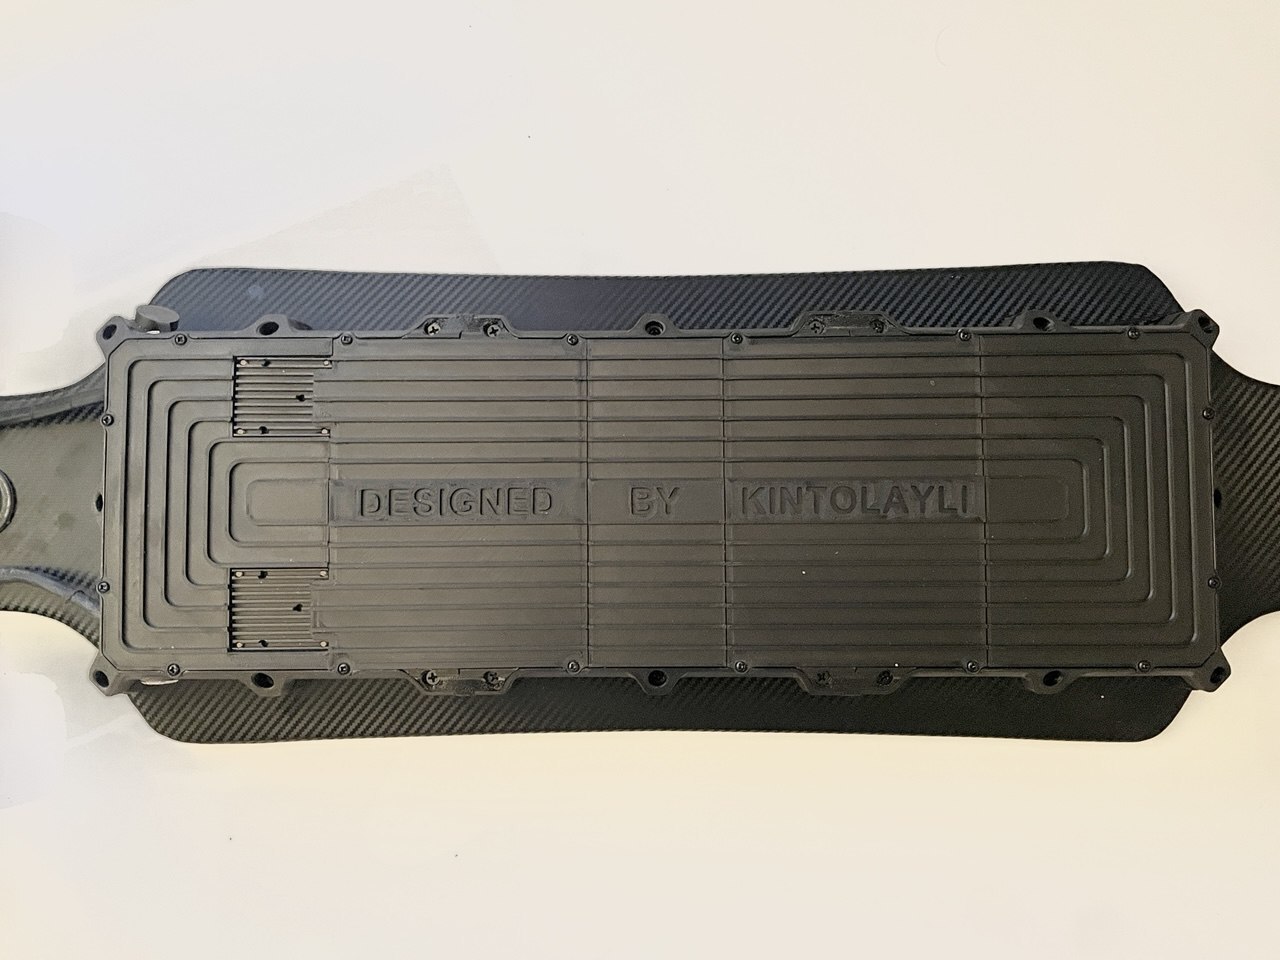
The enclosure cap consists of five parts due to 3D printing limitations. If I had a CNC machine, I would have made it as a single piece. In this project, I used FLIPSKY 4-13S Lipo ESC Mini FSESC6.7 70A controllers, which get quite hot during operation. Therefore, I had to place the heat sinks outside and create special openings for them in the cap.
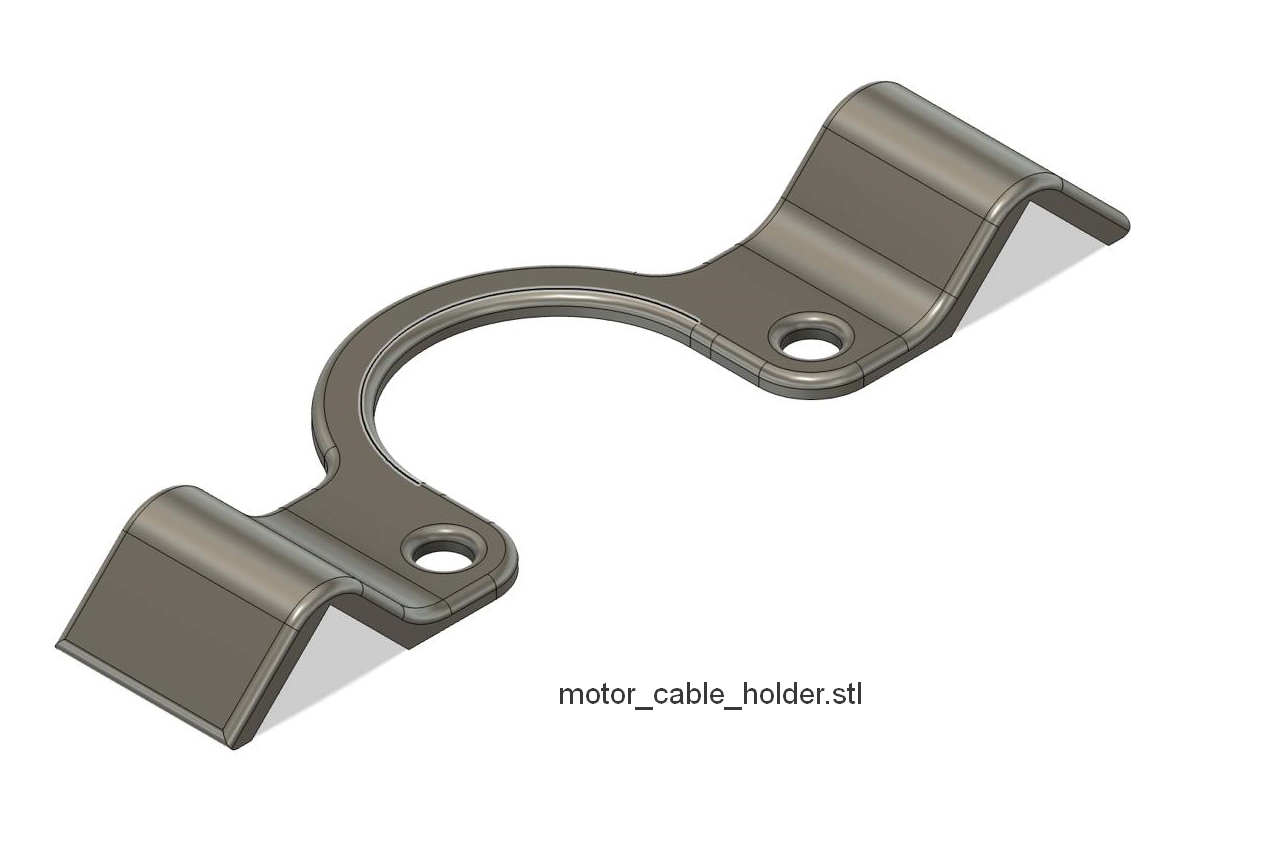
There is also a bonus motor_cable_holder.stl model in the project, which does not relate directly to the body, but can be useful for holding motor cables.
:format(webp)/https://fbi.cults3d.com/uploaders/18714575/illustration-file/4fdc7e9c-8d6e-4a24-ada1-c482f6b19011/photo_2024-08-25_21-14-14.jpg)
/https://preview3d-images.cults3d.com/8ly4yxldejgveq7s1r6zsbnxnptc)
/https://preview3d-images.cults3d.com/uzyo2tqy5aqvzut2vf9vcqy7242q)
/https://preview3d-images.cults3d.com/tyevmo5qg8rnwcc69ee4bdxaswek)
/https://preview3d-images.cults3d.com/lwzu1u4tw2ggoc8sadtrbqq78o2z)
/https://preview3d-images.cults3d.com/i4zd93h1h9vpl84qt8t25brvotpt)
/https://preview3d-images.cults3d.com/rcx2kucezxuc5qnbegf22u1drpf0)
/https://preview3d-images.cults3d.com/z6sjc4xd7q8wwmk7qttc8tkcozhs)
/https://preview3d-images.cults3d.com/nzctl0dnusocigyhi1gmw89xiscg)
/https://preview3d-images.cults3d.com/2xo1u3mynvx5szjoxptfn6gs238i)
/https://preview3d-images.cults3d.com/hl8wauy7zxffxlbvaqc2ckmnu6yh)
/https://preview3d-images.cults3d.com/sr2ytbfa3uxdi5ku2mgzri4n3bl6)
/https://preview3d-images.cults3d.com/ks8weam1hc8lyfm2uozelbb7hafj)
/https://preview3d-images.cults3d.com/9w34yl0x2i73dcth8878lnt45fbs)


/https://preview3d-images.cults3d.com/p9ge91r699r0aw3jcucd0uzqx5ye)
/https://preview3d-images.cults3d.com/cmwalw22bpnw75ef0libf13wiz3k)
/https://preview3d-images.cults3d.com/60mxfm3gw7th5a0vx70sqz19e4x7)
/https://preview3d-images.cults3d.com/z5tpy3qinakxl56b509f0yytqz6i)
/https://preview3d-images.cults3d.com/l137ahp0u3vvk2saw1ubona5tjm9)
/https://preview3d-images.cults3d.com/xbj2h3lfcydljl600qlynhud0lm5)
/https://preview3d-images.cults3d.com/6m6k497ku162dnyna2vjozv6lej2)
/https://preview3d-images.cults3d.com/nydysb8kl0m87r8cefzcjmmku9wb)
/https://preview3d-images.cults3d.com/l83300tsh099vi9nje94d2x013ss)
/https://preview3d-images.cults3d.com/oxbkcvj6el8mhe4npjzki8dg9n24)
/https://preview3d-images.cults3d.com/349nllg1ycfoal6dh0dxpfmxudxi)
/https://preview3d-images.cults3d.com/jki1wkn7mh4qvciupdvpoqf0fdqb)
/https://preview3d-images.cults3d.com/13tlw74klw2oibqk0zvws7bnfouk)

:format(webp)/https://fbi.cults3d.com/uploaders/27680315/illustration-file/e75384c5-e897-424d-9dec-b63cf9d3e99f/shape_0138.jpg)