3D model description
There are many adapters out there that fall short of several design considerations. All other designs I've seen cause the facial interface to collide with the front of the head strap when bobovr says to allow 1-2cm gap for proper fit. Others have binding and/or poor fitment. Some are built so bulky that it flexs the headstrap out of shape and squeezes the Quest 3 speaker arms, which also causes the velcro strap to not reach the headset. Others have no twist even though the Quest 3 arms have a compound curve with a 10 degree twist.
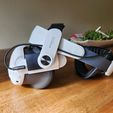
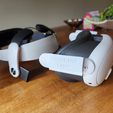
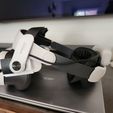
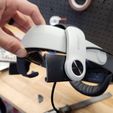
My design solves all these issues. It is a snap on fit and has properly contoured/dimensioned connection points so that it utilizes the friction rubber strips inside the bobovr straps so the headset can be brought toward/away from the face as bobovr intended. The connection points have been raised to provide proper clearance per bobovr specs. Bonus feature, no supports needed!
Jaybratt on YouTube covers the bobovr fitment issues even with their own M2 to M3 conversion kit (link below), issues which my adapters eliminate.
https://youtu.be/sI1wDaoNOE4?si=QCcLmuTJCT8dmMCX
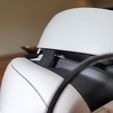
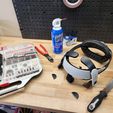
In order to utilize the headphone and usbc ports, you can cut off the front flanges of your M2 mount points. You can easily do this by carefully scoring the mounts with a razor blade (go over the same line several times do make a deep score/cut into the plastic). Then you can take some pliers and flex/bend it until it breaks off clean at the scored line. Any burrs or sharp edges can be filed or sanded down for a nice finish, as shown in my photos.
It is recommended that you print a 1st unit so that you can use it as a sacrificial unit. Try to break the adapter by hand when not connected to the headset to ensure that you have a solid print and your printer settings didn't print a brittle adapter. With my testing with eSun PLA+ White, I was physically unable to break these by hand with a very excessive hand force, even at the locations where the adapters are the thinnest.
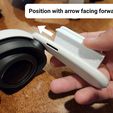
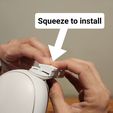
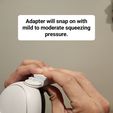
Installation Instructions: firmly hold the headset's speaker arms in a pinching fashion when snapping together. Do not attempt to slide them on as the fitment is too tight to slide, but provides a very reliable grip when snapped. Align the front of the adapters with the back of the usbc or headphone jack (this will provide the proper front-to-back locating of the adapters). Snap them in place. Then take your M2 adapter and slide each side evenly. Test fit and function before gaming.
Any questions just let me know!
3D printing settings
Material PLA+
Layer height 0.20mm
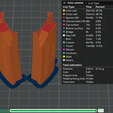
Wall count 3
Infill 20%
Infill pattern cubic
Top/bottom layers 3
Supports no
/https://fbi.cults3d.com/uploaders/20360442/illustration-file/377dfd71-35bb-4ebc-b570-714381d0b5f3/20231016_132436.jpg)





/https://fbi.cults3d.com/uploaders/20360442/illustration-file/b081b3b0-b0a1-4675-ad3f-136edbe38d6d/IMG_5466-conv.jpeg)
/https://fbi.cults3d.com/uploaders/20360442/illustration-file/1d096bbd-d802-4256-932d-cdc83b58054f/ezgif-3-5407932a25.gif)
/https://fbi.cults3d.com/uploaders/20360442/illustration-file/d9c29a94-a9f2-4dc6-a761-6e8ba0c255c8/1000006377.jpg)
/https://fbi.cults3d.com/uploaders/20360442/illustration-file/afcbd681-7eda-4f1c-9348-7484bcc1b6b1/received_3451501231839294.jpeg)
/https://fbi.cults3d.com/uploaders/20360442/illustration-file/692e0fa5-6b02-4bc3-994f-e2a7fdc98a56/20231205_210705.jpg)
/https://fbi.cults3d.com/uploaders/20360442/illustration-file/aaa44345-d531-4426-b4d0-b1b5f8f6d10f/Geodnet-Miner-Install-1.jpg)
/https://fbi.cults3d.com/uploaders/20360442/illustration-file/c5c0feba-07d3-4036-9a18-3fe032ddf503/Screenshot_20241209_170238_Gallery-1.jpg)
/https://fbi.cults3d.com/uploaders/20360442/illustration-file/11ecec68-b514-4b2b-9a1d-cba2e3ce2202/3.png)