3D model description
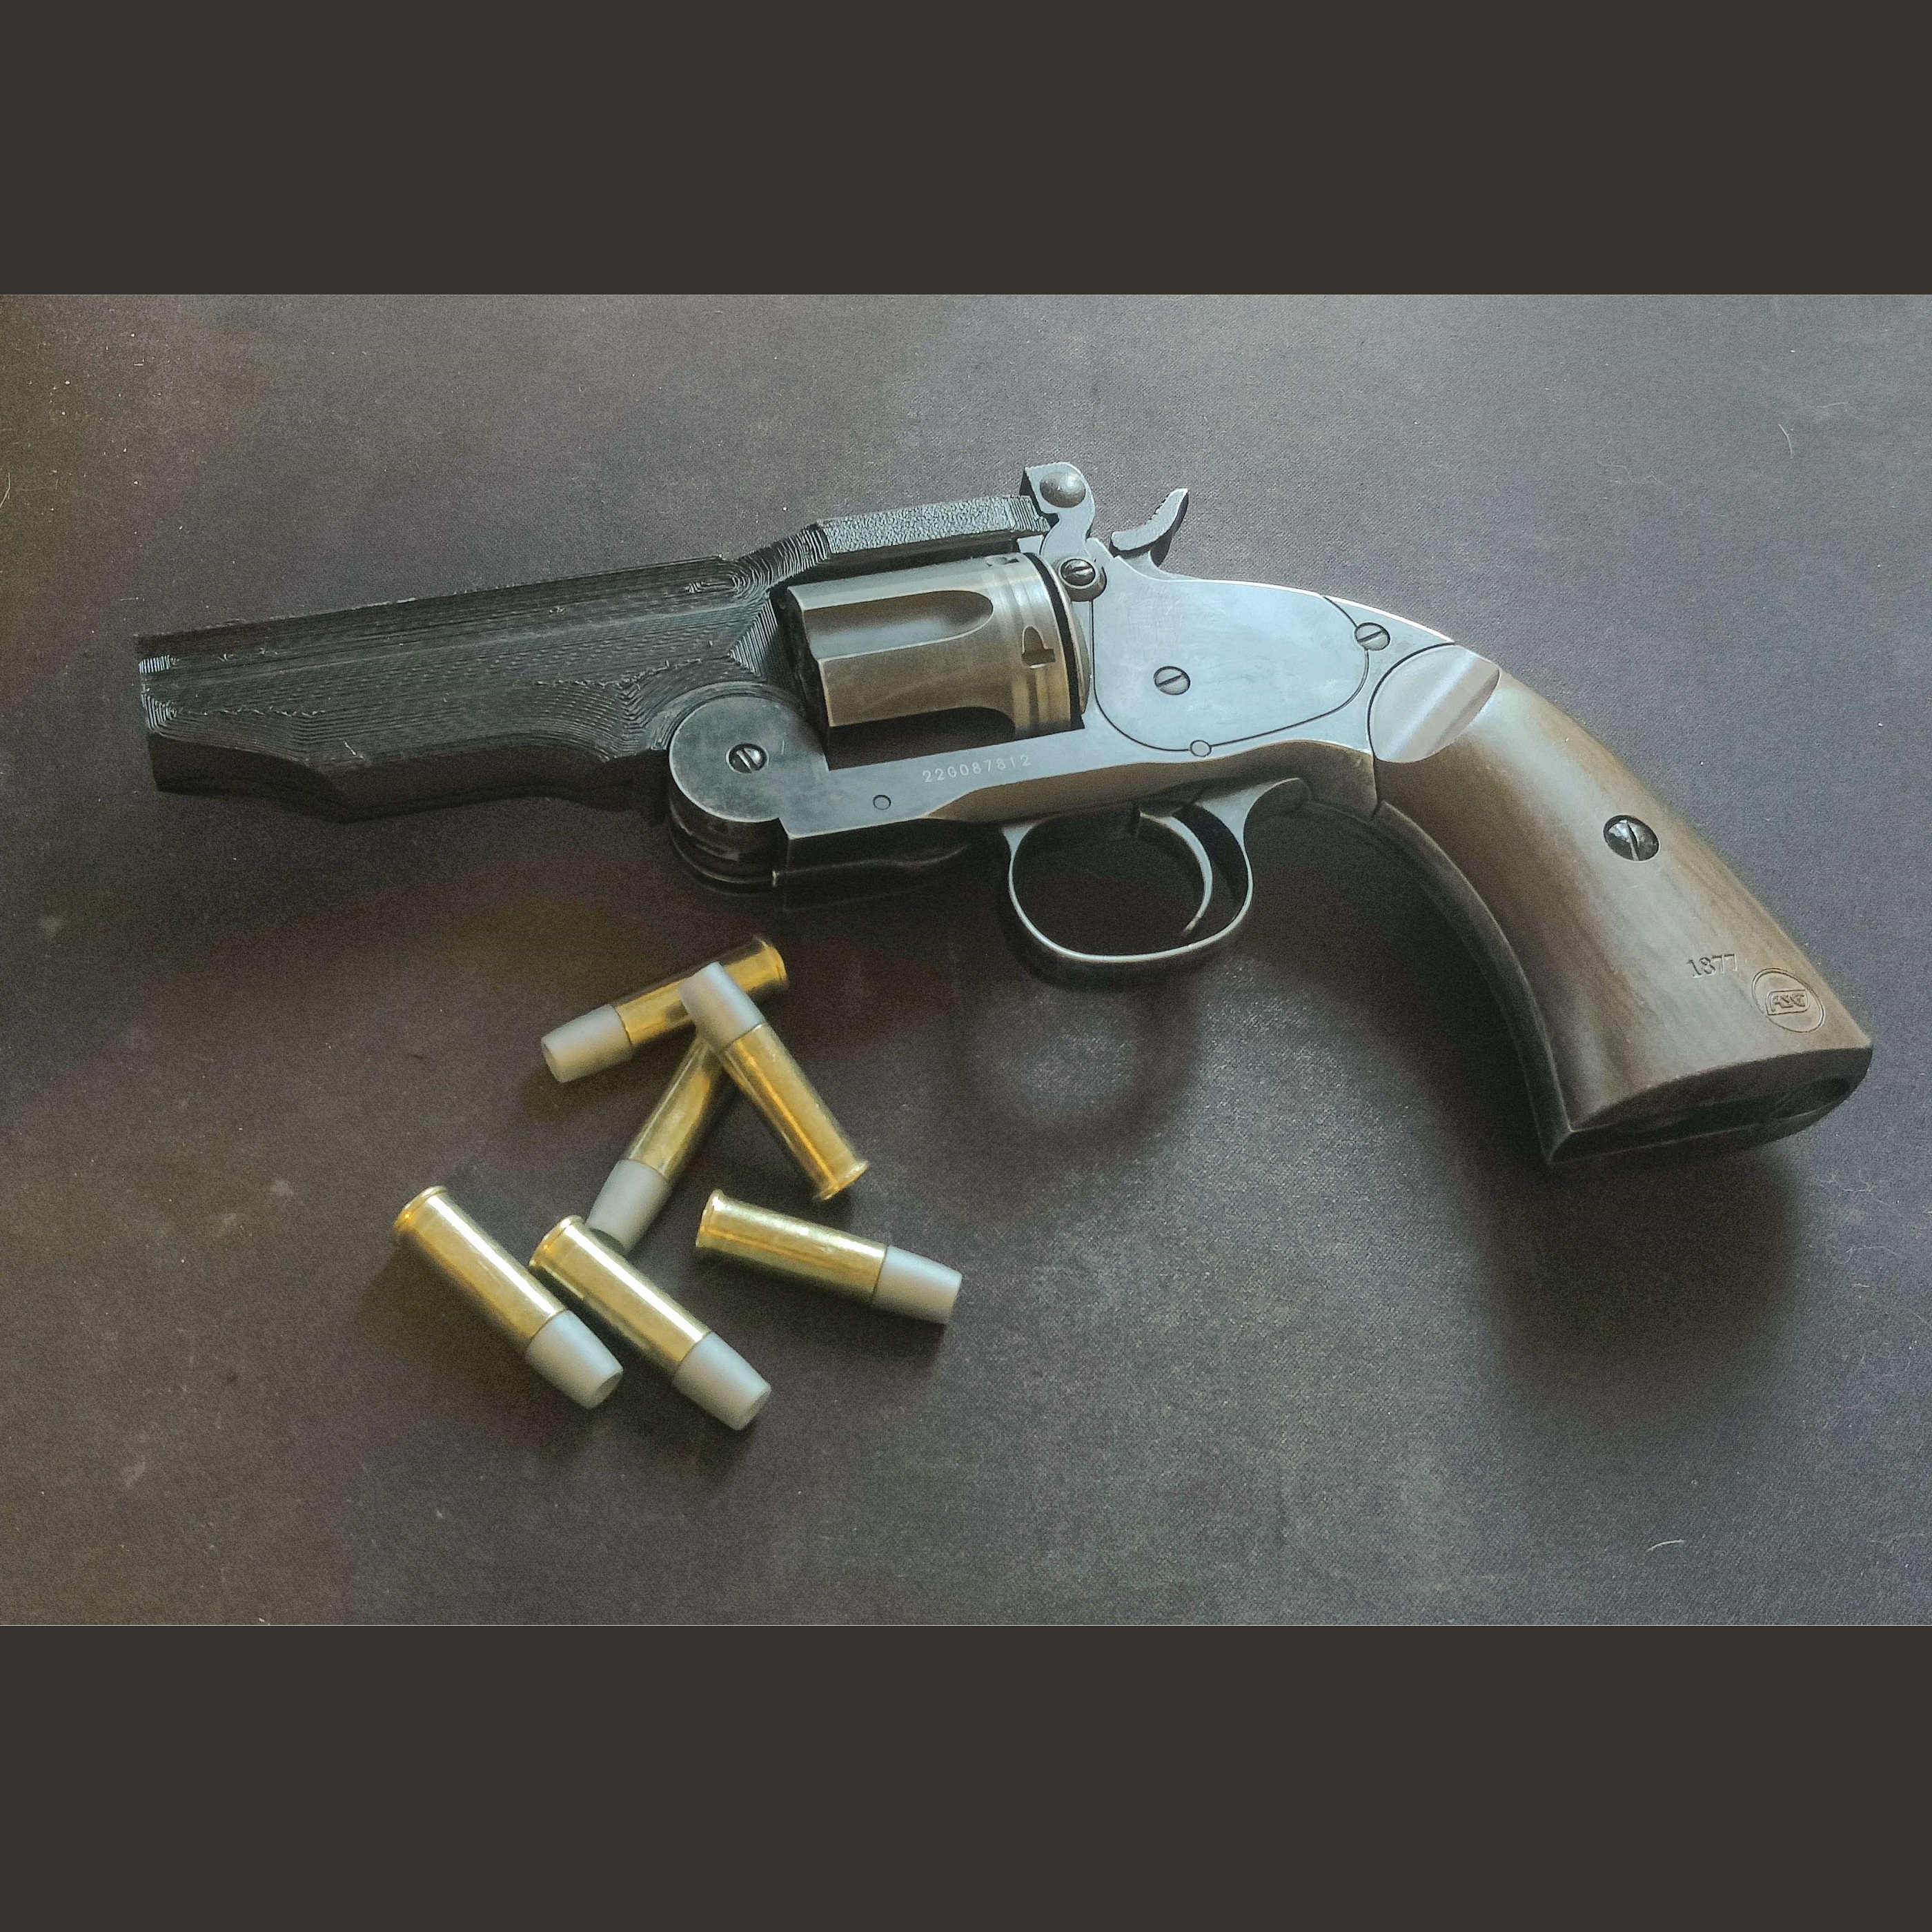
This is a shortened barrel for the ASG Schofield airsoft revolver that retains functionality of automatic shell ejection with an additional fixed hop-up system to increase effective range.
I do not know if this is compatible with the BARRA Schofield.
If you have questions regarding the assembly, please message me.
Parts required:
- Printed files
- 4x 3mm steel roll pins
-Pen spring or 0.5mm piano wire to wind your own spring
- GBB type hop-up rubber
- 78-86mm long GBB type inner barrel
- Thin double-sided mounting tape or glue
- (Optional; as weights) 6x M6 nuts, 6x M5 nuts
Notes for assembly:
The shims may have to be printed with different thickness depending on printer calibration. If you find the shims are too thick/thin during assembly, disable uniform scaling and scale them in the Z-axis in your slicer accordingly, then reprint.
A too thick or thin cylinder shim can cause malfunction of the rotating mechanism (may seize or require manually assisting the cylinder to rotate) Do not force the cylinder to rotate. This will cause premature wear or damage of the cylinder rotating arm.
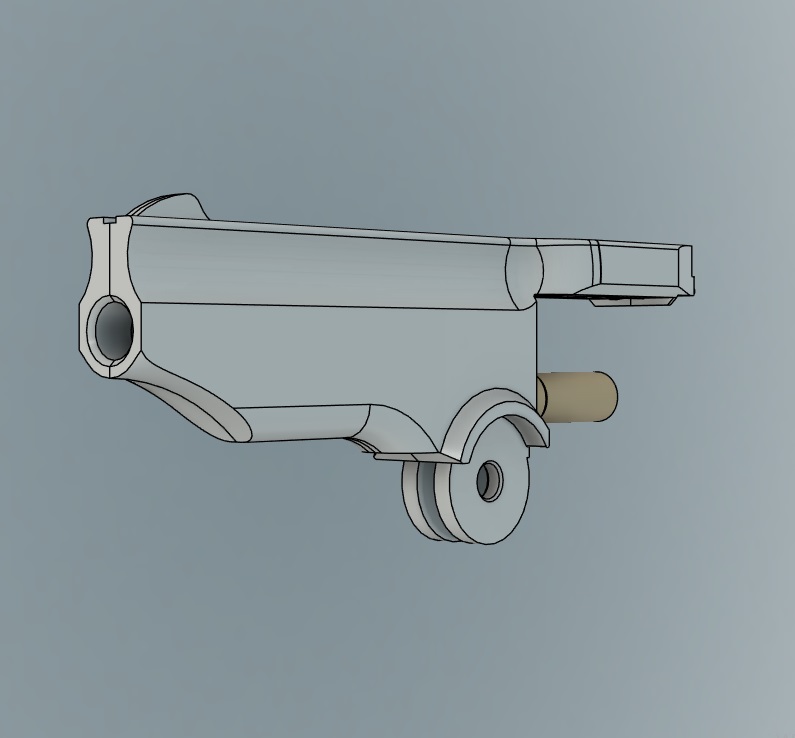
The 2 sides of the barrel are press fit together using roll-pins and a printed dovetail wedge. Though the barrel is resistant to peeling apart, I recommend additionally gluing or taping the barrel halves together to prevent them from splitting due to outside forces.
-The cylinder axle is fixed to the right half of the barrel first with thin double-sided mounting tape or glue. The cutout on the axle is for the shell ejector mechanism and must be facing away from the inner barrel channel, towards the bottom of the barrel assembly. Wrap the thin part of the axle with a couple layers of scotch tape to reinforce the layers and reduce friction. Wrap clockwise to prevent unraveling when the cylinder rotates. Add silicone or ptfe grease to the taped portion.
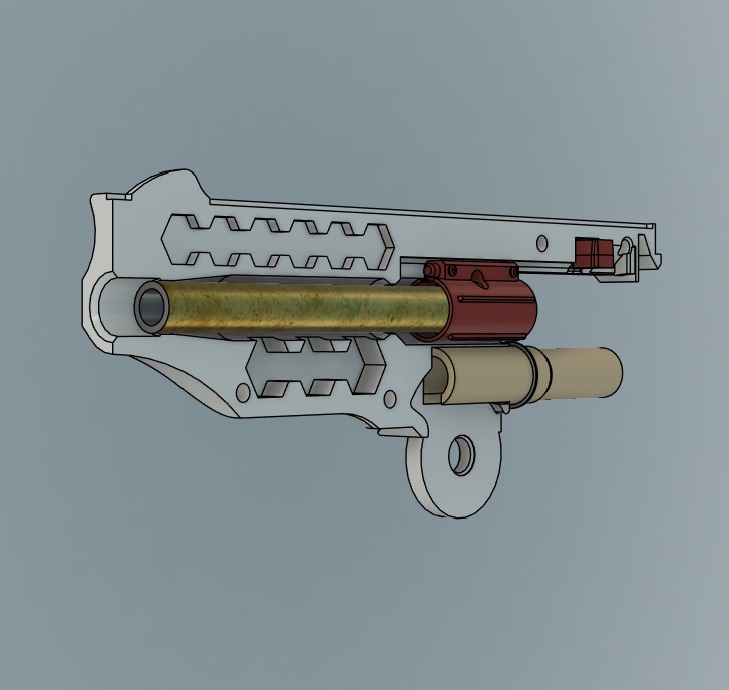
When the axle is attached to the barrel, slide the shell ejector actuator out from the old barrel (big metal circle sandwiched between the barrel attachment plates) and install it in the new barrel.
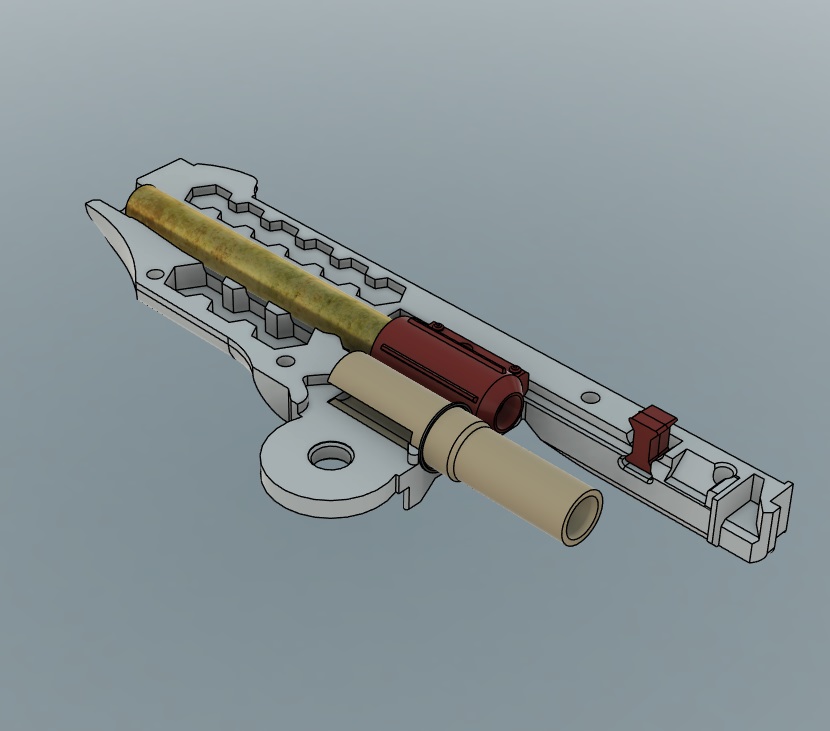
-When assembling the hop-up chamber, insert the hop-up rubber from the wide end by folding it, then shimmying it back using needlenose pliers until you can align the "fin" with the cutout in the chamber. You can use a non-sharp stick to prod the inside of the rubber to fit it correctly.
The inner barrel can then be carefully inserted from the front by rotating back and forth while backing it in. The rubber will stretch allowing the barrel to seat in place.
After the inner barrel is installed, slide the chamber collar thin end first from the front of the barrel inside the hop-up chamber to keep the inner barrel centered. If it doesn't fit, use sidecutters to cut the thin strip of plastic on the collar to allow it to flex.
Slide a rubber hop up nub into the hole in the side of the chamber from the left side of the chamber. It is kept in by friction.
The spring mentioned in the parts list attaches to the nub in front of the hop-up chamber and pushes the chamber back towards the cylinder to create a seal. If the spring doesn't stay on the nub, use a dab of glue or blu-tack to stick it on. The barrel housing keeps the spring secure once it is installed. If the spring is too long, cut it to about 15mm. The hop-up chamber should be pushed out from the back of the barrel about 5mm when the spring is relaxed. It must also be able to be pushed completely inside the barrel.
3D printing settings
Printed in PLA using Voxelab Aquila (Ender 3 clone)
Layer height: 0.15mm. Use 0.10mm for the small parts for accuracy of dimensions and durability.
Recommended wall, top and bottom thickness: 2.4mm/6 layers (To resist hits from opponents' BBs. Using PLA, the surface may deform or crack from the impact of a BB. Select correct plastic to fit your use-case)
Supports: Yes. I recommend a support roof with 33% density for better surface quality. You may require tools to pry the supports off afterwards.
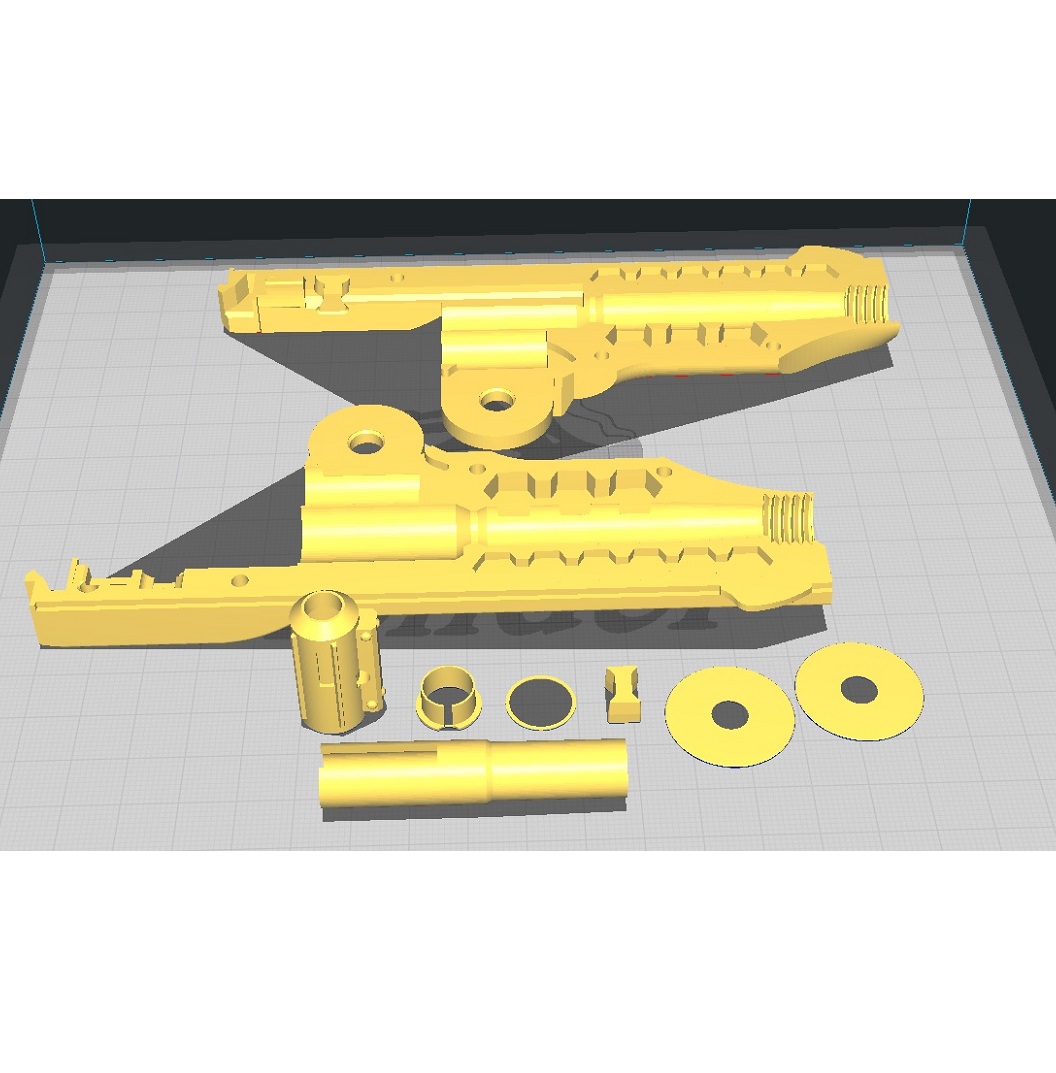
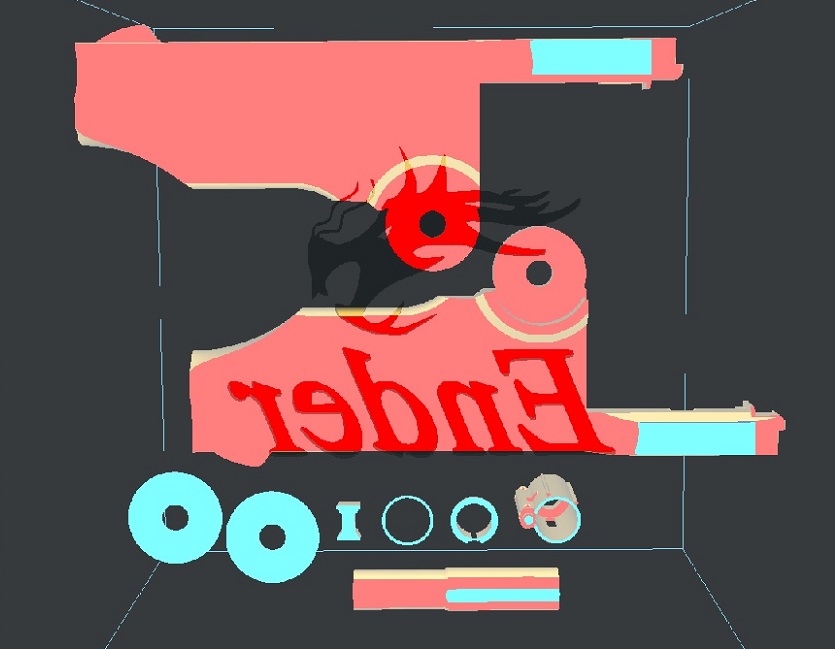
Print orientation: Screenshot of slicer attached with parts oriented correctly. Make sure only the outermost back part of the barrel halves is touching the build plate and it is otherwise only resting on supports.
Infill: 15%
Brim: Yes. Use brim distance to make the brim useful but easy to remove. I used 0.15mm.
:format(webp)/https://fbi.cults3d.com/uploaders/24615759/illustration-file/811567f3-dd18-485d-8f12-e94cc837076b/Schofield-short-barrel.jpg)
/https://preview3d-images.cults3d.com/ukhn15jttr20szjqfwqn100arsv5)
/https://preview3d-images.cults3d.com/qkhlnpae9ovdyykao6iv1hmmpdk1)
/https://preview3d-images.cults3d.com/jsymagjca9o02udglfnpb9npqc6z)
/https://preview3d-images.cults3d.com/dng5la8jmyhegupyhvi2qoymljyg)
/https://preview3d-images.cults3d.com/xhx9lz9urwrvuqdajm3fa66z7ltr)
/https://preview3d-images.cults3d.com/j9zephcvsgs2b3bu75tighnrujbf)
/https://preview3d-images.cults3d.com/5wqgc7ilnw0zgqh2qcxw7r79toyo)
/https://preview3d-images.cults3d.com/9wacdcftr4ynks3zi7ix6veyap9t)
/https://preview3d-images.cults3d.com/4530rzswoz2gqntx0syioyp5xzsn)
/https://preview3d-images.cults3d.com/xqxqccw4jsikb4tp1njyq9a1v0ai)
/https://preview3d-images.cults3d.com/mdoecodwppgh3iswitvxdxokmidy)
/https://preview3d-images.cults3d.com/30fdo0uy88v8r5elhfb977pyzyvh)
/https://preview3d-images.cults3d.com/4i48wierqkz0ox5sy599oc9dwt8d)
/https://preview3d-images.cults3d.com/j31iyintmm38c2to0f51bo6c25nu)
/https://preview3d-images.cults3d.com/m24jfuyft452ng08zl4yffdqyttt)
/https://preview3d-images.cults3d.com/x6vlmyl805347l7rd1789atfniv0)