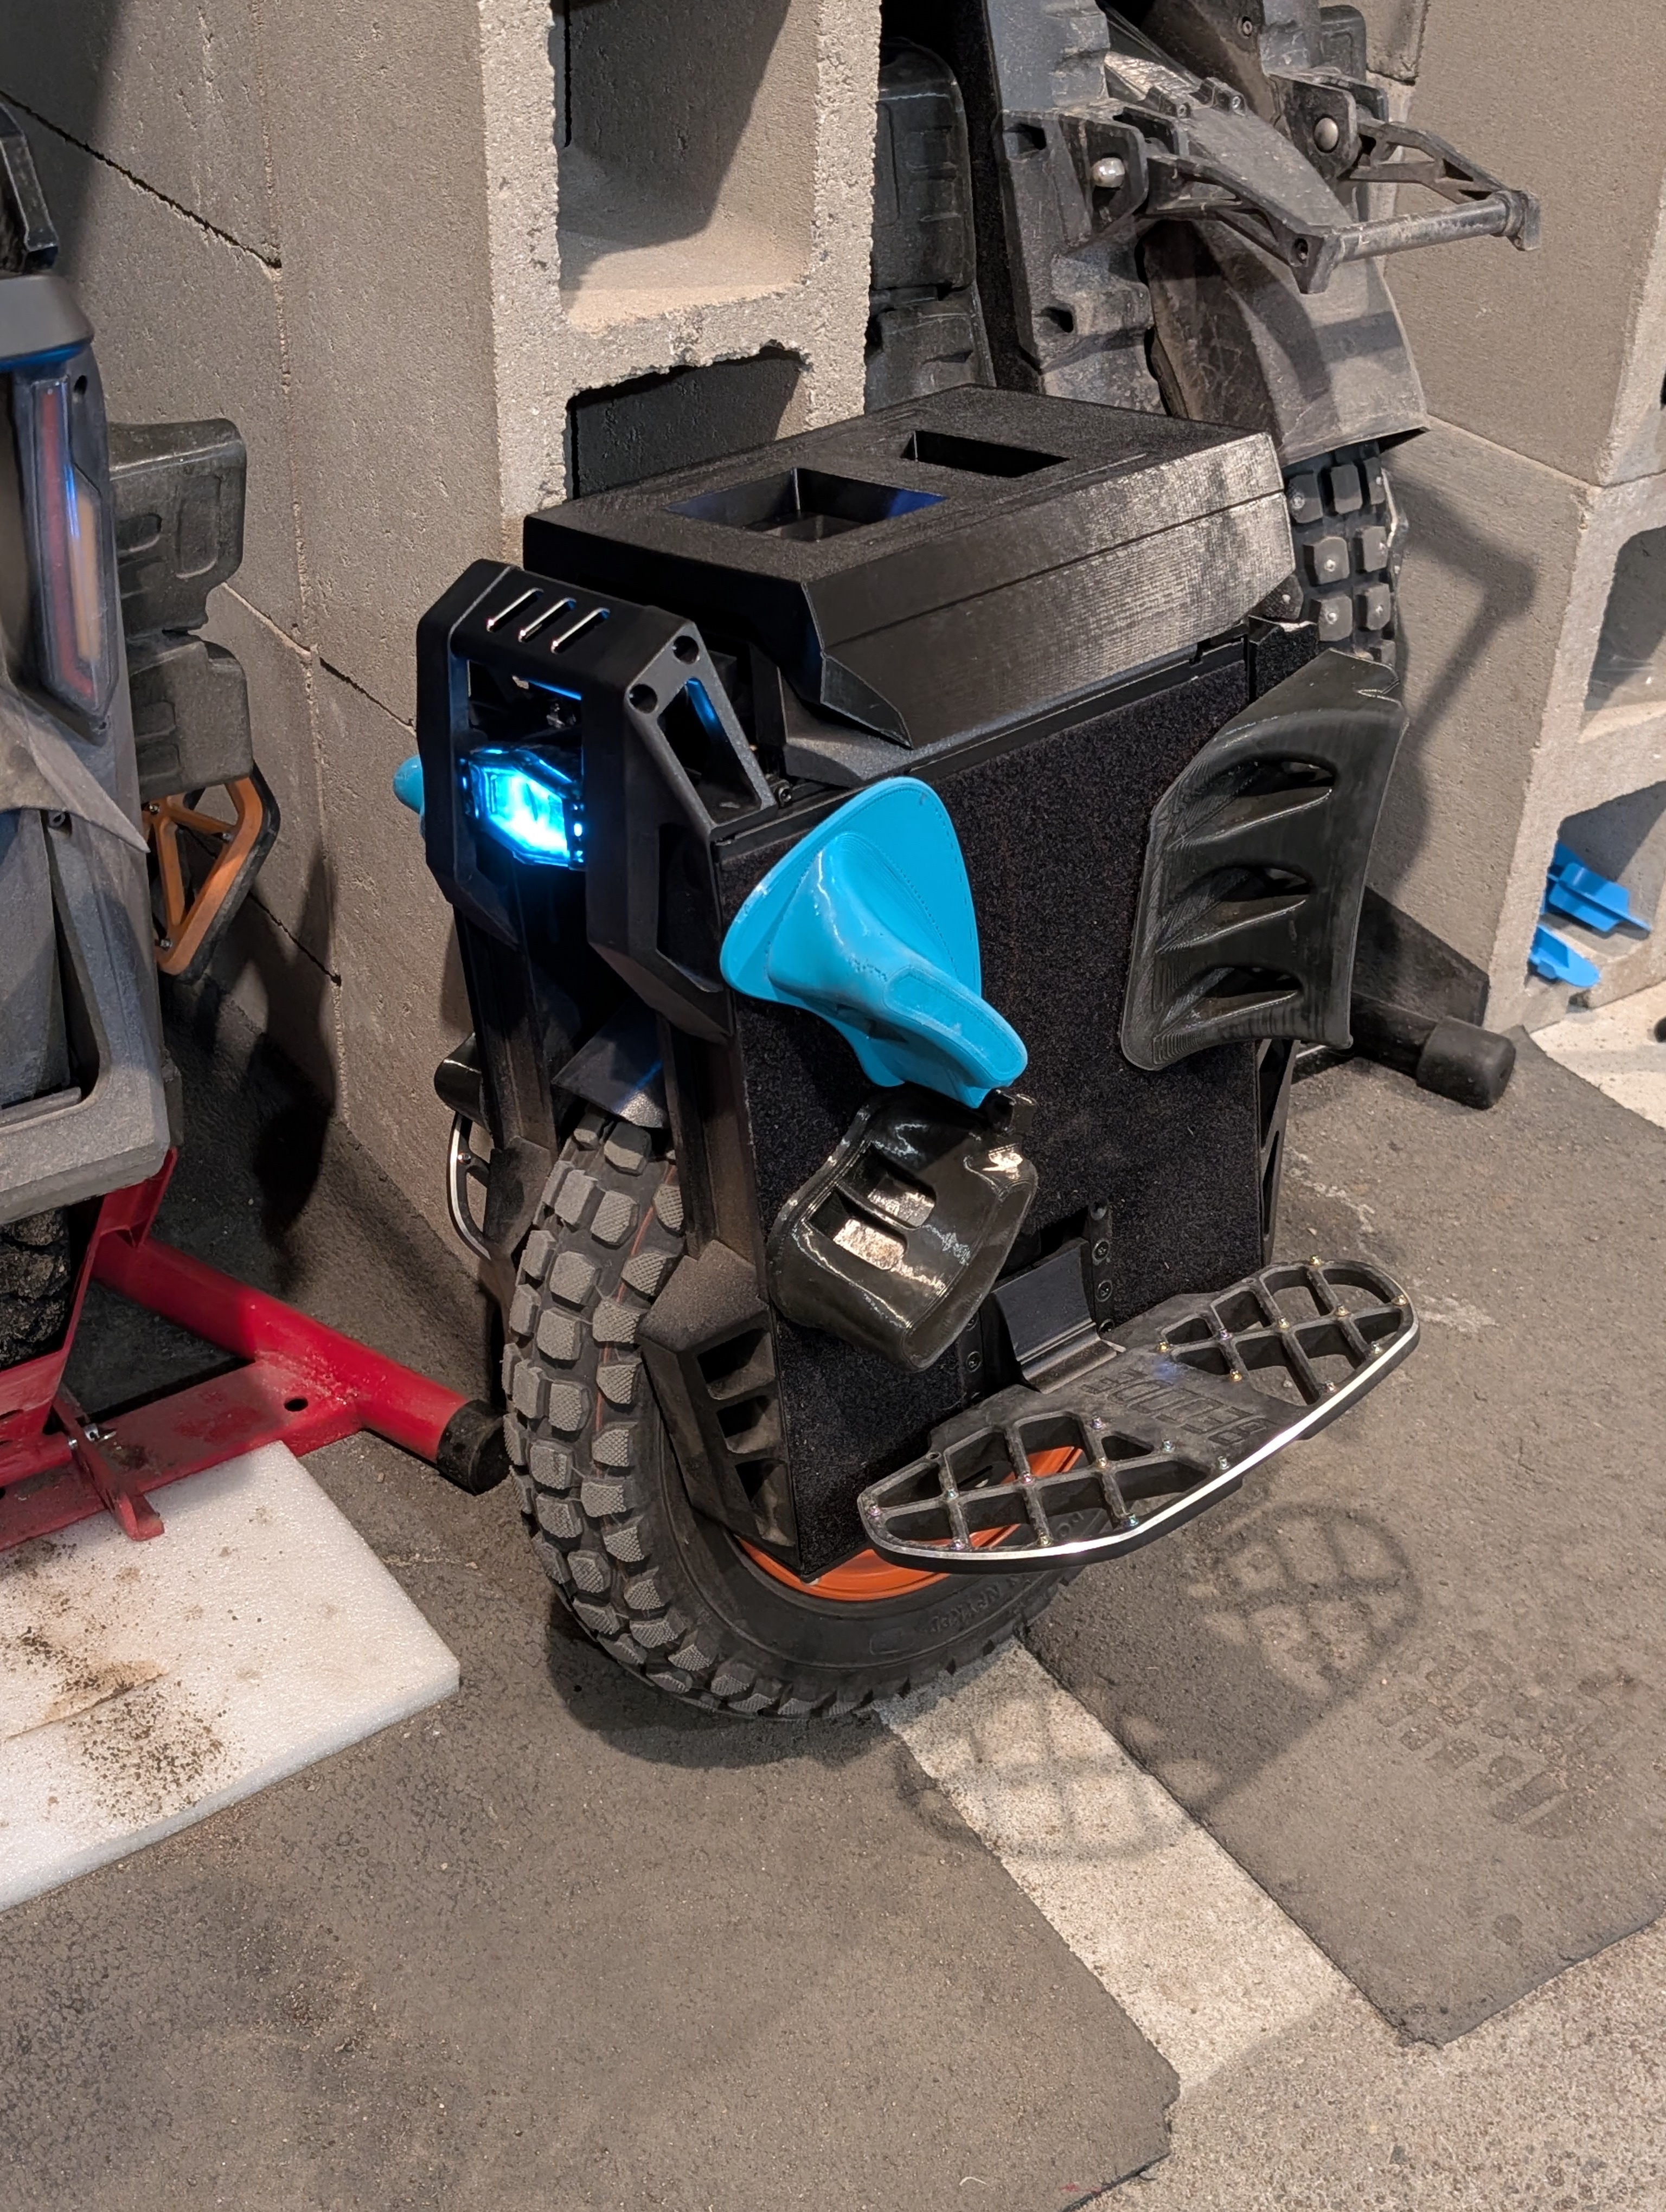
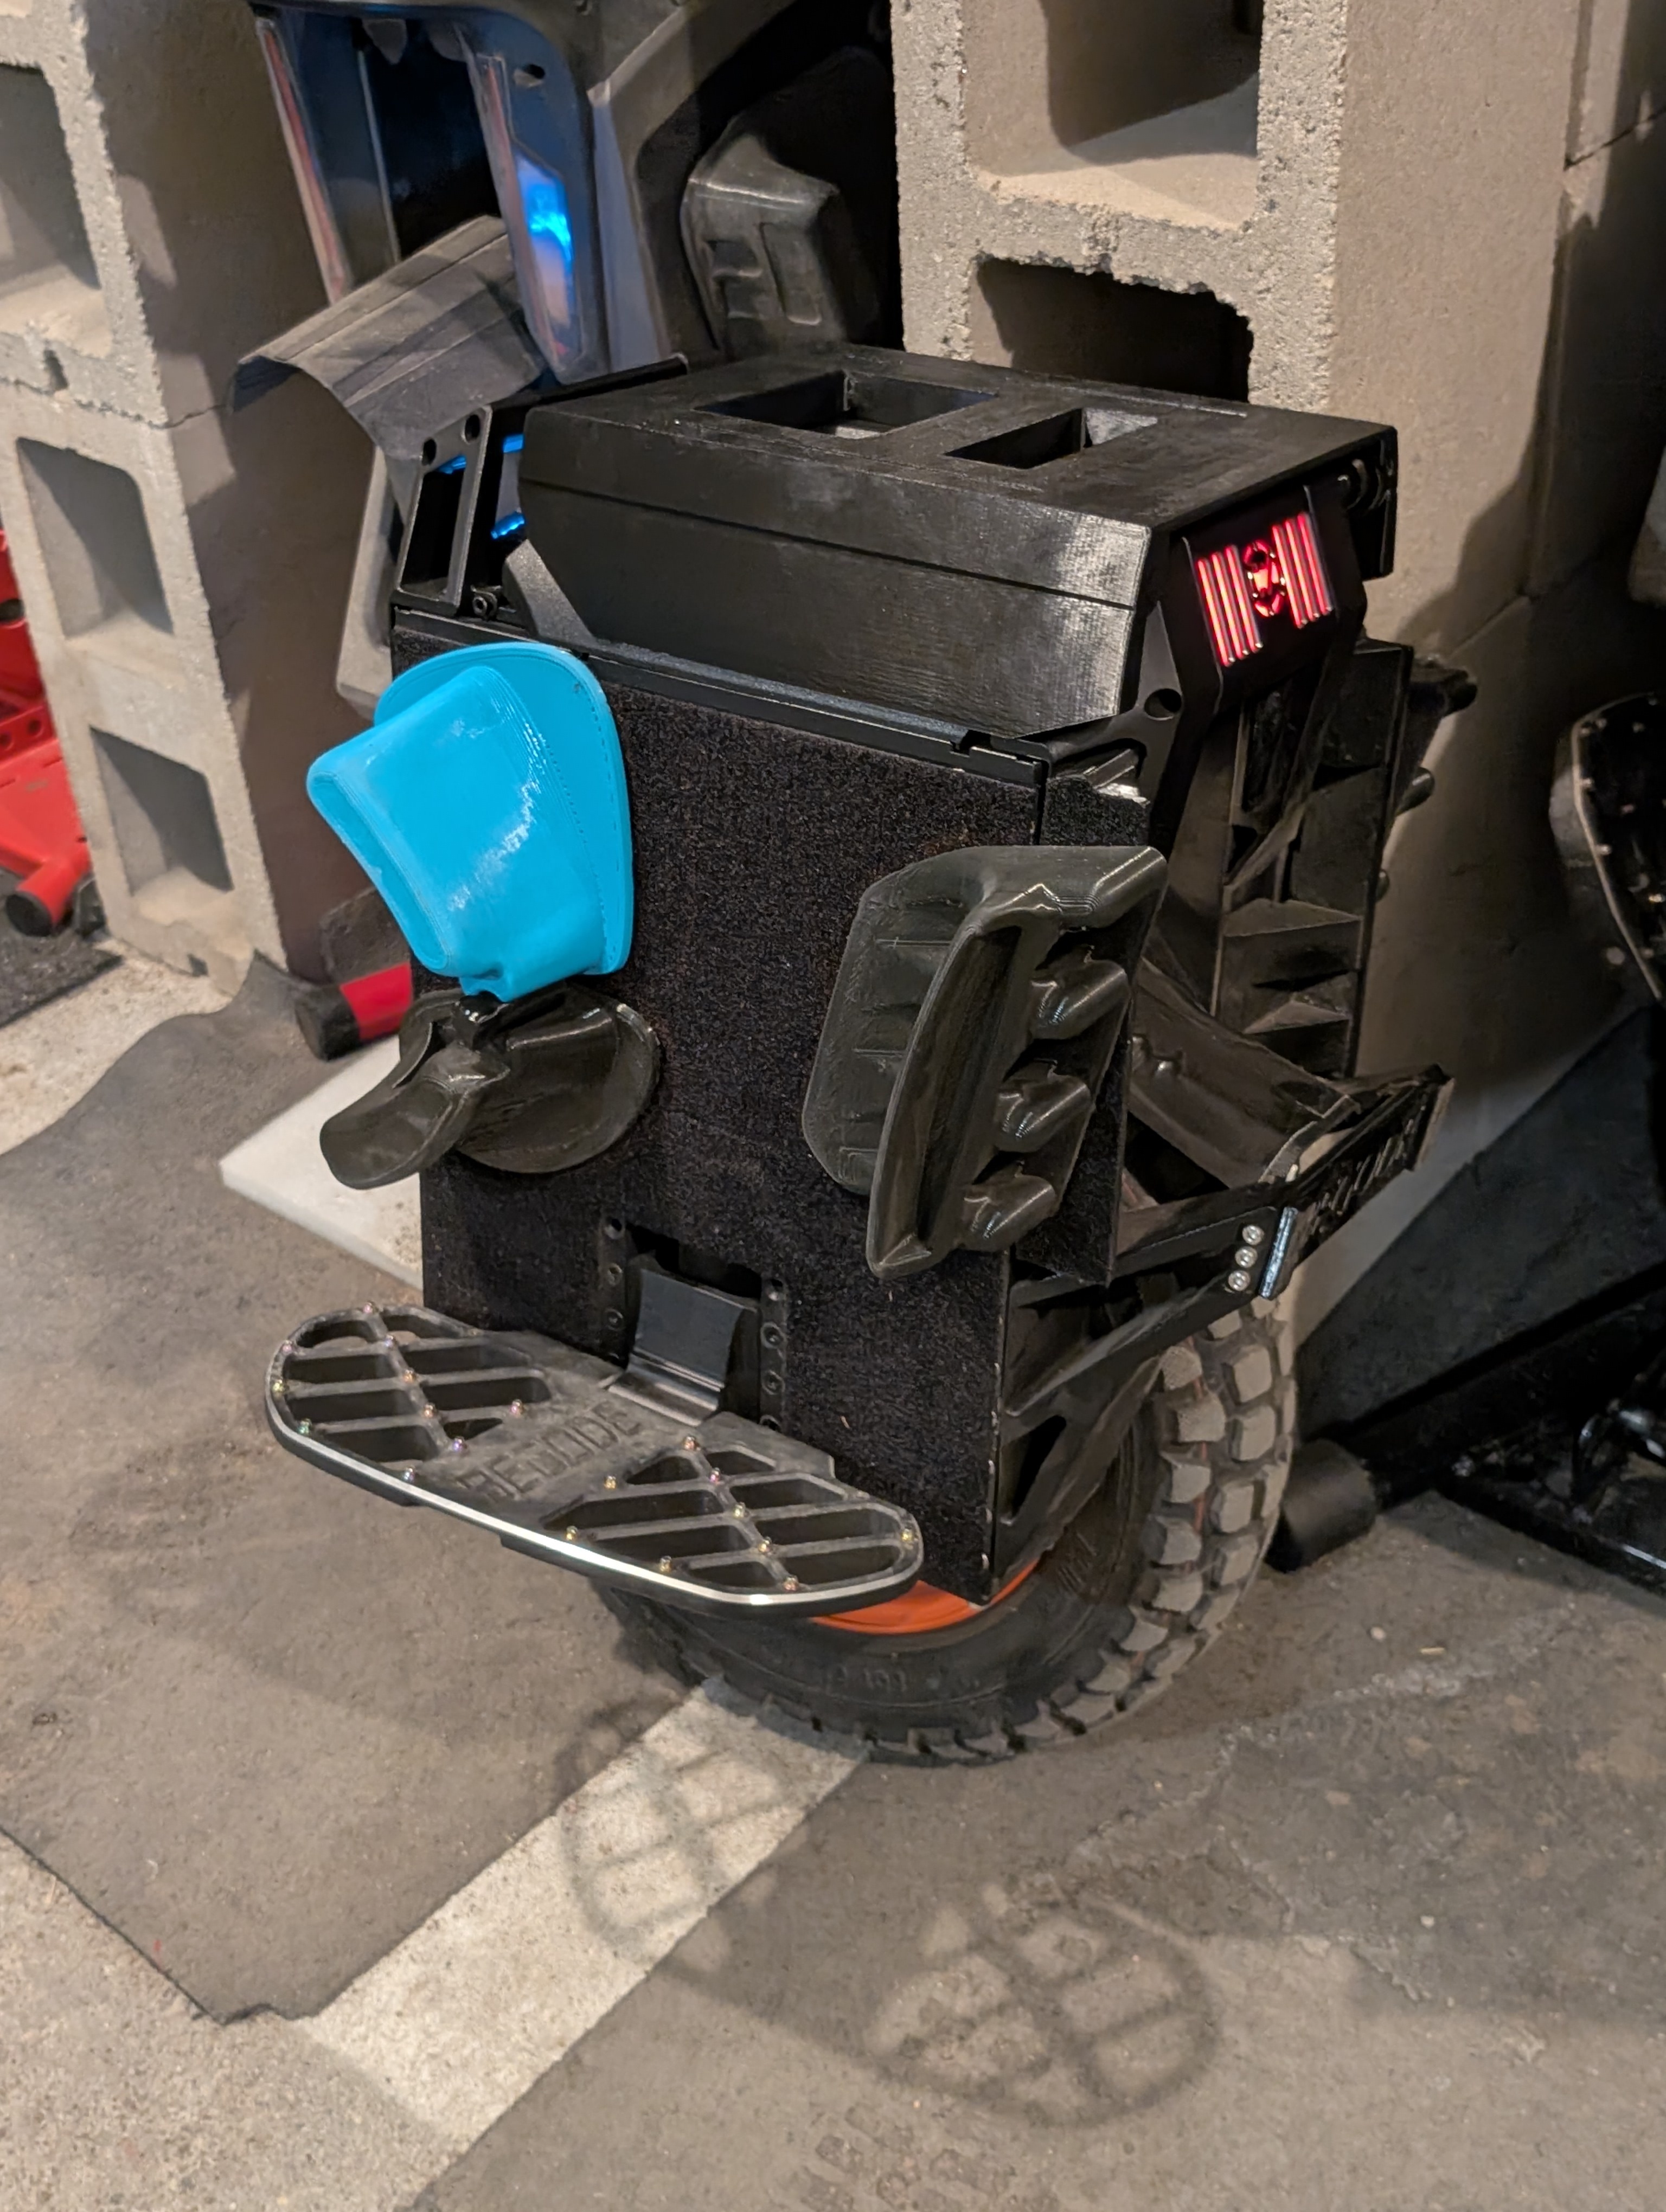
I set out to make a longer handle, and shin pads separately. After a good deal of thought around how to maximize the height of the handle, yet make it printable on a standard 256 cubed build-plate, I decided that combining the shin pads with the handle was the best option. This handle adds roughly 4" (10cm) over the stock trolley. This print also makes for a usable seat, or seat base for the future seat print (incoming), and extra crash protection (or for those who like to throw it off their CyberTruck at demo days...Lem😁).
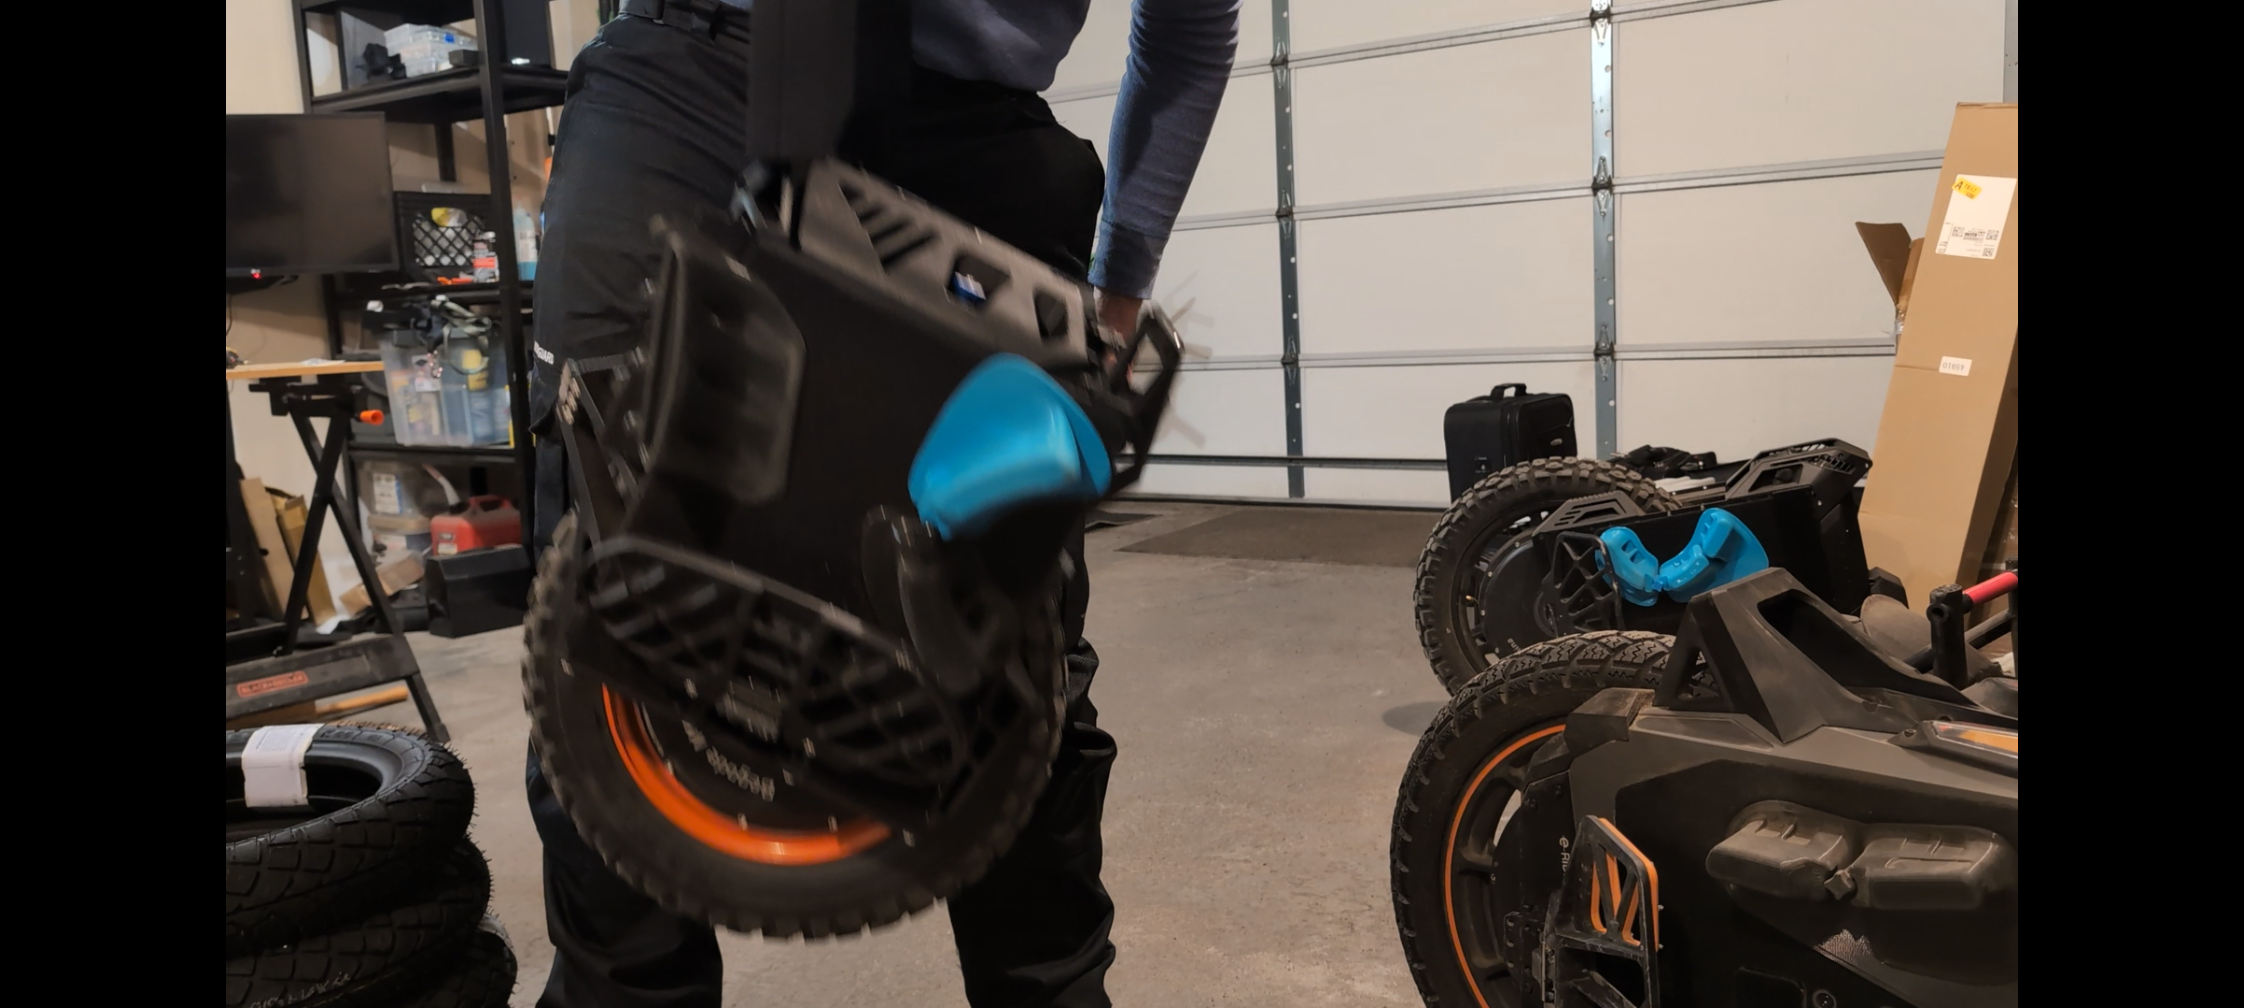
While the handle/pad/seat is a single (day long) TPU print, the 2 knobs are a quick PLA print and what makes this handle possible. The knobs MUST be printed at an angle to give them maximum strength. Done this way, the wheel can be picked up by the trolley handle (see pic), and will not break with normal use. And if you try to re-orient the main handle print vertically, then expect that the layer lines will shred your pants or kneepad straps (or skin) over time. Print everything as originally oriented in the files, and turn off all supports. Yay!
There are 2 different height prints to choose from, 73mm and 78mm. I went with the 73mm personally, as the seat will come later, but some may want more height on their shin pads with the 78mm print.
Print Settings:
-I use a .6 nozzle, so increase walls/infill/tops/bottoms if using a .4.
Knobs
-Use any hard material. I used HTPLA, but standard PLA is fine to use here.
-Set seam position to Random, and turn off all Scarf settings. I recommend changing the Print sequence to "By object", or just print one Knob at a time.
-3 walls, 3 tops, 3 bottoms, 18% Cubic infill.
-If you use or look at the 3mf file, you'll notice that I used PETG for the Raft Interface. If you have an AMS and some PETG, then I suggest trying this mix (not necessary, but no post processing).
-If you print this as originally oriented in the file, then you can TURN OFF SUPPORTS. Yay!
-Once printed, verify a snug fitment of both Knobs in the topmost bolt holes of the FP's rear carry handle. If they aren't perfectly snug, then scale the x/y up slightly.
Handle/Shin Pad/Seat
-I recommend 98a TPU (or 72d) for this application, as you need it to be flexible to stretch over the Knobs at install, and it will hold up better on impact over hard materials like PLA. You can use normal 95a TPU, but I recommend you bump up the walls and infill if you do.
-Set Seam position back to "Aligned" and reactivate the Scarf settings if they were changed previously.
-Again with a .6 nozzle, I used 3 walls/3 tops/4 bottoms and 14% Cubic infill. Increase these a bit if using a .4 nozzle. With this 24 hour long print, it's better to error on the side of having more stiffness than not enough.
-If you print this as originally oriented in the file, then you can TURN OFF SUPPORTS. Yay!
Installation
-Peel off existing stock side shin pads at the top of the wheel, including the Velcro strips leftover. Doesn't hurt to leave any of the sticky residue left over, but clean it off if you want.
-With the Knobs installed, rotate them so the 45 degree cutaways of both are facing upwards.
-At the rear of the Handle/Shin Pad/Seat, stretch one side over one of the Knobs and push HARD until fully the Knob seated in its receiving "hole", then flex the rear to slip the other side onto the opposing Knob.
-Once both sides are on, press inward HARD on both sides of the rear shin pad area.
-There's a place to put Velcro on the underside. I recommend that the loop (soft) side be placed against the print, and the hook (hard) side on the wheel, this way it won't tear at your glove when trolleying.
Enjoy!
-TimTim
:format(webp)/https://fbi.cults3d.com/uploaders/27026480/illustration-file/0556548f-770a-4f1b-b7ca-2d13052535af/PXL_20260412_194155560.jpg)
/https://preview3d-images.cults3d.com/qwix3ajdp70ovtkvngn1mimvtovz)
/https://preview3d-images.cults3d.com/mp5hvbhwhofs7z65iejmvrw570u3)
/https://preview3d-images.cults3d.com/i5qel7fjq27mopaoe528iq45supx)

/https://preview3d-images.cults3d.com/ofzirt1mop8xks5zrxrcjqxojoqv)
/https://preview3d-images.cults3d.com/a1azhlpr2pjqbw0ya628h05n21uu)
/https://preview3d-images.cults3d.com/uuu6rx0s2yy044l8p3jg19clfqva)


:format(webp)/https://fbi.cults3d.com/uploaders/27026480/illustration-file/c1206355-5cd7-4549-889a-d1de9d418ce6/Screenshot_2026-02-03_124416.png)
:format(webp)/https://fbi.cults3d.com/uploaders/27026480/illustration-file/0c419578-413e-4f9c-a049-d1ac7fd83b57/PXL_20250428_212027706.jpg)
:format(webp)/https://fbi.cults3d.com/uploaders/27026480/illustration-file/d96ff2f2-820b-4319-ae5c-b2edcf14cb44/PXL_20260121_130657736.jpg)
:format(webp)/https://fbi.cults3d.com/uploaders/27026480/illustration-file/a5fe7705-ac0d-4989-820e-f61c371ae49f/PXL_20250803_144621465.jpg)
:format(webp)/https://fbi.cults3d.com/uploaders/27026480/illustration-file/80cc074d-0664-42c8-98f0-2293823c4521/PXL_20250803_144627938.jpg)
:format(webp)/https://fbi.cults3d.com/uploaders/27026480/illustration-file/7335cb90-edd4-48fc-9a73-42a2578590a2/PXL_20250717_111526203.jpg)
:format(webp)/https://fbi.cults3d.com/uploaders/27026480/illustration-file/82661537-a635-4bff-9ec6-902624fc0d4a/PXL_20260209_160607533.jpg)
:format(webp)/https://fbi.cults3d.com/uploaders/27026480/illustration-file/63521737-2802-4ae2-a9d6-db5727f9a989/PXL_20260225_232653205.jpg)