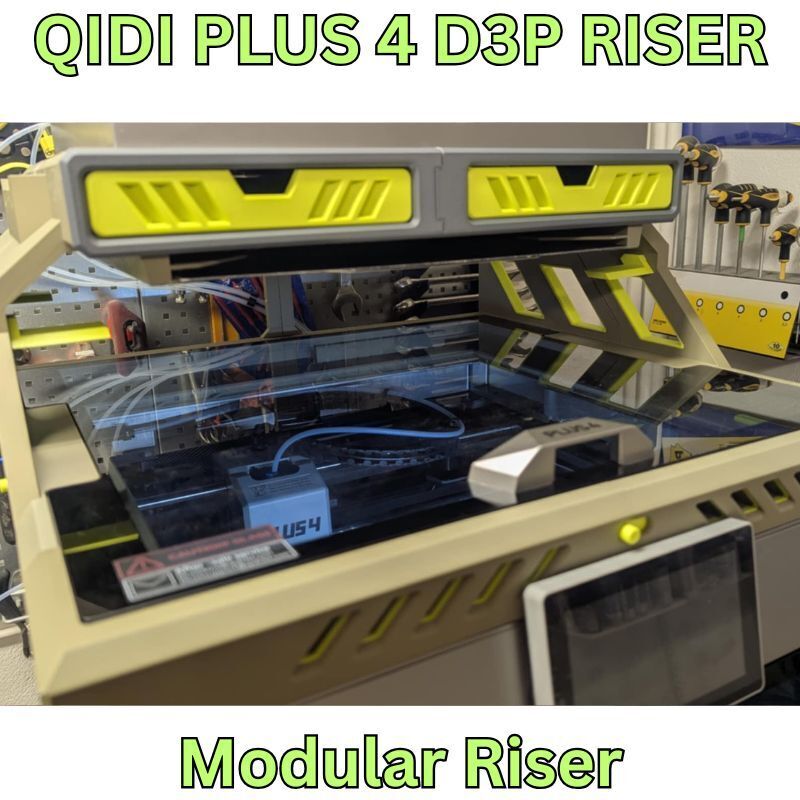
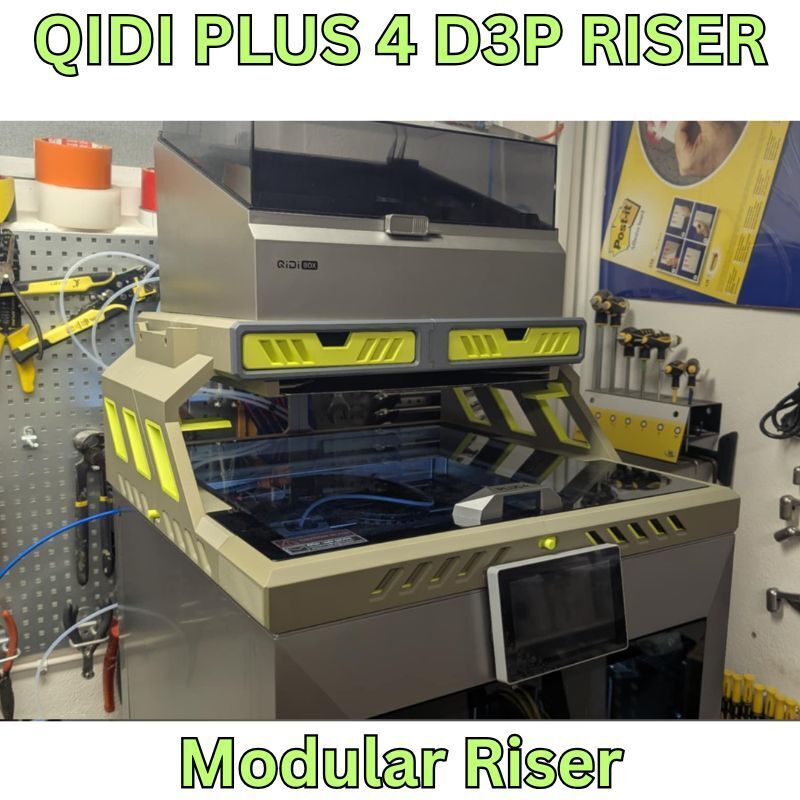
D3P RISER FOR THE QIDI Plus 4 by Darren 3d Print
2025-11-7 Revised the connector so it can be printed on the side for added strength (plate 13). Revised the front, left and right vent inserts by decreasing the opening to remove the slight slit on the edge (plates 11, 12 and 13). Uploaded a new STL zip and 3mf print setting. These parts are optional if you already printed them. If you are in the process of printing then you can print the revised parts.
2025-10-30 Revised the following parts of the design and uploaded revised print settings (3mf), STL zip and instructions:
1. Added tabs to the front lid supports to avoid issues with the lid slipping off (new ones are available on plate 12 -)
2. Revised rear right to increase the size of the Qidi USB box cutout
3. Revised rear right and middle right to adjust lid holder position by approx 2mm.
If you are printing now you will want the new front lid supports. If you printed the rear right or middle right I would not reprint unless having the additional space for the rear USB cutout is a must then reprint the rear right. If having the lid holders at the exact same height is also a must (vs 1.5-2mm difference) then also reprint the middle right.
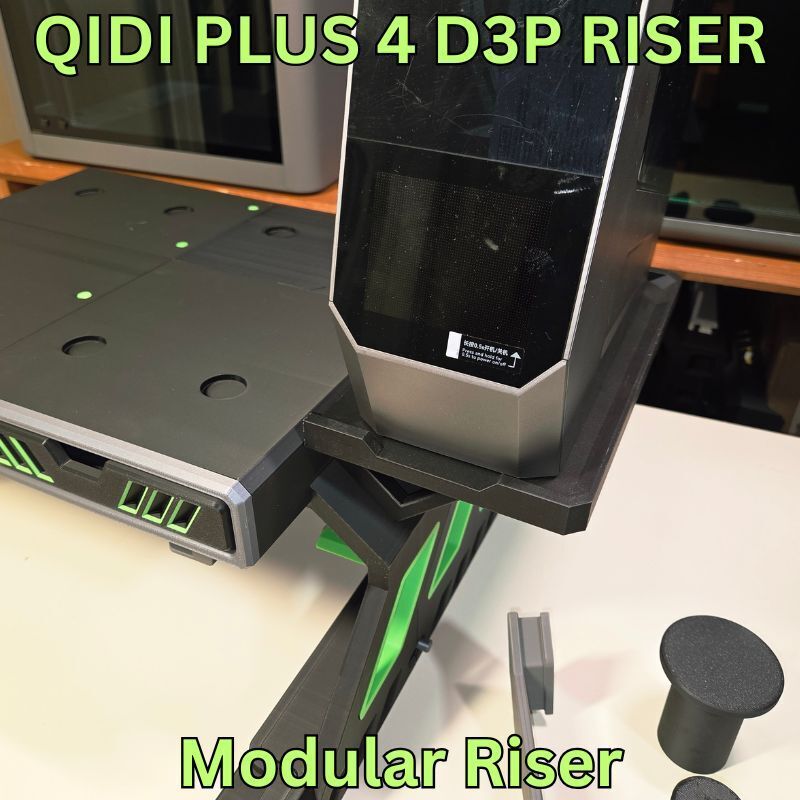
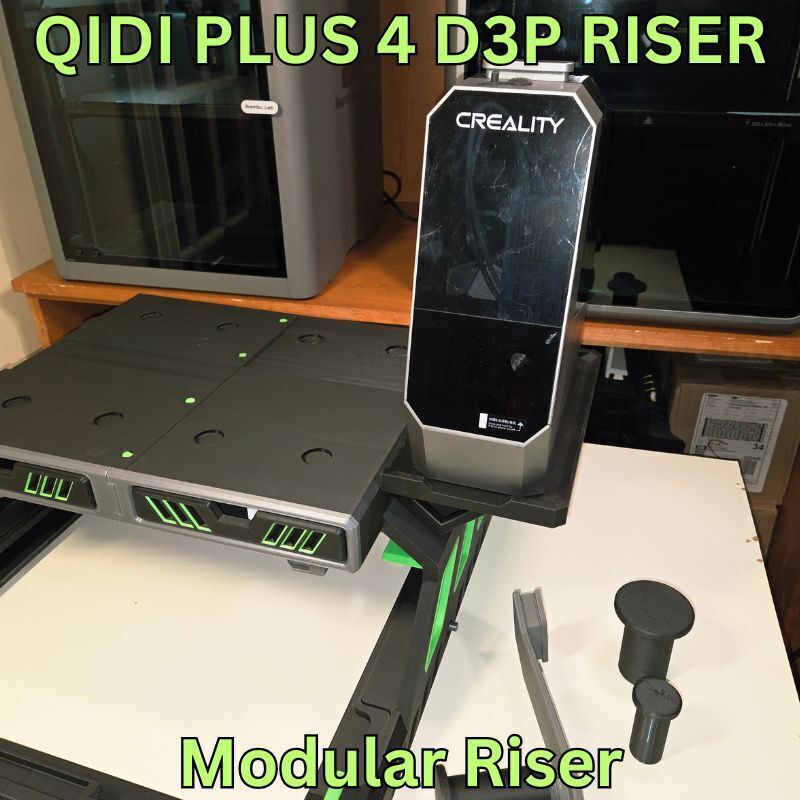
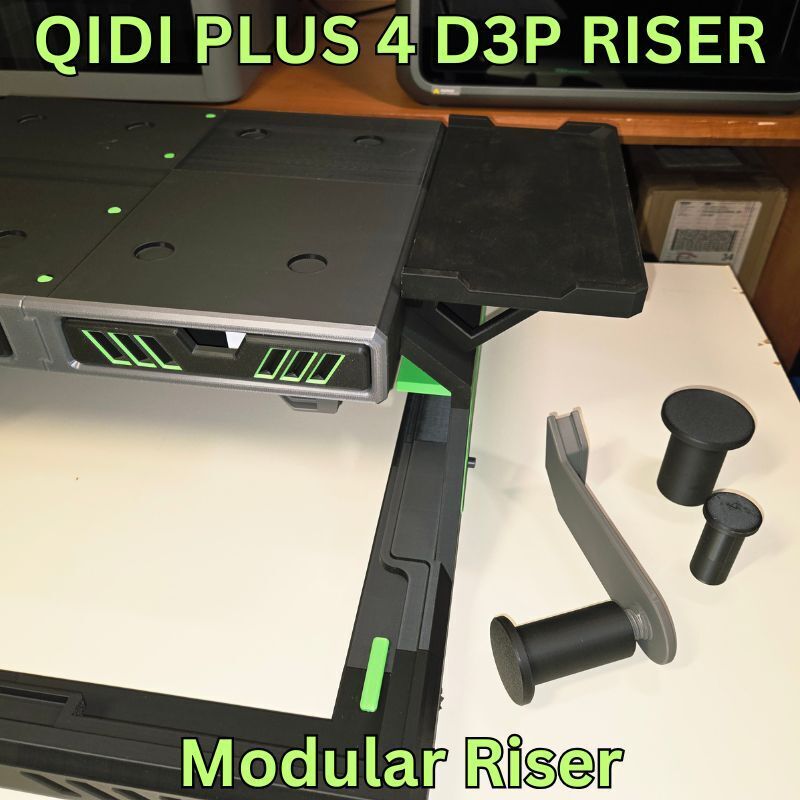
2025-10-26 Added two new addons - A top mount TPU holder and a Side mount build plate holder
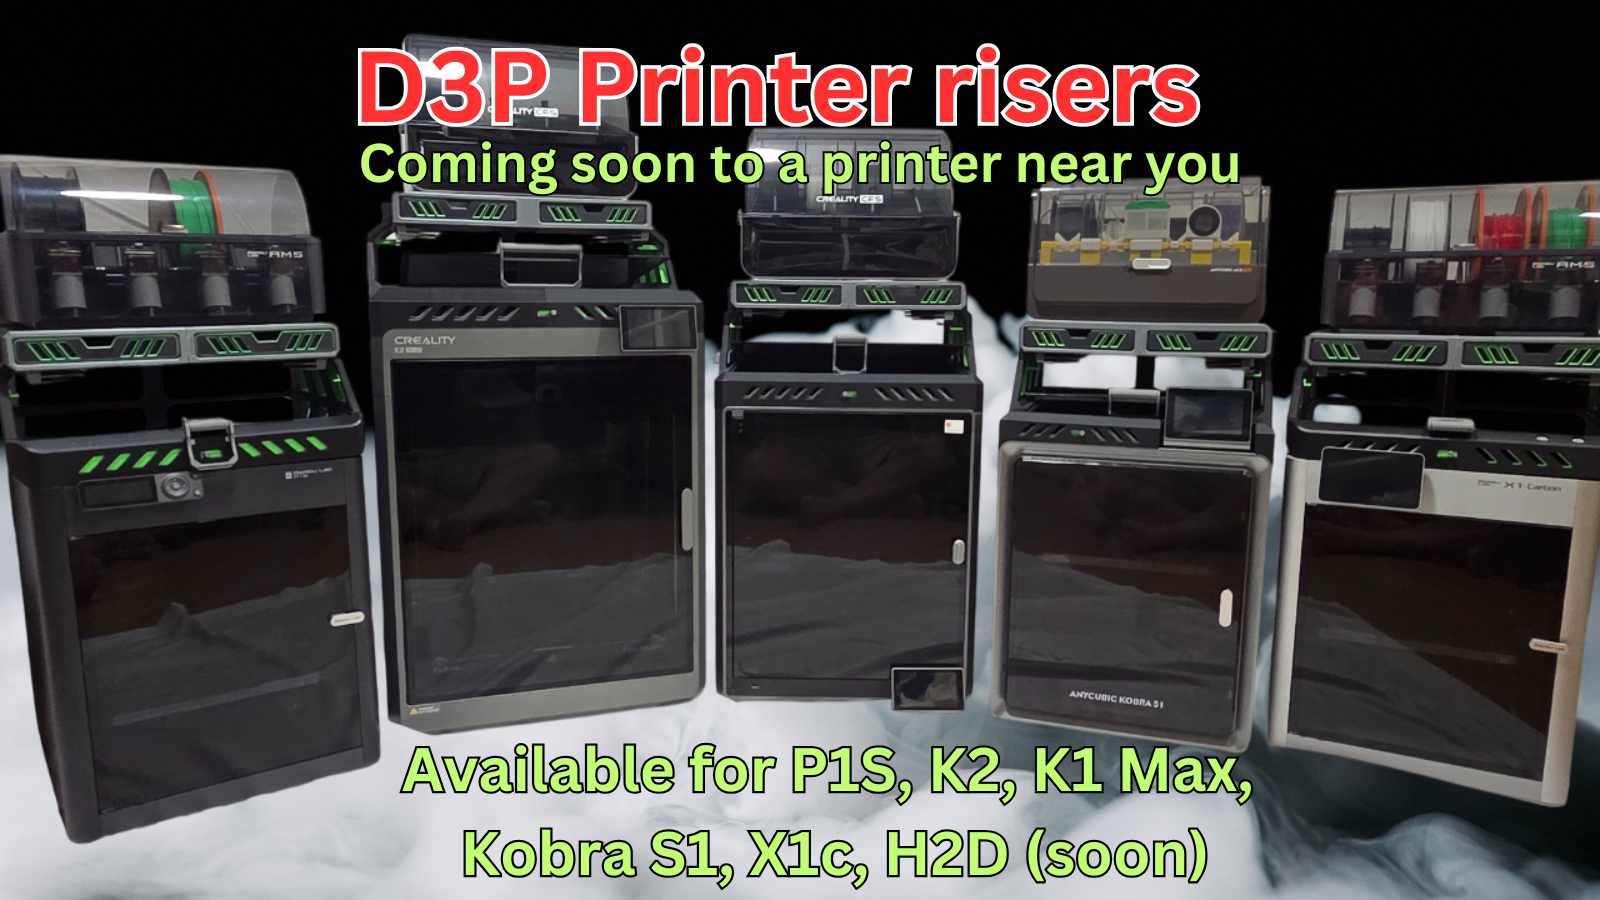
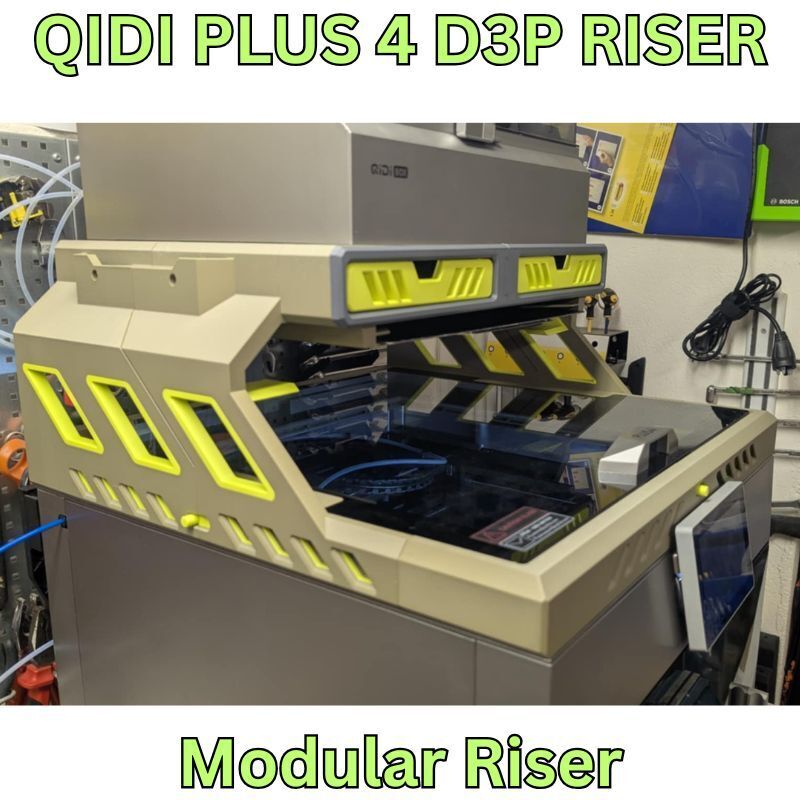
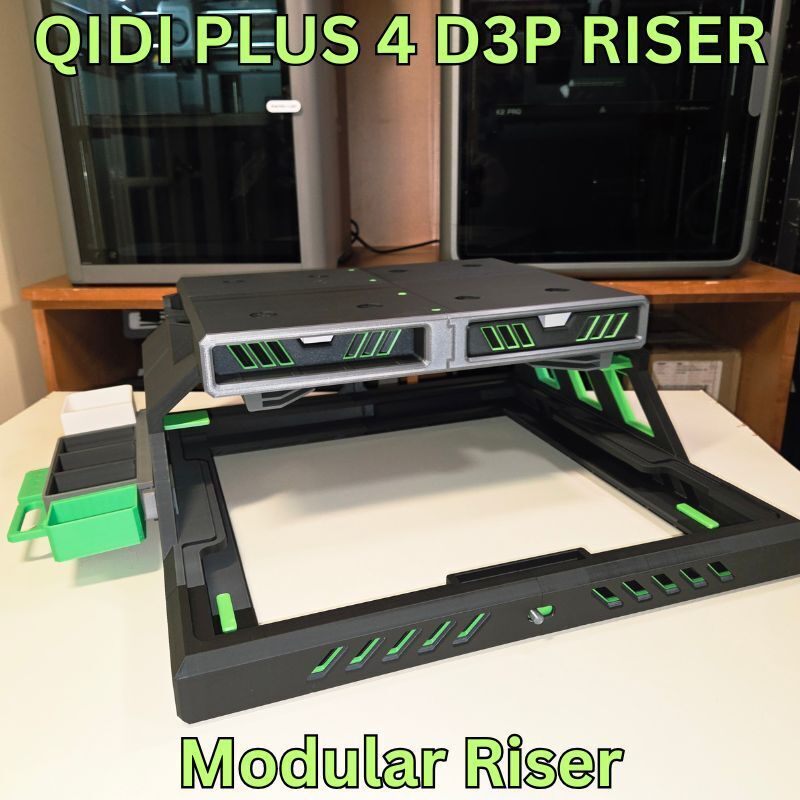
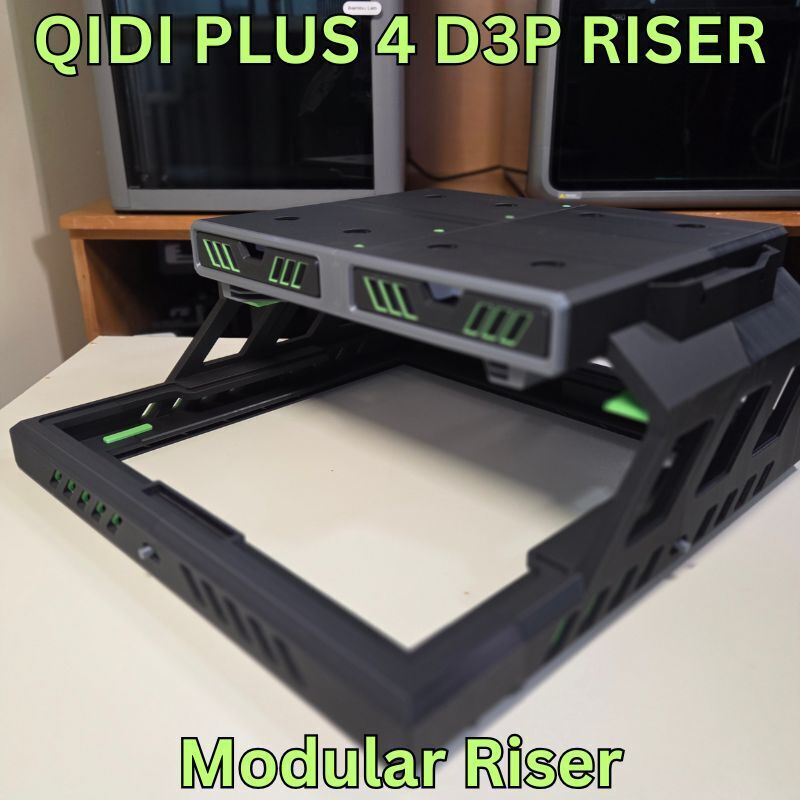
The D3P riser system is an innovative and modular riser system for your 3d printer. It features numerous free to download add-ons allowing you to customize your printer and riser like you want. The design of the D3P riser system is patent pending.
FEATURES
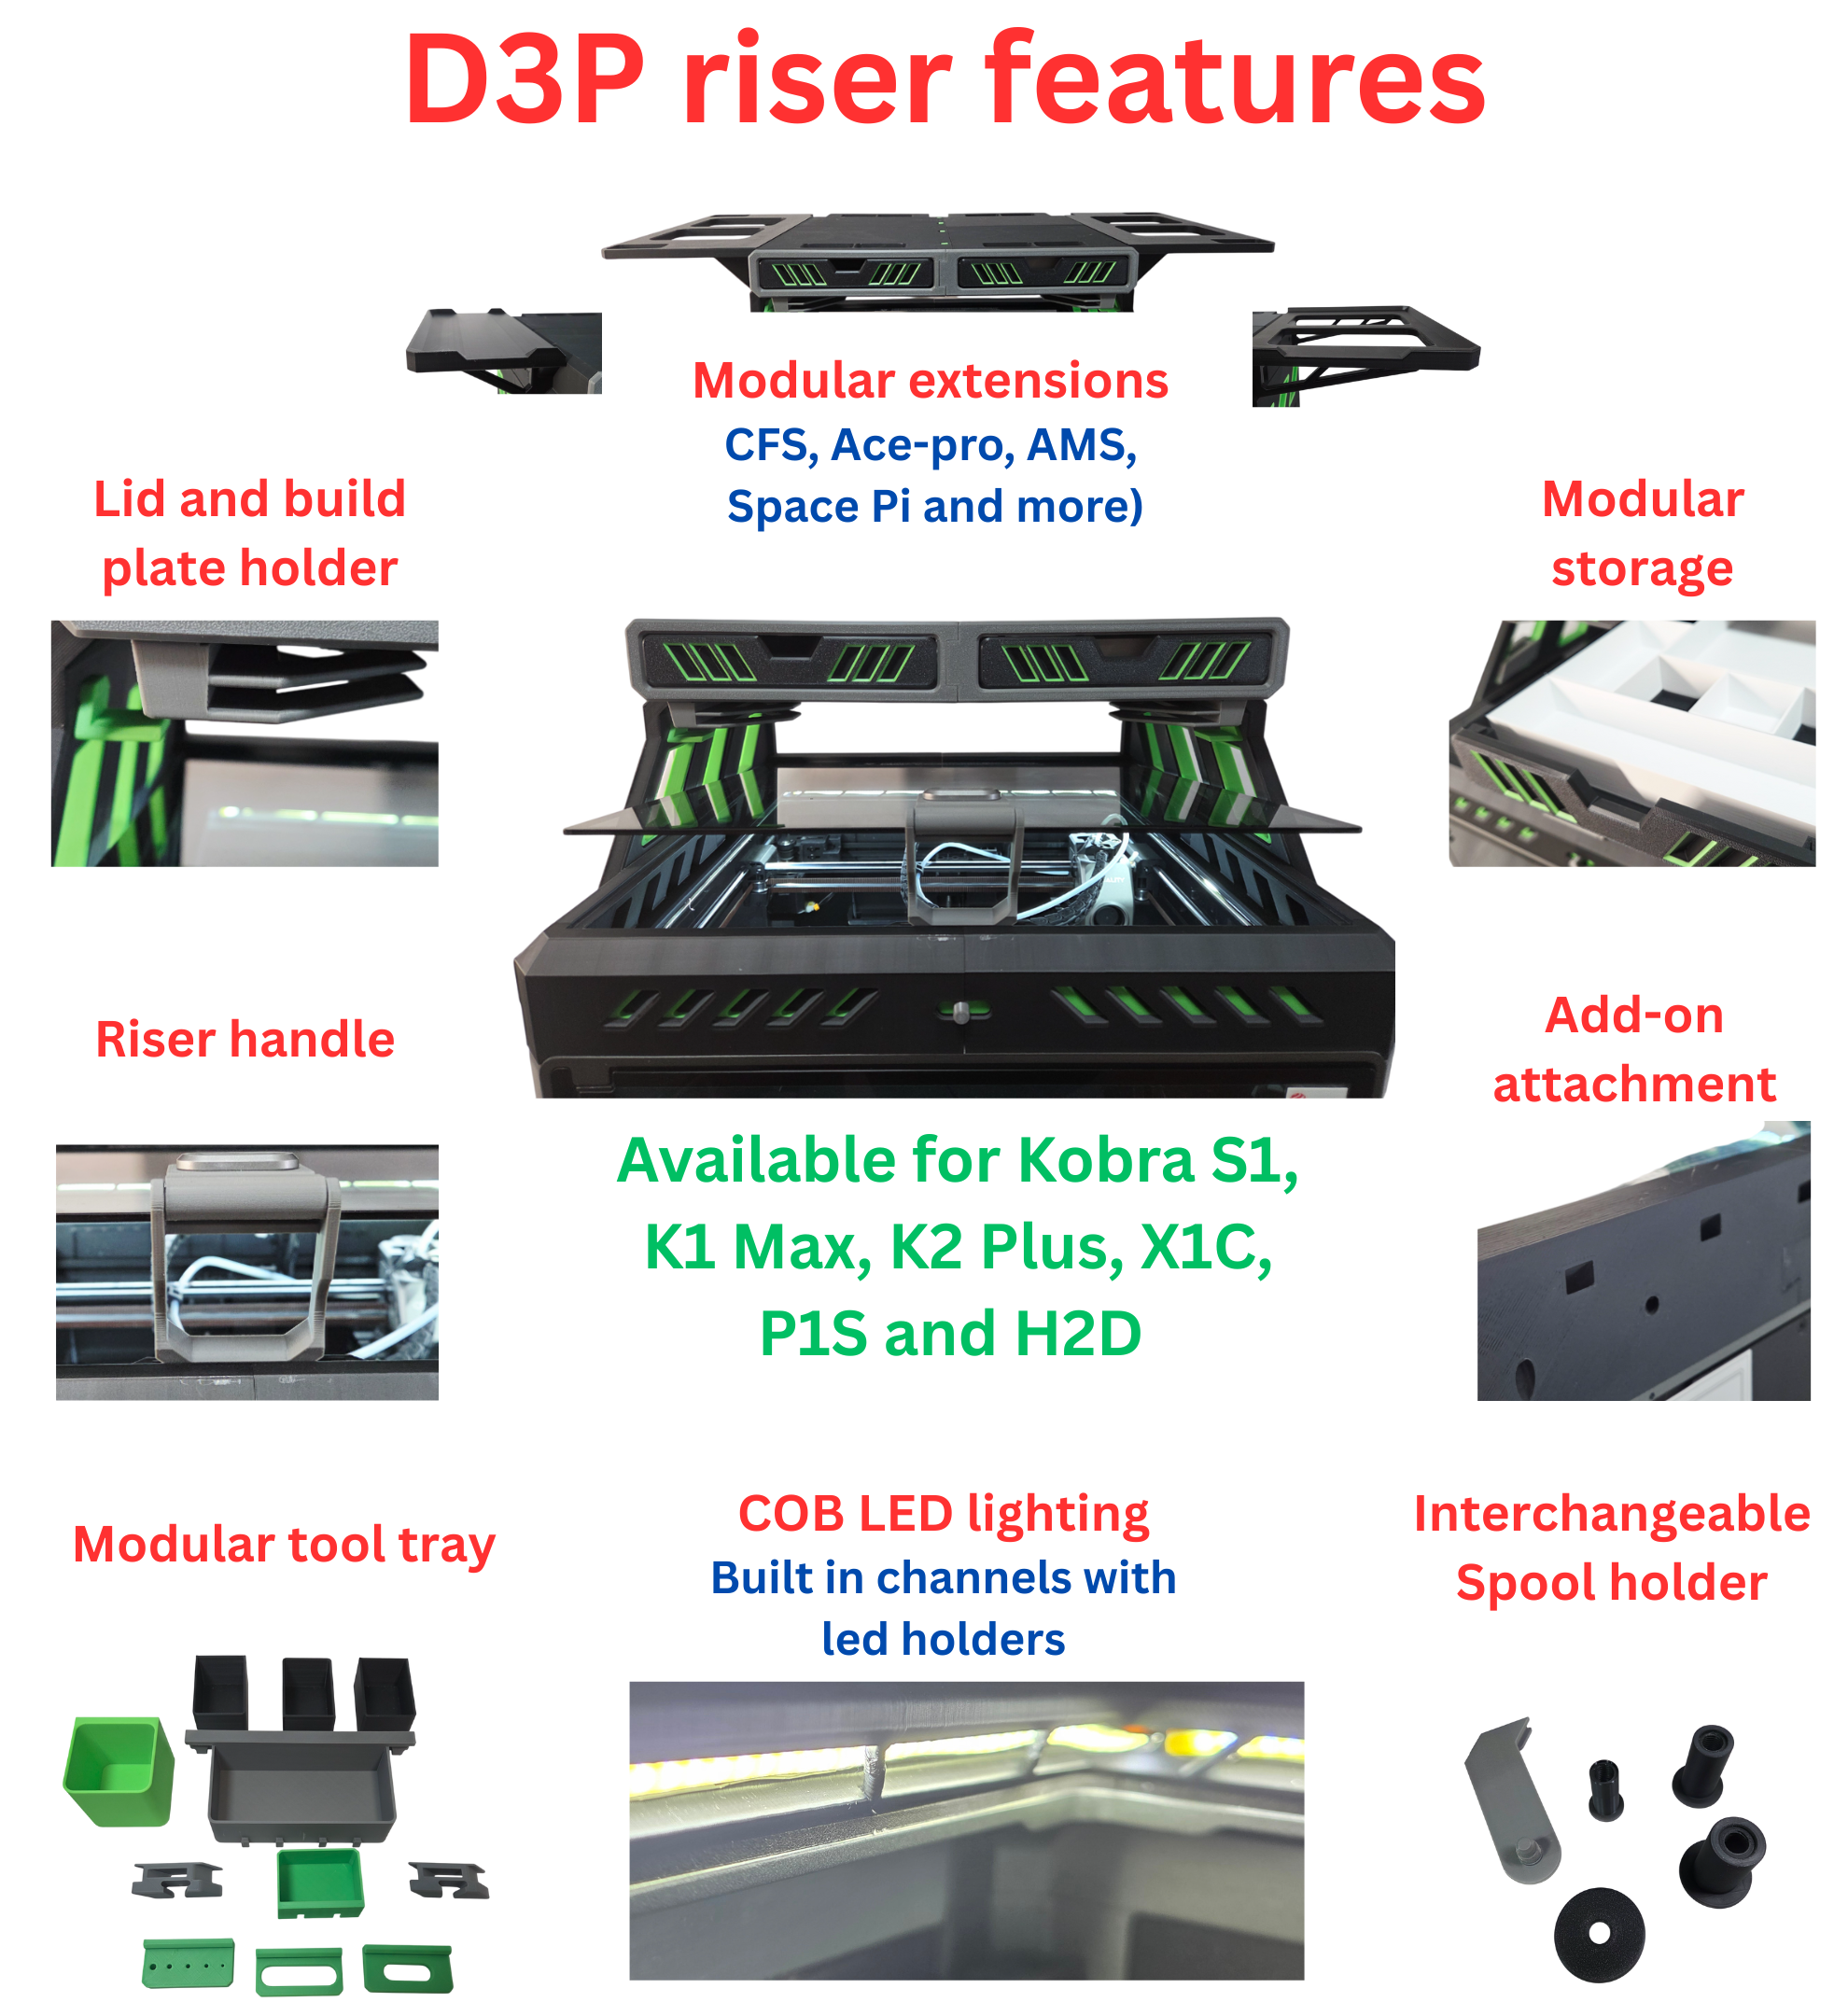
Features of the D3P riser system:
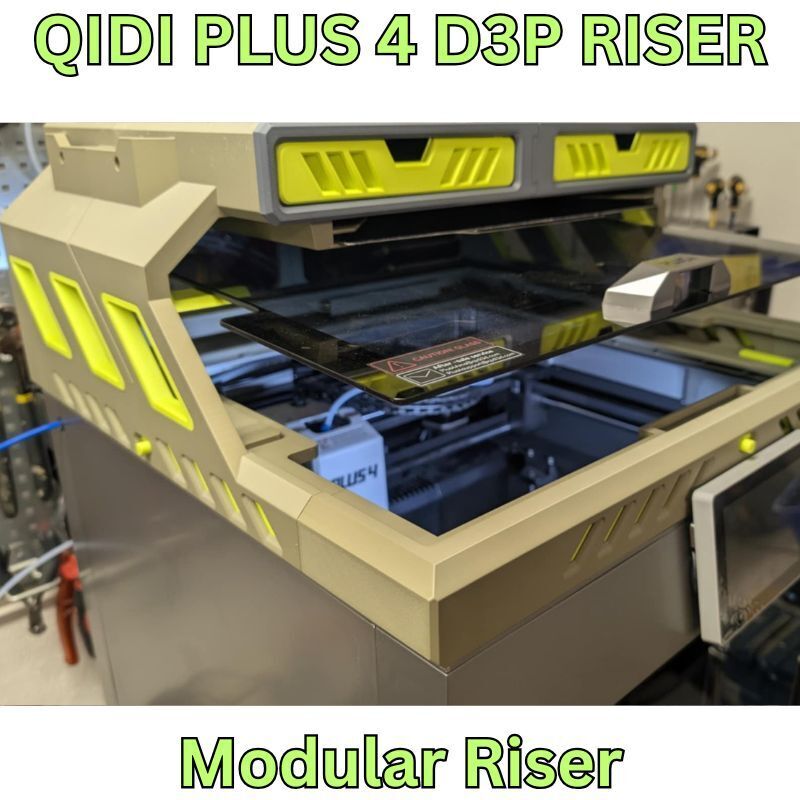
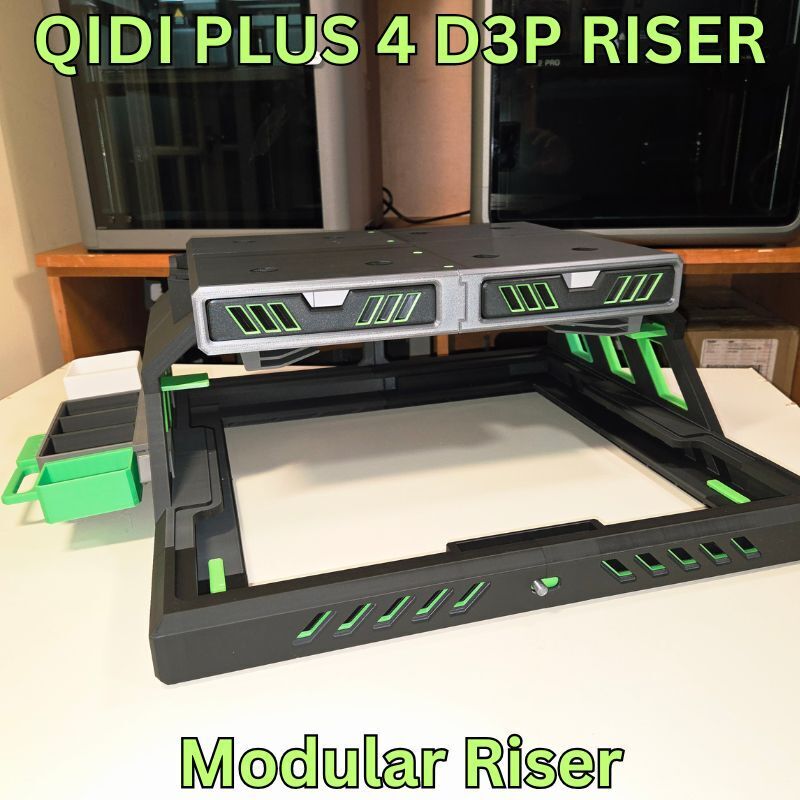
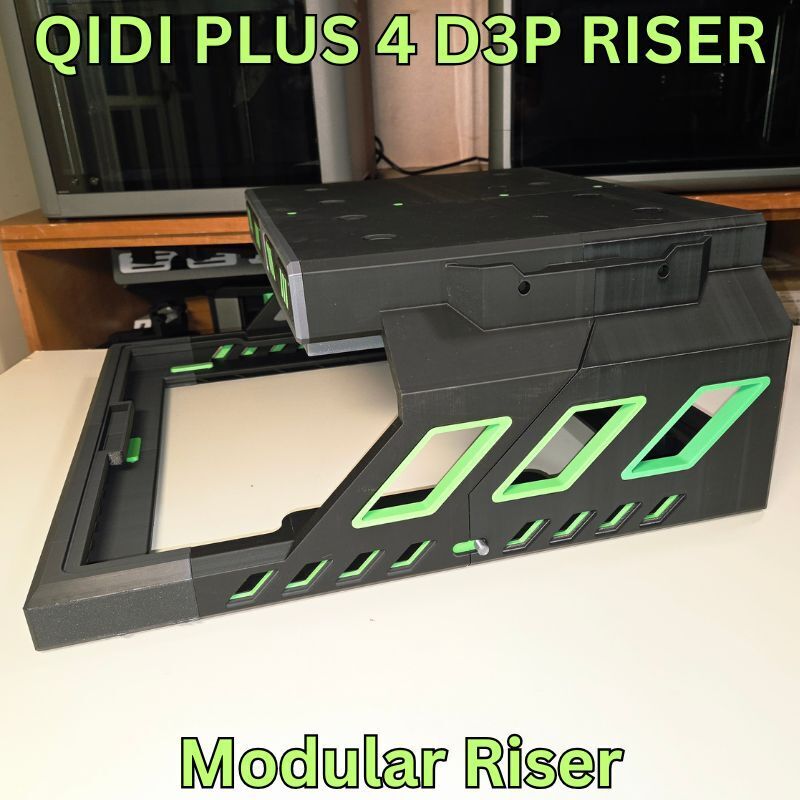
• Front and side adjustable vents;
• Add-on extensions for dual Qidi boxes units, single, dual and Quad dryers;
• Innovative COB LED channels that feature brackets to secure the LEDS in place;
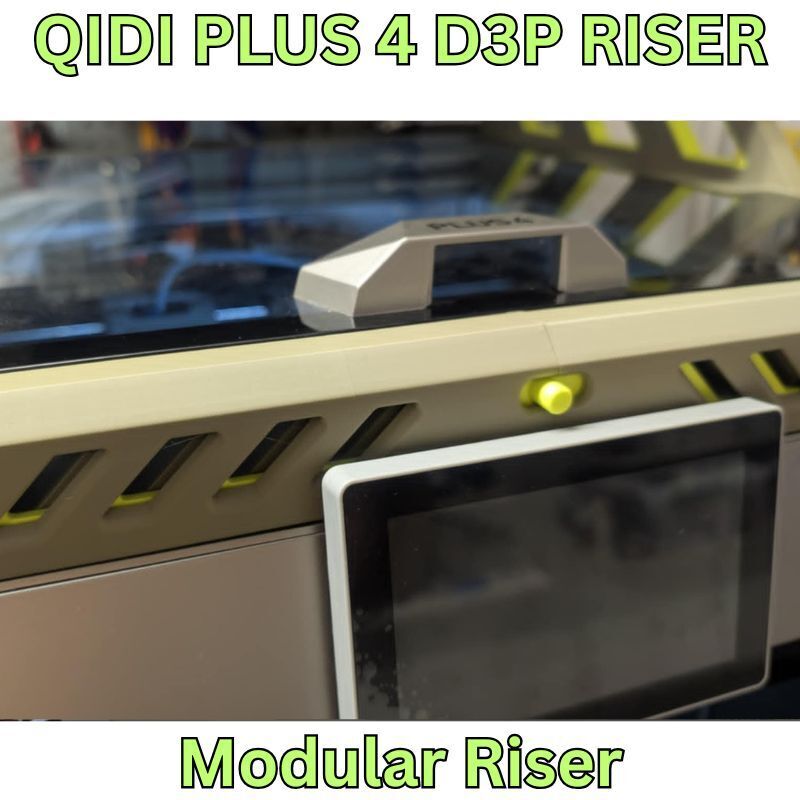
• Top unit is set back to allow easy access to the printer from the top;
• Sturdy and reinforced construction and design to prevent sagging;
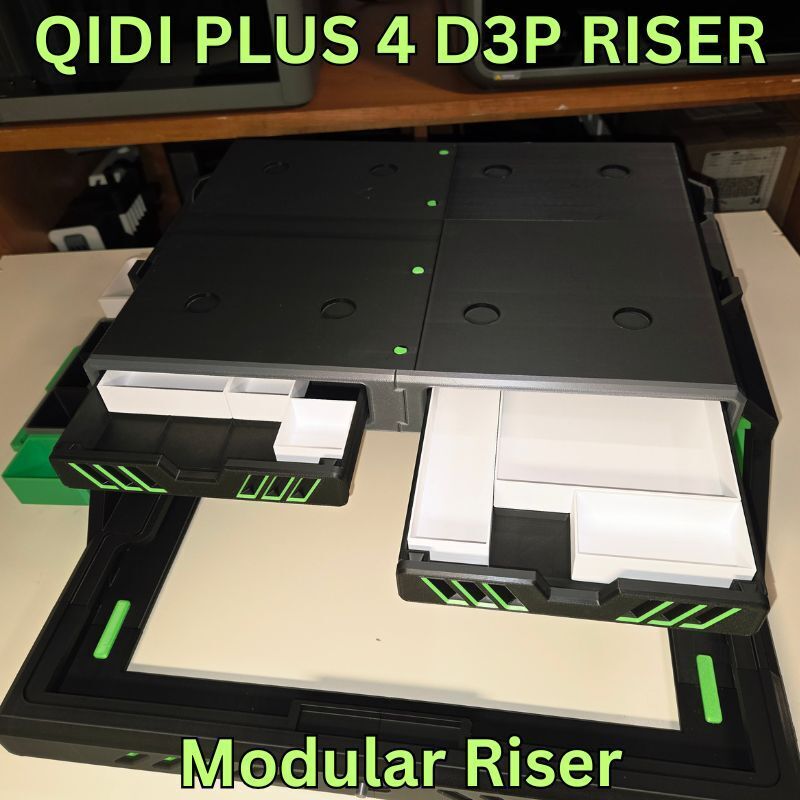
• Two large storage drawers with gridfinity style drawer inserts;
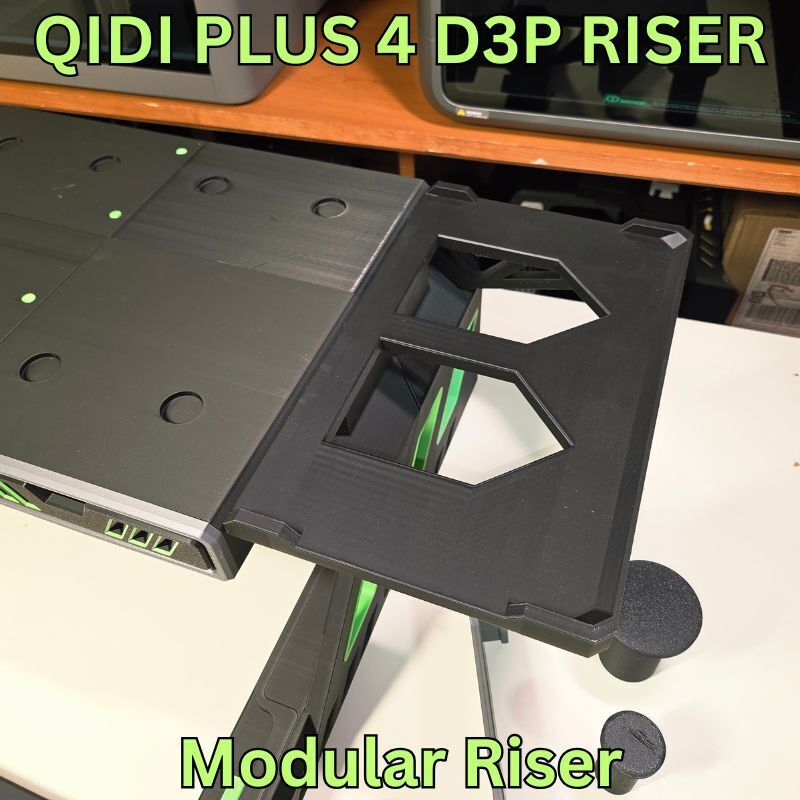
• Integrated build plate holder for two build plates;
• Integrated lid holders;
• Multiple add-ons such as a modular tool tray, interchangeable external spool holder and more to come;
• Detailed pdf instructions with pictures and steps;
• Printing requires little or no support.
SPECIAL THANK YOU
I would like to extend a very special thank you to Idus (https://makerworld.com/en/@Idus). This project would not have been possible without his help who worked with me and patiently printed test pieces and two test risers to make sure everything fit and took the photos .
INTELLECTUAL PROPERTY
This work is licensed under the standard digital file license. You are prohibited from sharing, sub-licensing, selling, renting, hosting, transferring, reproducing or distributing the digital file or 3d printed versions of this object, as well as any other derivative work in either digital or physical form (including remixes or copying/reproducing the design by any means).you are not allowed to use the objects in any manner that involves charging money or collecting fees without permission.
A patent has been filed for the D3P riser design and it is patent pending. I thank you for your understanding.
ADDONS
The model features a number of add-ons that are free to download. Be sure to bookmark this page as I will be adding to them in the next few days.
Qidi Plus4 Double Filament Mount for use with Riser by DDC_Rob: https://cults3d.com/en/3d-model/tool/qidi-plus4-double-filament-mount-for-use-with-riser
Side mount build plate holder: https://cults3d.com/en/3d-model/tool/qidi-plus-4-d3p-riser-side-mount-build-plate-holder
Top mount TPU spool holder: https://cults3d.com/en/3d-model/tool/qidi-plus-4-d3p-top-mount-tpu-spool-holder
Qidi box side extensions (for dual Qidi box): https://cults3d.com/en/3d-model/tool/qidi-plus-4-d3p-riser-qidi-box-shelves
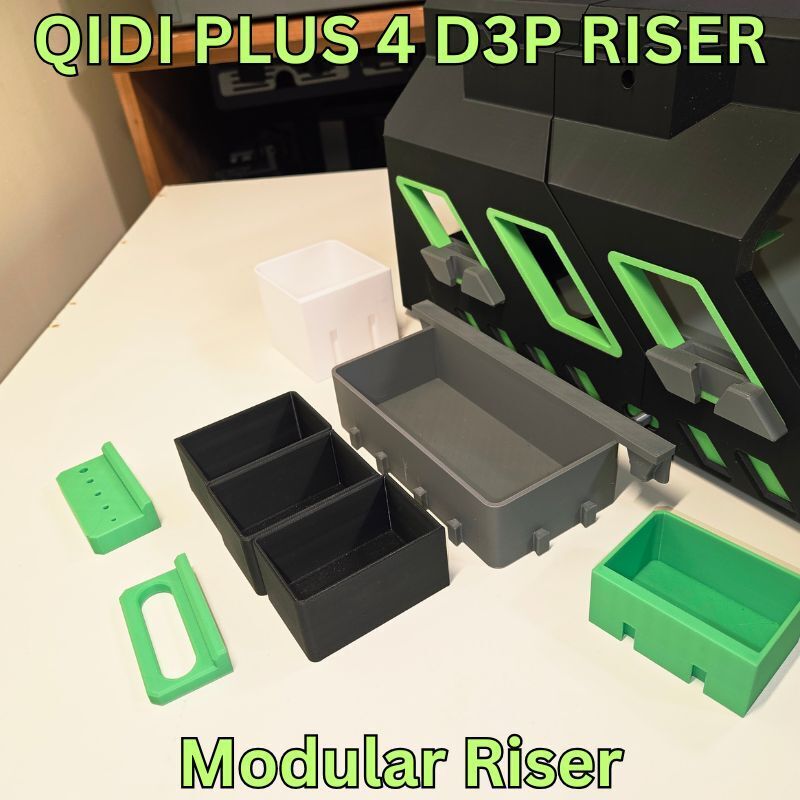
Modular tool tray: https://cults3d.com/en/3d-model/tool/qidi-plus-4-d3p-riser-modular-tool-tray
Single dryer shelf: https://cults3d.com/en/3d-model/tool/qidi-plus-4-d3p-riser-single-dryer-shelf
Dual dryer shelf: https://cults3d.com/en/3d-model/tool/qidi-plus-4-dual-dryer-shelf
Quad dryer shelf: https://cults3d.com/en/3d-model/tool/qidi-plus-4-d3p-riser-quad-ryer-shelf
Interchangeable external spool holder: https://cults3d.com/en/3d-model/tool/qidi-q2-d3p-riser-interchangeable-external-spool-holder
Drawer inserts: https://cults3d.com/en/3d-model/tool/qidi-q2-d3p-riser-drawer-inserts
Dual Qidi Box extension shelves: https://cults3d.com/en/3d-model/tool/qidi-plus-4-d3p-riser-qidi-box-shelves
Modular tool tray: https://cults3d.com/en/3d-model/tool/qidi-plus-4-d3p-riser-modular-tool-tray
Sunlu Quad extension shelfs: https://cults3d.com/en/3d-model/tool/qidi-plus-4-sunlu-quad-dryer-shelf-extensions
TECHNICAL SPECIFICATIONS
For the base riser:
Filament: 3 kg
Approximate print time: 3 days 14h
Height with closed Qidi Box: tbd
Height with open Qidi box unit: tbd
PRINT SETTINGS
IMPORTANT I upload a print setting files for all my models. The print settings has the parts positioned for correct printing.
THE PRINT SETTING FILE WORKS WITH QIDI STUDIOS.
EACH BUILD PLATE HAS THE TYPE OF SUPPORT REQUIRED INDICATED ON THE BUILD PLATE DESCRIPTION (TREE AUTO, TREE MANUAL OR NO SUPPORT).
I strongly recommended you use my print setting file. If not, I will not be able to assist you if there is an issue when printing. From experience, many of the issues with printing my models are on account of users not using my print settings.
CHANGELOG
If there are any changes to the STL files or print settings I will list them here. I recommend looking at this section prior to printing as it is the only way I can inform users of changes.
3D PRINT SETTINGS
I use the following settings and materials to print this model:
Infill % : 15% (no need for more)
Nozzle diameter: 0.4 mm
Layer height: 0.2 mm standard
Material: I am often asked the question about the riser deforming when using PLA when printing ABS or ASA. I prefer PLA since it cheaper to purchase and easier to print. I print all my risers in PLA but I seldom print in ASA or ABS. I have some users that printed in PETG and some in ABS. Both will also work providing your printer can maintain tolerances. PETG may be preferable if you intend on printing higher temp materials. PETG-CF has a slightly higher melting point than PETG so this may also be considered.
ASSEMBLY AND INSTRUCTIONS
A detailed instruction and assembly guide with steps and pictures is available for download with the model files.
TROUBLESHOOTING
All parts and the assembly have been tested multiple times (both printing and assembly).
• Make sure your build properly cleaned and free of grease and oils before printing. This is the cause of adhesion.
• Make sure you use my print profiles/settings (the .3mf file that has multiple plates with all the parts) and that you enable support as indicated for each build plate on the build plate description.
• Filament and printer will affect tolerances however all should fit. If unsure proceed slowly and cautiously.
• If there are any changes I list them in a changelog on the model page. Please have a look at it prior to printing in the event there are any changes.
I am available to assist with any issues with this model.
The best way to reach me is through Facebook messenger – my user name is “Darren 3d print”.
I thank you for your support and hope you like this model.


:format(webp)/https://fbi.cults3d.com/uploaders/15758717/illustration-file/d9e1de26-1e05-4021-969e-801b146a3e40/Q1.png)
:format(webp)/https://fbi.cults3d.com/uploaders/15758717/illustration-file/2fef9f7f-8285-42c3-b697-bbbf9dee5947/qb1.png)
:format(webp)/https://fbi.cults3d.com/uploaders/15758717/illustration-file/65a6625f-61ee-46aa-8a7f-2c3894eac922/di2.png)
:format(webp)/https://fbi.cults3d.com/uploaders/15758717/illustration-file/b4442f6c-509a-42c0-aaa8-3db767fea49b/dd1.png)
:format(webp)/https://fbi.cults3d.com/uploaders/15758717/illustration-file/79d60eb9-81aa-49e8-9b60-dc766a645b2d/es1.png)
:format(webp)/https://fbi.cults3d.com/uploaders/15758717/illustration-file/ad51d36b-65cf-4745-9c7a-b7cf5132c67a/mtt1.png)
:format(webp)/https://fbi.cults3d.com/uploaders/15758717/illustration-file/15b0c336-cafe-4831-9f66-55f729d1e9a2/qd1.png)
:format(webp)/https://fbi.cults3d.com/uploaders/15758717/illustration-file/4cc62fb5-b98d-4903-b9b3-005304128ad8/sd1.png)