Bonjour à toutes et à tous,
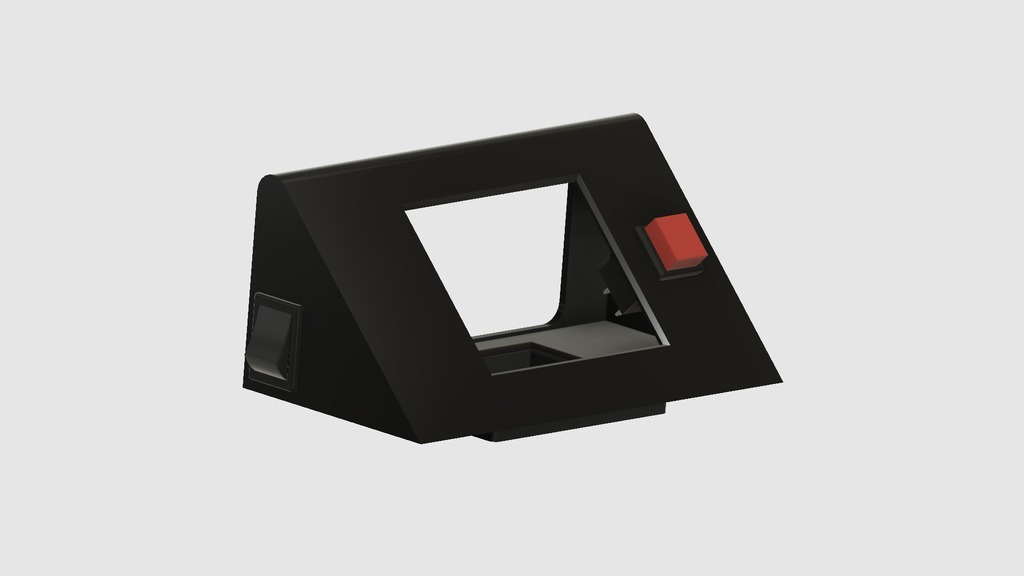
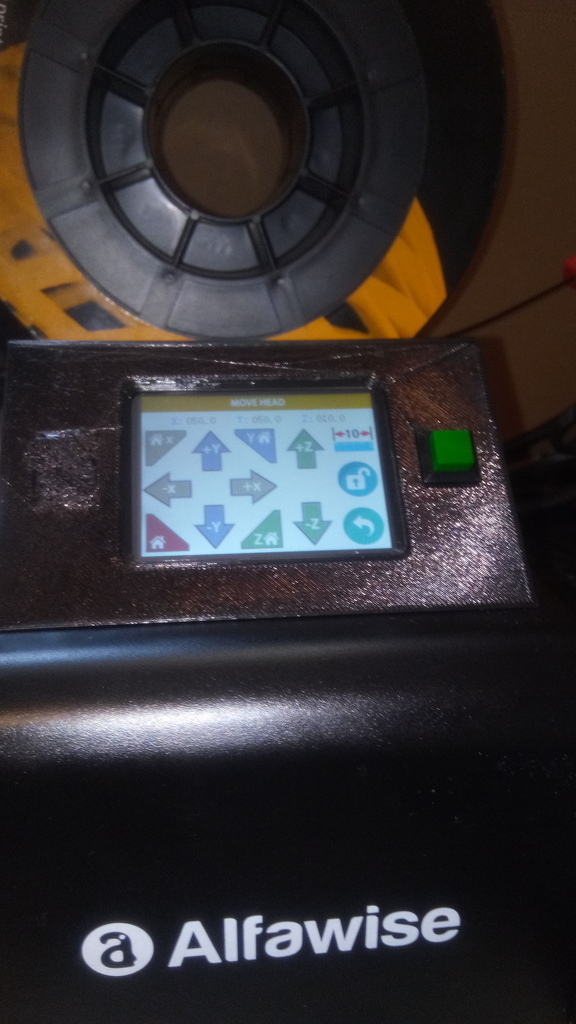
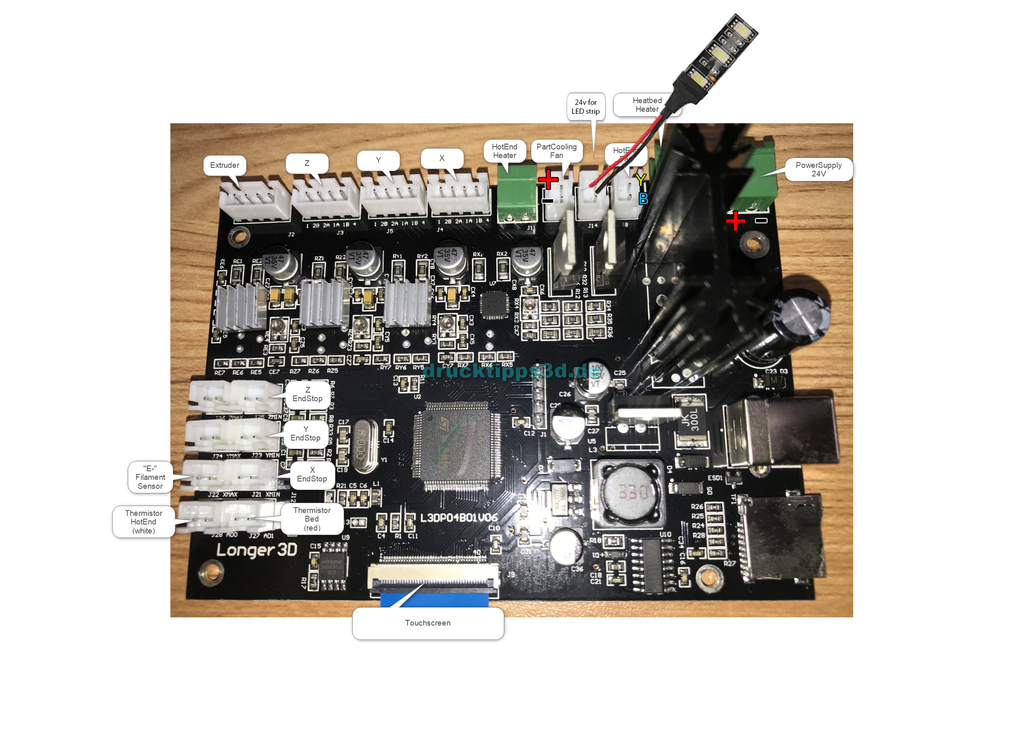
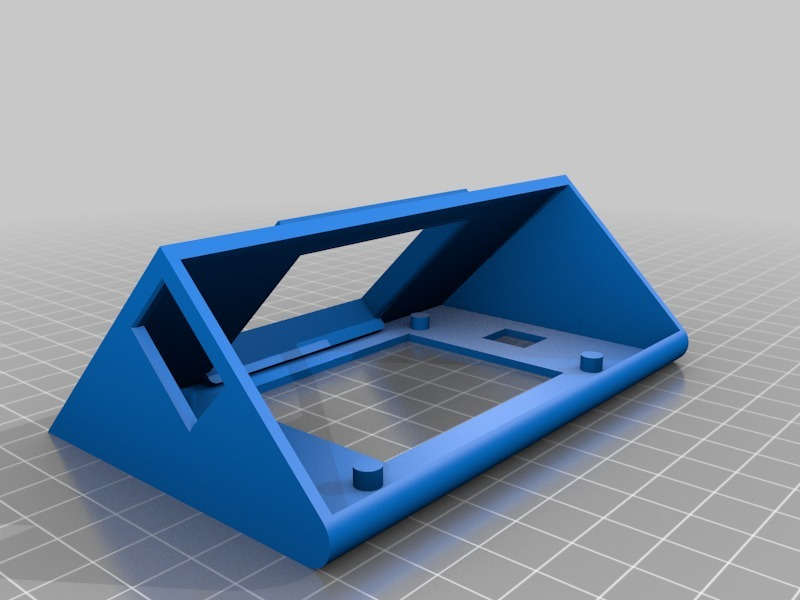
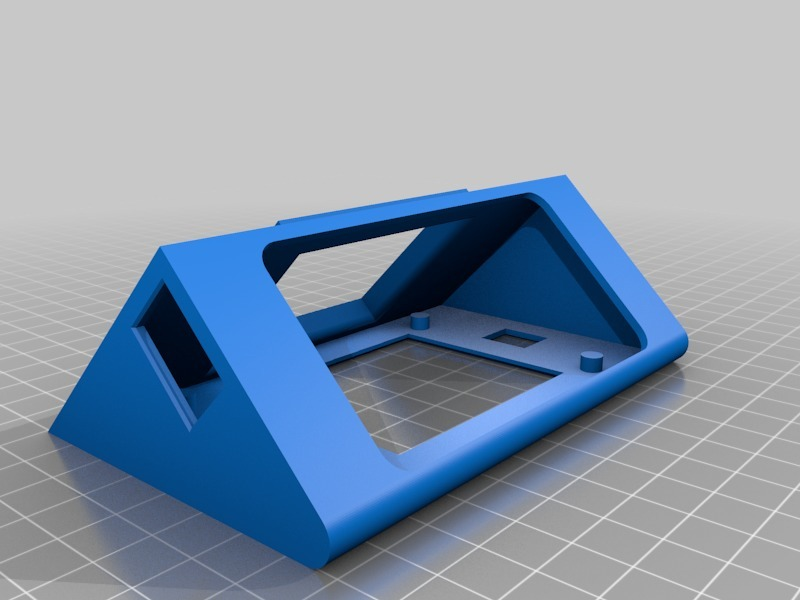
Comme notre alimentation de notre Alfawise U20 n'est pas très pratique notamment en ce qui concerne la lecture de l'afficheur LCD quand nous sommes assis et aussi le bouton power qui est très mal placer si une bobine se trouve sur cette dernière, j'ai donc dessiné cette pièce qui j'espère fera plaisir aux possesseurs de l'imprimante Gearbest.
Donc, le but premier est une lecture correct et un accès plus facile à l'écran LCD et ensuite, j'avais besoin d'un éclairage ruban LED. J'ai donc intégrer un bouton poussoir pour le ruban mais aussi un interrupteur On/Off afin d'allumer plus facilement l'imprimante.
Je rajouterais un peu plus tard mon support pour le ruban LED qui fonctionne avec toutes les imprimantes à architecture profile d'aluminium 2020 v-slot.
Je dois faire un essai car la version qui est actuellement sur mon alimentation ne contient pas le bouton On/Off.
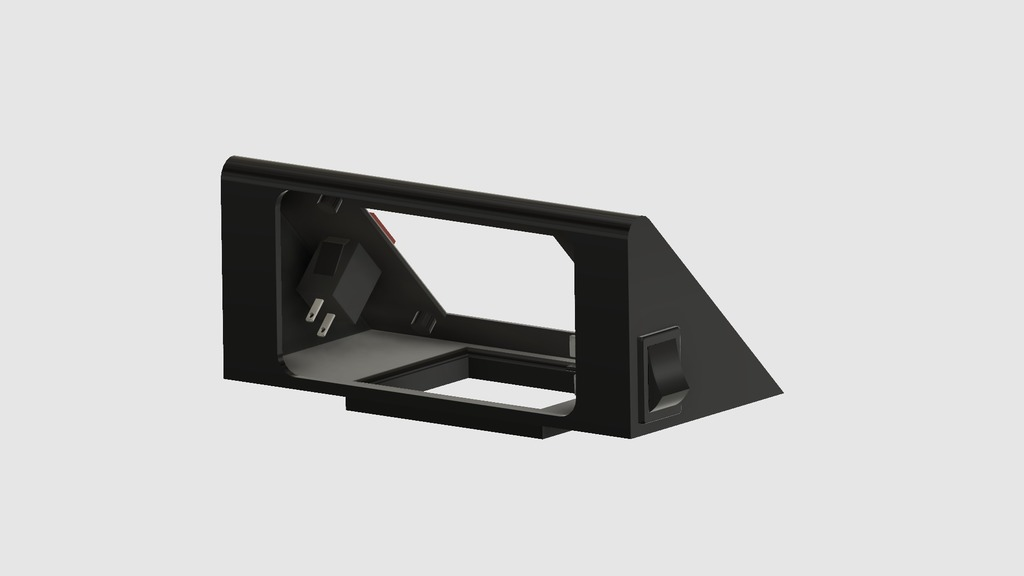
Tout compte fait, j'ai préférer fixer le LCD à la colle chaude.
Lien à titre d'exemple pour les boutons poussoirs:
https://www.ebay.fr/itm/2PCS-Red-Square-Micro-Self-locking-DS429-On-Off-Push-Power-Control-Button-Switch/222589932615?hash=item33d364d447:g:jmgAAOSwhmtbNIn5:rk:5:pf:0
Les miens font 3A sous 125v et 1A sous 250v, largement suffisant pour 30cm de LED 24v.
Lien à titre d'exemple pour les interrupteurs:
https://www.ebay.fr/itm/1-Pcs-x-4-Pin-On-Off-2-Position-DPST-Boat-Rocker-Switches-10A-125V-6A-250V-AC/282772345869?hash=item41d68b940d:g:nScAAOSwy0JaMkBb:rk:1:pf:0
Et pour terminer le lien pour le ruban LED:
https://www.amazon.fr/gp/product/B01HG63RCS/ref=oh_aui_detailpage_o04_s00?ie=UTF8&psc=1
Pour information, rien ne vous oblige à passer par ces liens et je n'ai aucune affiliation avec eux.
Mise à jour:
En faisant un montage à blanc avec l'interrupteur d'alimentation, j'ai cassé la fine partie du coté gauche en le retirant.
J'ai donc modifié le fichier afin de renforcer cette partie et pour le visuel, j'ai fait pareil pour l'autre coté.
J'ai également arrondi les angles qui étaient présents sur ma version non publiée.
Collez l'écran LCD en premier puis mettez en place les interrupteurs.
Hello everyone,
As our power supply of our Alfawise U20 is not very practical especially as regards the reading of the LCD display when we are seated and also the power button which is very badly placed if a filament spool is on the latter, I So I designed this piece that I hope will please the owners of the printer Gearbest.
So, the primary goal is correct reading and easier access to the LCD screen and then, I needed LED strip lighting. So I integrate a push button for the ribbon but also an On / Off switch to turn on the printer more easily.
I will add a more later my support for the LED strip that works with all 2020 v-slot aluminum profile architecture printers.
I have to give it a try because the version that is currently on my power supply does not contain the On / Off button.
I prefer to fix the LCD panel with hot glue.
Link as an example for the push buttons:
https://www.ebay.fr/itm/2PCS-Red-Square-Micro-Self-locking-DS429-On-Off-Push-Power-Control-Button-Switch/222589932615?hash=item33d364d447:g:jmgAAOSwhmtbNIn5: rk: 5: mp: 0
Mine are 3A under 125v and 1A under 250v, more than enough for 30cm LED 24v.
Example link for the switches:
https://www.ebay.fr/itm/1-Pcs-x-4-Pin-On-Off-2-Position-DPST-Boat-Rocker-Switches-10A-125V-6A-250V-AC/282772345869? hash = item41d68b940d: g: nScAAOSwy0JaMkBb: rk: 1: mp: 0
And to finish the link for the LED strip:
https://www.amazon.fr/gp/product/B01HG63RCS/ref=oh_aui_detailpage_o04_s00?ie=UTF8&psc=1
For information, nothing requires you to go through these links and I have no affiliation with them.
Update:
By doing a blank mount with the power switch, I broke the thin part of the left side by pulling it out.
So I modified the file to strengthen this part and for the visual, I did the same for the other side.
I also rounded the angles that were present on my unpublished version.
Paste the LCD screen first and then place the switches.
:format(webp)/https://fbi.cults3d.com/uploaders/14139350/illustration-file/94580fd7-2c77-4a61-9730-8bfb6f0b0d5c/Alfawise_U20_LCD.png)
/https://preview3d-images.cults3d.com/mdqr3d5os4zalbami5wctoc8vf46)
/https://preview3d-images.cults3d.com/sce3u49nngd95ldcbwo1dl12gfvf)


:format(webp)/https://fbi.cults3d.com/uploaders/14139350/illustration-file/2bcbe0d3-ae43-42ab-b567-8bda39ebe4d5/IMG_20250425_095138.jpg)
:format(webp)/https://fbi.cults3d.com/uploaders/14139350/illustration-file/c812044c-10fc-4b46-b8bf-f80cd8cc6872/1727020717472.jpg)
:format(webp)/https://fbi.cults3d.com/uploaders/14139350/illustration-file/72eb3959-a939-49bf-be99-8b929c60184d/3.jpg)
:format(webp)/https://fbi.cults3d.com/uploaders/14139350/illustration-file/690a494d-e002-4d49-b464-8301c65cbd8c/1746792791752.jpg)
:format(webp)/https://fbi.cults3d.com/uploaders/14139350/illustration-file/91fa8175-e411-47c7-b6a5-8c11a9a726cb/1746792857318.jpg)
:format(webp)/https://fbi.cults3d.com/uploaders/14139350/illustration-file/353ca08a-3865-4f17-a0a9-81f585c50ee8/1746973666143.jpg)
:format(webp)/https://fbi.cults3d.com/uploaders/14139350/illustration-file/877f4fbf-1b1f-4f56-8fd6-947085b88733/1748020244757.jpg)