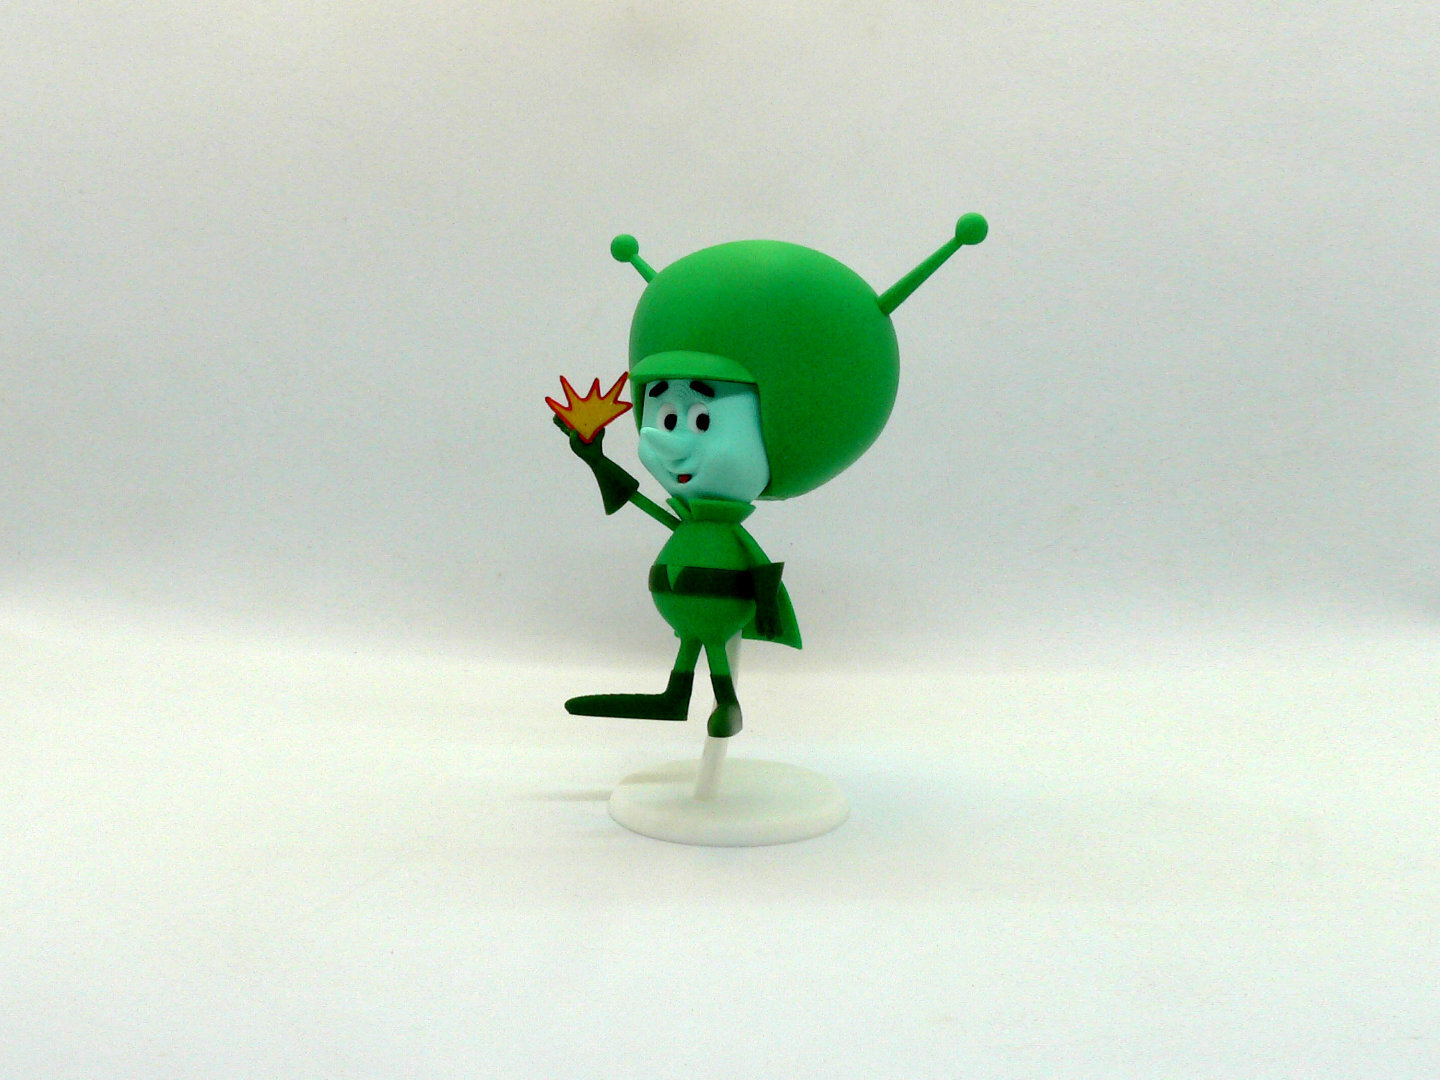
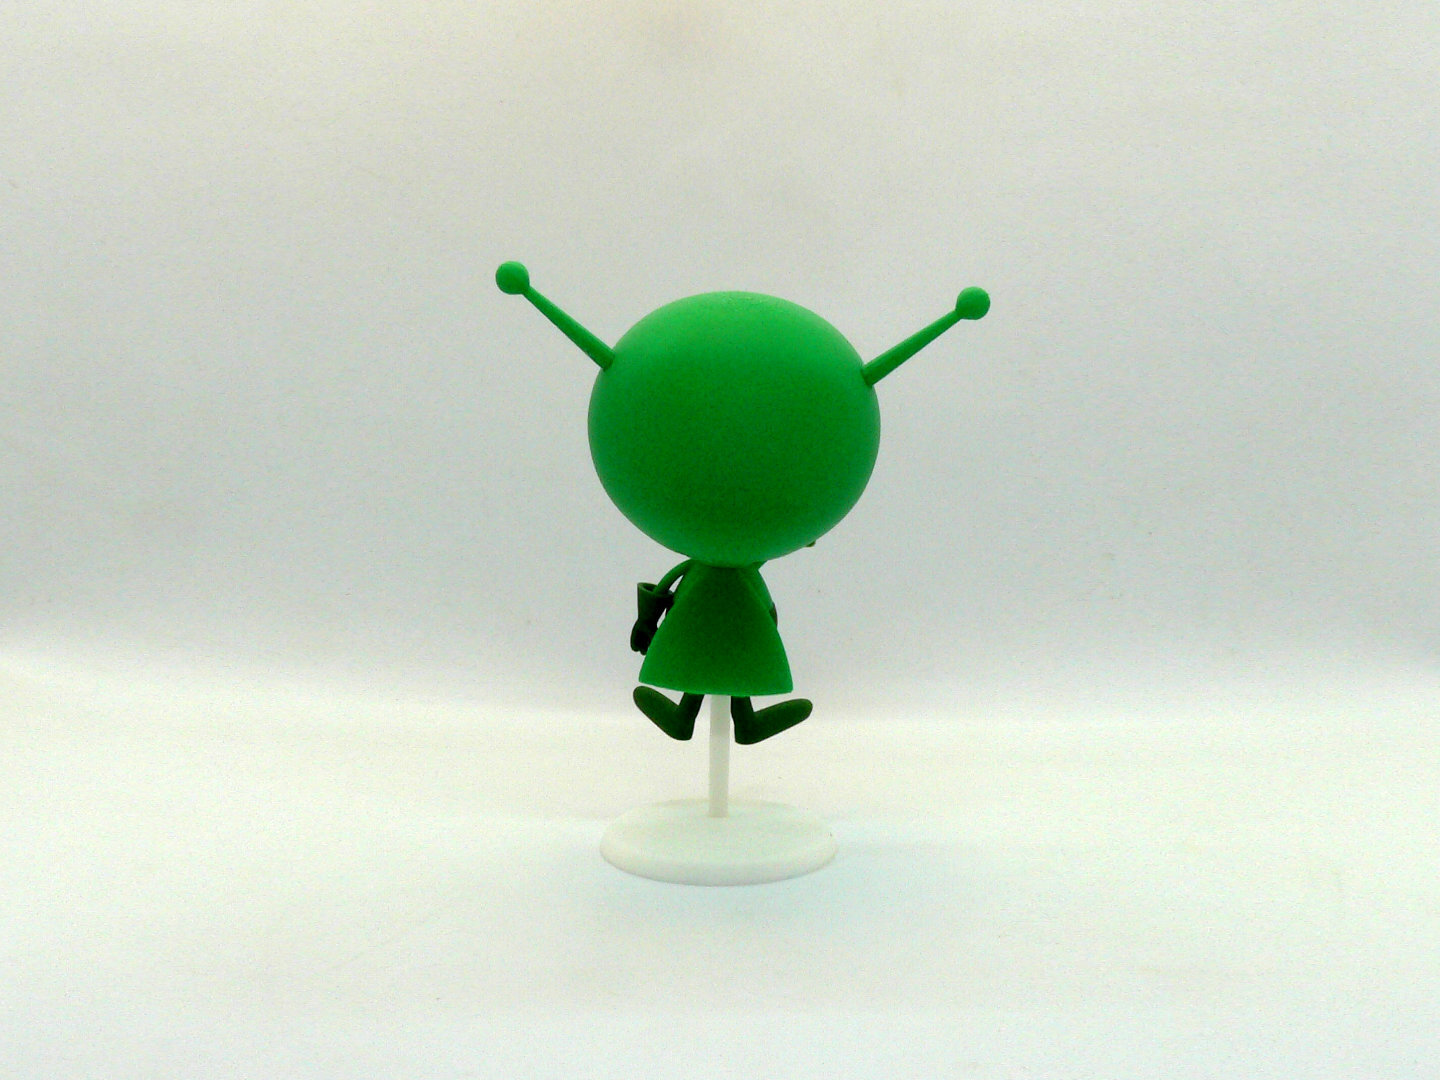
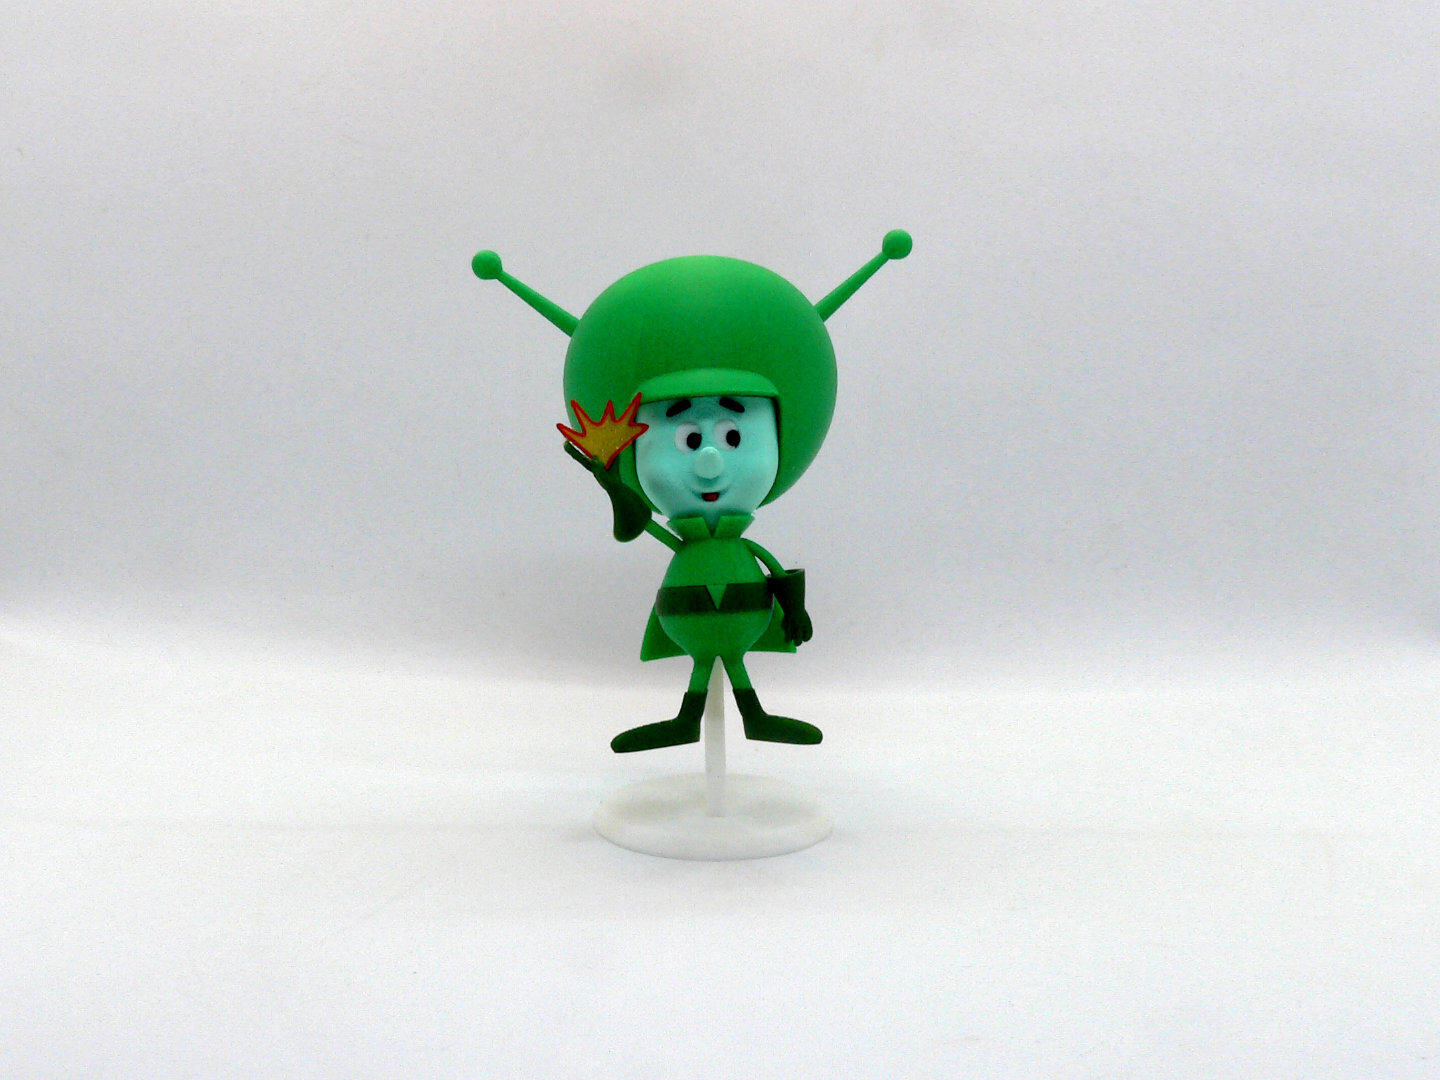
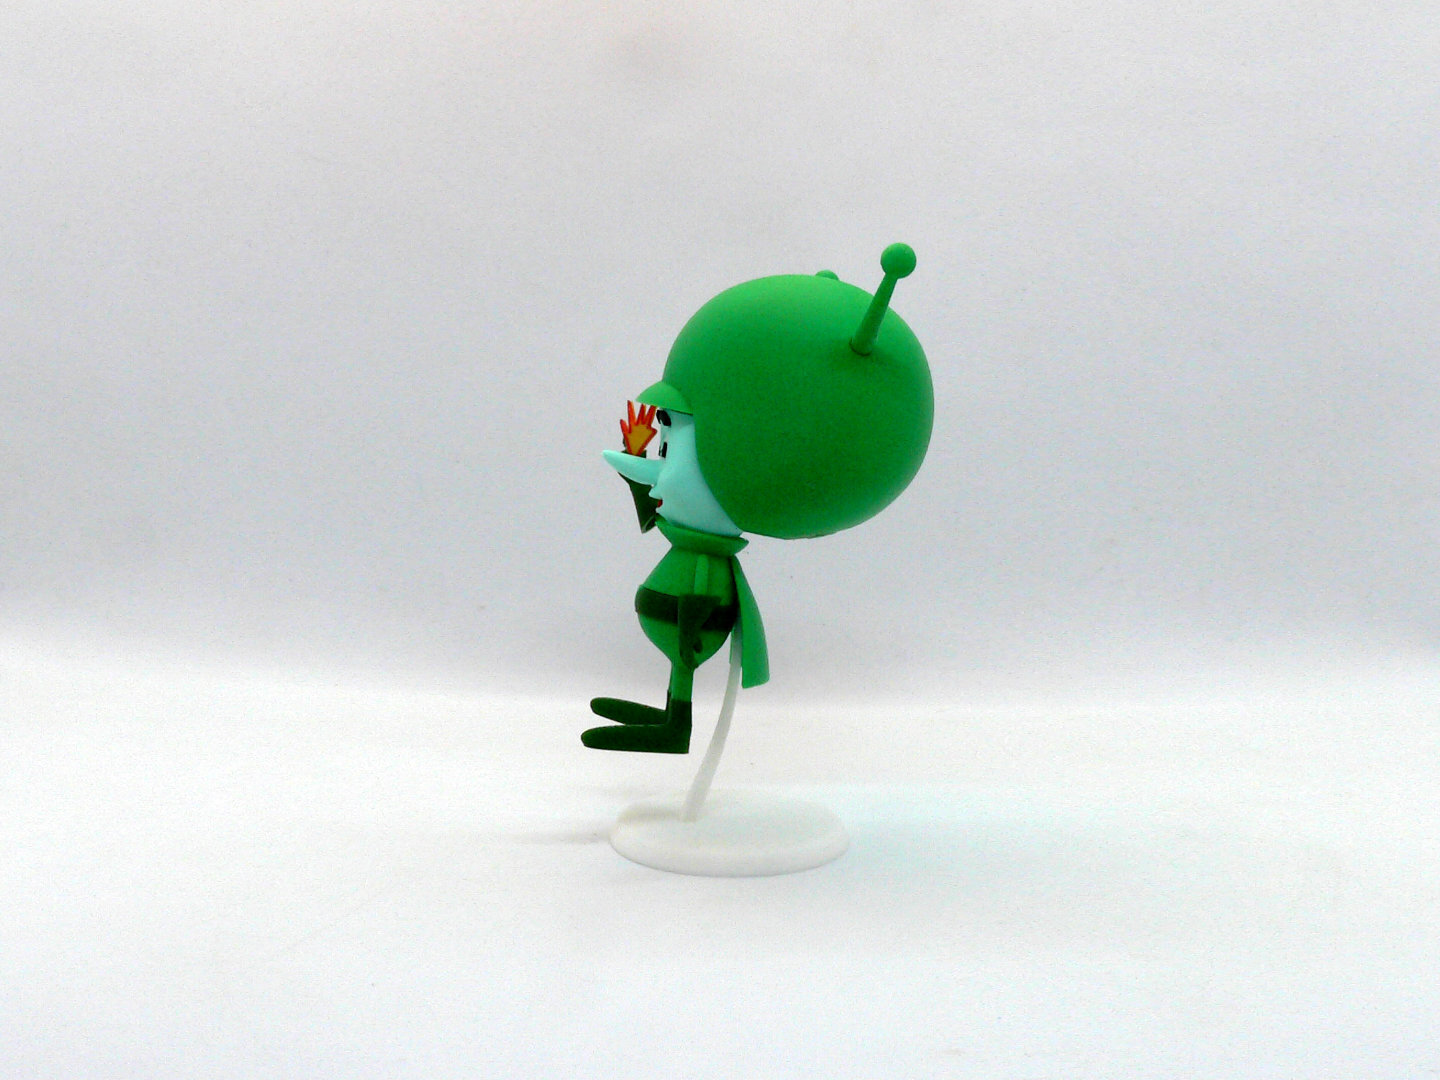
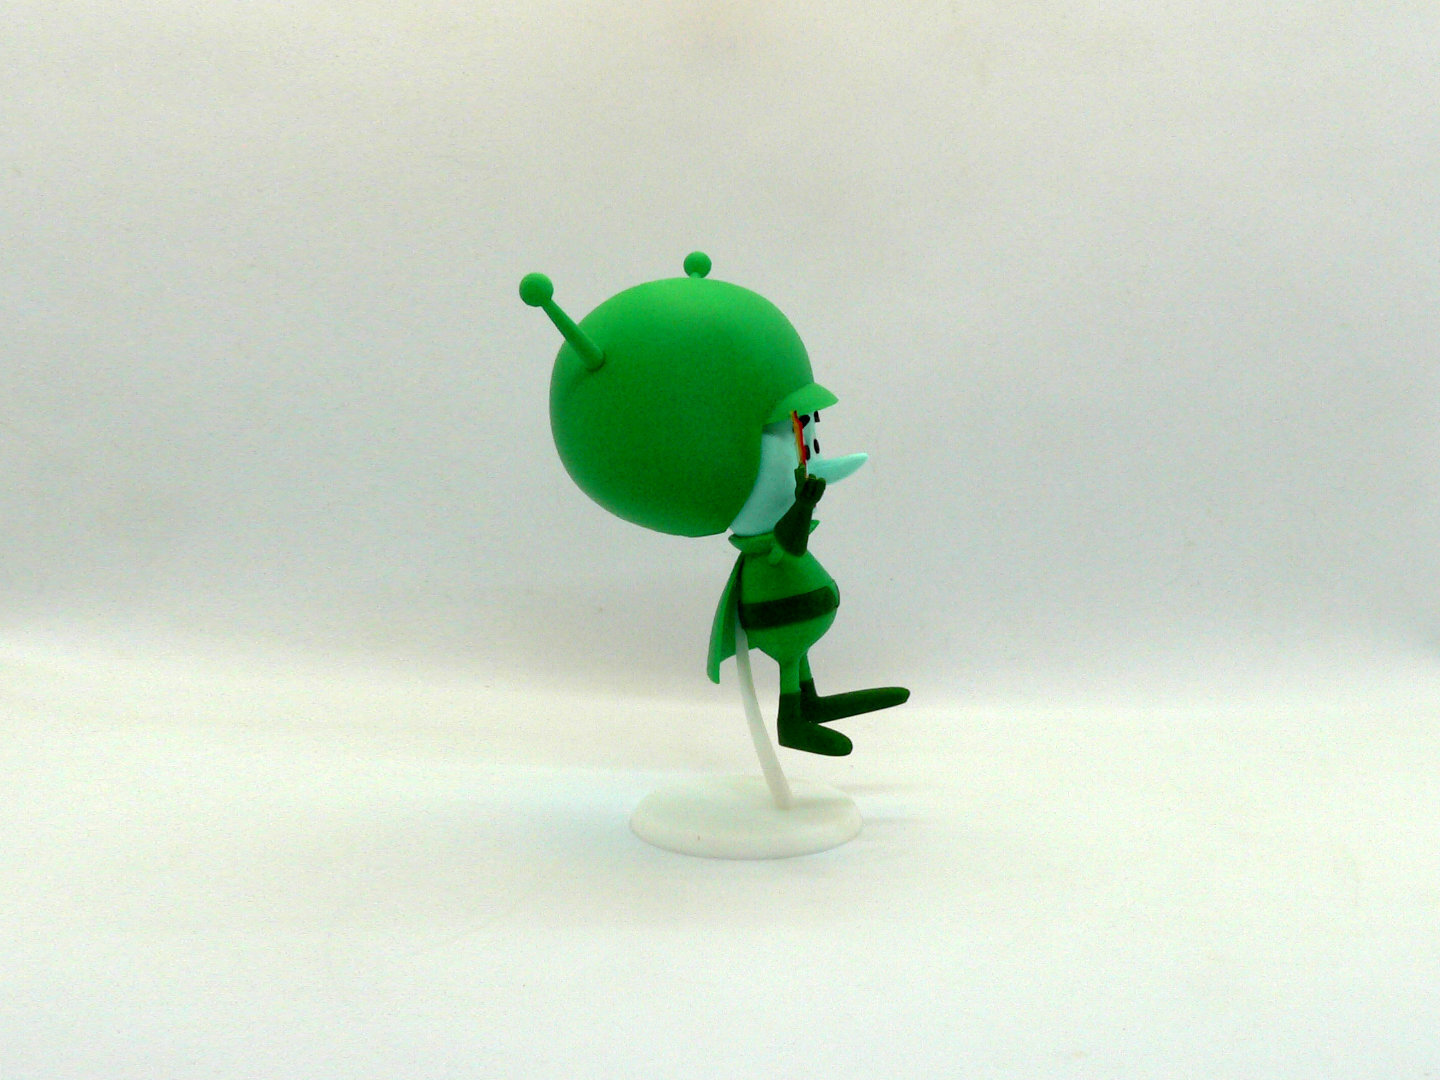
The Great Gazoo, or simply Gazoo, is a fictional character from the animated series The Flintstones.
The Great Gazoo is a tiny, green, floating scientist who was exiled to Earth from his home planet for inventing a Doomsday Device. He refers to Fred and Barney as "dum-dums" and constantly causes problems for them.
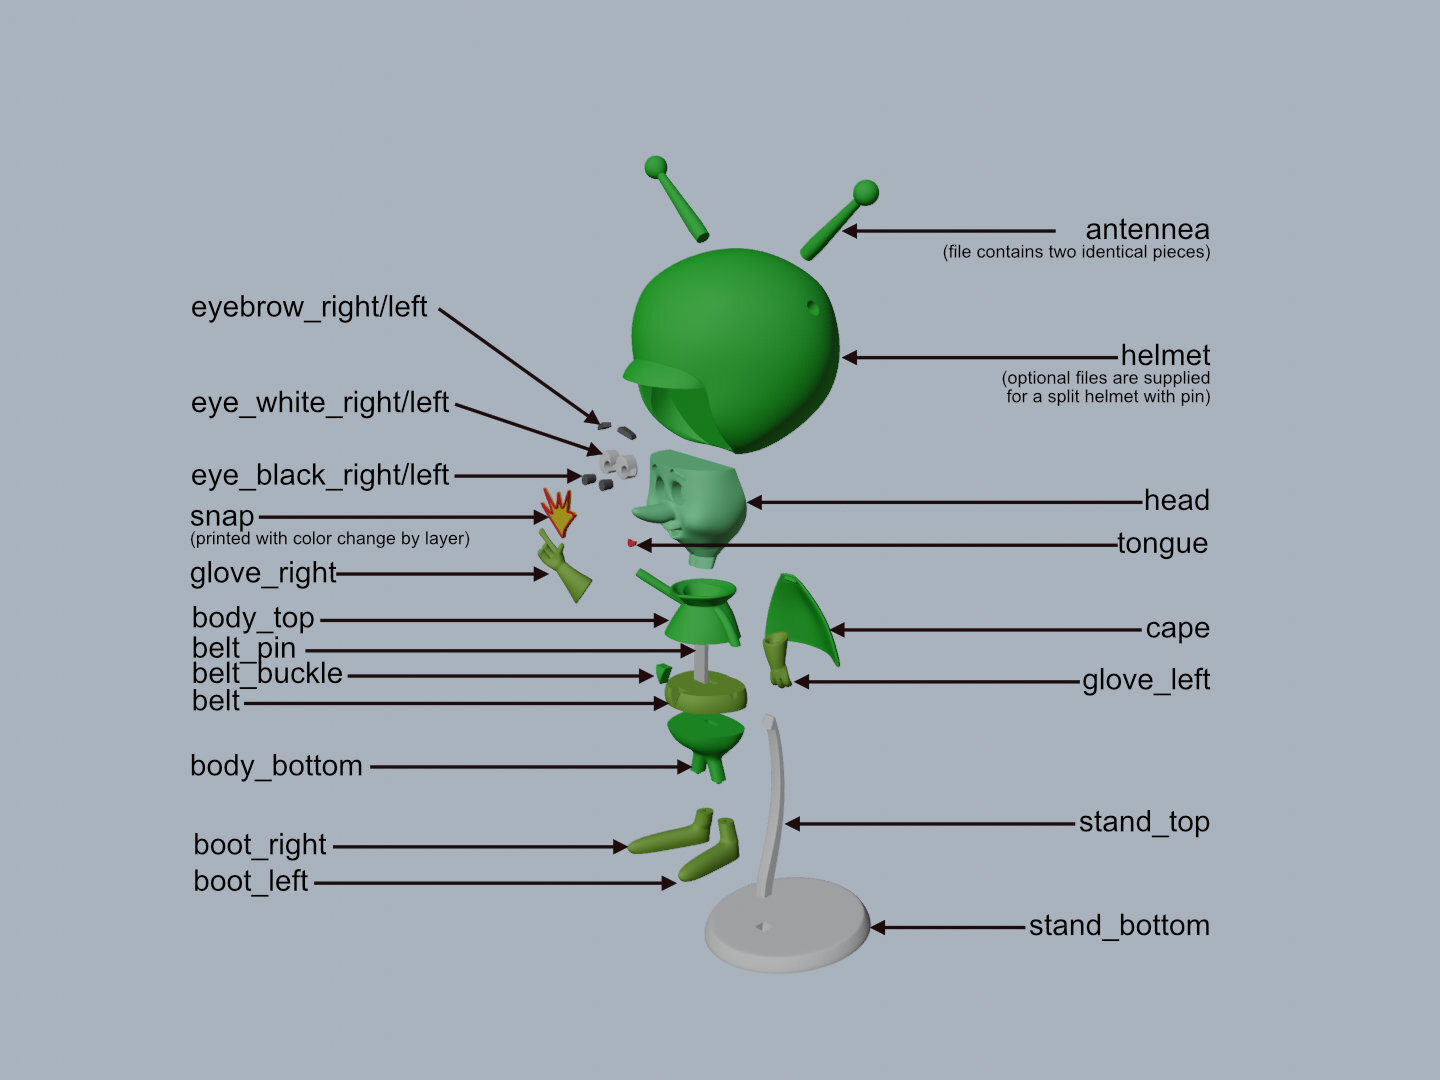
Supports ARE required on one part only, helmet. See notes for specific helpful printing tips and alternative helmet files.
If you have the proper filament colors, no painting is needed.
The assembled model is 150mm tall (with stand) and is mostly in proportion to my previously posted original Flintstone and Jetson split models.
Important note
Due to the model size, there are small parts and some connections have more leeway than I would have liked. In order to enjoy the model, please read the notes for details.
Enjoy!
...........................................................................................................
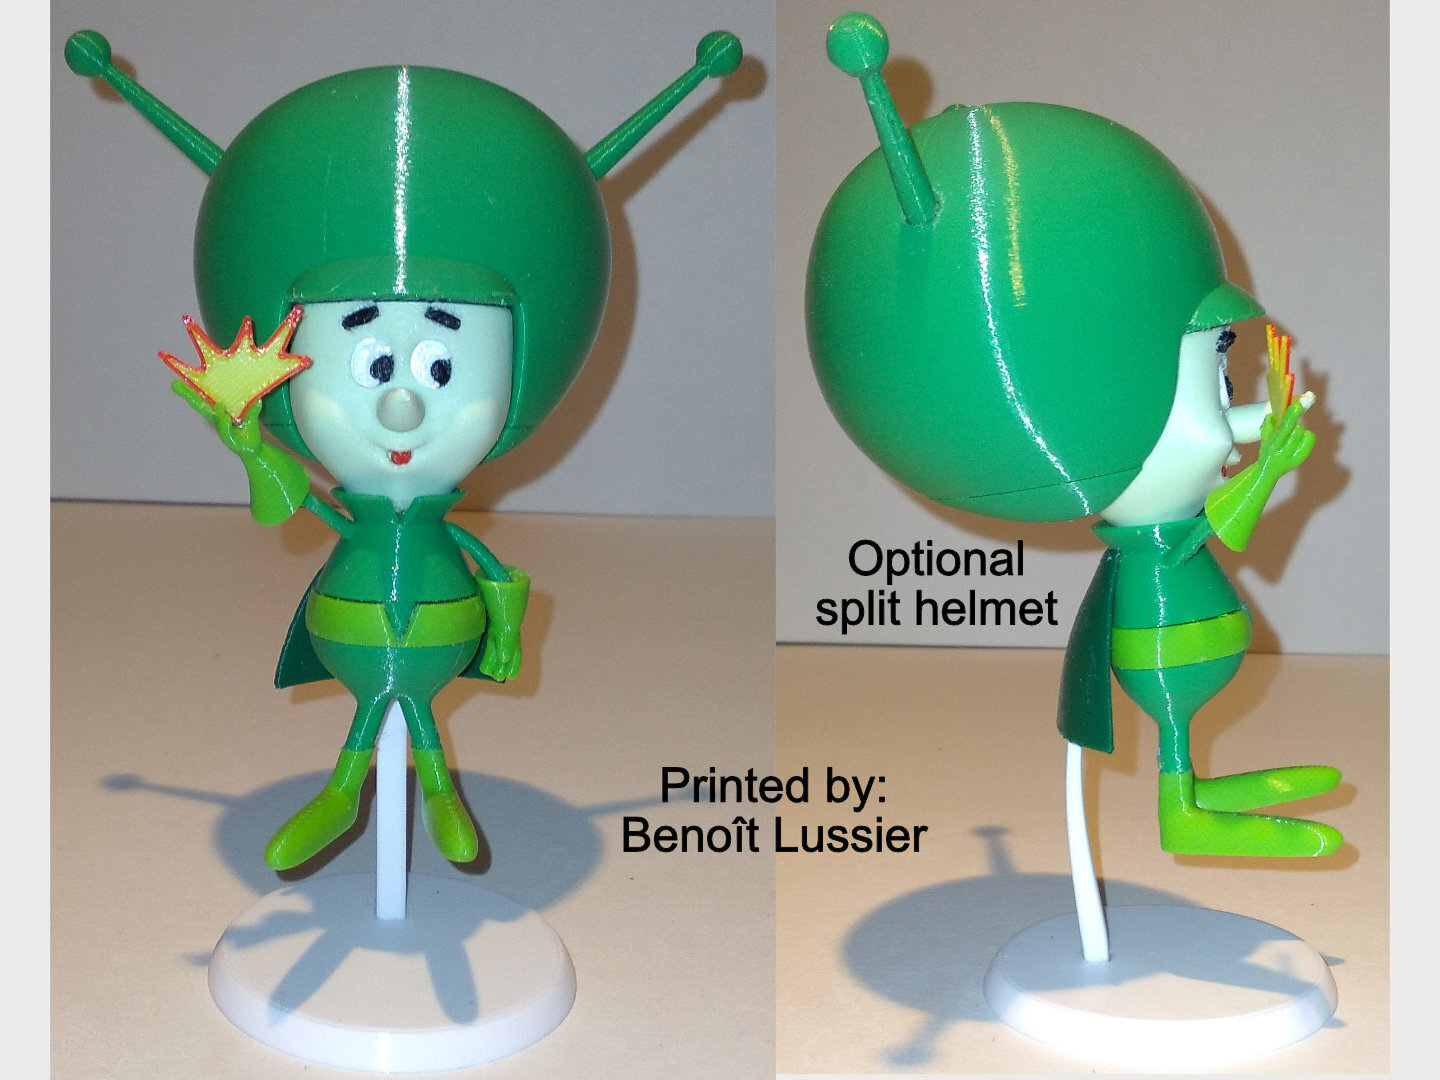
Special shoutout to maker Benoît Lussier for providing QA printing and quality feedback.
Special thanks to Jason McMillan (makerworld ID Gatekeeper) for creating the Bambu Print Profile on Makerworld.
...........................................................................................................
Print Instructions:
Supports: YES on one part only, helmet, see specific instructions below
Resolution: .2mm
Infill: 15%
Notes:**
Refer to the notes below for a few helpful printing and assembly instructions.
...........................................................................................................
Building the model
Colors
Black: (Devil Designs PLA - Black)
eye_black_right
eye_black_left
eyebrow_right
eyebrow_left
..
White: (Devil Designs PLA - White)
eye_white_right
eye_white_left
stand_top
stand-bottom
..
Mint: (Devil Designs PLA - Mint)
head
..
green: (BambuLabs PLA - Green)
helmet
(optional helmet_top, helmet_bottom, pin_helmet. See notes for details)
body_top
body_bottom
cape
antennae (file contains two identical pieces)
belt_buckle
..
Dark Green: (Paramount3D PLA - St Andrews Green)
glove_right
glove_left
belt
boot_right
boot_left
..
Red: (Hatchbox PLA - Red)
tongue
..
Gold Sparkle: (BambuLabs PLA - Gold Sparkle)
snap (with color change to red sparkle after .6mm)
..
Red Sparkle: (Devil Designs PLA - Galaxy Red)
snap (with color change from gold sparkle after .6mm)
..
Any Color (hidden parts)
pin_belt
...........................................................................................................
Printing and assembly tips
Printing tips
1 - Supports are required on one part, helmet. Due to the slope of the back section of the helmet, even with supports there may be considerable scarring. Optional helmet parts are supplied, helmet_top, helmet_bottom and pin_helmet if you prefer to have a joint line rather than scarring in the back.
*supports: organic/tree supports were used on:
- helmet or the optional helmet_top
2 - There are some pieces that may need brims or rafts, use your discretion. When setting up my prints I prefer to be conservative to ensure the least chance of a print failure, especially since the base of many parts are hidden when inserted into another part. Brims also ensure that the first layer of small parts will have a better fit for my models.
*I used a raft on the following parts to endure a clean fit, and strongly recommend it for this model:
- eye_black_right/left
- eyebrow_right/left
- antennae (if you have problems printing this, add organic supports)
- cape
- tongue
3 - The snap part is printed with a color change by layer. I used three .2mm layers of sparkle gold and then three .2mm layers of sparkle red.
4 - When removing parts from the printer bed, it's a VERY good idea to place left/right parts into separate containers to help with the assembly process. Sometimes the difference between the left and right parts is very small but it is still worth keeping track of them and assembling them in their proper place.
..
Assembly tips:
1 - Take your time gluing the model together and enjoy the process. Give some thought into which parts to glue together as groups and then gluing the groups together. Let the glue for each group set completely before combining groups.
2 - I used 3D Gloop (strong fast drying) and E6000 (tacky slow drying) glues to put this model together. For both glues using a smaller amount is usually better than more glue.
3 - important for all my models, be sure to dry fit all parts before gluing.
4 - The eye_blacks, eyebrows and tongue all have the bed side (raft side) inserted. The tongue is exceptionally small, so just wiggle it in until it looks good. Keeping the bed side down and the slightly wider side up will help the tongue be positioned correctly. Remember, less glue is better.
5 - As noted, due to the small size of this model, a number of connections are not as good as I would have liked. Simply position and rotate the gloves as per the pictures.
6 - The head snaps into the helmet. Be sure to scrape off any fat first layer you may have on the head to make the fit easier.
7 - The buckle should fit correctly, but if it is too tall when assembling, use your slicer to lower it below the bed and reprint. Mine fit perfectly but Benoit said it was too tall during his QA.
8 - The stand_top should be glued into the body_top BEFORE the cape is glued on. Be sure to let it dry thoroughly
before adding the stand base and cape.
9 - Refer to the assembly diagrams in the pictures section as well as the uploaded pictures for putting the model together. The model is meant to be glued.
Do not hesitate to ask questions, feedback is essential to making better models.
:format(webp)/https://fbi.cults3d.com/uploaders/12888752/illustration-file/fc90bc4f-82a8-4560-8a97-07e8302bf68e/gazoo-angle.jpg)
/https://preview3d-images.cults3d.com/f1rggt9mtx67n8fj0uprjwn18o4r)
/https://preview3d-images.cults3d.com/8tkv6fnqlc6p3pomrbnmftvw9ddh)
/https://preview3d-images.cults3d.com/8ojh5pzy4tzmq8nk0b3p9epnnjp3)
/https://preview3d-images.cults3d.com/0aup3a4wclpdslfeh14r4ysuwg1s)
/https://preview3d-images.cults3d.com/5tc7k721ocw8swqiqhegicvc8564)
/https://preview3d-images.cults3d.com/s48bgslwetootg8ioreif6fniydt)
/https://preview3d-images.cults3d.com/8iknrknphy0xv1cu3g95qpdv272f)
/https://preview3d-images.cults3d.com/7w2lvihqdyti4idwik6psulixezt)
/https://preview3d-images.cults3d.com/l8kcgpow0xwjt2f51ytgzdi5ullj)
/https://preview3d-images.cults3d.com/ks7jnneyywgmjksq61l282jeun7s)
/https://preview3d-images.cults3d.com/opu1bv8fwja9oj9aqmryeidpwt8d)
/https://preview3d-images.cults3d.com/myyzuw6b00cvwrhz07iztw1fkyrb)
/https://preview3d-images.cults3d.com/nz2zz1xdgzh6h3ic80bjeli4ag5z)
/https://preview3d-images.cults3d.com/1uy543tlrlyelbj5xw22ydl9u3ld)
/https://preview3d-images.cults3d.com/hx0650k65emnet8awf5ci2bpdmzu)
/https://preview3d-images.cults3d.com/bb28p1im8gnj5w5livycdgo4ufyn)
/https://preview3d-images.cults3d.com/aeofej19jrqat2rwro9hmtcr0qa3)
/https://preview3d-images.cults3d.com/dv29jbjzl98o6q8ob2i6apq7j3jj)
/https://preview3d-images.cults3d.com/h7l58kqyabgyd4x3nflkg6i8dxne)
/https://preview3d-images.cults3d.com/vx7k2gzohh0mq9ikxrp37byvwy52)
/https://preview3d-images.cults3d.com/x4riihbtxsoyt0jqoguqrjcxmv13)
/https://preview3d-images.cults3d.com/muoozpd25q6lh0ijb2462zr0nyi1)
/https://preview3d-images.cults3d.com/1h3s6aef0acoaunsne78kcf47cql)
/https://preview3d-images.cults3d.com/661f7q3a355pl4ccrdq4glwdipfi)
/https://preview3d-images.cults3d.com/vg8wbzxy8og8tm3hlgxw189a44gt)
/https://preview3d-images.cults3d.com/sc18nkfp8hnu5i8oimxlxtq4gxrk)


:format(webp)/https://fbi.cults3d.com/uploaders/12888752/illustration-file/1466756698-6047-9939/Capture_d_e_cran_2016-06-24_a__10.22.19.png)
:format(webp)/https://fbi.cults3d.com/uploaders/12888752/illustration-file/1466757475-6047-5333/Capture_d_e_cran_2016-06-24_a__10.35.33.png)
:format(webp)/https://fbi.cults3d.com/uploaders/12888752/illustration-file/1466757796-6047-6005/Capture_d_e_cran_2016-06-24_a__10.39.40.png)
:format(webp)/https://fbi.cults3d.com/uploaders/12888752/illustration-file/1466758245-6047-0600/Capture_d_e_cran_2016-06-24_a__10.43.24.png)
:format(webp)/https://fbi.cults3d.com/uploaders/12888752/illustration-file/1466758592-6047-2514/Capture_d_e_cran_2016-06-24_a__10.48.58.png)
:format(webp)/https://fbi.cults3d.com/uploaders/12888752/illustration-file/1467831904-29883-9246/scene_angle.jpg)
:format(webp)/https://fbi.cults3d.com/uploaders/12888752/illustration-file/1469551534-8824-0955/dilbert7a.jpg)
:format(webp)/https://fbi.cults3d.com/uploaders/12888752/illustration-file/1470180379-30202-8608/boss_front1.jpg)