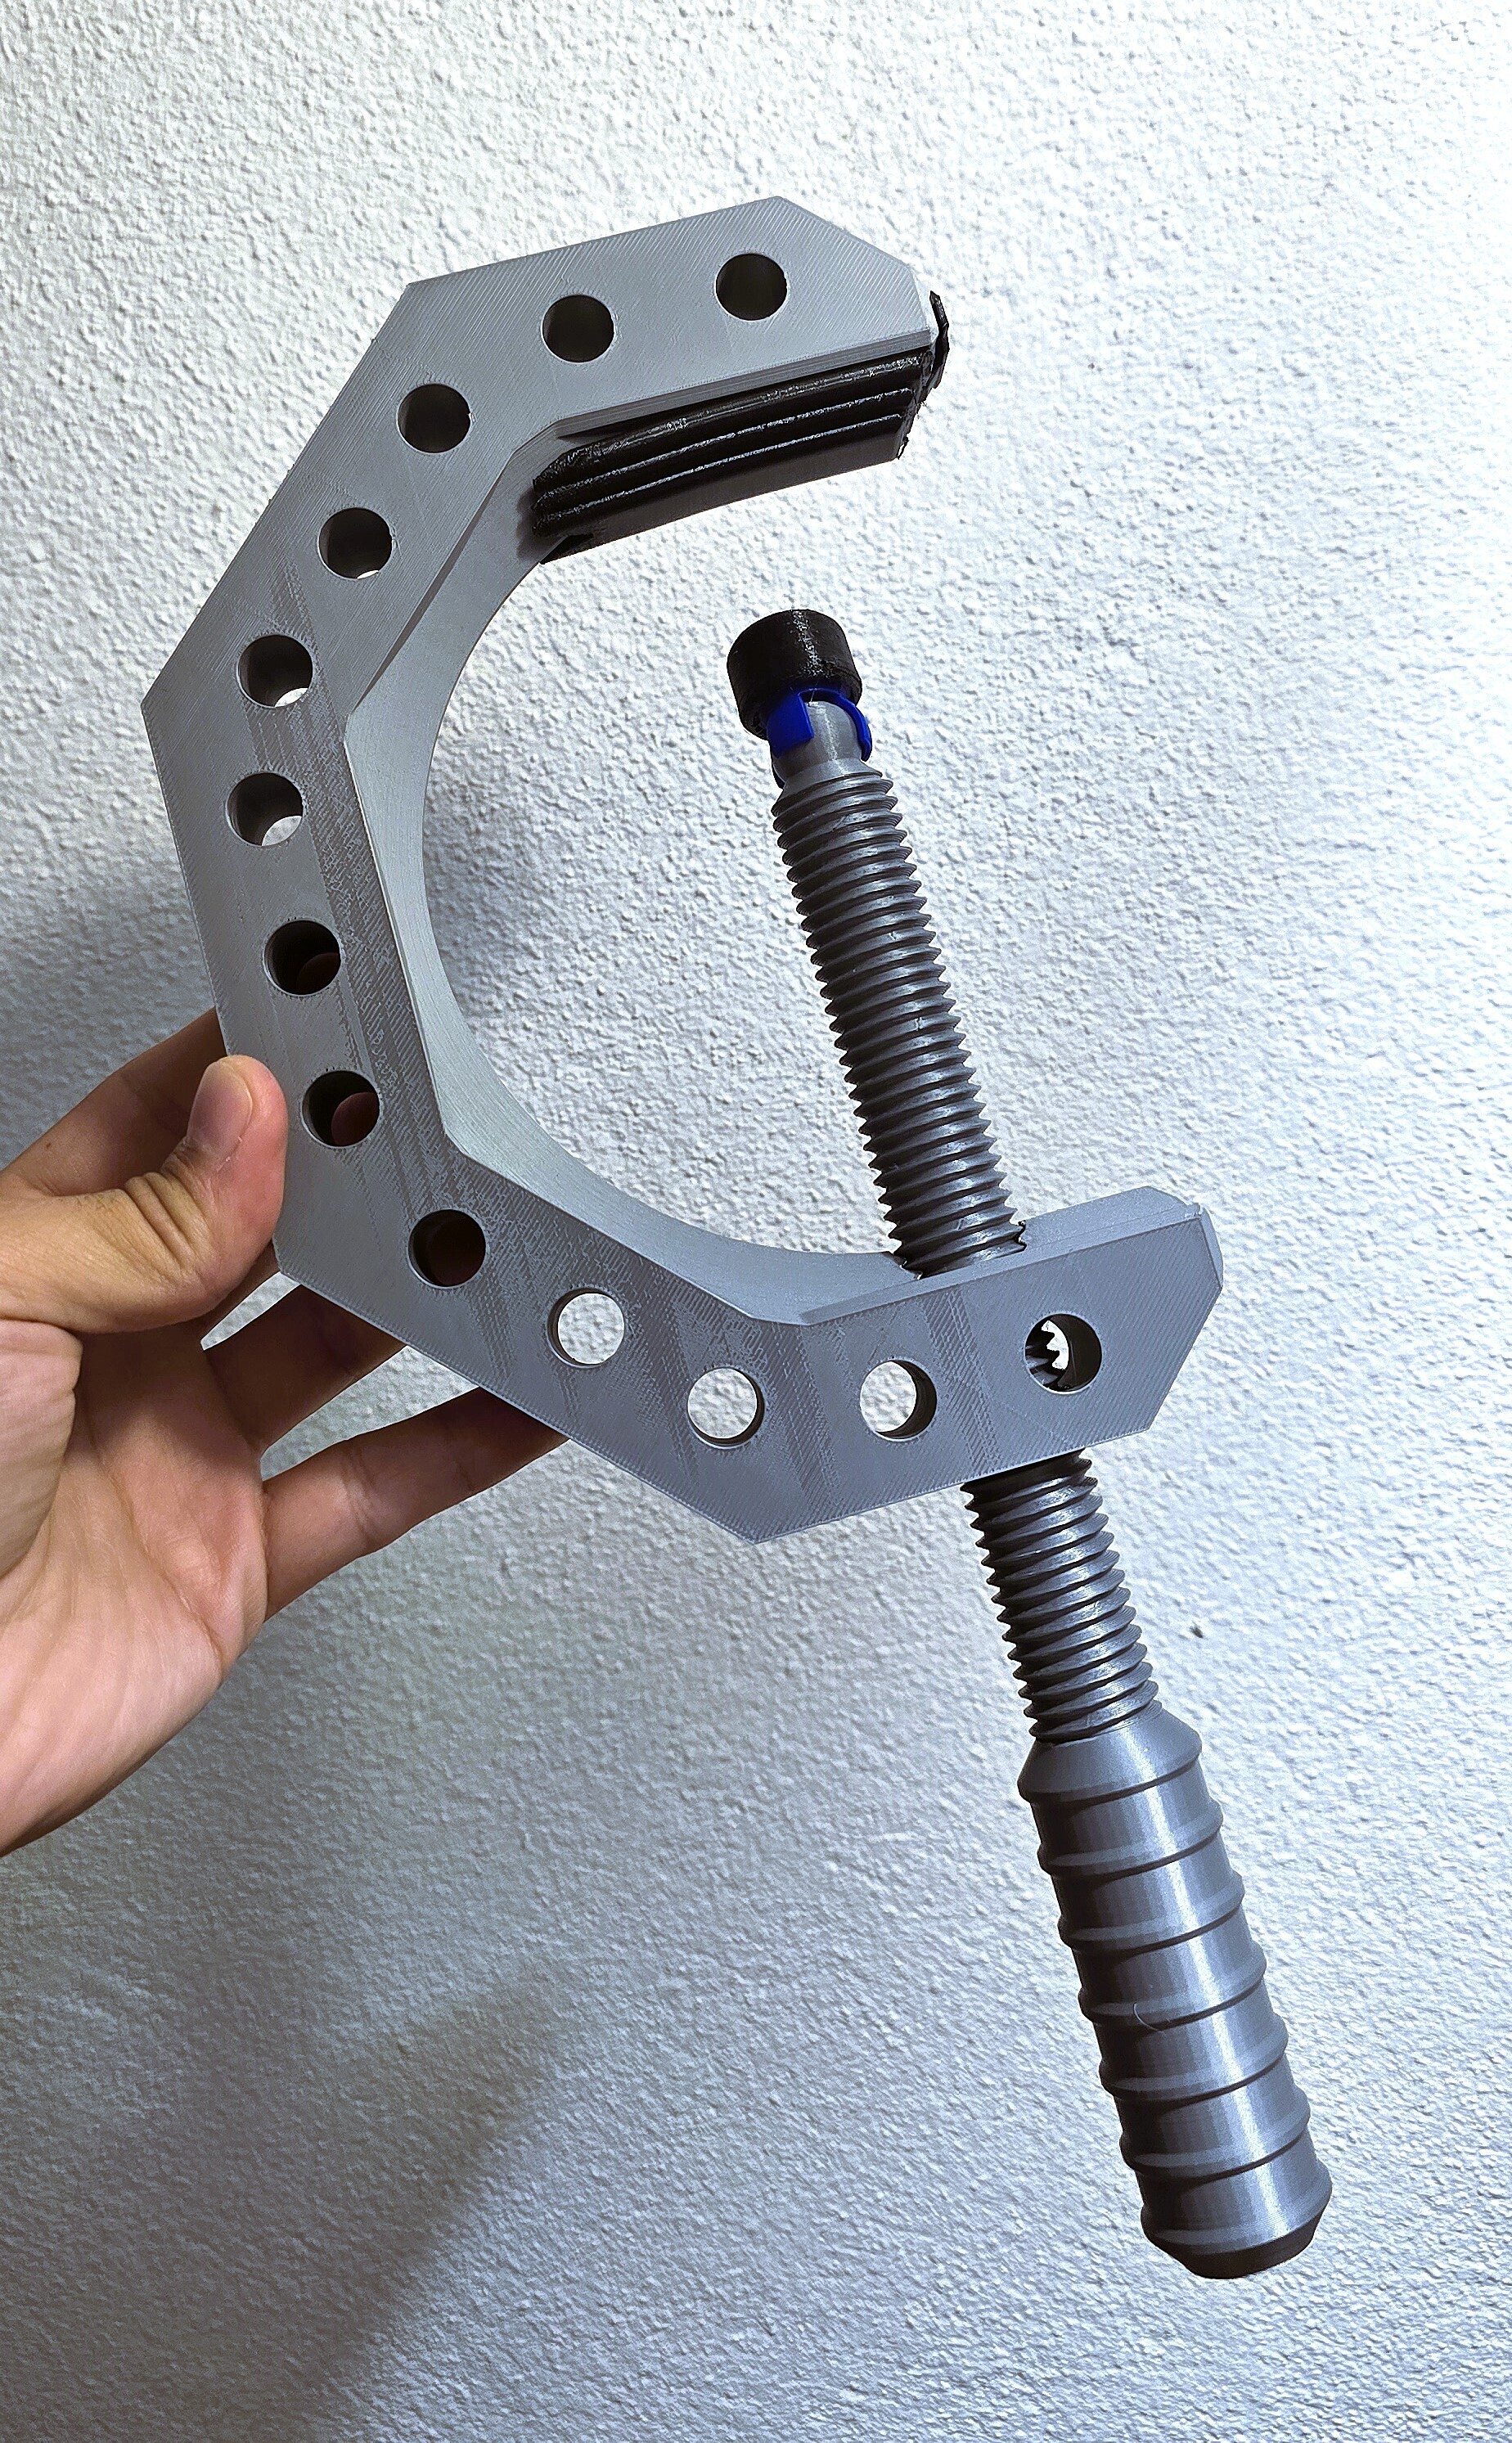
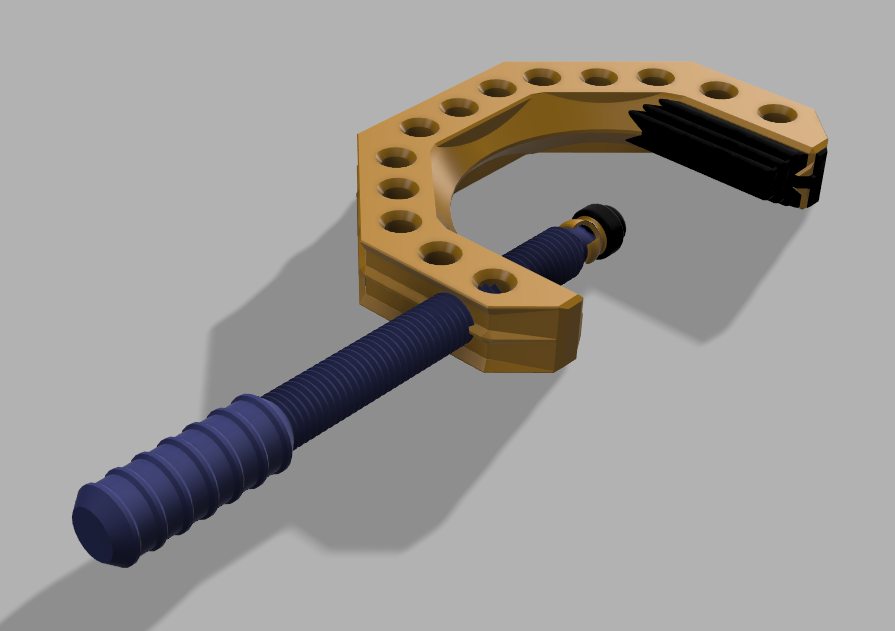
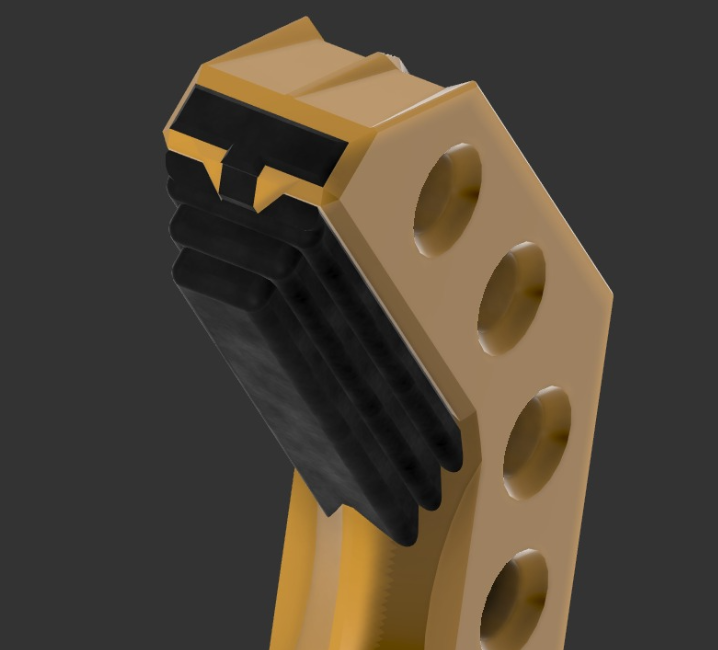
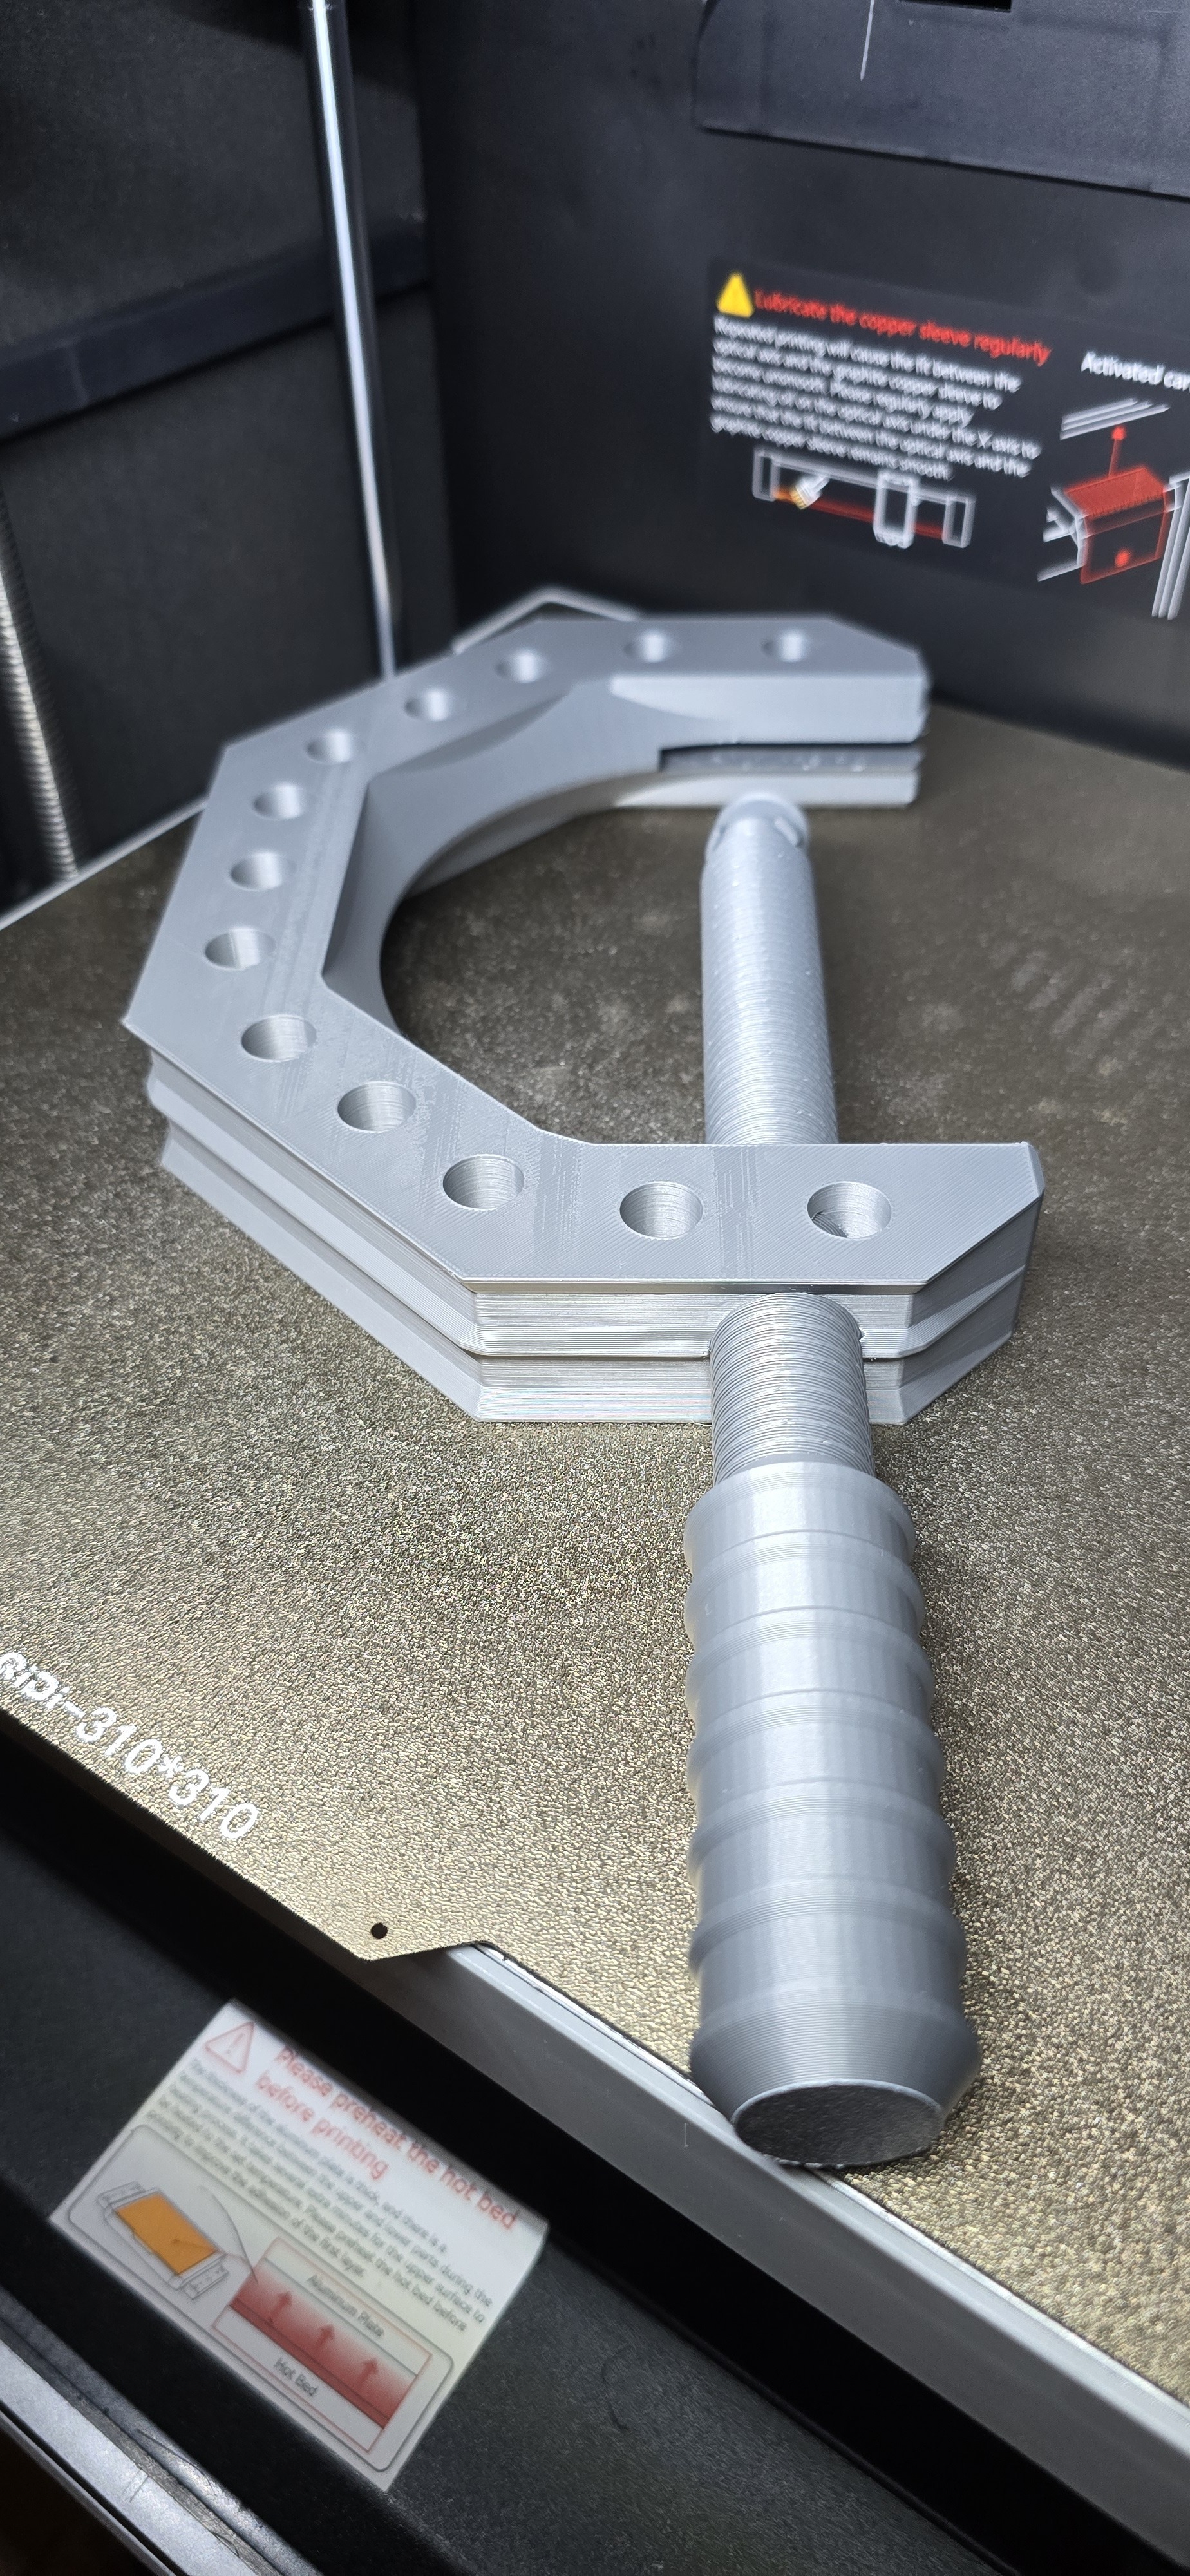
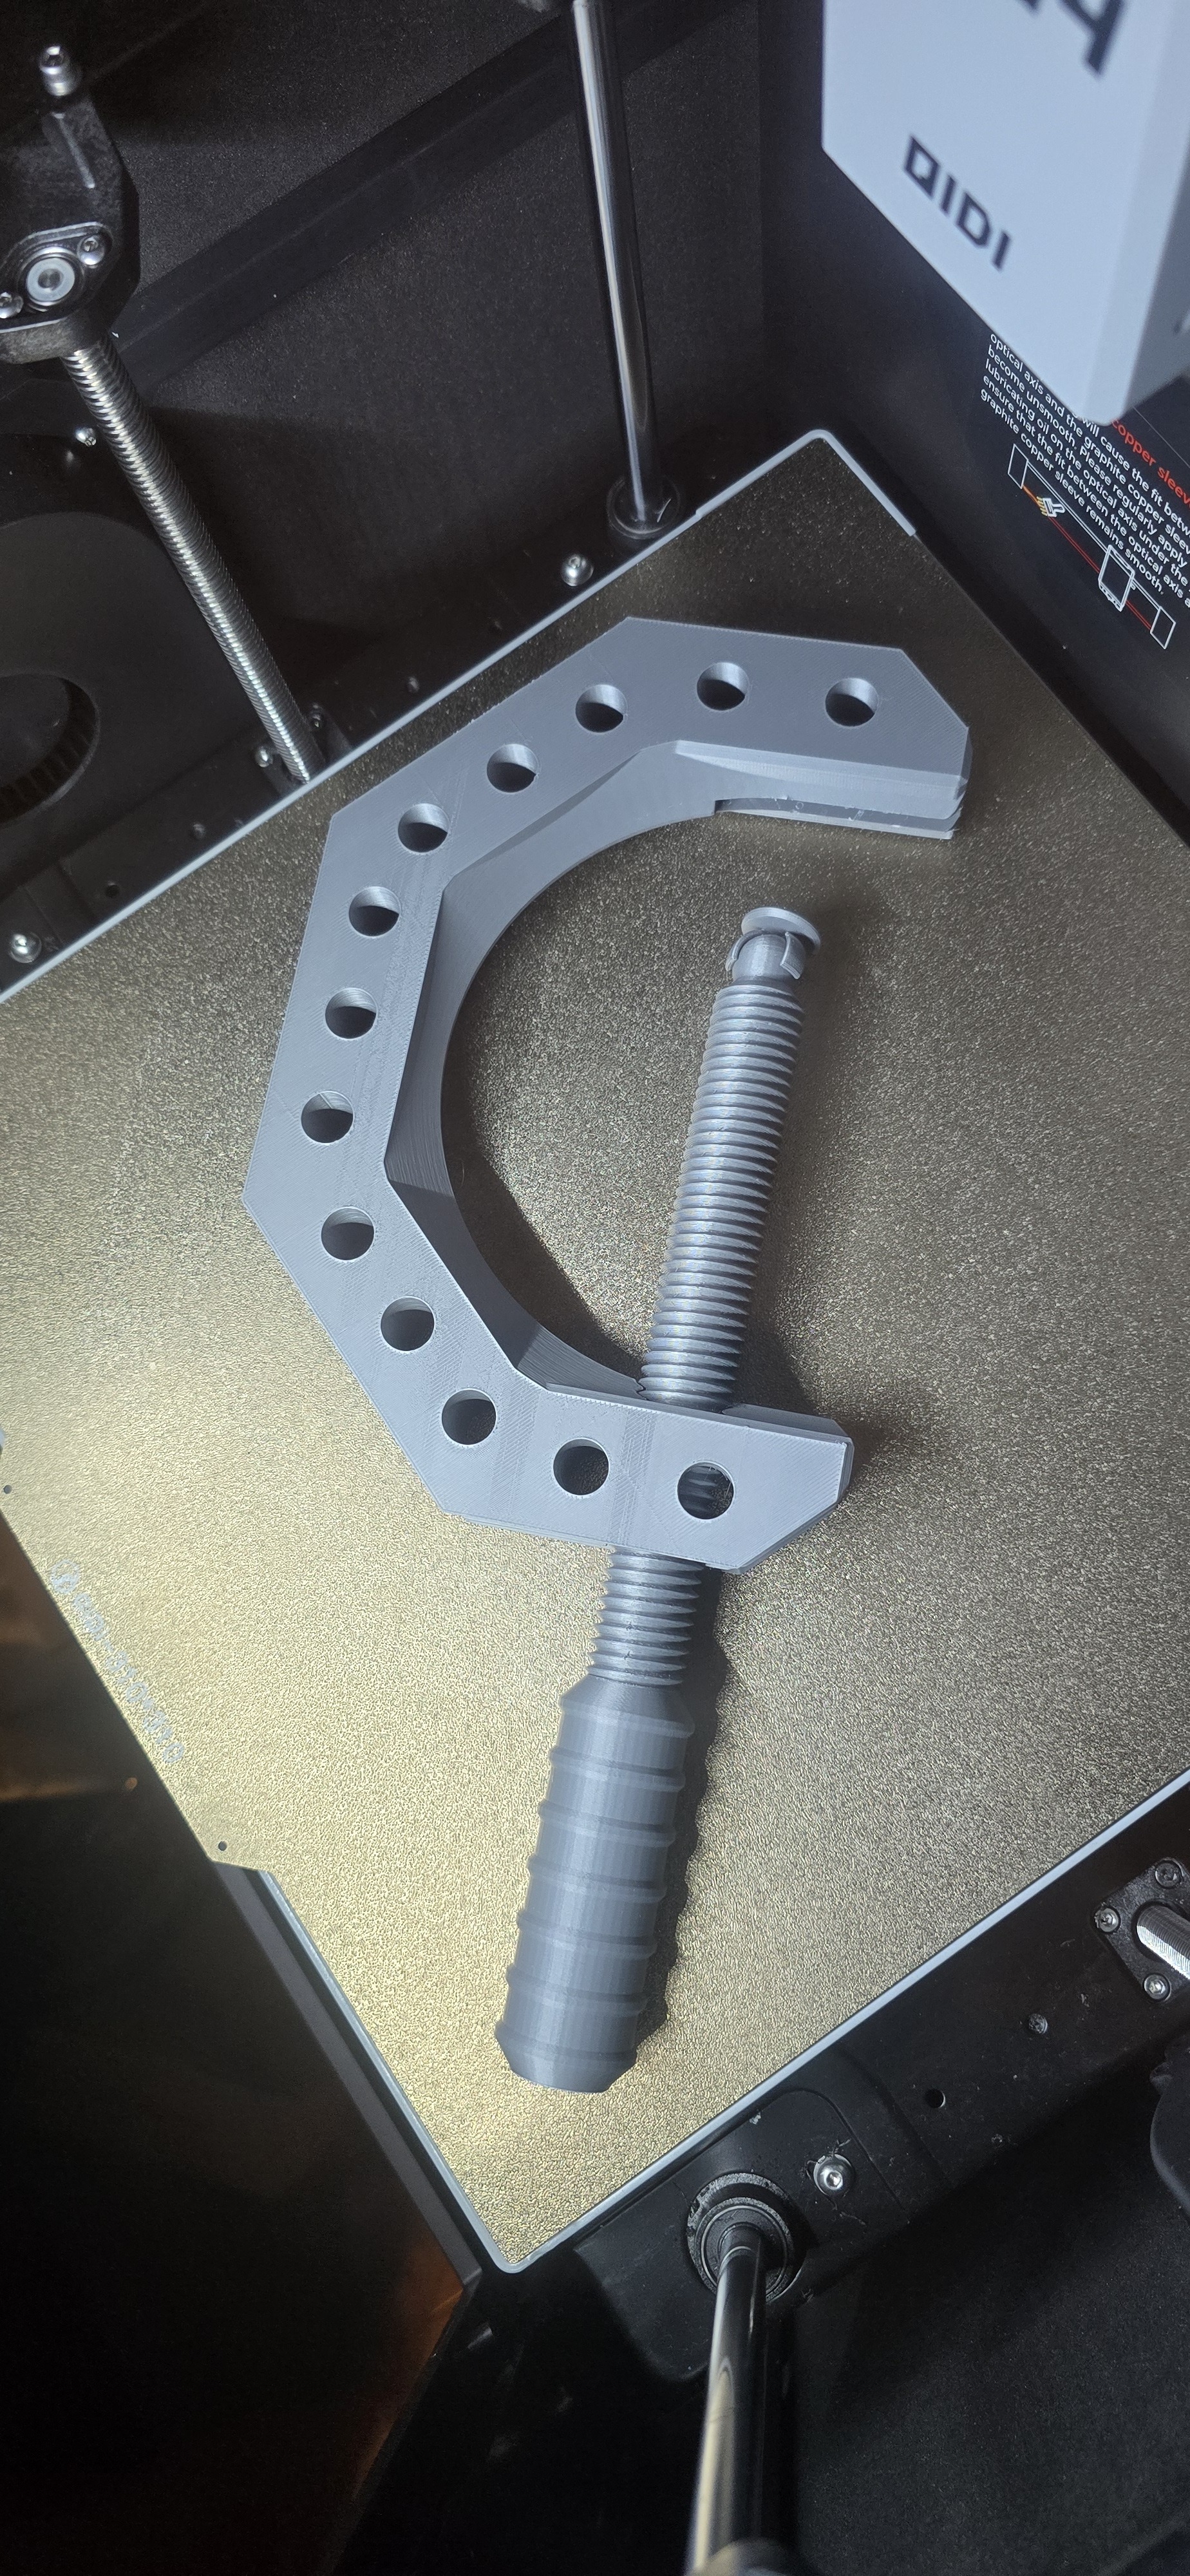
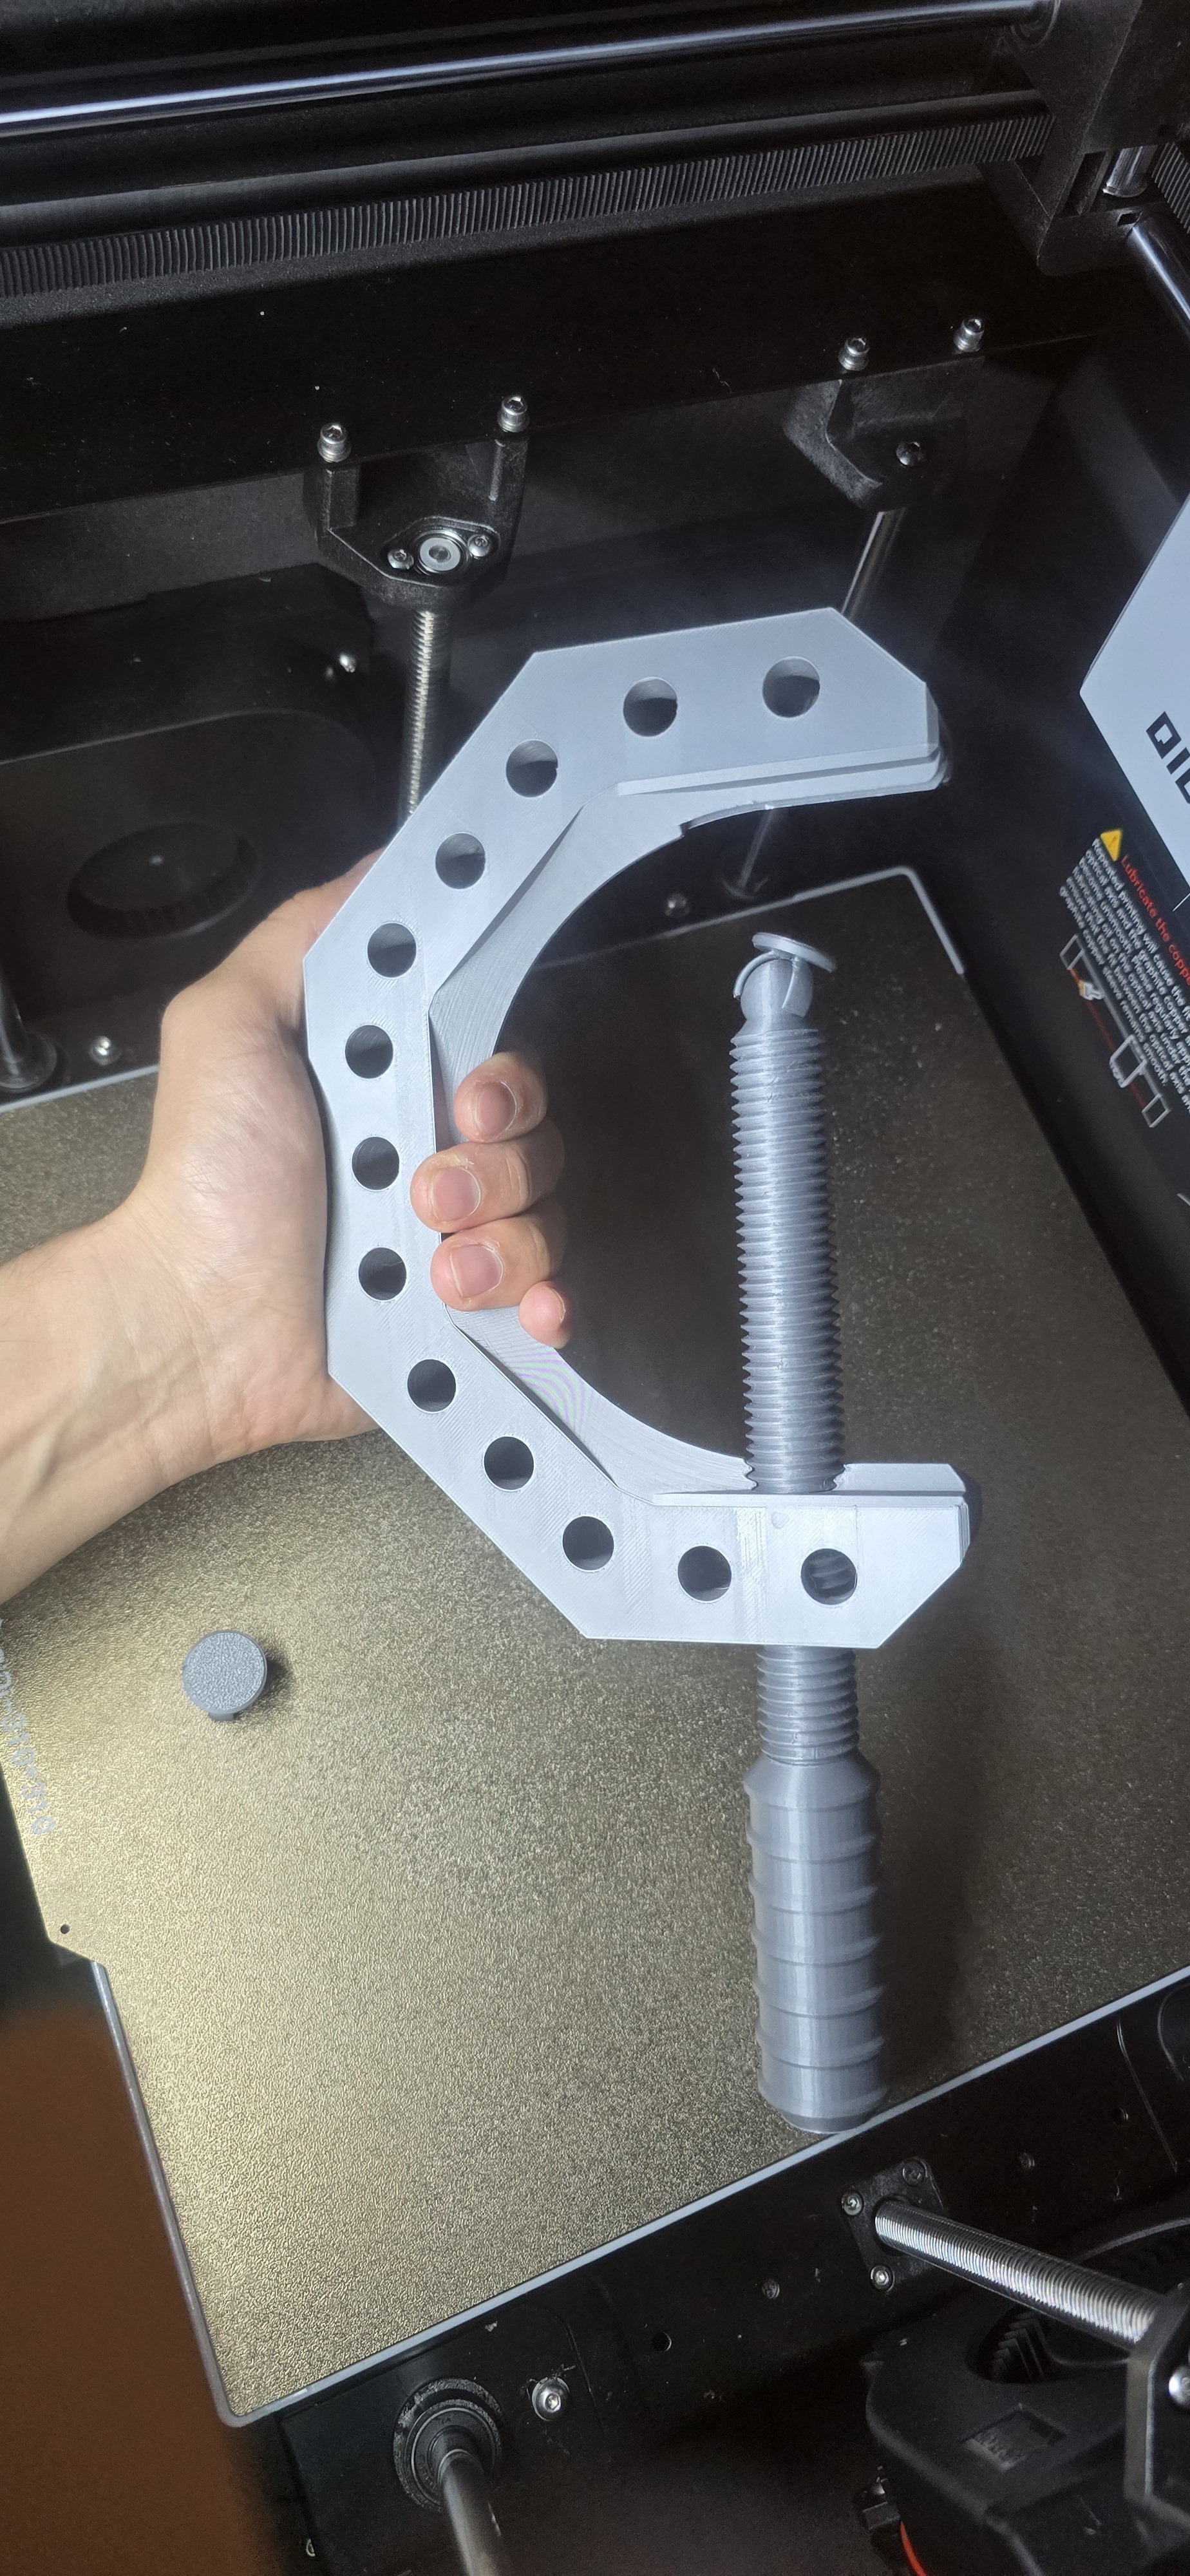
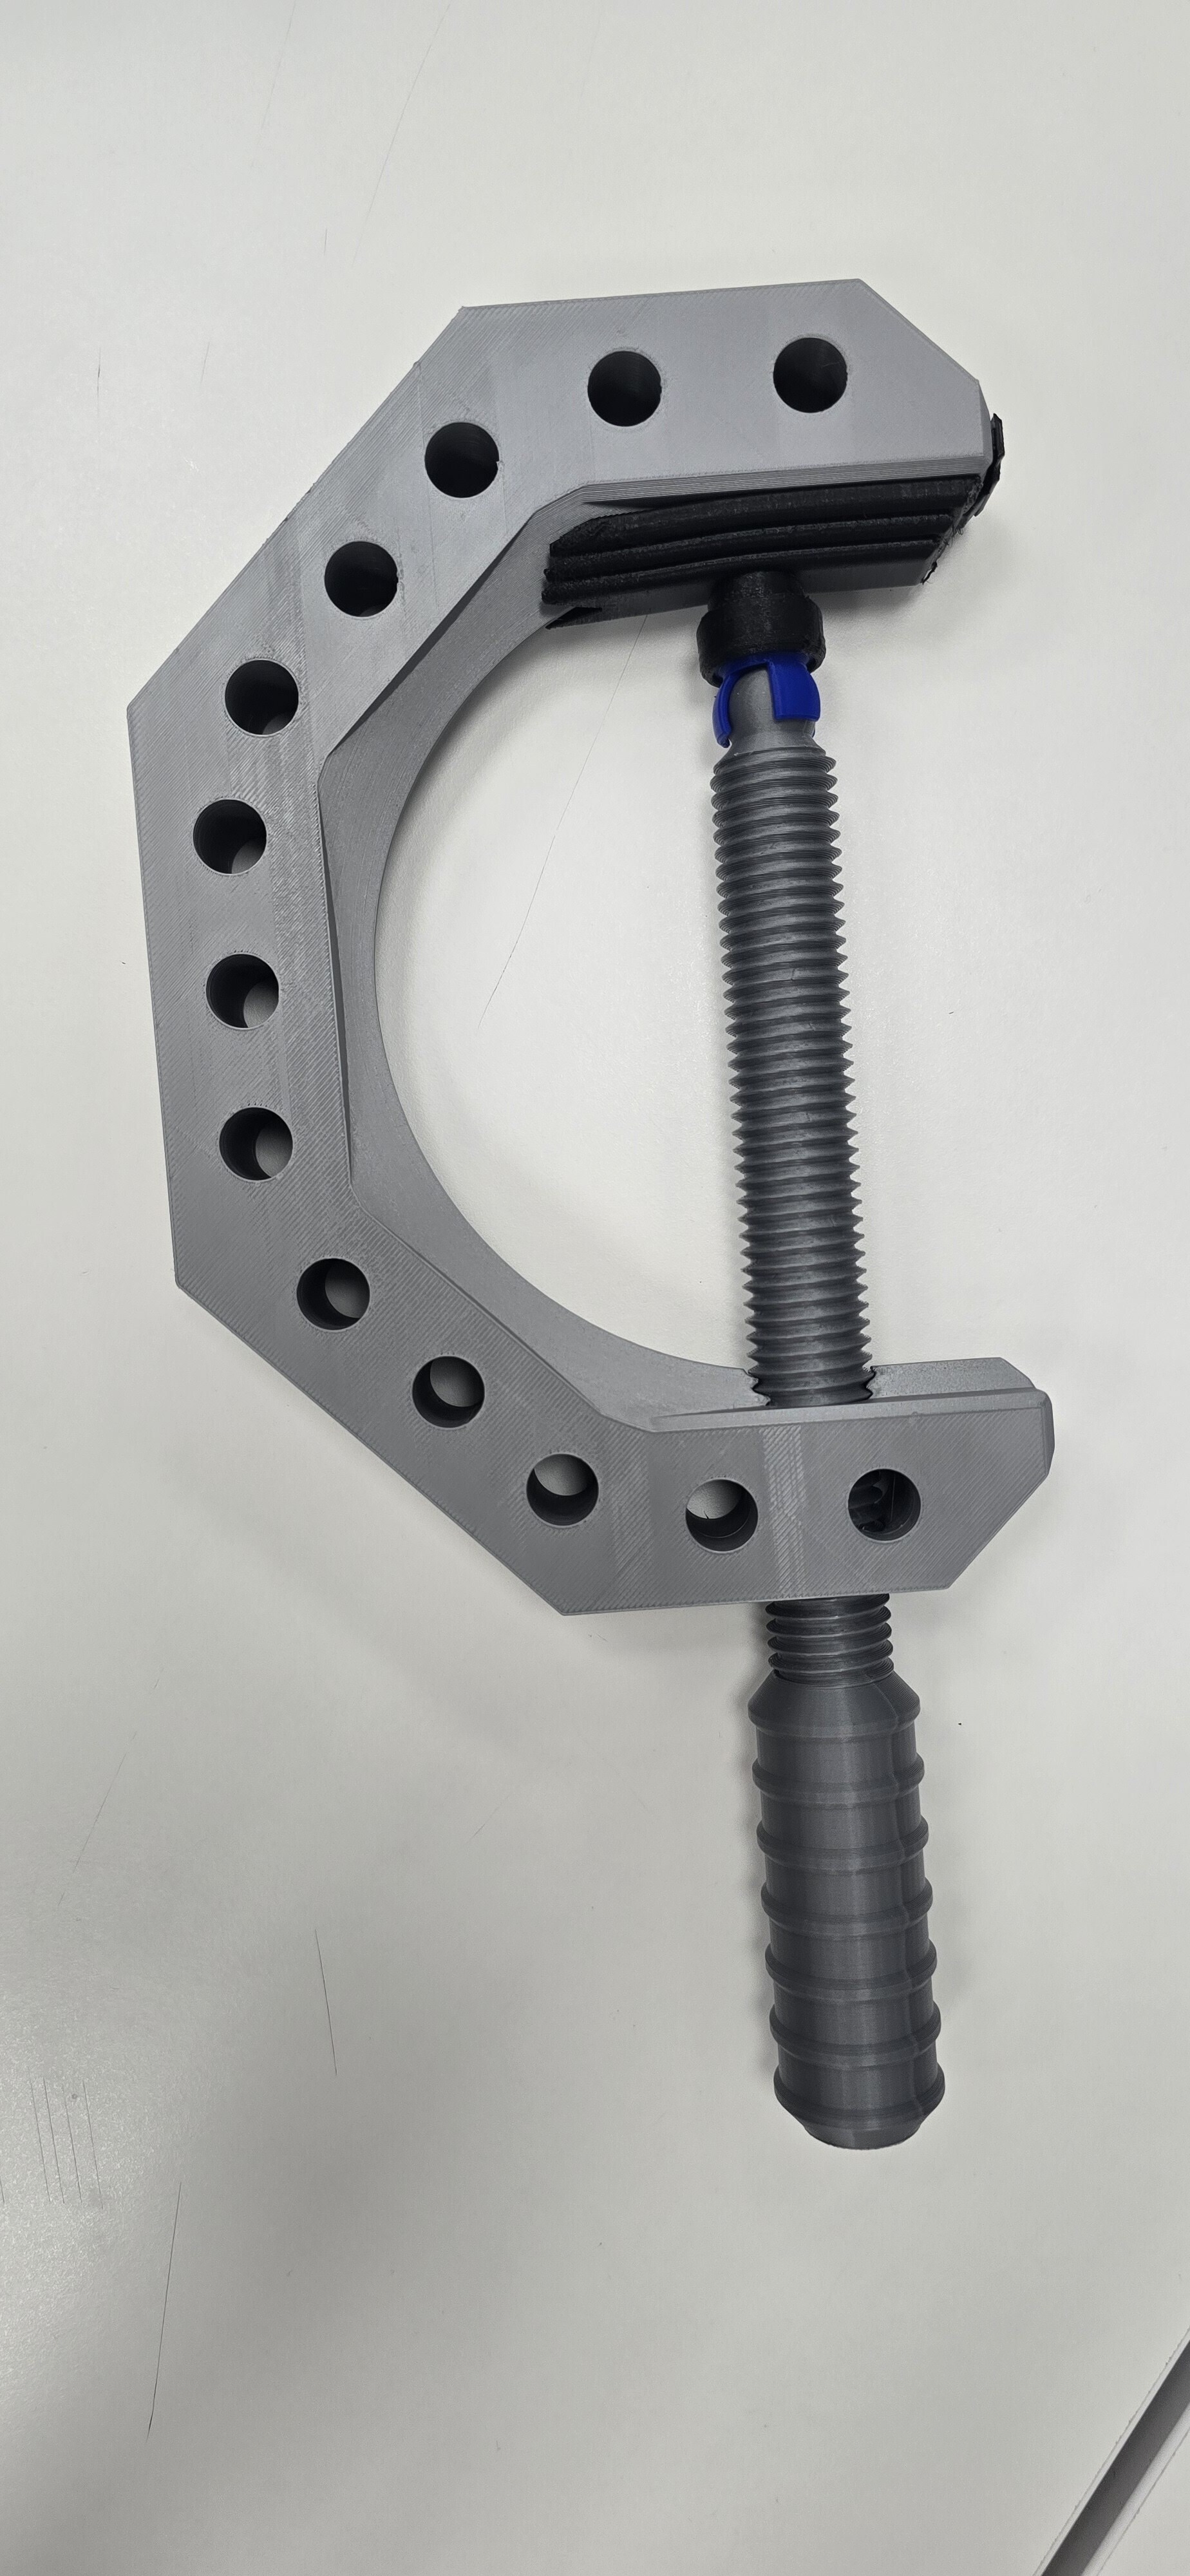
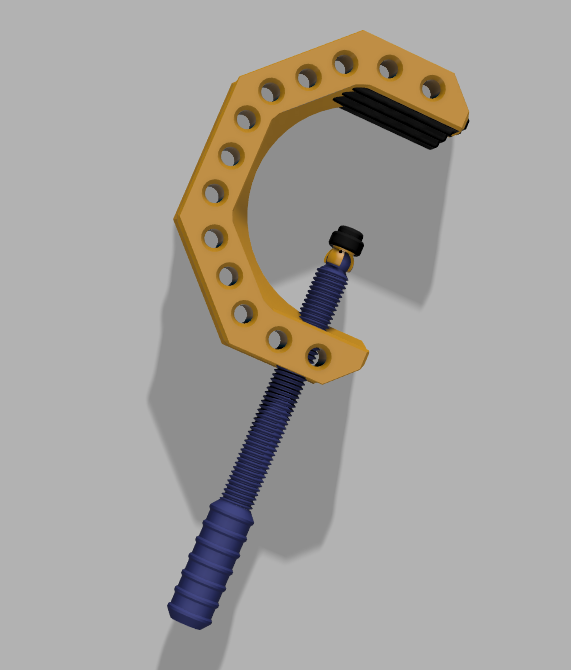
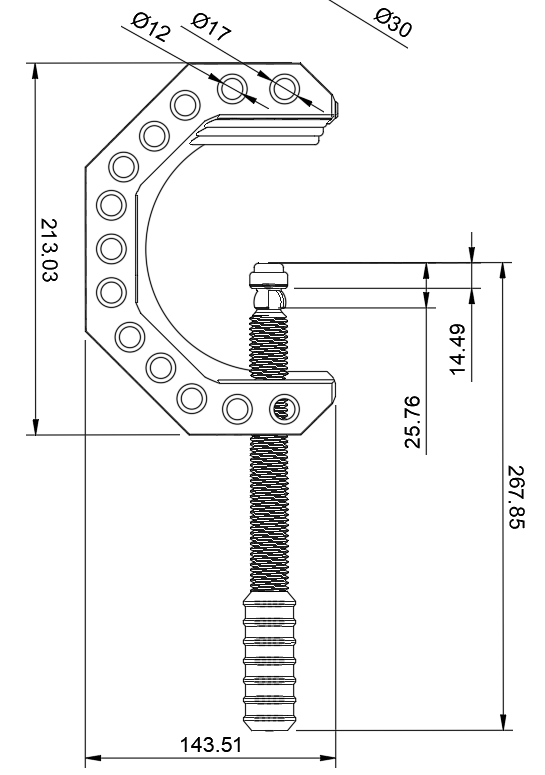
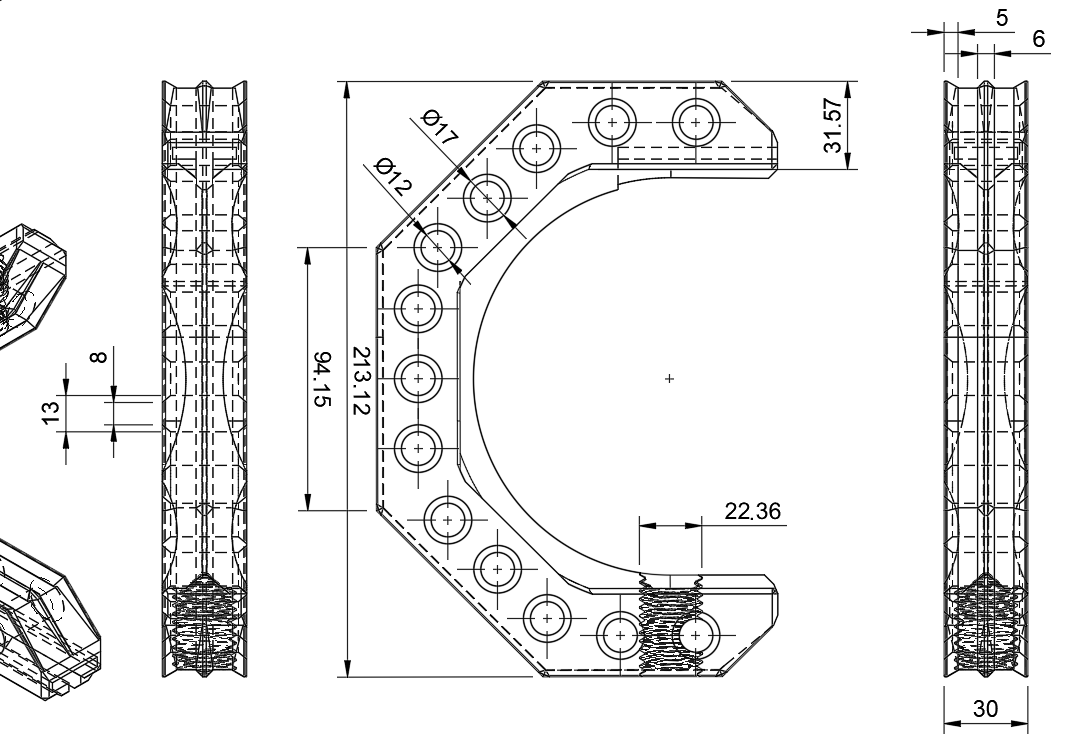
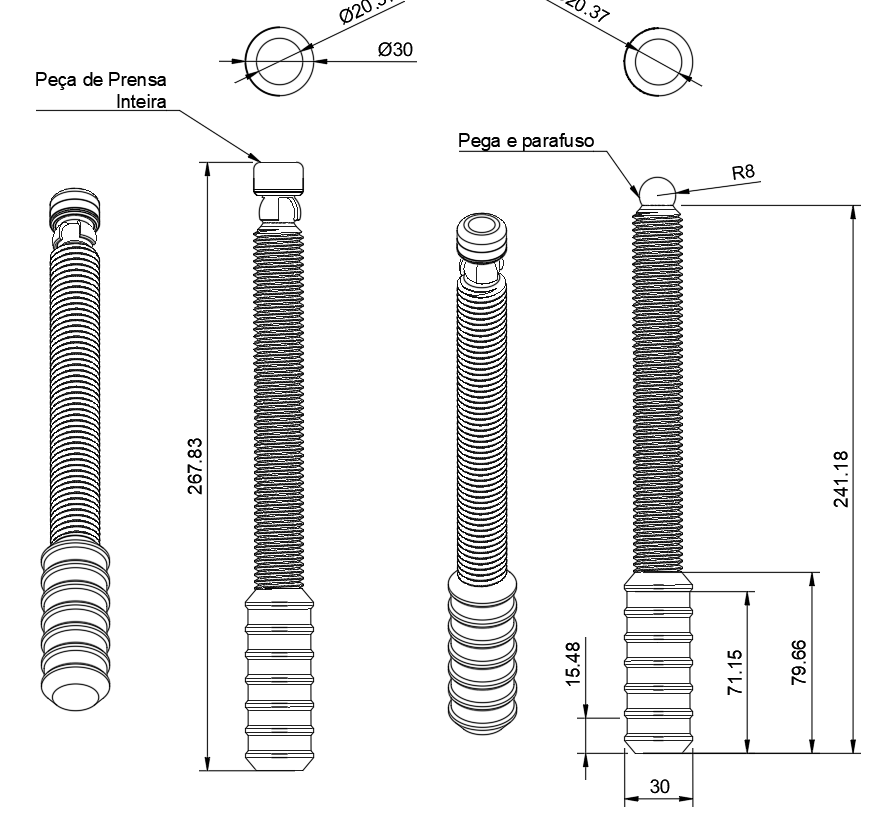
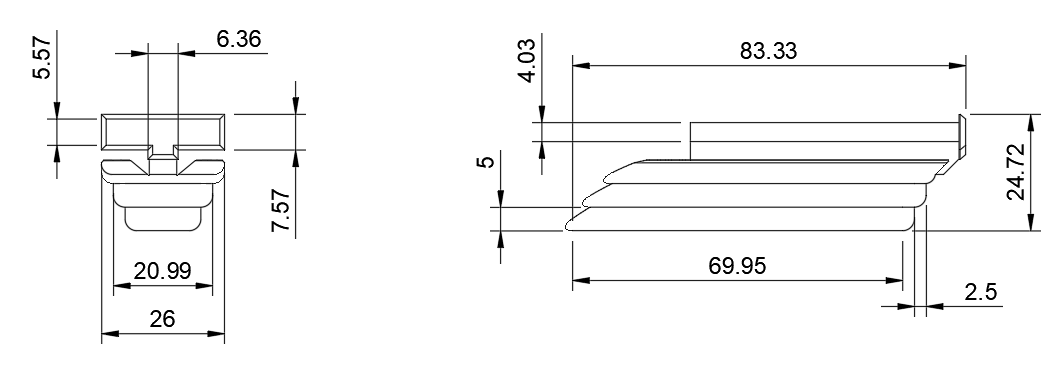
ADAPTUS 3D-Clamp (Strength Edition) - большой и точный мягкий зажим для 3D-печатных деталей
:format(webp)/https://fbi.cults3d.com/uploaders/35013394/illustration-file/ad736aba-5baf-4332-8899-3b112df080a3/20251027_203323-2.jpg)
/https://preview3d-images.cults3d.com/40k6t58g90s6ao9j4kjceq2406nh)
/https://preview3d-images.cults3d.com/vq9082vfww285m3ro3jhxc2zy0ee)
/https://preview3d-images.cults3d.com/rd2bf9kmnxsq4d6x3vnidp3tlrmx)
/https://preview3d-images.cults3d.com/hwhoh77vo46sig583bi6ostblke3)
/https://preview3d-images.cults3d.com/4pv9rebmq6kujgqv9g3labqr8ilz)
/https://preview3d-images.cults3d.com/booio4apuv2ffiv8z5h69oa6tmnt)
/https://preview3d-images.cults3d.com/3pl8dv3ioagq8baxn31mhbm643xb)
/https://preview3d-images.cults3d.com/t8hnqzufowm4k8en5heb2xh6fneg)
/https://preview3d-images.cults3d.com/6nx7j5vpzuc73wm6cs2mzvp3nmf5)
/https://preview3d-images.cults3d.com/mtcet2qb7s7lft1r83th4wno2ydr)
/https://preview3d-images.cults3d.com/0s63wtd1plvy60qncuzaazwhpdcj)
/https://preview3d-images.cults3d.com/av4o39ybdamkii1foc2qufk91md6)
/https://preview3d-images.cults3d.com/knxw2n09rs7fmw9uy4kht7848ker)
/https://preview3d-images.cults3d.com/qlegl4j06xuvu0q8cy21f66puzj4)
- 43 виды
- 0 мне нравится
- 0 загрузка
- 0 коллекции
- 0 kомментарий
- 0 makes
| Лицензия | |
|---|---|
| Использование | |
| Формат 3D-проектирования |
7 файлов (OBJ) Закрыть
|
| Дата публикации | |
| Номер конструкции | 4093511 |
| Автор дизайна | hubertdungen |


:format(webp)/https://fbi.cults3d.com/uploaders/35013394/illustration-file/57904bdb-1155-4bf4-804e-c438864a9c26/a06d865c-8280-4e6b-a0fa-c027c3a8d141.png)
:format(webp)/https://fbi.cults3d.com/uploaders/35013394/illustration-file/d32d746e-d869-4193-af98-d851e3374a64/Ender3_Enclosure_Filament-Tube_2024-Jun-11_09-03-46PM-000_CustomizedView1681150454.png)
:format(webp)/https://fbi.cults3d.com/uploaders/35013394/illustration-file/5cd5d9ce-5d9e-4278-9f10-a93faeba097f/P%C3%A9_Tv_Philips-1080p_2024-Jun-11_11-16-32PM-000_CustomizedView5403510120.png)
:format(webp)/https://fbi.cults3d.com/uploaders/35013394/illustration-file/6216c8b4-4e79-4666-8484-30a250ca5014/imagem_2024-12-27_012039946.png)
:format(webp)/https://fbi.cults3d.com/uploaders/35013394/illustration-file/14727414-7a47-4e63-9ec8-7d5301b8ef86/imagem_2025-04-27_042920659.png)
:format(webp)/https://fbi.cults3d.com/uploaders/35013394/illustration-file/37b81880-4fb4-4d96-9d44-65e9dd482ba8/Soldering-Iron_Base_2025-May-05_02-56-17AM-000_CustomizedView28284113023_png_1-1.png)
:format(webp)/https://fbi.cults3d.com/uploaders/35013394/illustration-file/4b250369-7c75-4b1f-874f-13abb116c9c3/FRONT_SECOND_ADD.png)
Вы хотите поддержать Cults?
Вам нравятся Cults и вы хотите помочь нам продолжить наш путь самостоятельно? Обратите внимание, что мы — маленькая команда из 4 человек, поэтому поддержать нас в поддержании деятельности и создании будущих разработок очень просто. Вот 3 решения, доступные для всех:
- РЕКЛАМА: Отключите блокировщик рекламы.
- ДОНАТЫ: сделать пожертвование через Ko-Fi здесь Отправить донат
- ПРИГЛАШЕНИЕ ДРУЗЕЙ: Приглашайте своих друзей, откройте для себя платформу и великолепные 3D-файлы, которыми делится сообщество!
Обмен и загрузка на Cults3D гарантирует, что дизайны остаются в руках сообщества создателей! А не в руках гигантов 3D-печати или программного обеспечения, которые владеют конкурирующими платформами и используют дизайны в своих собственных коммерческих интересах.
Cults3D - это независимый и самофинансируемый сайт, который не подчиняется ни одному инвестору или бренду. Почти все доходы сайта возвращаются создателям платформы. Контент, публикуемый на сайте, служит **только интересам его авторов, а не брендов 3D-принтеров, которые также хотят контролировать рынок 3D-моделирования.