Status: Complete
The cost for this model is under 50USD. Prior to installation, you will need to design your own hopper. Tubing can be purchased from any local hardware store (home depot/lowes).
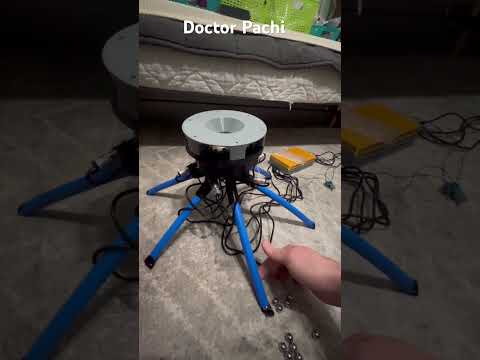
Video: https://youtube.com/shorts/yNB91yp2A4A?si=zLZDvOeG6zKLamtv
The Parts:
- 1x Optocoupler (red bridge cap 1 channel is okay unless using TFT then use 8 channel)
- 1x L298N motor driver
- 1x ESP32-C3
- 6x M12 PNP Proximity sensor (QTY = number of lanes you are using)
- 3x M6 x 10mm bolt
- 6x M3 x 8mm screw
- 6x zip ties
- 2x twist caps
- 1x DC female input
- 12V 2A power supply
- JGB 37-520 35-107 RPM. More RPM for more lanes. If you are looking for exact RPM to go by I would go by this formula: ((RPM*12) -100) to get your approximate output rate per lane. Output of ~300 should be more than enough per lane.
- 1x 6mm Shaft Coupler
- 3x #6 screws (length will depend on depth of board you are using for base of hopper or if you are using the flow drain)
The Print:
These can all be printed with 3-4 walls 20% infill.
Housing: Print with base facing plate. No supports needed.
Tube Attachment: Print flat side facing bed. Use supports only under the sensor inputs.
Rotary disc: Print flat side down with supports.
Rotary disc Plug: Print flat side down with supports around edges
Flow Drain: Print flat side down. No supports needed
The purpose:
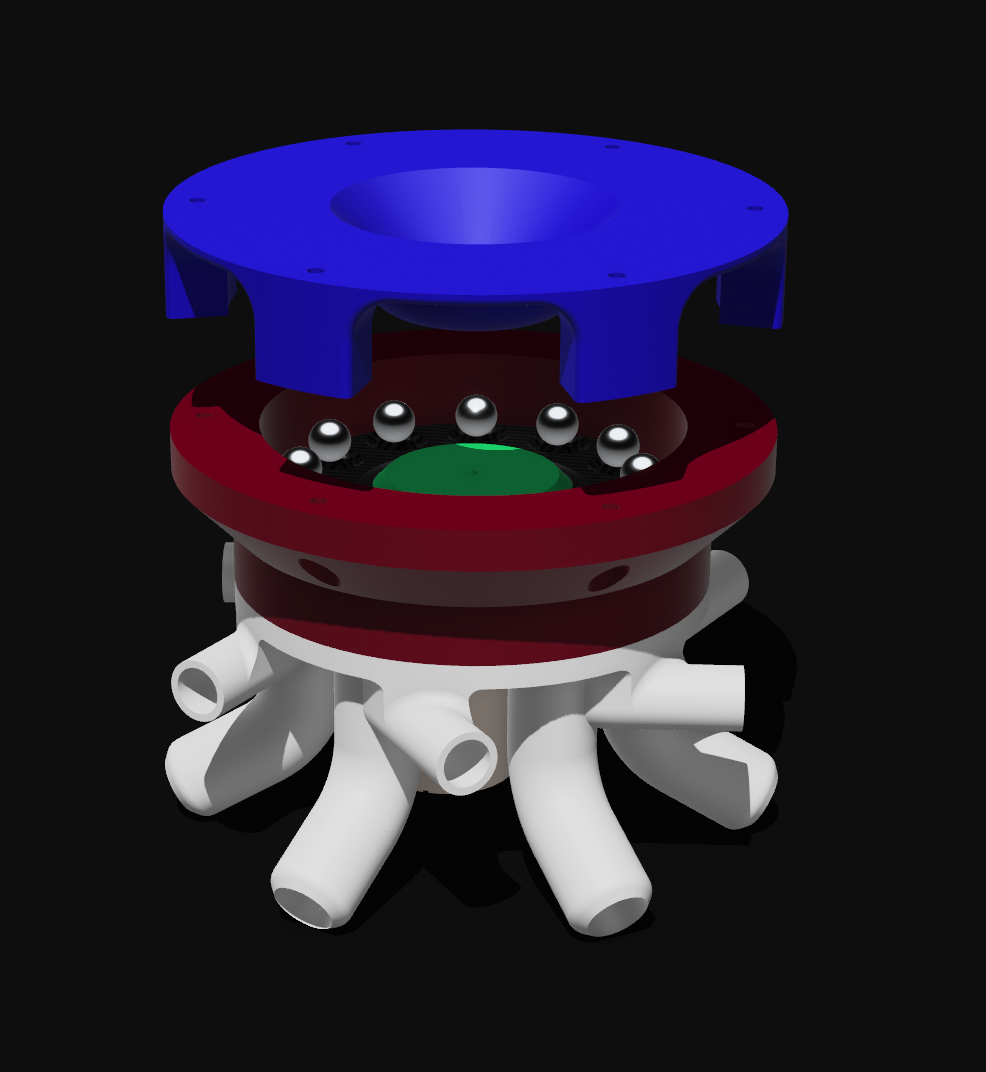
Housing: Attach underneath and surface hopper of your selection. This piece serves as a hub for where the balls can flow to and then the rotary disc distributes the balls into empty lanes.
Tube attachment: This allows for attachment of all of the sensors and tubes. Each sensor monitors the status of the lanes and talks to the ESP32. Each set of tubes goes from the UFO unit to each pachinko machine.
Rotary Disc: Spins and distributes the balls into empty lanes. How does it not jam? Some say its magic/ luck. Definitely magic..
Rotary Disc Plug: Covers the central hole in the rotary disc. Underneath allows access to remove the set screw holding the rotary disc to the aluminum hub around the motor shaft.
Drain Plate (optional): Prevents ball stacking around the rotary disc. This easy 2 dollar print takes torque off the rotary disc which permits a smaller motor (saves money).
The build:
1) Motor and Housing: Start by attaching the motor underneath the housing. Align the holes and screw 6 M3 x 8mm screws securing the motor into place. Place two washers over the motor shaft. You can place a small amount of silicone lubricant in between the washers if you would like.
2) Press 3 M6 x 6mm heat inserts into tube attachment piece. Place underneath housing and bolt into place using 3 M6 x 10mm bolts.
3) Insert M3 heat inserts into rotary disc and press into place using solder iron. Press 6mm aluminum hub into place. Screw underneath using 4 M3 x 8mm screws. Place rotary disc and aluminum hub over motor shaft. Use set screw to secure from above the rotary disc. Press Rotary disc plug into the opening from above.
4) Screw PNP NC sensor into sensor slots. Screw until a pachinko ball cannot pass through. Unscrew until ball falls through. Unscrew by another 1/4 turn. Wrap wire underneath sensor insert and secure using a small zip tie. This will prevent the sensor from screwing/unscrewing. Repeat for all 6 sensors.
5) Wire the sensors, ESP32-C3, motor driver, optocoupler accordingly using the wiring diagram provided.
6) Locate area of collection (for island) cut hole into platform and screw UFO into board from underneath. If using for small area I would recommend using the ball drain piece to be screwed in on top of the wood. This piece is responsible for limiting the flow into the UFO allowing you to use a smaller motor without the need for excess torque.
7) Run tubing from UFO to the back of the pachinko machine hopper (working on a couple of designs to make this efficient and universal).
Once UFO is wired correctly and the tubing is in place, pour pachinko balls into the island trough (main hopper supply) and let the UFO do its work. The coding on the ESP32-C3 is meant to allow the UFO to run as smooth as butter regardless of how many machines it supplies.
If you need access to the codes feel free to send me a message. Glad to see many people have been interested in this project for DIY home pachinko island systems.
Best,
Dr. Pachi
/https://fbi.cults3d.com/uploads/user/avatar/26416968/Screenshot_2025-01-06_at_8.19.36_PM.png "DrPachi")


:format(webp)/https://fbi.cults3d.com/uploaders/26416968/illustration-file/e882ed68-0b36-471a-b839-d60eef305365/IMG_5424.jpg)
:format(webp)/https://fbi.cults3d.com/uploaders/26416968/illustration-file/7cfff15c-a985-4a76-ad34-49dff57e99db/IMG_5494.jpg)
:format(webp)/https://fbi.cults3d.com/uploaders/26416968/illustration-file/6c2f00c9-4b5e-44ce-980a-913ebc1b11c7/Photoroom_20240805_055726.jpeg)
:format(webp)/https://fbi.cults3d.com/uploaders/26416968/illustration-file/dcf79bd0-8d86-4f26-8ecc-44d7b14a3e30/Screenshot-2024-09-03-at-11.20.49%E2%80%AFAM.png)
:format(webp)/https://fbi.cults3d.com/uploaders/26416968/illustration-file/0798511b-d523-4fe8-ab4b-ae38efb9cc04/Screenshot-2025-01-09-at-7.10.52%E2%80%AFPM.png)
:format(webp)/https://fbi.cults3d.com/uploaders/26416968/illustration-file/0dec8afb-2698-499d-b59d-24528b925dea/Screenshot-2026-06-10-at-12.01.16%20PM.png)