D3P BOTTOM RISER FOR ANYCUBIC KOBRA X by Darren 3d Print
NEW be sure to watch FRENZi3D excellent assembly video. A 100% discount code is given for a set of drawer inserts for the Kobra X bottom riser that are custom made for the tools supplied with the Kobra X. Becky took lots of time and effort to make the video and I am certain it will be very useful for assembly. Be sure to subscribe to her channel for this and other interesting content. Link: https://www.youtube.com/watch?v=P7VXovl2buY
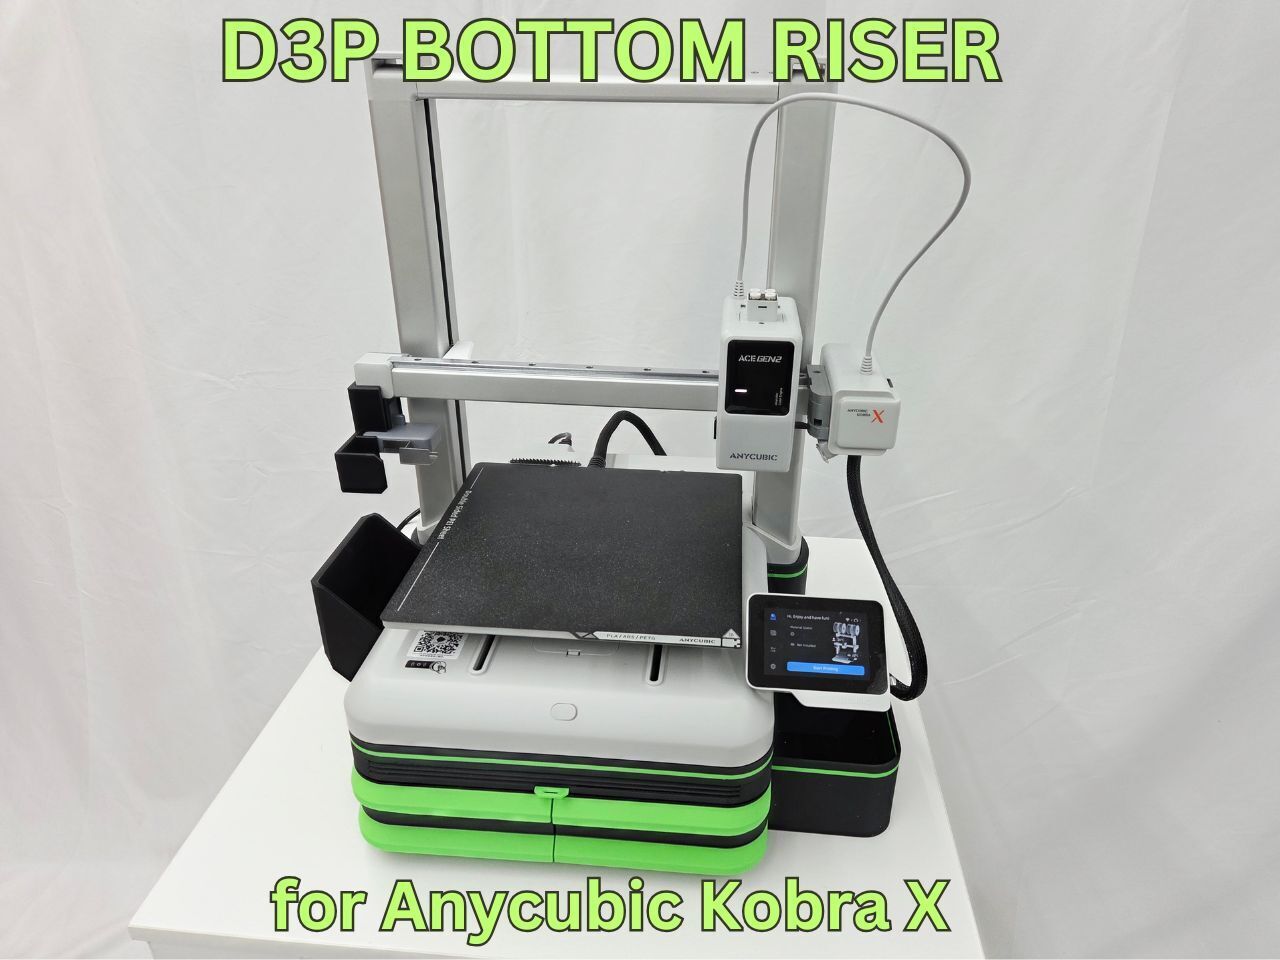
The Kobra X D3P bottom riser is the newest addition to the D3P line of printer upgrades.
**IMPORTANT: The Kobra X D3P bottom riser model is only for the bottom riser. The Kobra X D3P overhead is a separate model. Both models can be used separately or together. To find out more about the Kobra X D3P overhead mount click here:https://cults3d.com/en/3d-model/tool/d3p-overhead-mount-for-anycubic-kobra-x
I have been asked about designing bottom risers for some time. These take a fair amount of filament. I wanted to make it worthwhile to print. I had my checklist and held off until I could check them all off. I believe this design should offer an interesting and worthwhile addition to your printer.
Find out more here: https://www.youtube.com/shorts/C-kWFGDL_LA
FEATURES
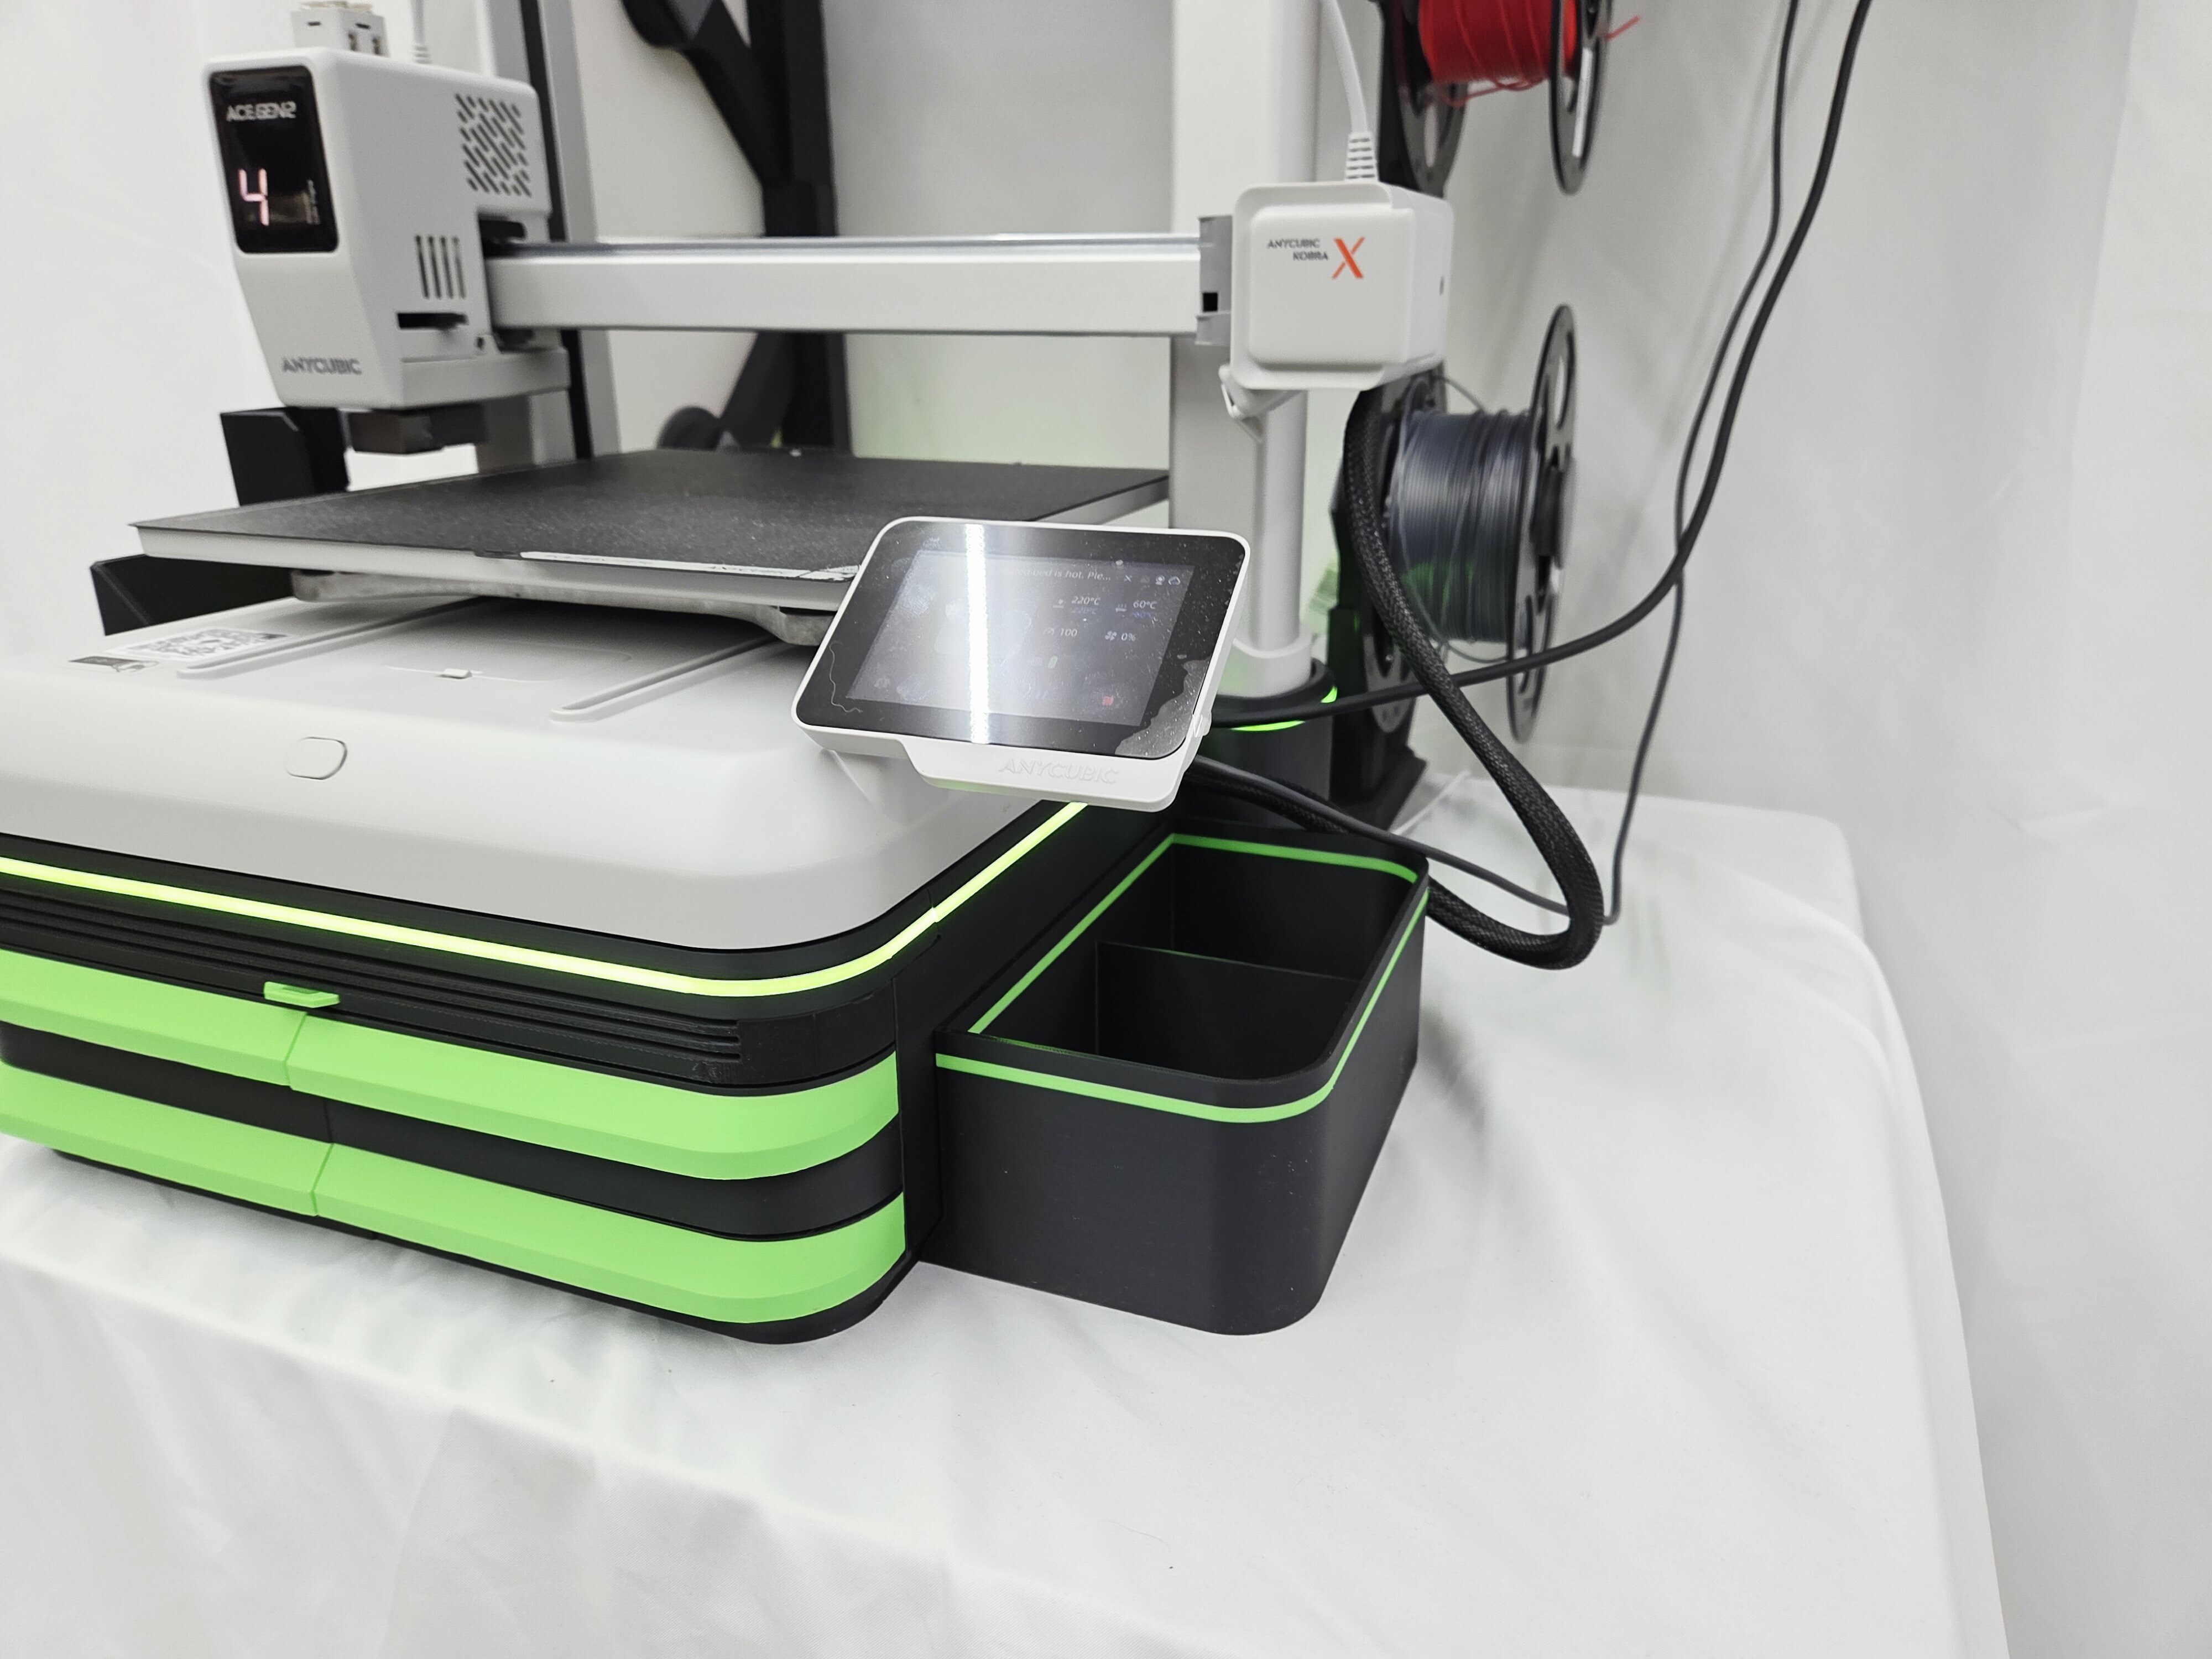
Features of the Kobra X bottom riser system:
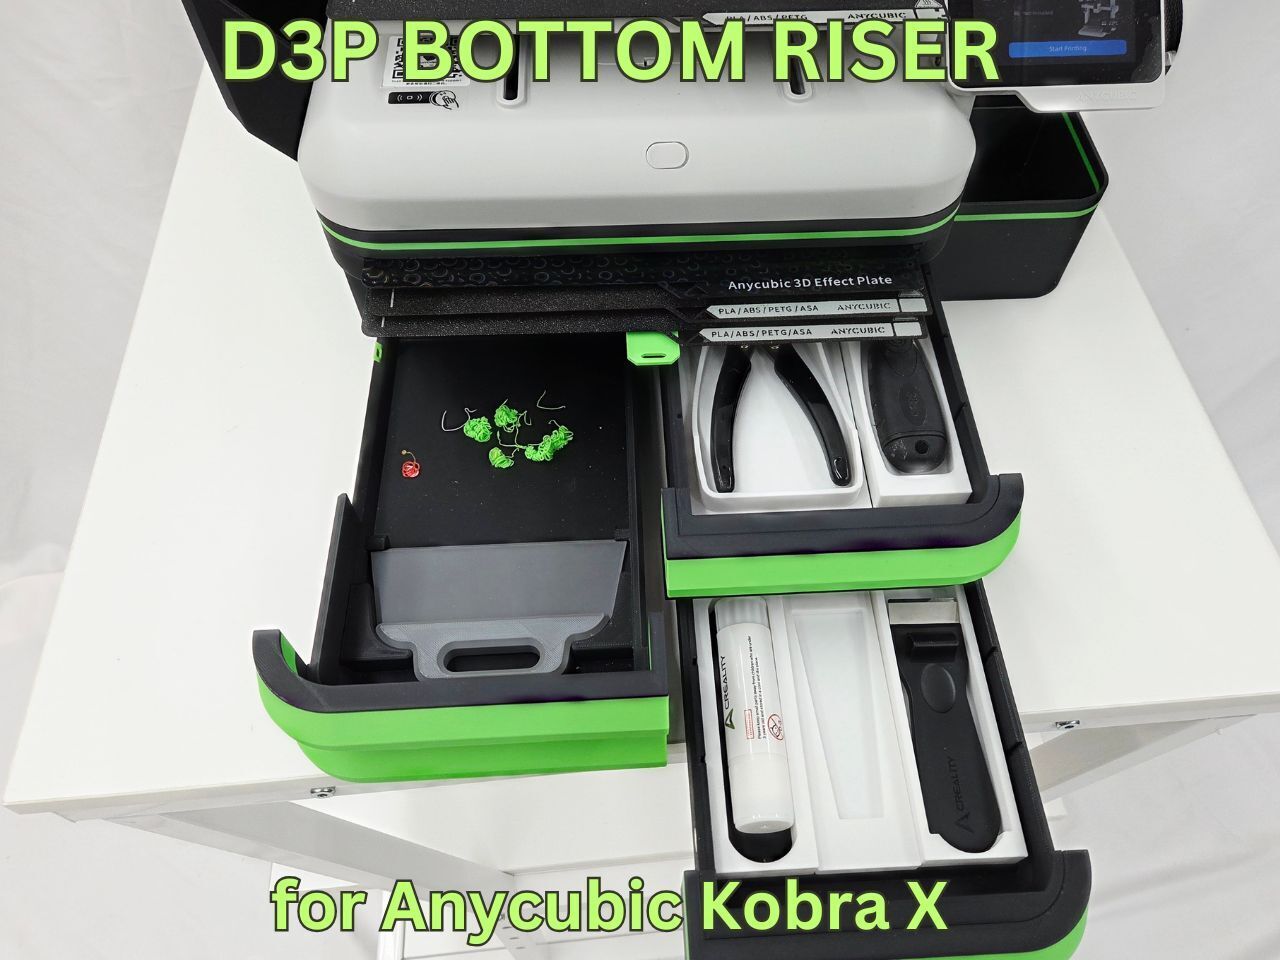
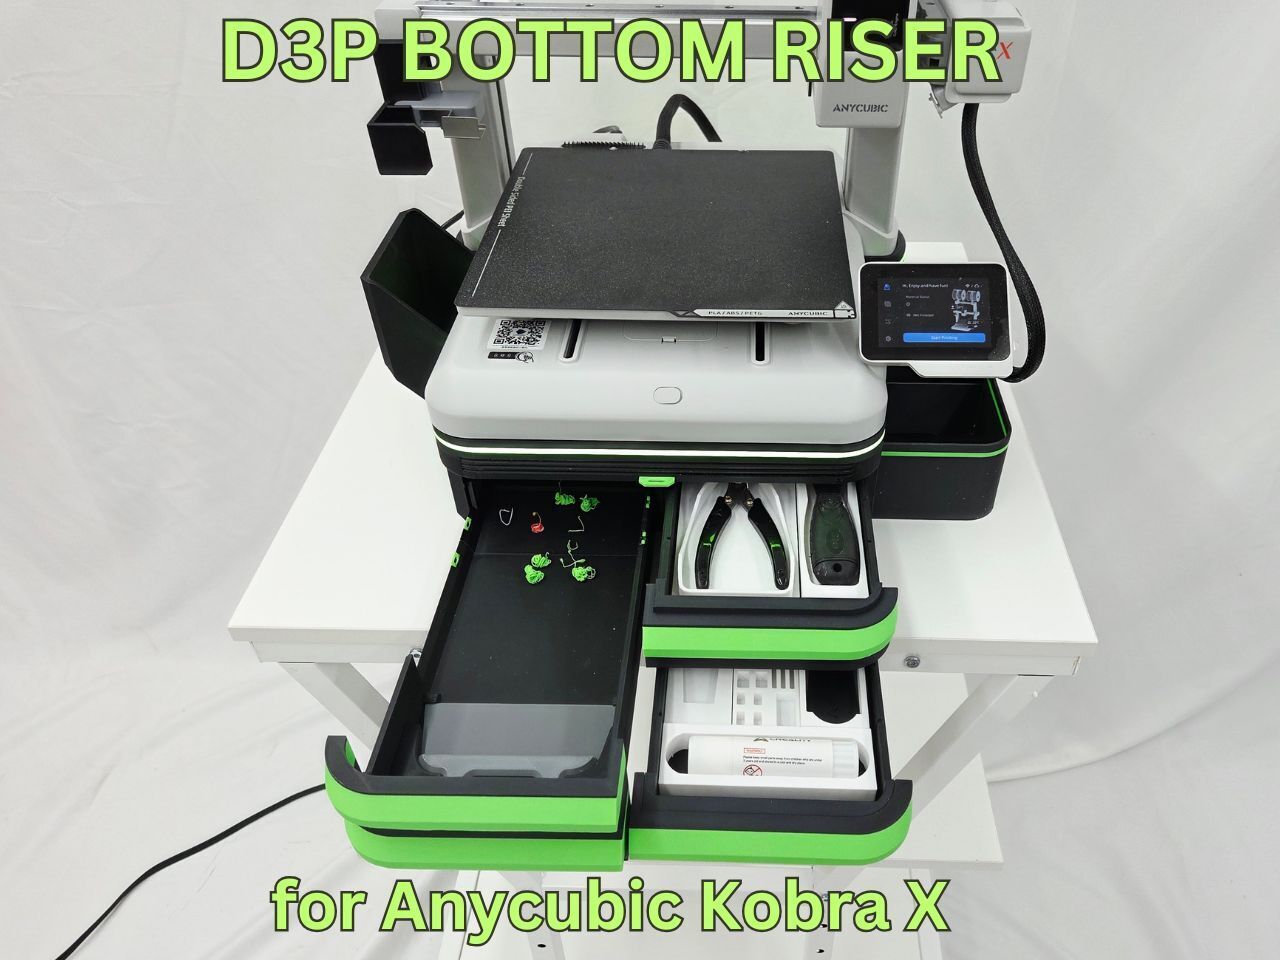
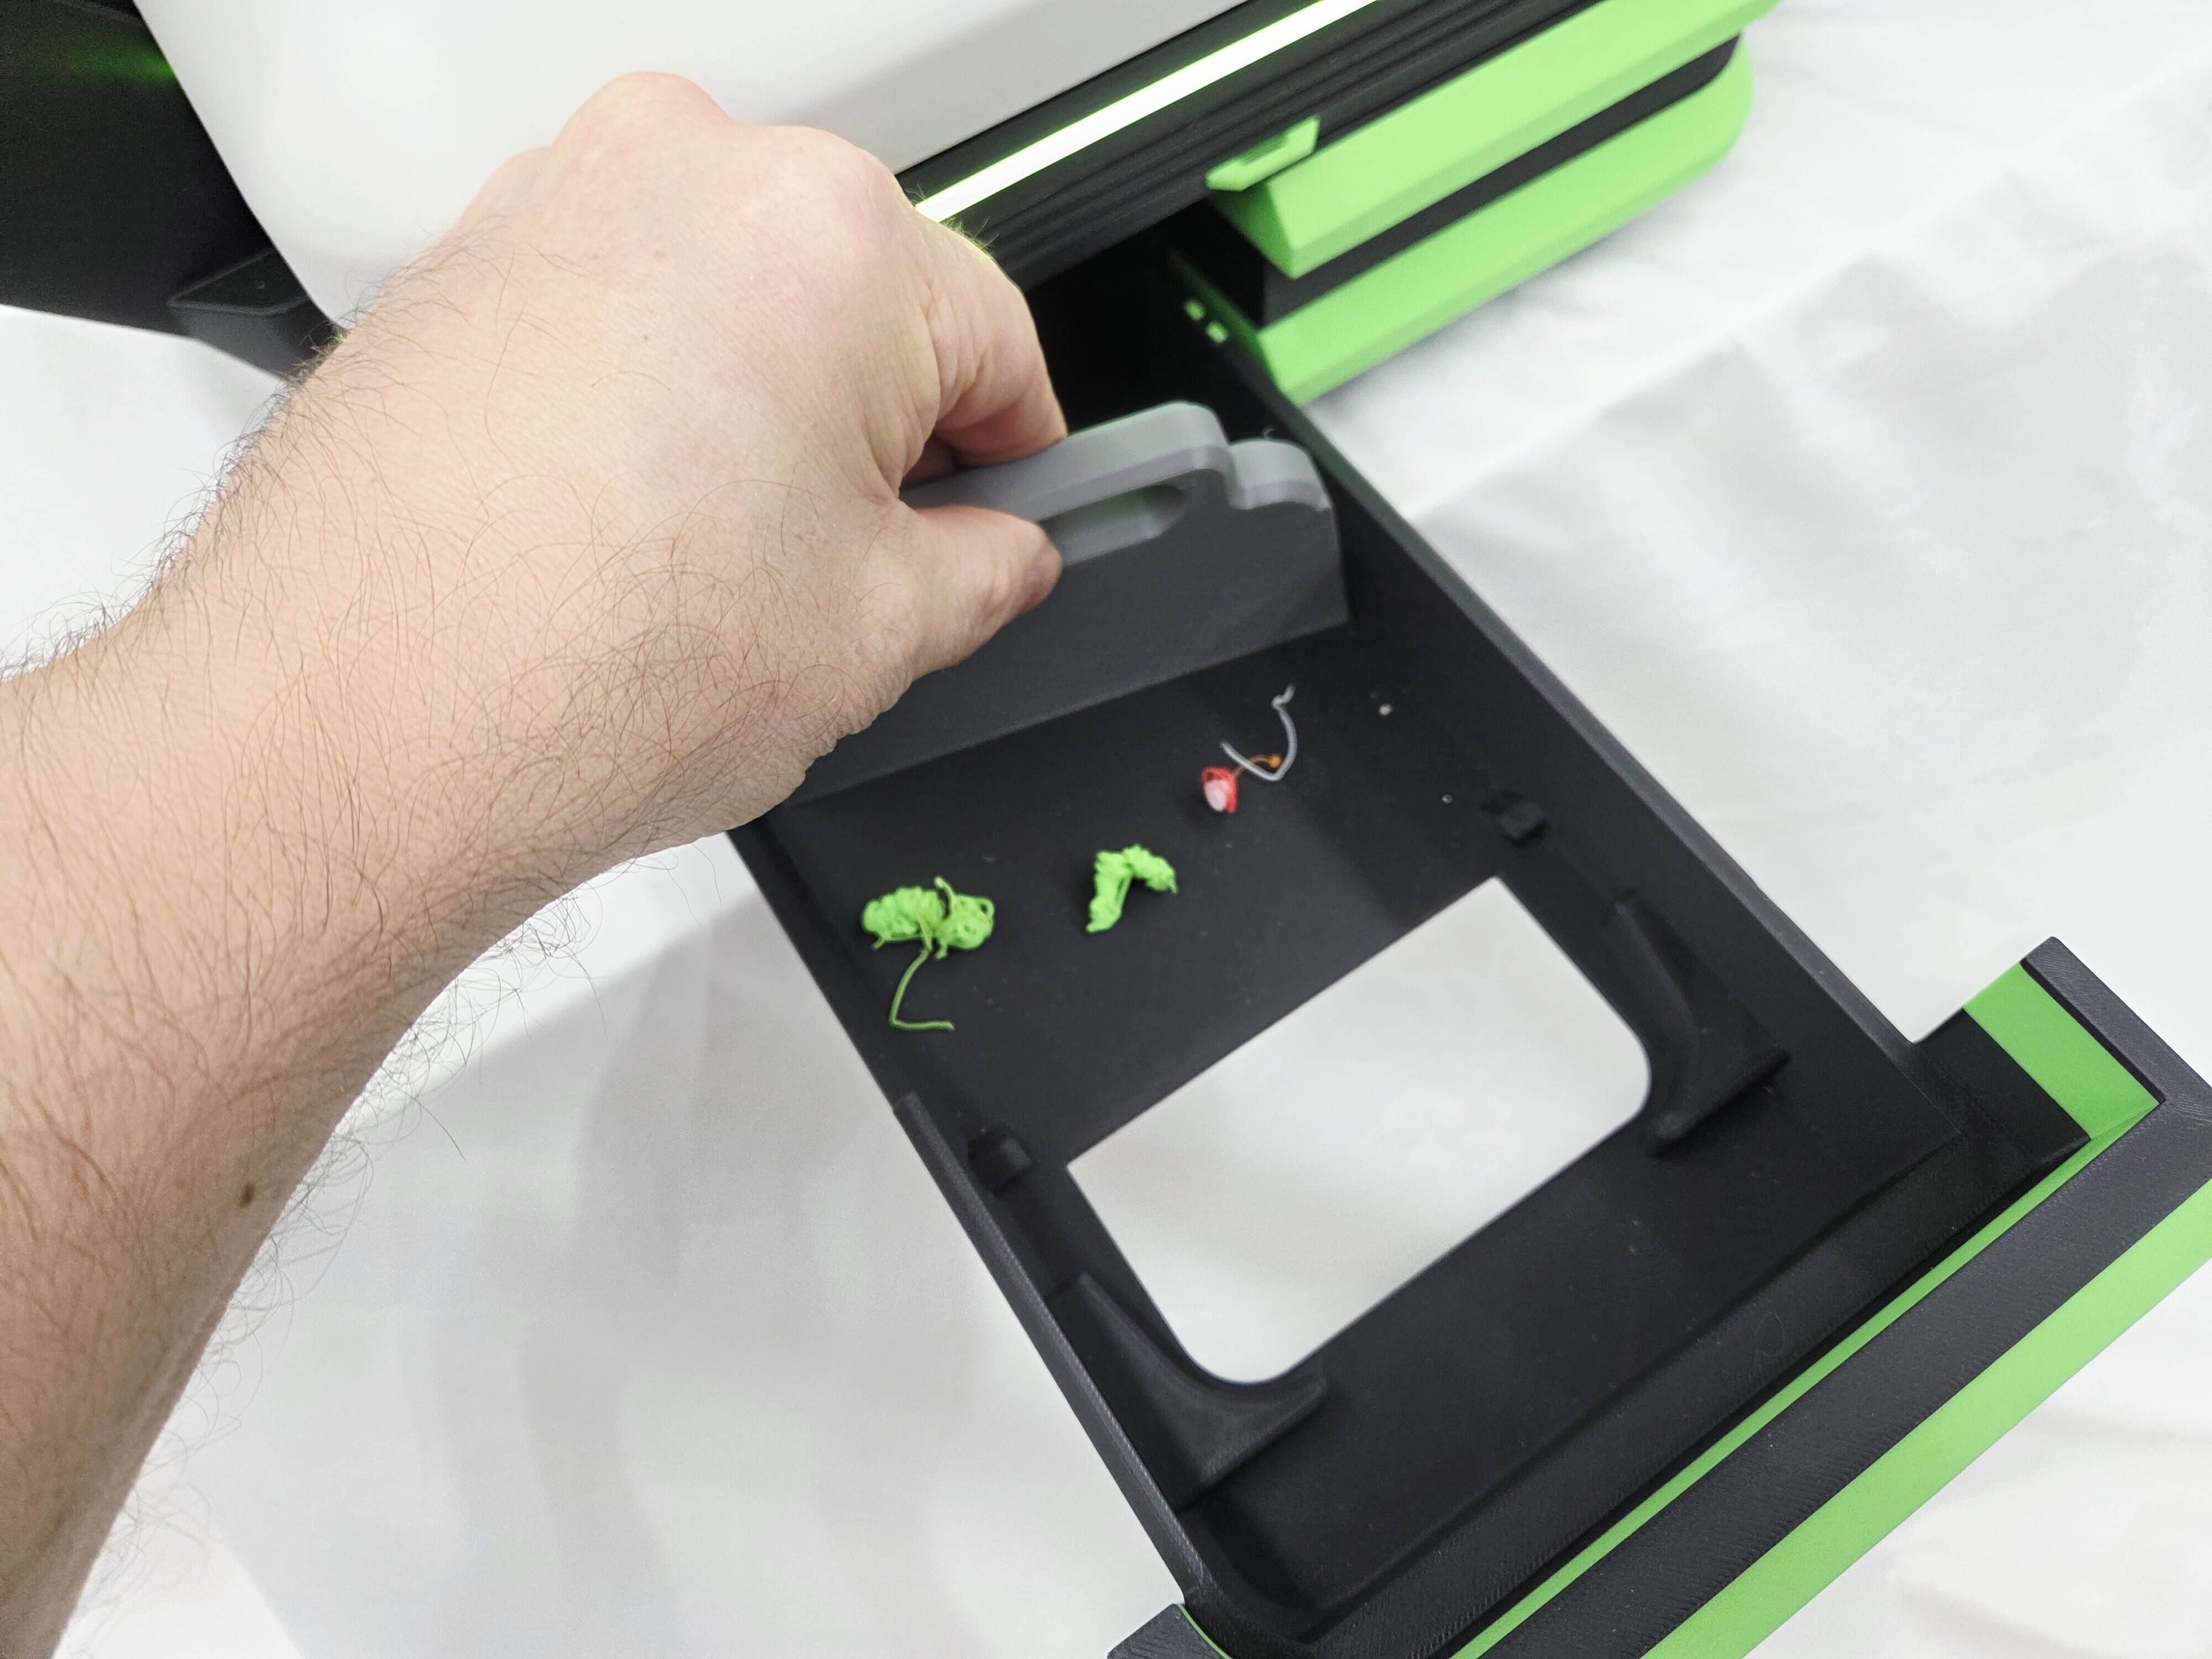
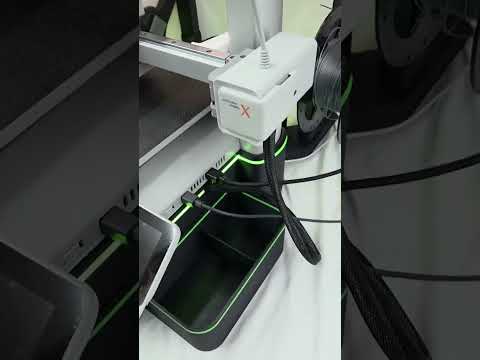
• Integrated poop chute and deflector that directs all the poop into the drawer;
• Poop drawer featuring a unique bottom cutout to allow easy poop disposal without having to remove the drawer. I even added a "poop pan" that is held in place when not in use;
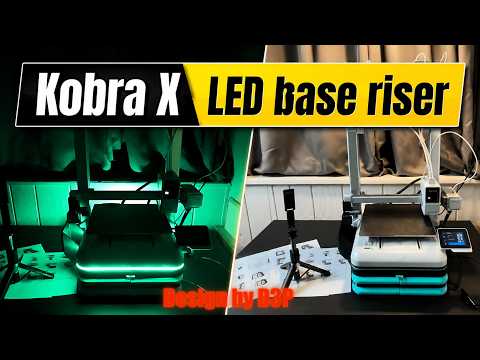
• An innovative LED channel that is integrated into the side of the printer for a COB LED. The LED light shines through the side of the riser and gives a cool glow effect. The color is dependent on the color of filament you choose for the highlight accent. You customize the color by changing the color of the filament or the LED. You can also widen the accent to further personalize the design.
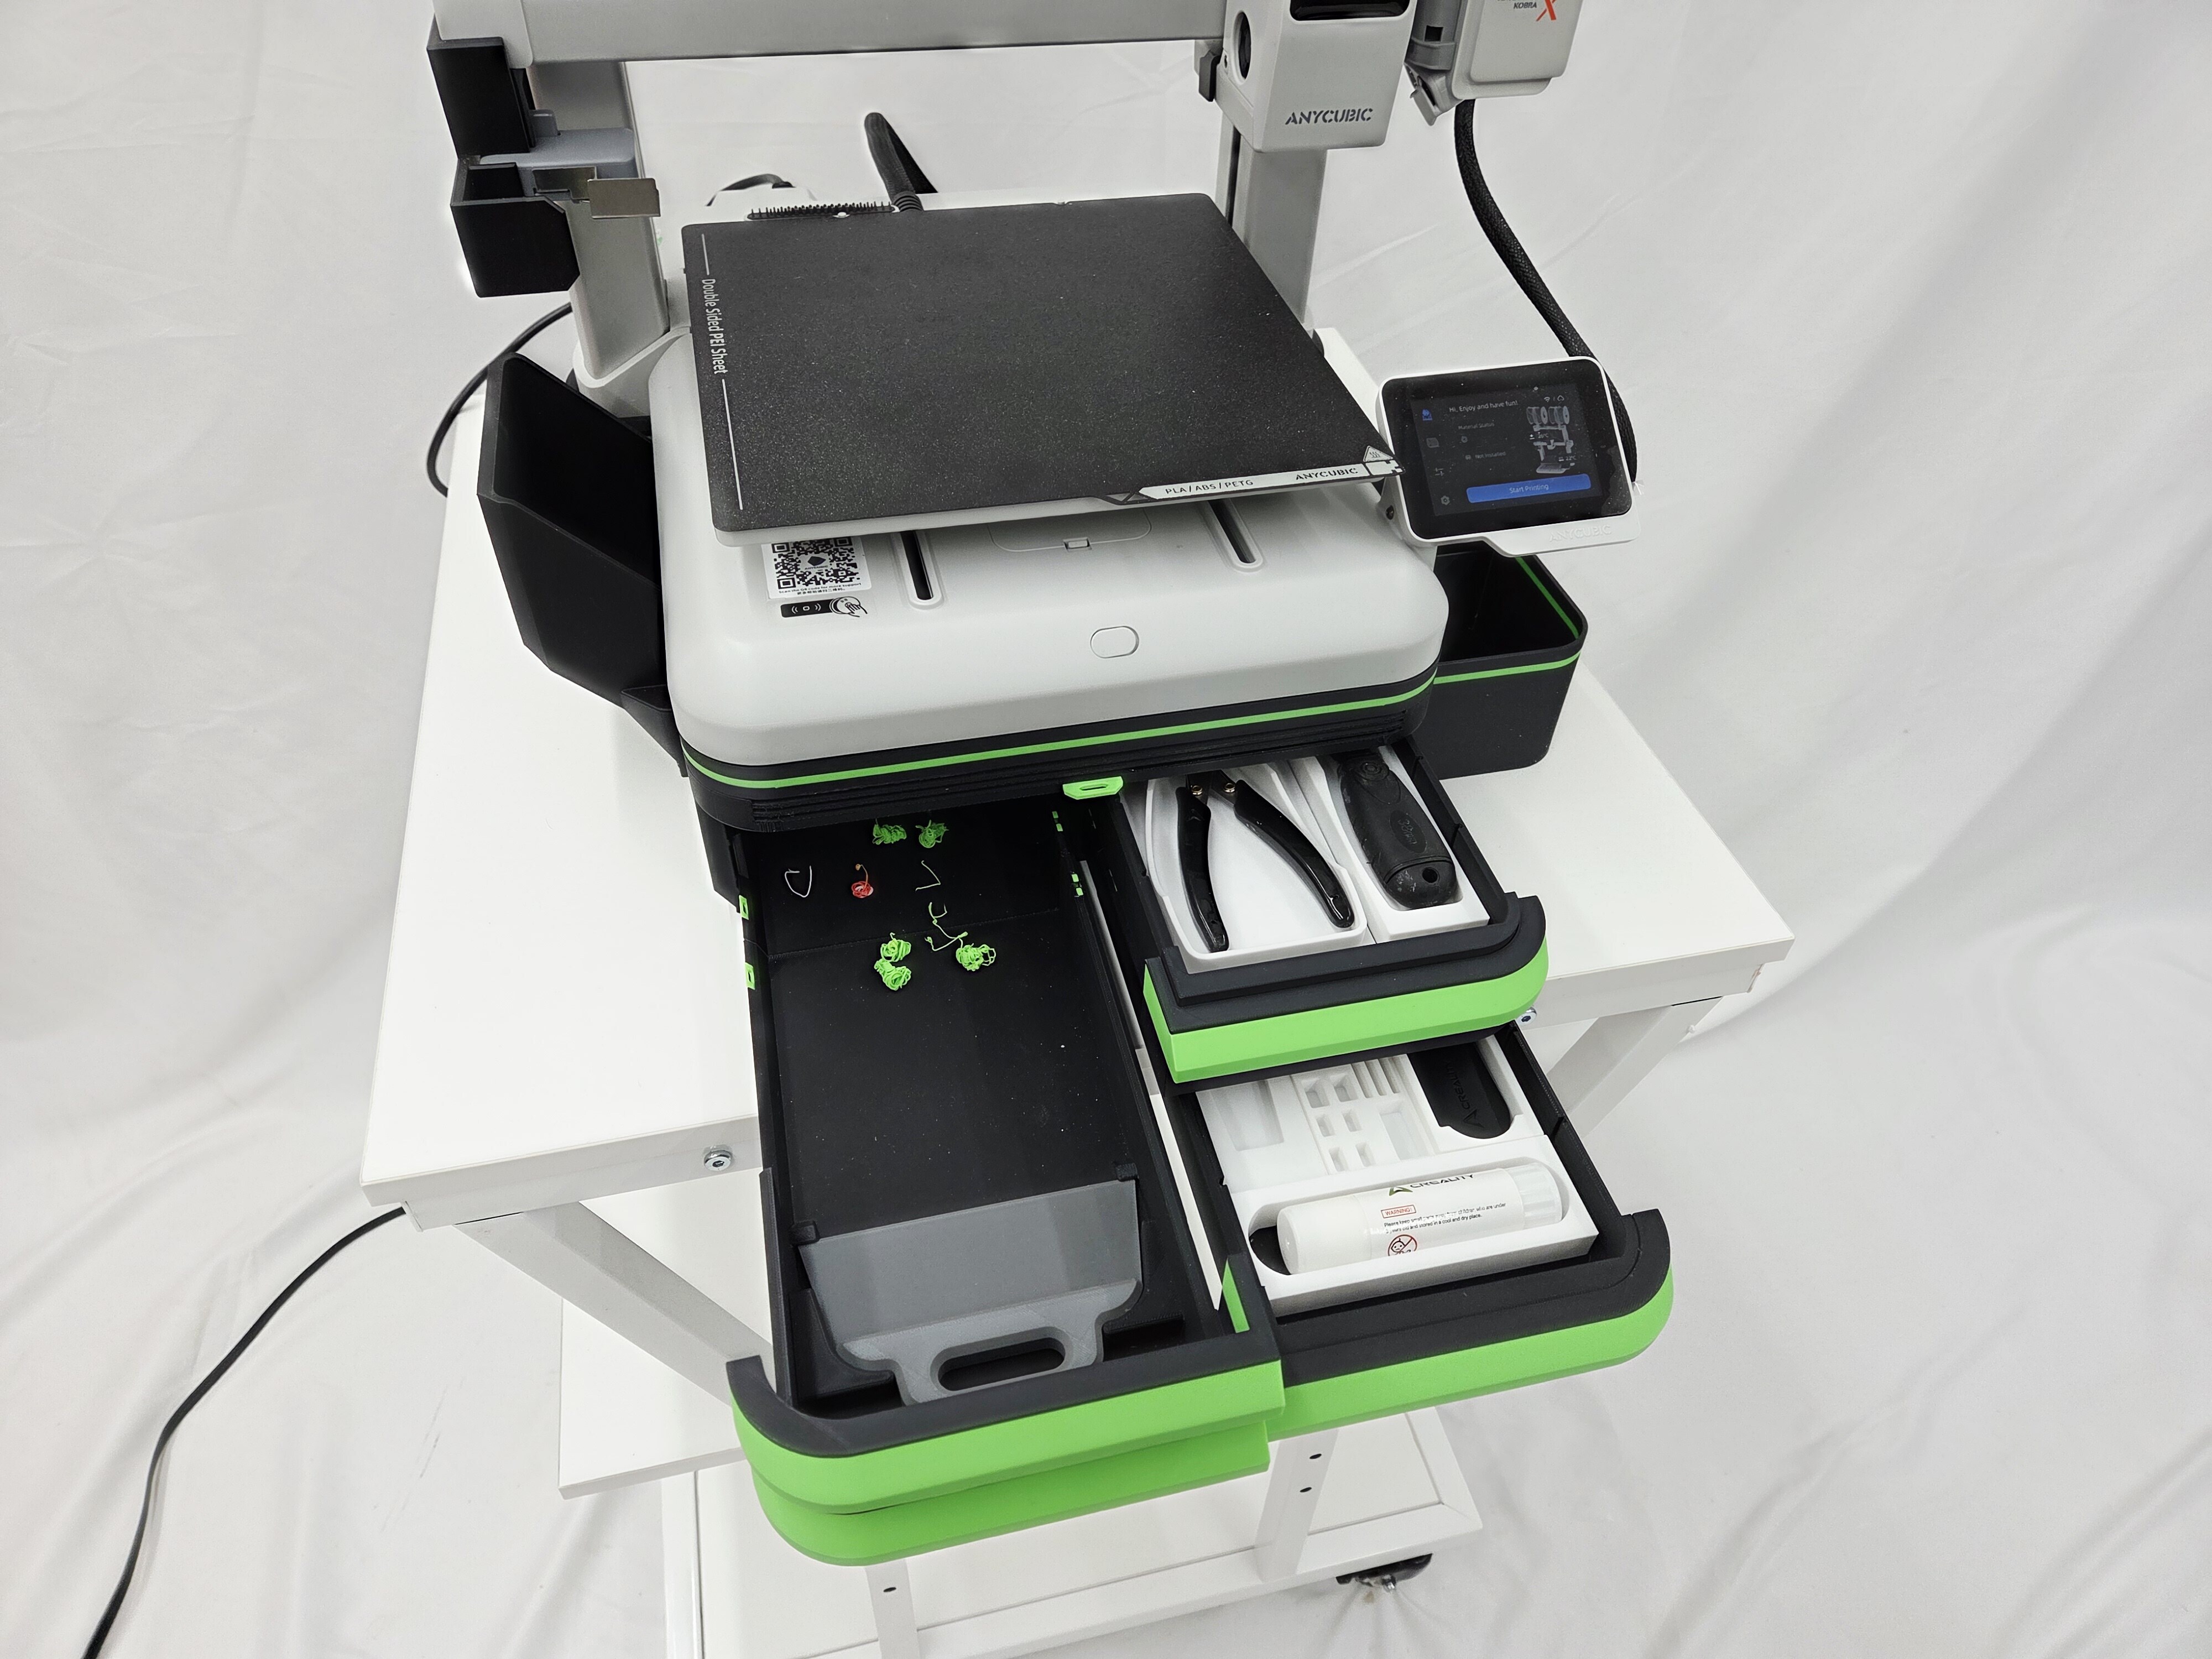
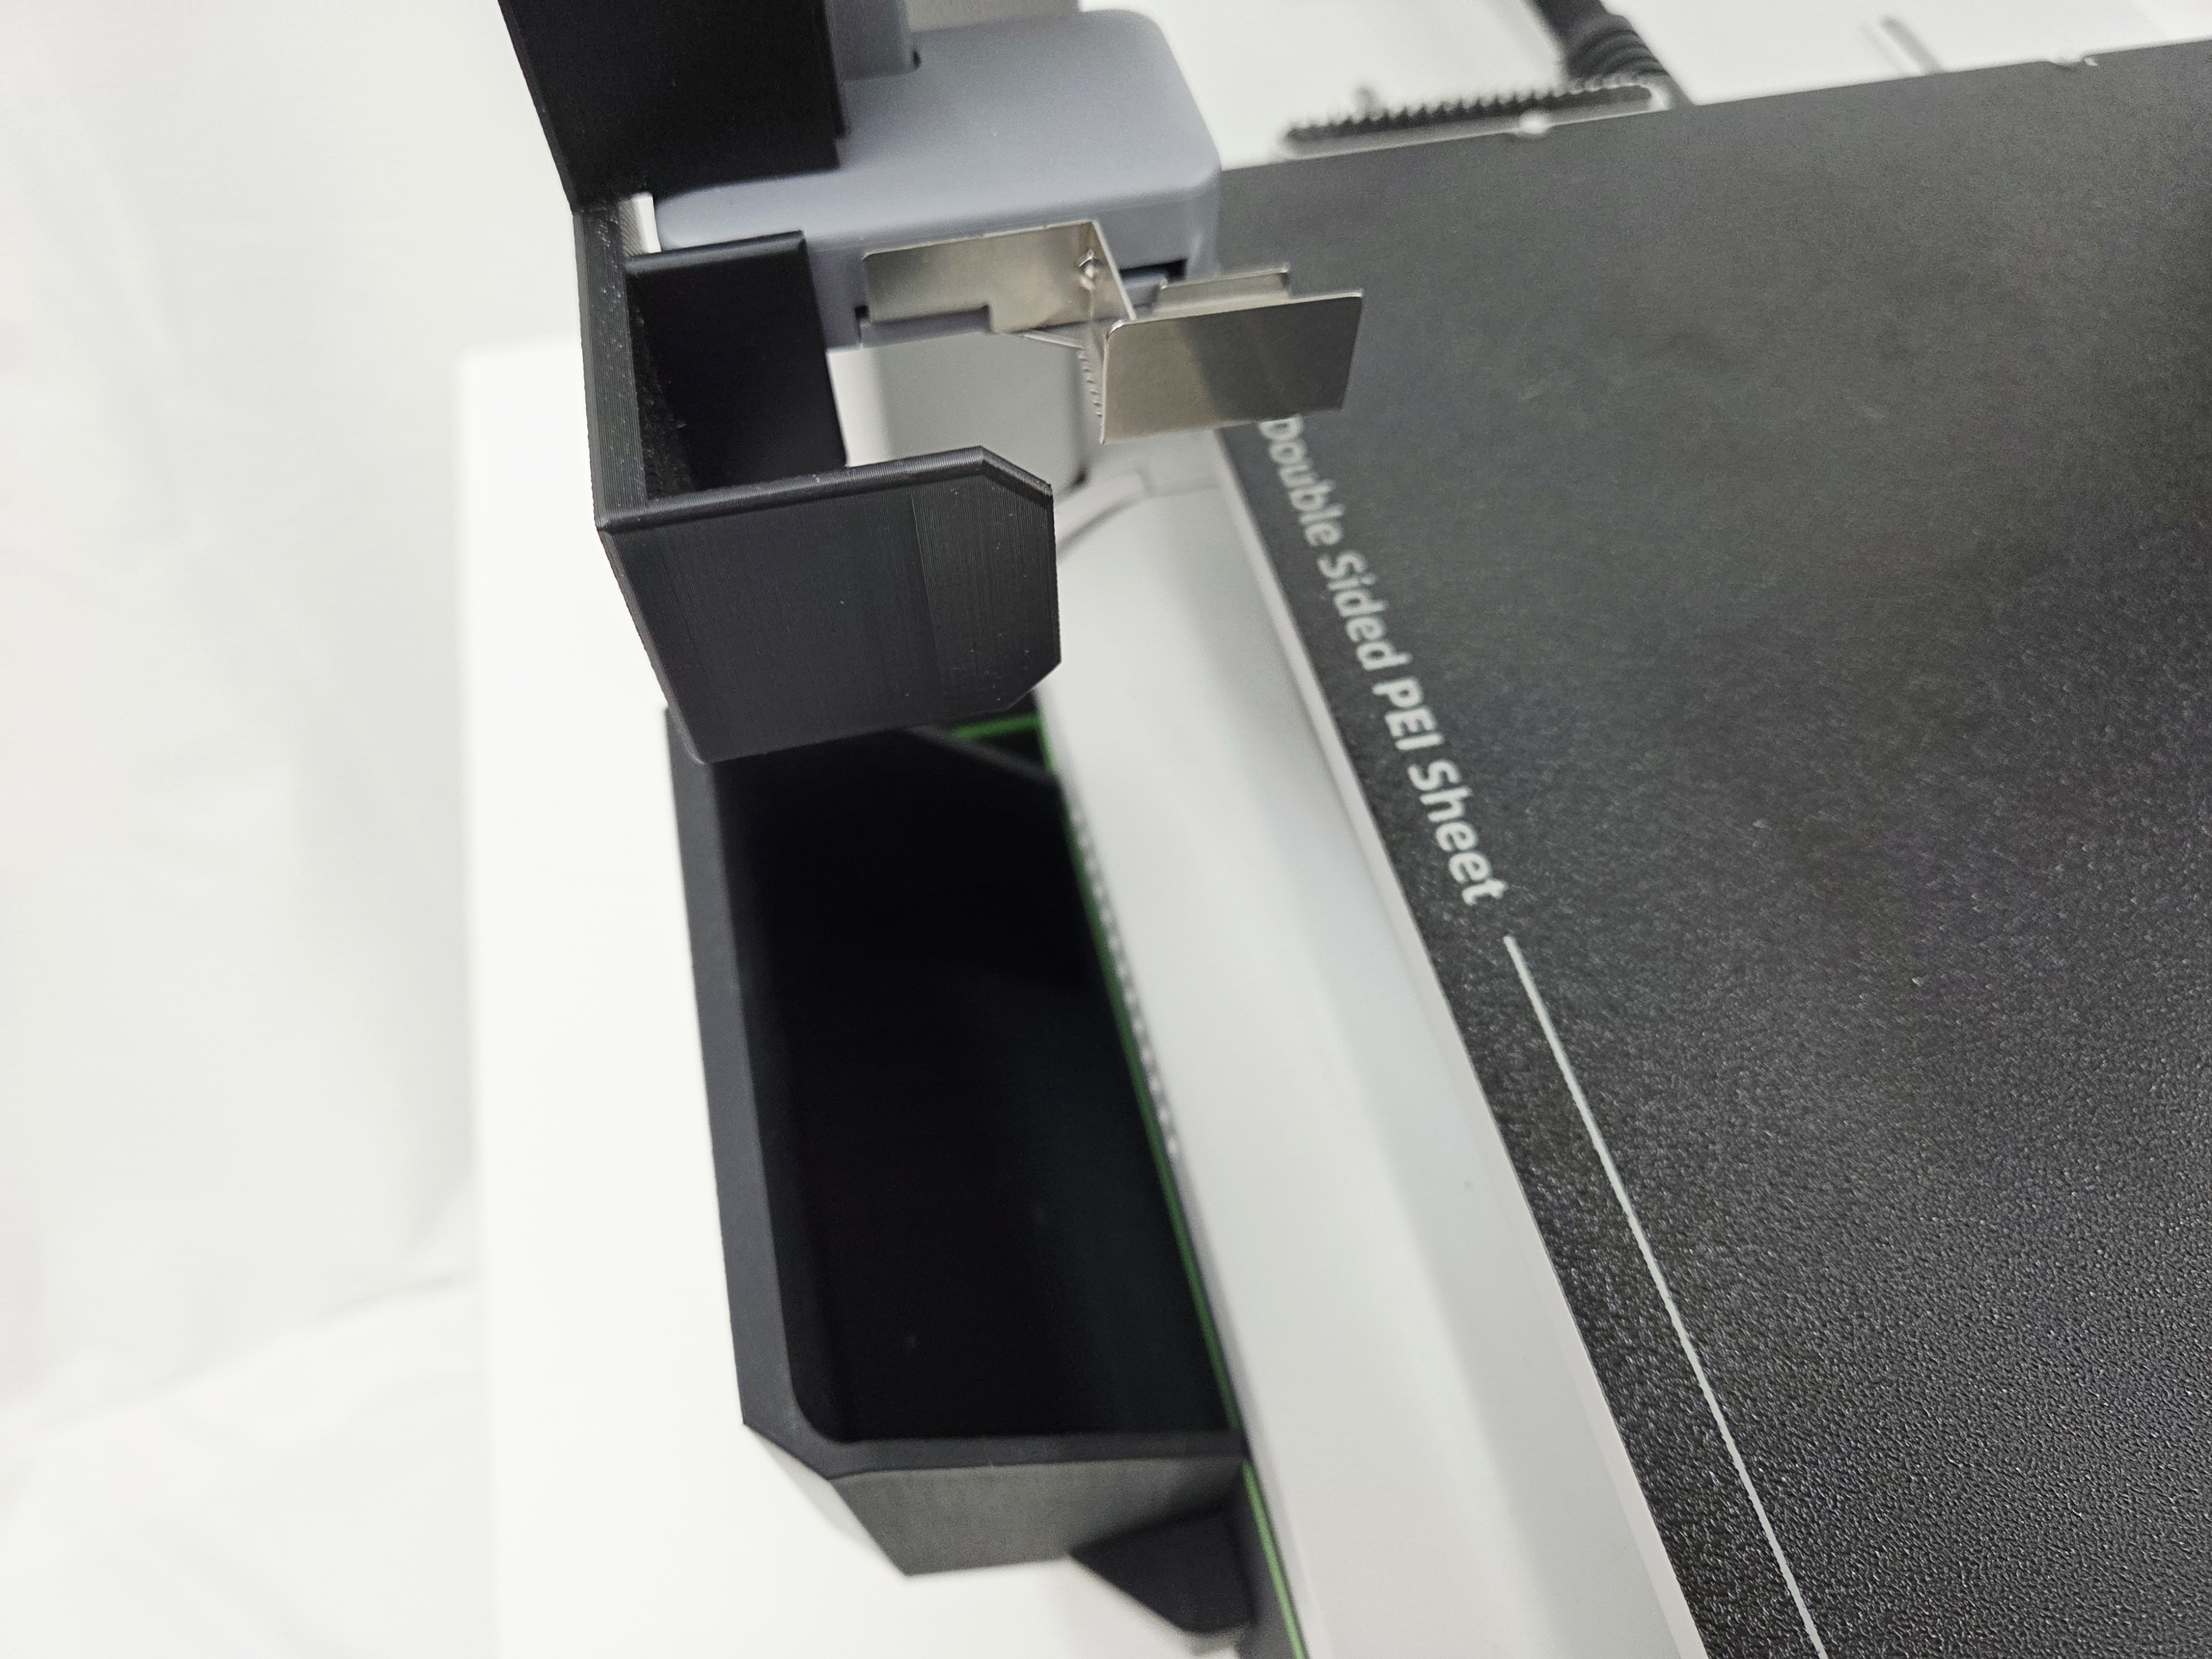
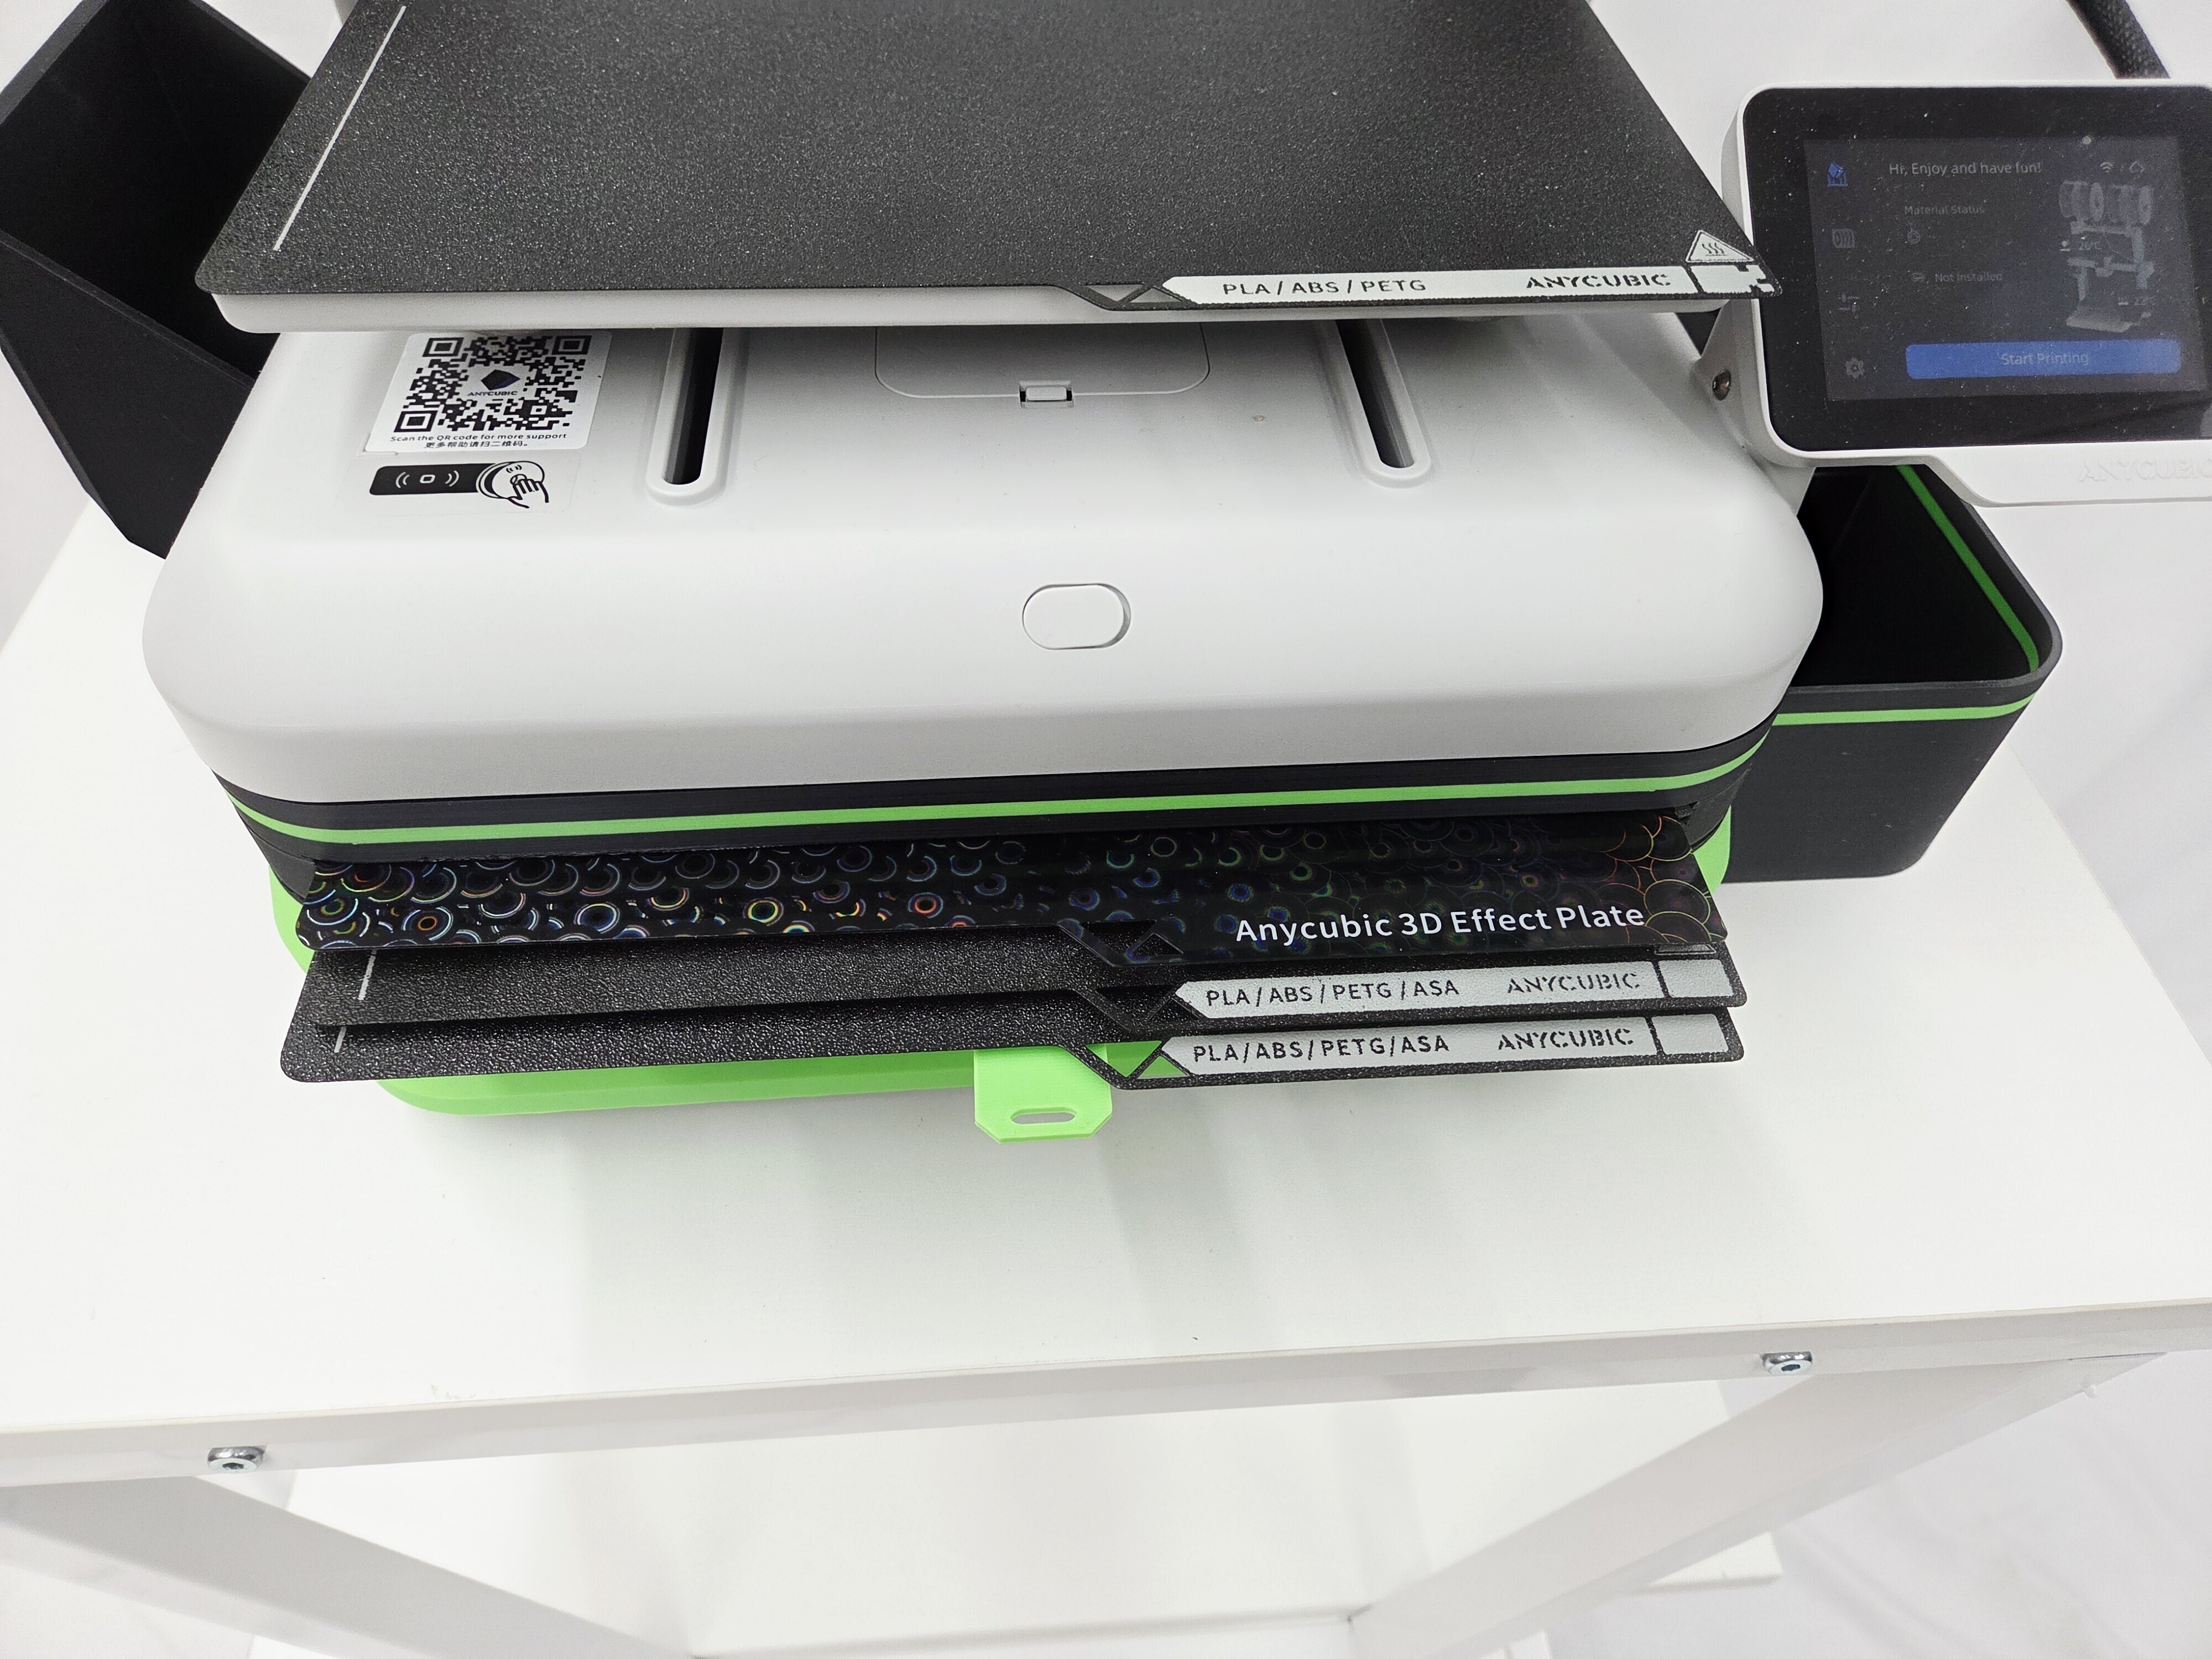
• An innovative build plate holder for up to 3 build plates. The system features a lever which holds the build plate in a staggered configuration. The builds plates stay in position on the lever when pulled out or pushed in;
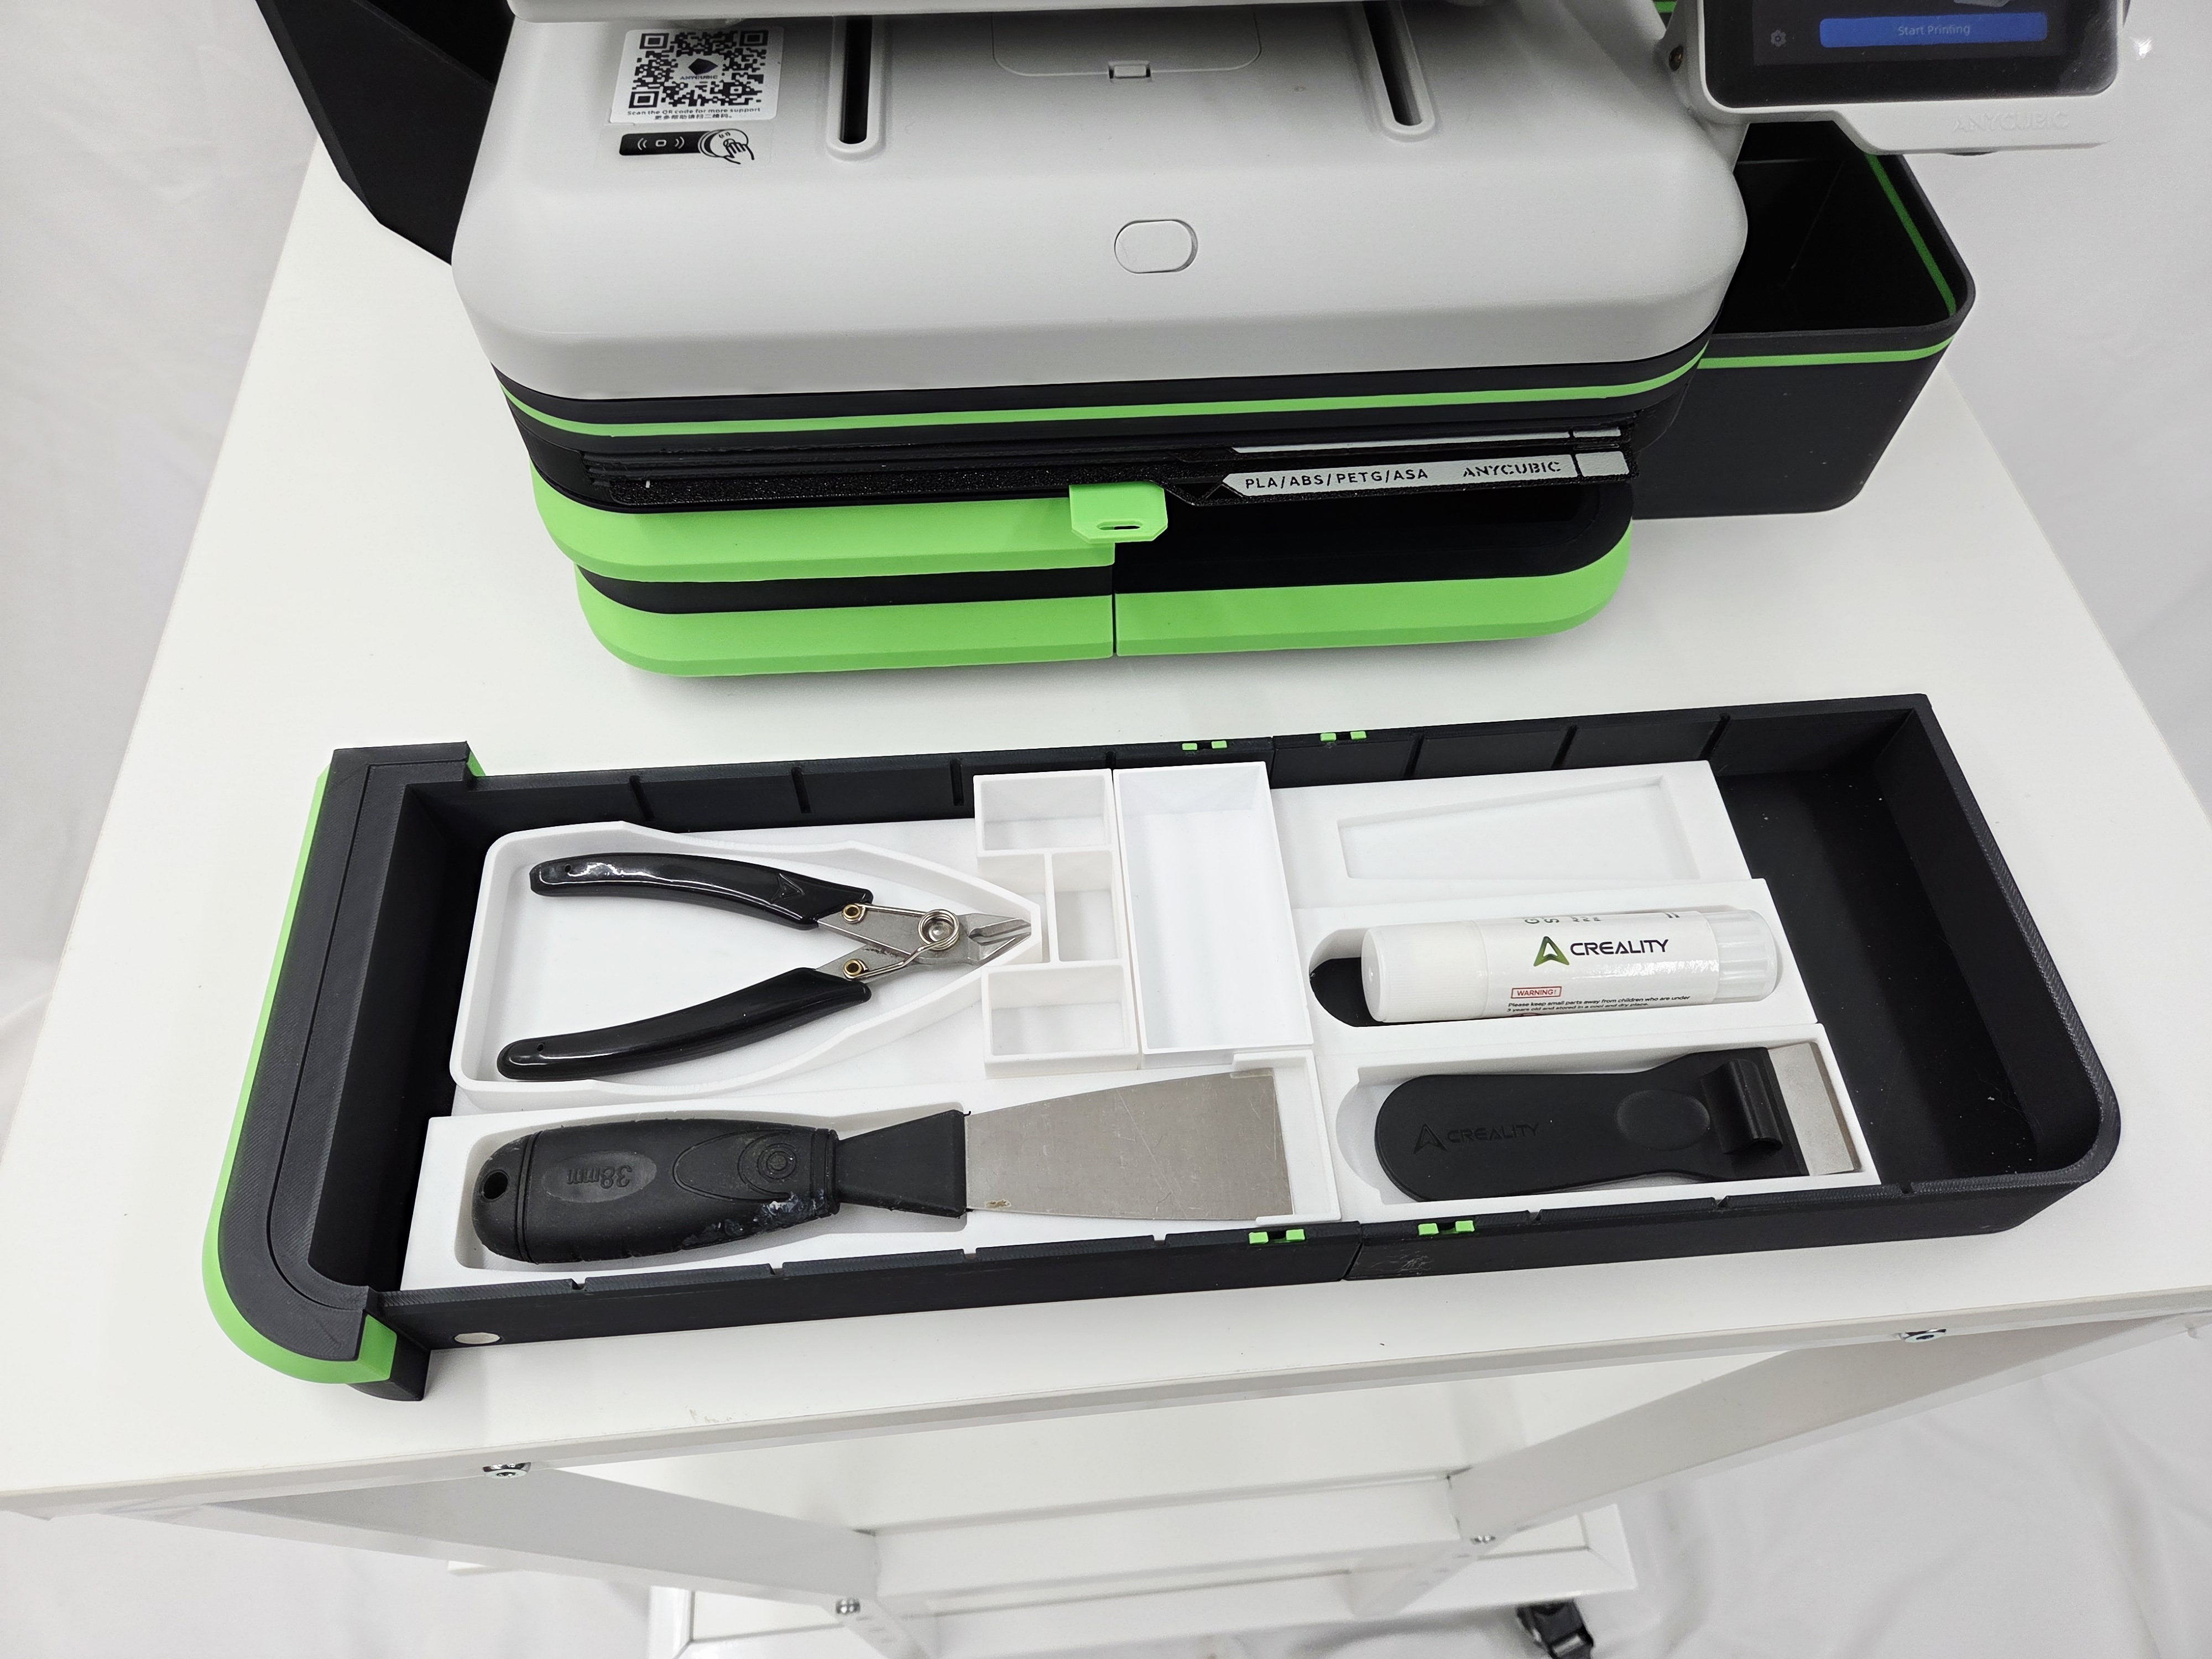
• Two drawers with my own custom gridfinity style base. These are the same I use in all my risers so you can use any of my custom drawer inserts to customize your drawers to your liking;
• Stay in place drawers - The drawers feature magnets to hold them in place so no sliding out while printing;
• Maximum interior space - the design of the bottom riser was carefully done to maximize interior drawer space;
• Sturdiness and filament efficiency - the design minimizes filament use while maintaining structural strength;
• Modular integration with the Kobra X D3P overhead mount. The Kobra X D3P bottom riser is interchangeable and can be used with my Kobra X D3P overhead mount system;
• Custom drawer inserts - I have added custom drawer inserts for the drawers that can be downloaded for free on Makeronline (see the Addons section below);
• A side mounted tray can be added (see the Addons section below). All future addons are planned to be free to download on Makeronline;
• Detailed pdf instructions with pictures and steps;
• Printing requires little or no support.
EXTERNAL COMPONENTS
The following external components are optionally required. Links and further details are provided in the assembly instruction pdf:
- 1x - 8 mm wide, 2-meter-long COB LED - 5 V;
- 1x - 5v External power supply for the COB LED;
- 15 x - 10 mm x 3 mm Neodymium round magnets;
- 1x - Non-skid rubber pads (Optional);
INTELLECTUAL PROPERTY
This work is licensed under the standard digital file license. You are prohibited from sharing, sub-licensing, selling, renting, hosting, transferring, reproducing or distributing the digital file or 3d printed versions of this object, as well as any other derivative work in either digital or physical form (including remixes or copying/reproducing the design by any means).you are not allowed to use the objects in any manner that involves charging money or collecting fees without permission.
ADD-ONS
The model features a number of add-ons that are free to download on MakerWorld.
I will be adding to these so be sure to check back from time to time.
TECHNICAL SPECIFICATIONS
For the bottom riser (approximates):
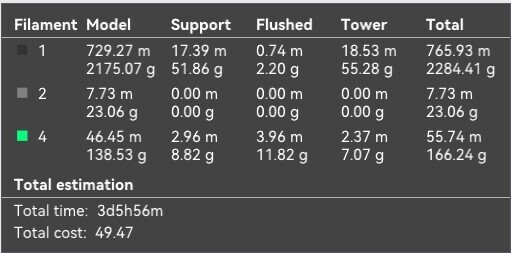
Filament: 2.4 kg (see photos for detailed filament use)
Approximate print time: 3 days 5h
Height added by riser: 10 cm (4 inches)
Footprint: The footprint of the base riser is the almost the same as the printer. No extra rear or side space is required.
PRINT SETTINGS
IMPORTANT I upload a print setting files for all my models. The print settings has the parts positioned for correct printing.
I strongly recommended you use my print setting file. If not, I will not be able to assist you if there is an issue when printing. From experience, many of the issues with printing my models are on account of users not using my print settings.
CHANGELOG
If there are any changes to the STL files or print settings I will list them here. I recommend looking at this section prior to printing as it is the only way I can inform users of changes.
3D PRINT SETTINGS
I use the following settings and materials to print this model:
Infill % : 15% (no need for more)
Nozzle diameter: 0.4 mm
Layer height: 0.2 mm standard
Material: PLA or PETG
IMPORTANT: The color accent around the top of the bottom riser is painted in the slicer (the green line in the photos). I have painted it green in my 3mf file. You can change the color of the filament and the highlight will change to that color. The led shine through the filament so I suggest a light friendly filament. You can also change the width of the highlight by changing the height of the painted portion when slicing.
ASSEMBLY AND INSTRUCTIONS
A detailed instruction and assembly guide with steps and pictures is available for download with the model files.
TROUBLESHOOTING
All parts and the assembly have been tested multiple times (both printing and assembly).
• Make sure your build properly cleaned and free of grease and oils before printing. This is the cause of adhesion.
• Make sure you use my print profiles/settings (the .3mf file that has multiple plates with all the parts) and that you enable support as indicated for each build plate on the build plate description.
• Filament and printer will affect tolerances however all should fit. If unsure proceed slowly and cautiously.
• If there are any changes I list them in a changelog on the model page. Please have a look at it prior to printing in the event there are any changes.
I am available to assist with any issues with this model.
The best way to reach me is through Facebook messenger - my user name is "Darren 3d print".
I thank you for your support and hope you like this model.


:format(webp)/https://fbi.cults3d.com/uploaders/15758717/illustration-file/b8376b77-ebec-4f88-b453-b4699b035d2f/da19.png)
:format(webp)/https://fbi.cults3d.com/uploaders/15758717/illustration-file/db1db915-4d72-406c-908b-1c24d9daba61/h3.png)
:format(webp)/https://fbi.cults3d.com/uploaders/15758717/illustration-file/d9e1de26-1e05-4021-969e-801b146a3e40/Q1.png)