CR10S Pro V2 DirectDrive Bracket for MicroSwiss Direct Drive Extruder- EASY MOUNT, NO MOTOR WIRE SWAPPING, VERY STURDY !!


- 112 vues
- 0 j’aimes
- 0 commentaires
| Date de publication |
2024-05-18 à 15h10
?
Publié sur Thingiverse le :
2022-07-14 à 18h20
|
|---|
:format(webp)/https://fbi.cults3d.com/uploaders/28042077/illustration-file/94809cd1-1c05-4a52-b719-d46b81571292/4.jpg)
Description du Make
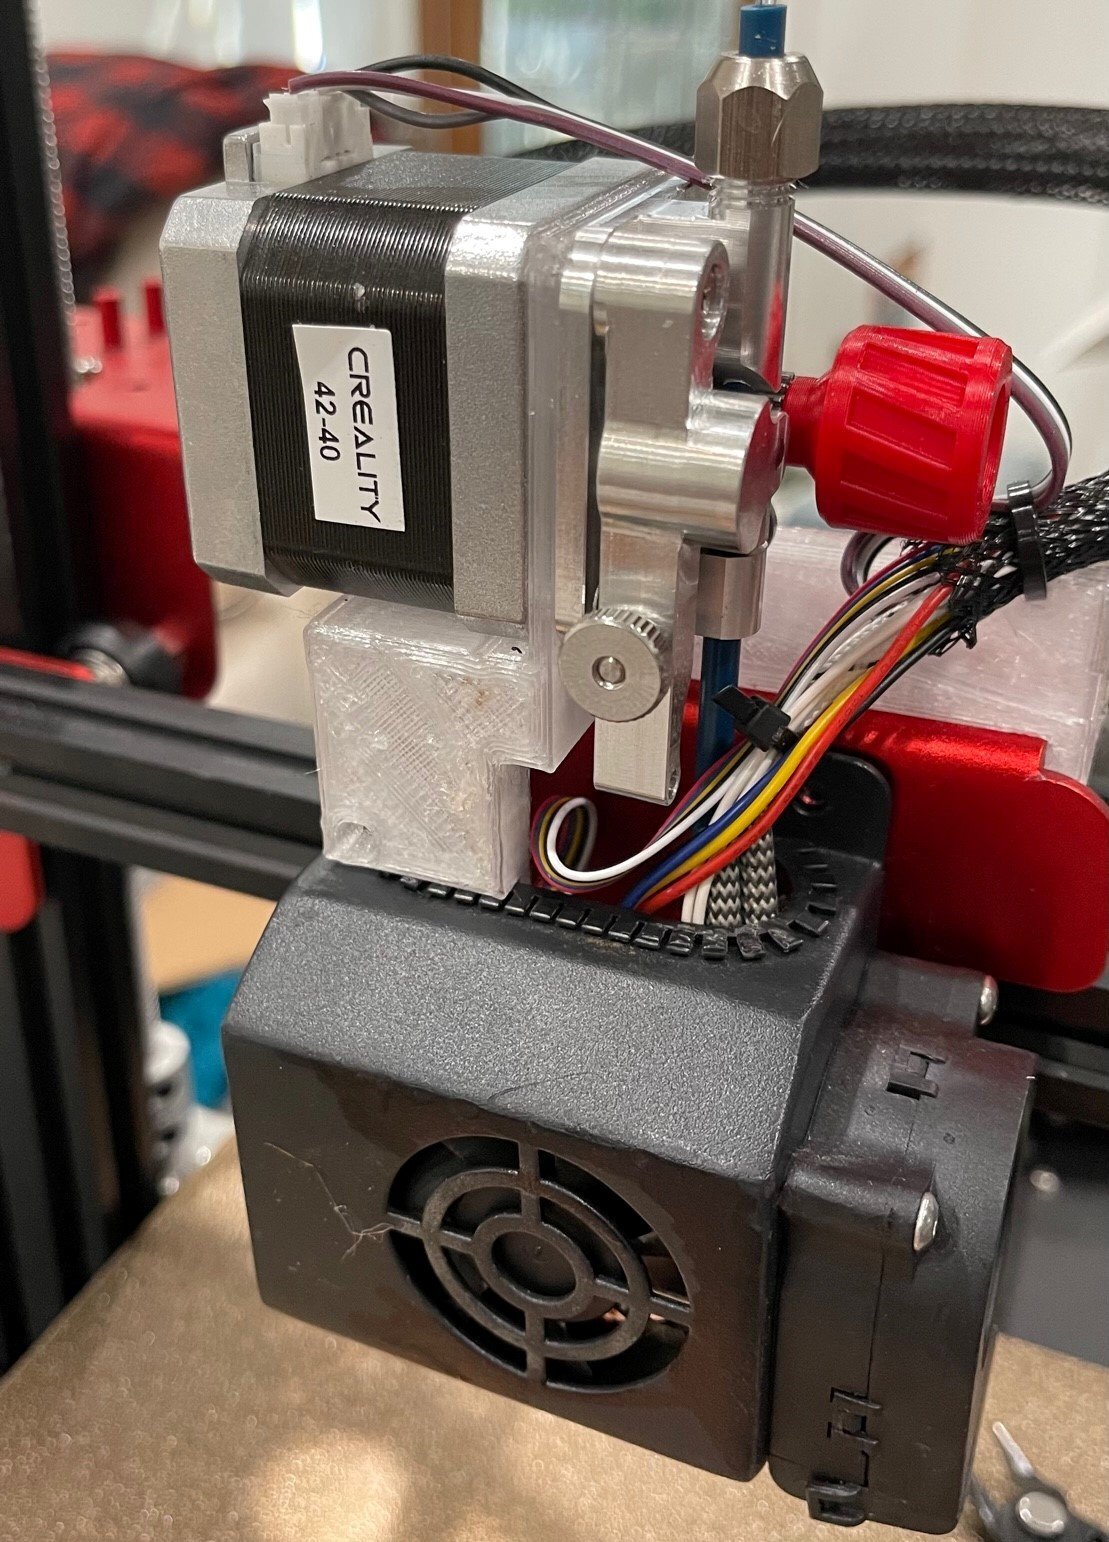
After finding NOTHING already made to mount a MicroSwiss Dual Gear Extruder on top of CR10s Pro V2's gantry in a direct-drive orientation, I designed my own. I am frankly shocked no one has done this before. This bracket makes the MS direct drive extruder upgrade very easy. No need to buy the overpriced entire aluminum bracket, no need to revise the mount for your BLTouch probe, no need to revise Z-offsets. Simple, easy and very effective.
I am also using a MicroSwiss clone all metal hot end with this. Works beautifully especially at high temps. Takes less than 2hrs to print at normal settings. See the "notes" section it will save you time.
Print Settings
Printer brand:
Creality
Printer:
CR10S PRO
Rafts:
No
Supports:
Yes
Resolution:
.2
Infill:
10 Gyroid
Filament brand:
Giant Arm
Filament color:
Clear
Filament material:
PETG
Notes:
NOTES:
PLEASE LOOK CLOSELY AT THE PICTURES! You will mount the MS DD extruder to the bracket upside down (e.g. the extruder's output becomes the input side from your filament roll). It works perfectly fine like this, you can keep your stepper motor wired the way it is now (normally you would need to reverse the stepper wires), and keeps the weight of the assembly centered over the nozzle and gantry wheels. It is actually BETTER like this because it puts the red feed knob and spring tension knob in very usable locations, and the DD lever is easy to operate in front.
The bracket simply slides on to the gantry piece and is secured in place by the fan housing, it is friction fit, no bolts or screws to mess with. it is solid AF when assembled. I printed this with a .6 nozzle and .3 layer height, with .6 line width. I used 2.4 wall thickness (4 walls), thicker walls make for a stronger part while keeping it lightweight.
I attached my Cura 5.0.0 profile for you to use. Printed in clear PETG at 250c with 90c bed. Normal supports with 86.0 overhang
This is a very precise-fit part. when done printing, use tools to slightly hog out the screw holes and ensure nice flat surface where the stepper motor sits. The stepper motor will press-fit into the hole cutout on the bracket. Enjoy.
Ajouter un commentaire
👉 Connectez-vous pour écrire un message