3D 模型描述
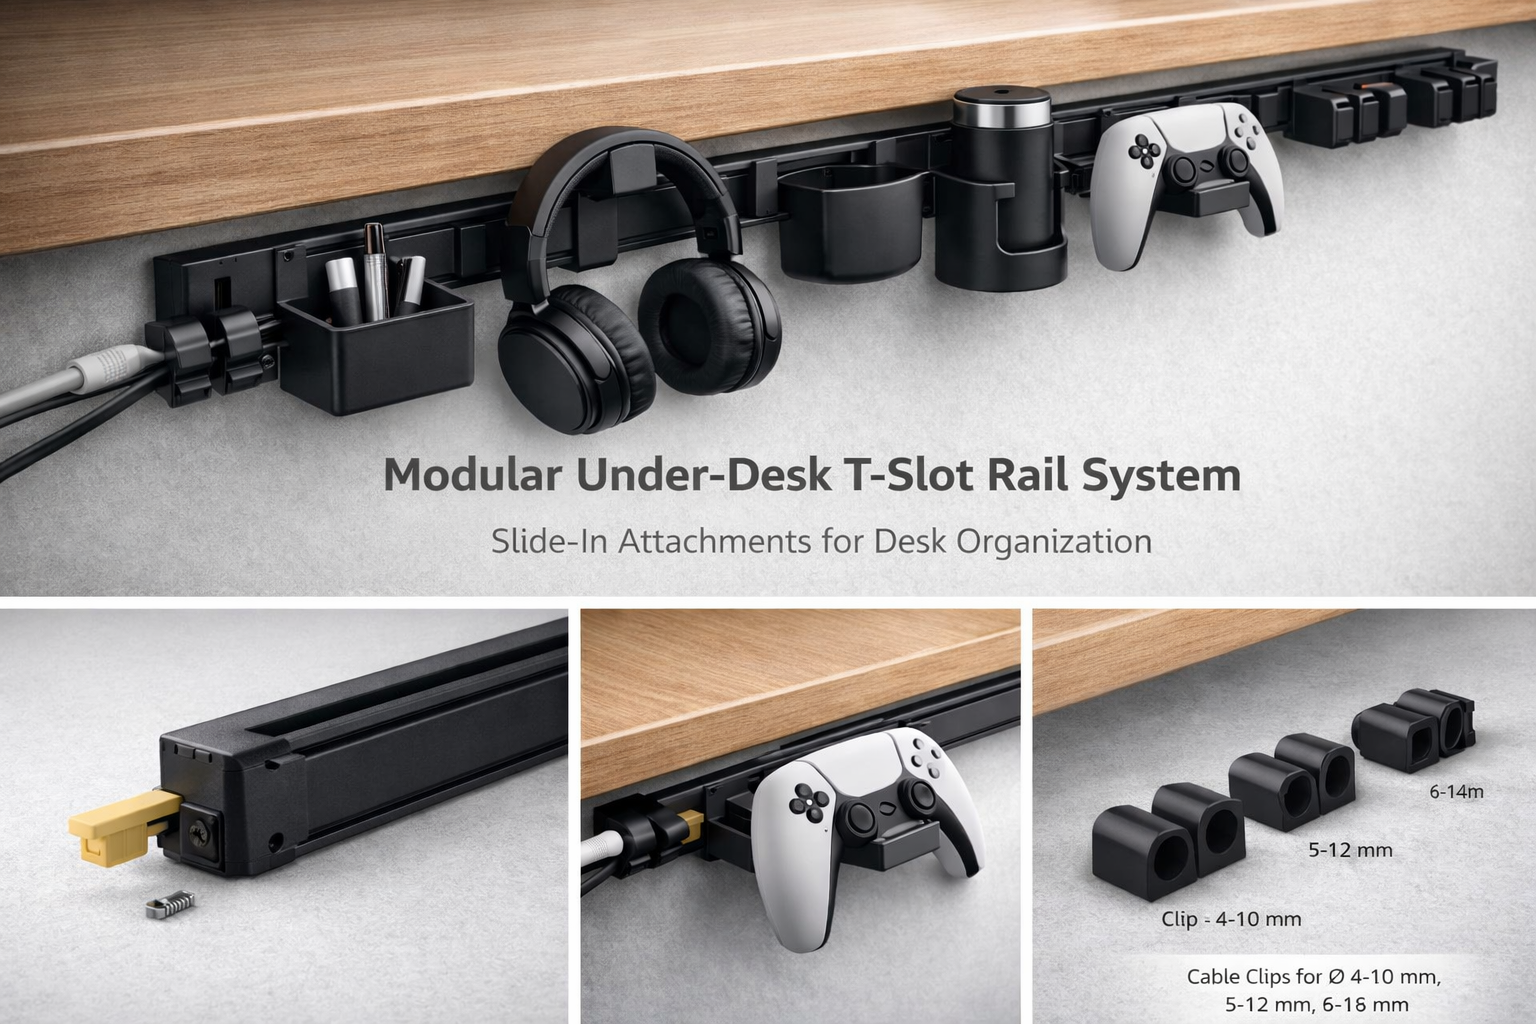
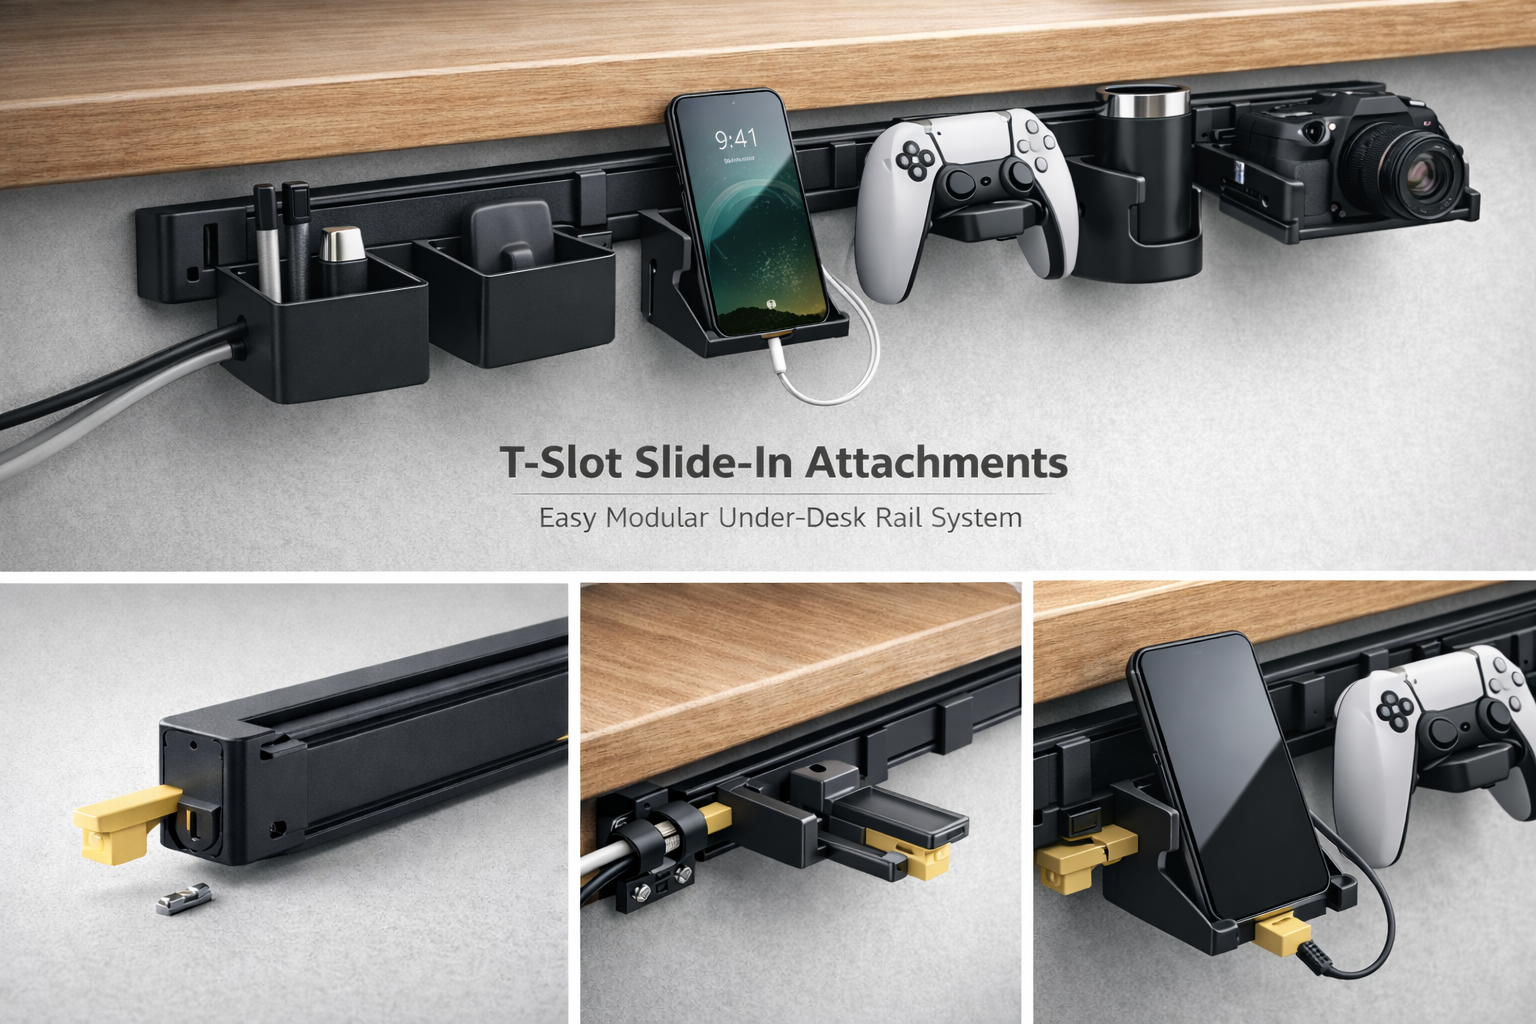
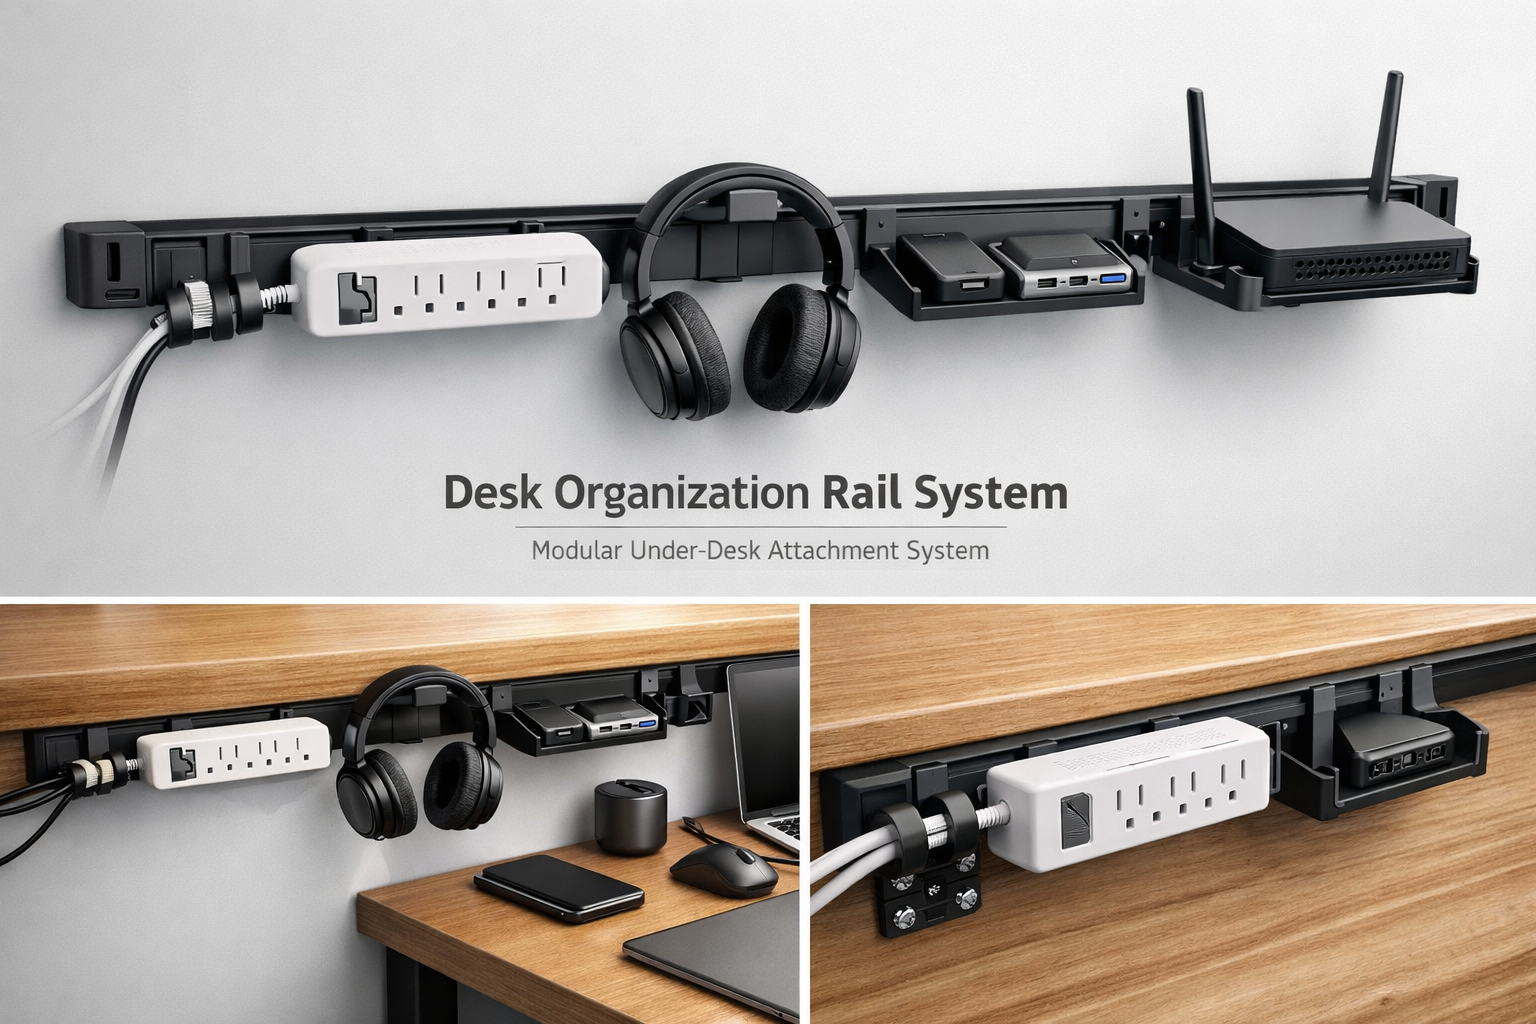
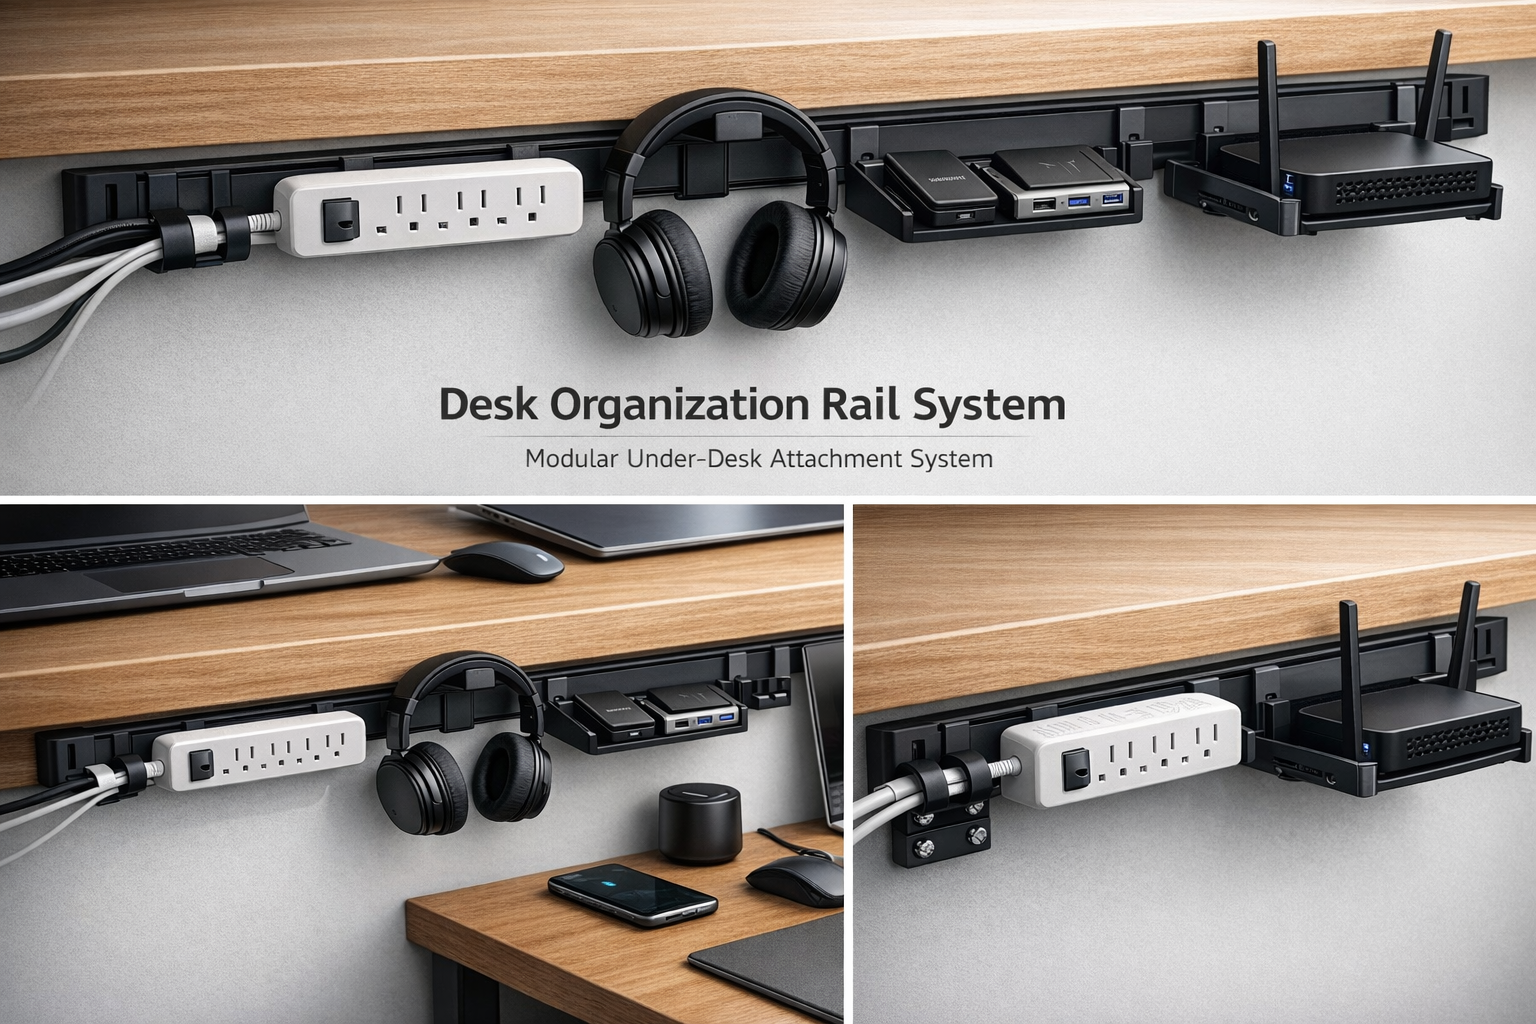
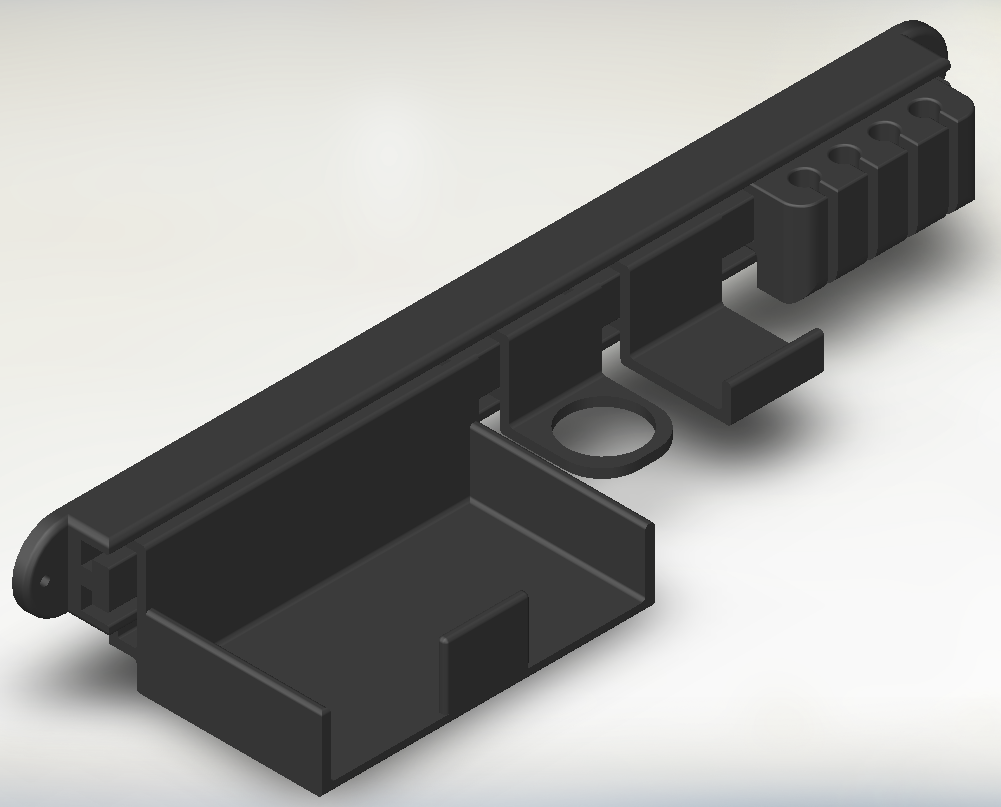
Under desk organizer rail / cable management rail with T-slot slide-in attachments (headphone hook, cup holder, shelves, storage bin, controller holder)
A modular under-desk T-slot rail system with slide-in attachments for clean cable management and desk organization. No supports required.
DESK RAIL MODULAR SYSTEM (T-Slot Slide-In) – Mega Bundle
Clean up your workspace with a strong under-desk rail and modular slide-in attachments.
Mount the rail under your desk, then slide accessories in from the side and rearrange anytime.
What’s included
✅ Rails (full length): 300mm / 400mm / 500mm
✅ Modular rail segments (150mm): Open End + Middle + Closing End (build custom length for smaller printers)
✅ Attachments:
Headphone Hook
Small Storage Bin (keys / USB / flash drives)
Shelves: 100mm + 170mm
Cup Holders: D40 + D50
PS5 Controller Holder
Cable Clips: 4–10mm / 5–12mm / 6–14mm
Printing
Supports: NO
Recommended material: PETG (PLA also works)
Layer height: 0.20mm
Walls: 3
Infill: 20% (attachments), 25–35% (rails/heavier parts)
Orientation
Place the biggest flat face on the bed and keep the sliding T-slot/key feature facing UP.
Installation
Screw the rail under the desk, then slide attachments from the side.
Note: Electronics/devices shown in images are not included.
3D 打印设置
Recommended 3D print settings
Process: FDM / FFF
Material: PETG recommended (best strength + heat resistance). PLA works for light use.
Nozzle: 0.4 mm (0.6 mm also OK)
Layer height: 0.20 mm (0.28 mm for faster prints)
Perimeters / Walls: 3 (use 4 for cup holder / shelves / rail)
Top/Bottom layers: 4–5
Infill:
Attachments: 20%
Rails / heavy parts: 25–35%
Supports: OFF (designed to be support-free with correct orientation)
Bed adhesion: Brim optional (recommended for long rails to prevent warping)
Orientation
Rails: place the flat mounting face on the bed, keep the T-slot opening facing UP
Attachments: place the largest flat face on the bed, keep the sliding key/T-slot feature facing UP
Assembly / installation
Mount the rail under the desk using wood screws (recommended).
Slide attachments into the rail from the side.
Modular rail (150 mm segments): connect segments end-to-end until fully seated/aligned. If fit is loose, use a tiny drop of CA glue (optional).
Tolerance note
If your printer is very tight/loose, test print one small piece first.
If sliding is too tight: lightly sand the key/slot edges.
:format(webp)/https://fbi.cults3d.com/uploaders/43225896/illustration-file/5b8e1de6-cf98-4b02-a4bd-f8f2ca742ff0/5.png)
/https://preview3d-images.cults3d.com/34cbvi5lt37zx5nu09n4w1fb37b4)
/https://preview3d-images.cults3d.com/ro90nwe6ybccf22v46sczrh5faq7)
/https://preview3d-images.cults3d.com/mwacujtl1vx87kc5beej0hqusxo4)
/https://preview3d-images.cults3d.com/du3es3v5uu47q95w19rzj23mgytf)
/https://preview3d-images.cults3d.com/irsh5aqswh7sbp8lamgiufpx8vh2)
/https://preview3d-images.cults3d.com/a2rkpvk6v5x054wdmcniczxxr1dh)
/https://preview3d-images.cults3d.com/xqkyc7eo17h1r1evpejffktc6bv2)

/https://preview3d-images.cults3d.com/cmi25u7s6imr5vf9m03qwzj0fbo5)
/https://preview3d-images.cults3d.com/3m1gok15kcmtvjotl75as9p07ktp)
/https://preview3d-images.cults3d.com/o9d3y6x293a1bacdfhexwatb2x6t)
/https://preview3d-images.cults3d.com/ieaht4u6foublqqdui5ifgwh2np7)
/https://preview3d-images.cults3d.com/3v6sisoeafx3rtn3n1p9tvjras89)
/https://preview3d-images.cults3d.com/y57ab84e0tbyo6vlmh79dib62zmj)
/https://preview3d-images.cults3d.com/d3yatapadpjjxbm647dfdqqawl4h)

:format(webp)/https://fbi.cults3d.com/uploaders/43225896/illustration-file/64c04014-9985-4f1c-8c0a-daed4ecb5de8/preview.jpg)
:format(webp)/https://fbi.cults3d.com/uploaders/43225896/illustration-file/c7bb62a1-adaa-4548-be99-cc2e92f52a6a/cults_hero_from_screenshot.png)
:format(webp)/https://fbi.cults3d.com/uploaders/43225896/illustration-file/a6cebcd0-48ba-4941-afa7-5d4c6d7b617a/headphone_hanger_HERO_1767449952.png)
:format(webp)/https://fbi.cults3d.com/uploaders/43225896/illustration-file/092b9229-ee86-476a-9a22-0bff20d60868/2-SLUT.jpg)
:format(webp)/https://fbi.cults3d.com/uploaders/43225896/illustration-file/f8dd0017-521c-44a8-ac1b-75078ea5465d/3-SLUT.jpg)
:format(webp)/https://fbi.cults3d.com/uploaders/43225896/illustration-file/0c025f64-3ab9-4b2d-80aa-731320c9eaf4/3-SLUT.jpg)
:format(webp)/https://fbi.cults3d.com/uploaders/43225896/illustration-file/9ae99d1d-3fea-47f3-9114-6113b9d28aab/3-SLUT.jpg)
:format(webp)/https://fbi.cults3d.com/uploaders/43225896/illustration-file/bc3aab35-d892-4fd0-ae88-49e9aea1b468/4-SLUT.jpg)